
(en) XignUp Admin Documentation
Content
This manual provides an overview of how to use XignUp, the portal for Digital Identities from XiTrust. Please note: You are also welcome to take a look at XignUp User Documentation. This will help you understand where your users are in the identification process when they have questions. Our regularly updated FAQ also provides a summary of the most frequently asked questions and their answers.
XignUp Admin Documentation
In the XignUp Admin documentation you will find all relevant information about XignUp for administrators. If you have any questions or suggestions regarding the documentation, please contact your XignUp contact person or XiTrust Support at support@xitrust.com.
1. What is XignUp?
XignUp is a portal from XiTrust that enables {{glossary.Digital Identity}} to be issued quickly and easily . The so-called xIDENTITIES are issued in cooperation with A-Trust, the Austrian trust centre for digital identities. With an xIDENTITY, you can digitally sign documents, whether in MOXIS or via other platforms.
XiTip
XiTrust+ A-Trust = xIDENTITY
Digital identities that are issued via another trust centre, such as D-Trust, are not referred to as xIDENTITY.
2. Registration with XignUp
Step 1: After entering your initial login details, you will be asked to change your password (see Figure 1) to activate your user account . It is important that you create a secure password. You will then be automatically redirected to the login page, where you should enter your user name and password as described in Chapter 3 in order to successfully master the initial access to XignUp.
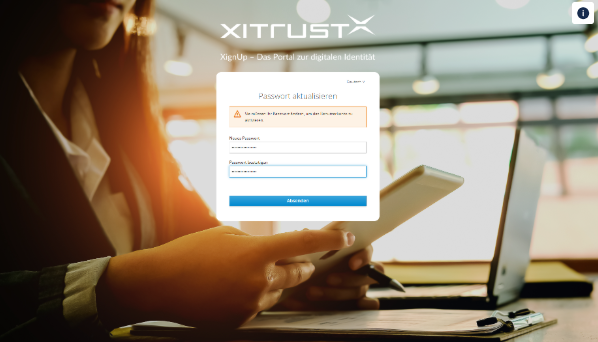
Figure 1: Update password on initial login to the XignUp portal.
XiTip
If the logon process needs to be interrupted , this could lead to a timeout . If this occurs, an error message will be displayed. In this case, please restart with step 1 (as shown in Figure 1 ) and continue the login process as described.
3. Mastering the first entry into XignUp
As an administrator , it is your responsibility to create so-called registration links that end users can use to register a digital identity. Please log in to the XignUp portal to continue. Follow these steps to do so:
Step 1: Open the XignUp portal at https://xignup.xitrust.cloud/ (see Figure 2)
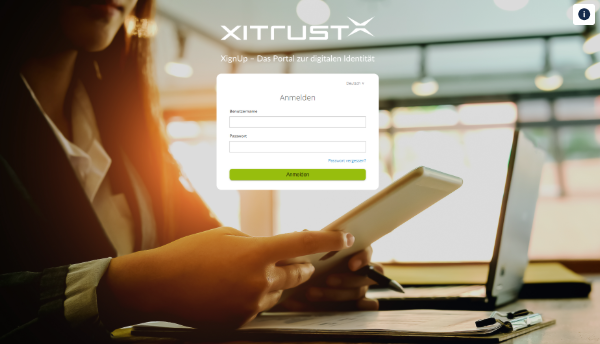
Figure 2: XignUp login screen without login data after initial registration
Step 2: Please enter your user name and the password you have chosen here. (see Figure 3). You will receive the login details from your XiTrust project manager. Click on the [Login] button to complete your registration.
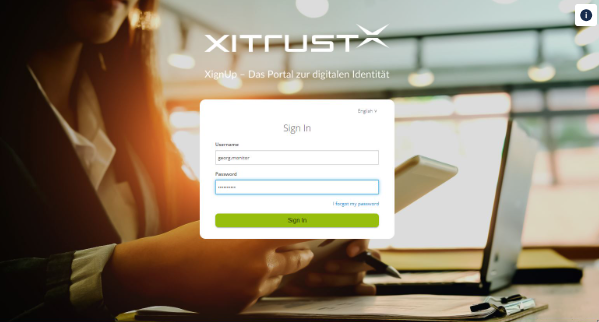
Figure 3: XignUp login screen with login data after initial registration - example in English to illustrate the functionality shown in Figure 5.
XiTip
You can already customise the XignUp portal to suit your requirements in the login screen . At the top right you have the option of modifying your language settings . You can choose between German and English . (see figure 4)
If you have forgotten your password, please click on the blue coloured link Forgot your password? (see Figure 4). You will then receive an e-mail asking you to set a new password.
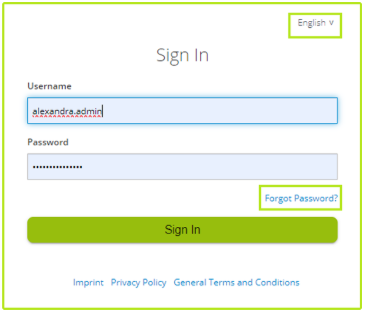
Figure 4: Login screen of the XignUp portal; top right with the option to change the language. Click on Forgot password? to request a new password.
Once you have successfully registered, you will be taken directly to the XignUp start page , which displays the dashboard (see Figure 5). There you will find an overview of the open and available registration links and their status. A detailed description of the individual components can be found at chapter 4.

Figure 5: XignUp Dashboard, which shows you an overview of the open and available registration links and their status.
4 The XignUp portal: Understanding and optimising the admin interface
The admin interface of the XignUp portal consists of various segments. While the dashboard provides an initial overview , you have the option of analysing the data stored by the system in the Evaluations area. The following chapters will introduce you to the individual components in detail.
4.1 Introduction to navigation and settings
The dashboard, shown in Figure 6, forms the centre of the admin interface of the XignUp portal. It appears immediately after logging in to give you an immediate overview. From this point, you can navigate to the various areas of the XignUp portal. In this chapter you will find instructions on how to navigate safely in XignUp and how to customise the portal to your individual requirements. If you are already familiar with these, please skip straight to chapter 4.2, where you will find a detailed description of the dashboard.
4.1.1 The Burger Menu
The burger menu in the top left-hand corner (see Figure 6) allows you to navigate between the Dashboard and the Analytics section with one click (see Figure 7). To do this, please proceed as follows:
Step 1: Click on the Burger Menu.
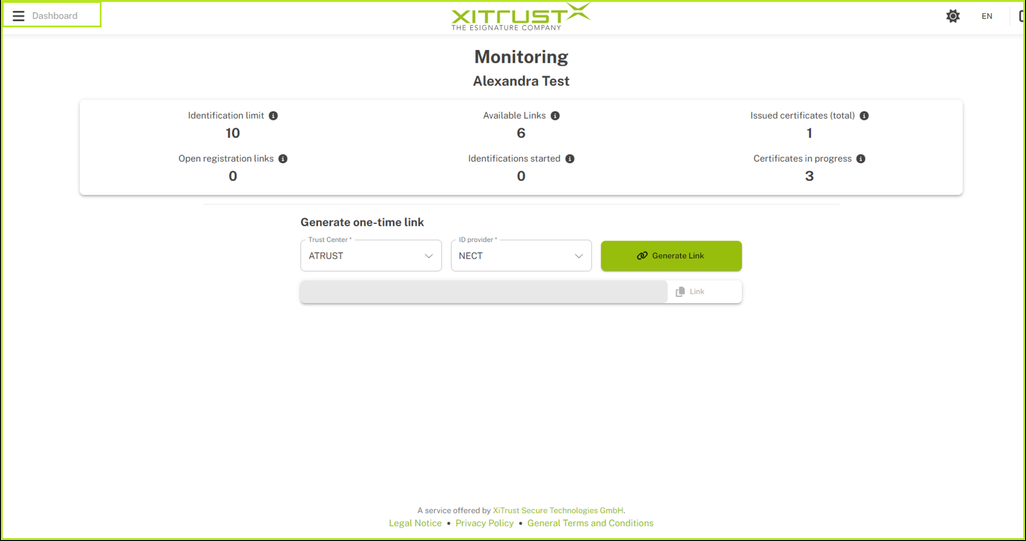
Figure 6: XignUp interface after initial access. In the top left-hand corner you will find the Burger Menu, which allows you to jump back and forth between the pages.
Step 2: Click on your preferred option(Dashboard or Analyses, see Figure 8) and you will be redirected accordingly.
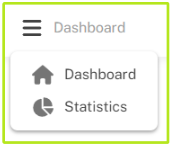
Figure 7: Expanded burger menu with link to dashboard and analyses
4.1.2 The settings
In the settings (see Figure 8), you can make the following adjustments (from left to right):
Figure 8: You will find the XignUp settings in the top right-hand corner.
Switch from normal view to dark mode - here's how!

Clicking on the sun allows you to display the website in the dark design for the browser ("dark mode"). Click again to return to the normal view.
Change the language settings - XignUp is also available in English!
Click on the [DE] button or the [EN] button to change the language to German or English.
Safety first: How to log out of the XignUp portal.

If you are not currently using the XignUp portal, please log out of it. This can be done quickly and easily by clicking on the corresponding [Logout] button.
4.2 The XignUp Dashboard
The dashboard (see Figure 9) is the centrepiece of the admin interface of the XignUp portal. It is displayed immediately after logging in so that you are immediately informed about the limit, the number and the status of the registration links . This chapter provides you with an overview of the dashboard and how to use it optimally.
4.2.1 How to monitor the status of registration links, identifications and certificates
The dashboard consists of two sections. The first shows you an overview of all orders and certificates. The second allows you to create one-time links.
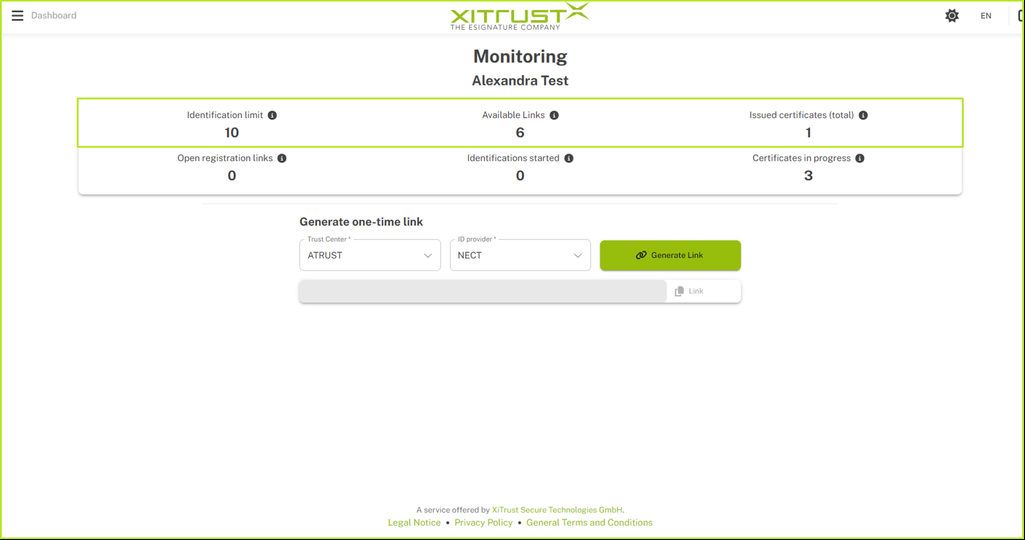
Figure 9: XignUp dashboard. The highlighted line provides information about the identification limit, the number of available links and the total number of certificates issued.
In the first line of the dashboard (see Figure 10) you will find (from left to right) an overview of the following data:
Identification limit: This number shows you the limit of your total available links. It is set individually by XiTrust.
Available links: Here you can see the available number of registration links that can (still) be created.
Certificate exhibitions (total): In this field you will find the number of successfully completed and therefore billable certificate exhibitions.
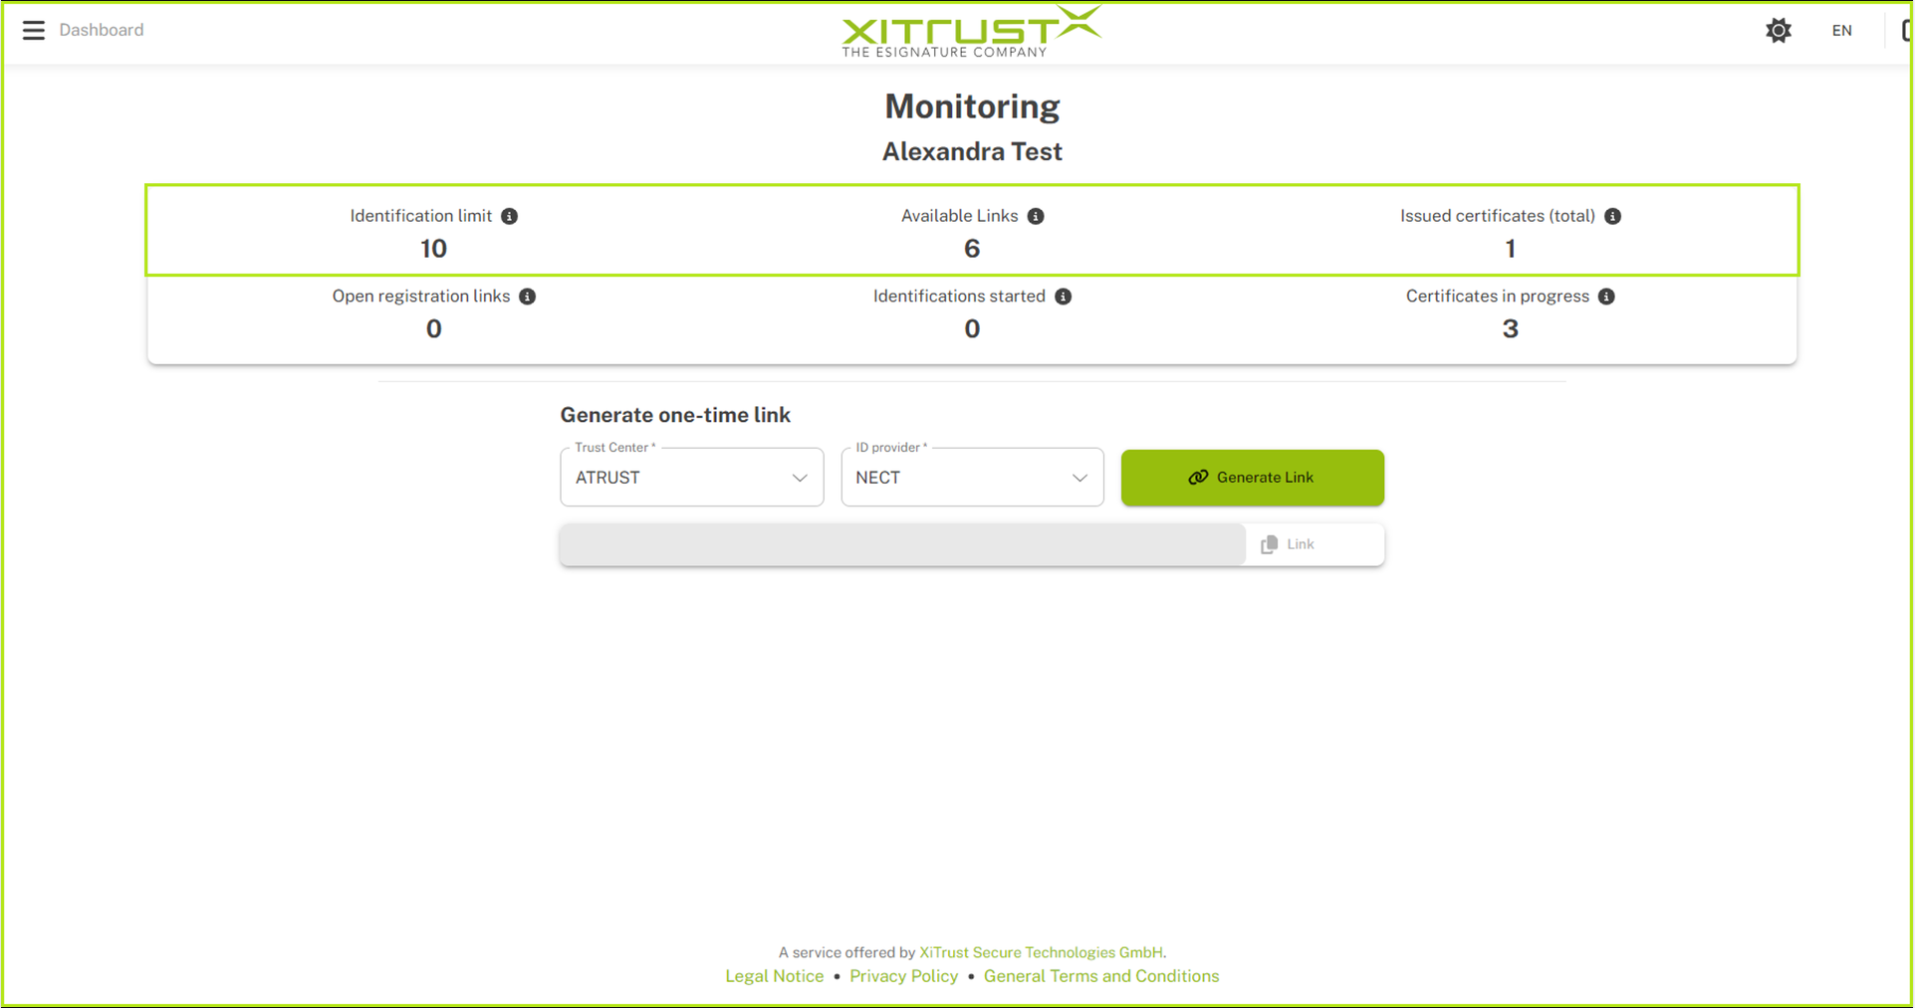
Figure 10: XignUp dashboard. The highlighted timeline provides information about the identification limit, available links and total certificate issues.
In the second line of the dashboard (see Figure 11) you will find (from left to right) an overview of the following data:
Open registration links: This number shows you the number of valid registration links.
Identifications started: This field provides information that the data transfer has been transferred to the identity provider and the link to the identification has been created.
Certificates in progress: Here you can see the number of successfully completed identifications. In this case, the certificate has not yet been issued.
Figure 11 XignUp dashboard. The highlighted line provides information about the open registration links, the identifications that have been started and the certificates in progress.
4.2.2 How to create a one-time link to register a digital identity
A one-time link allows a person to register online for a digital identity as soon as the data has been transferred to the identity provider and the link for identification has been created.
XiTip
Please note that the person has 30 days after the link has been generated to register online for a digital identity .
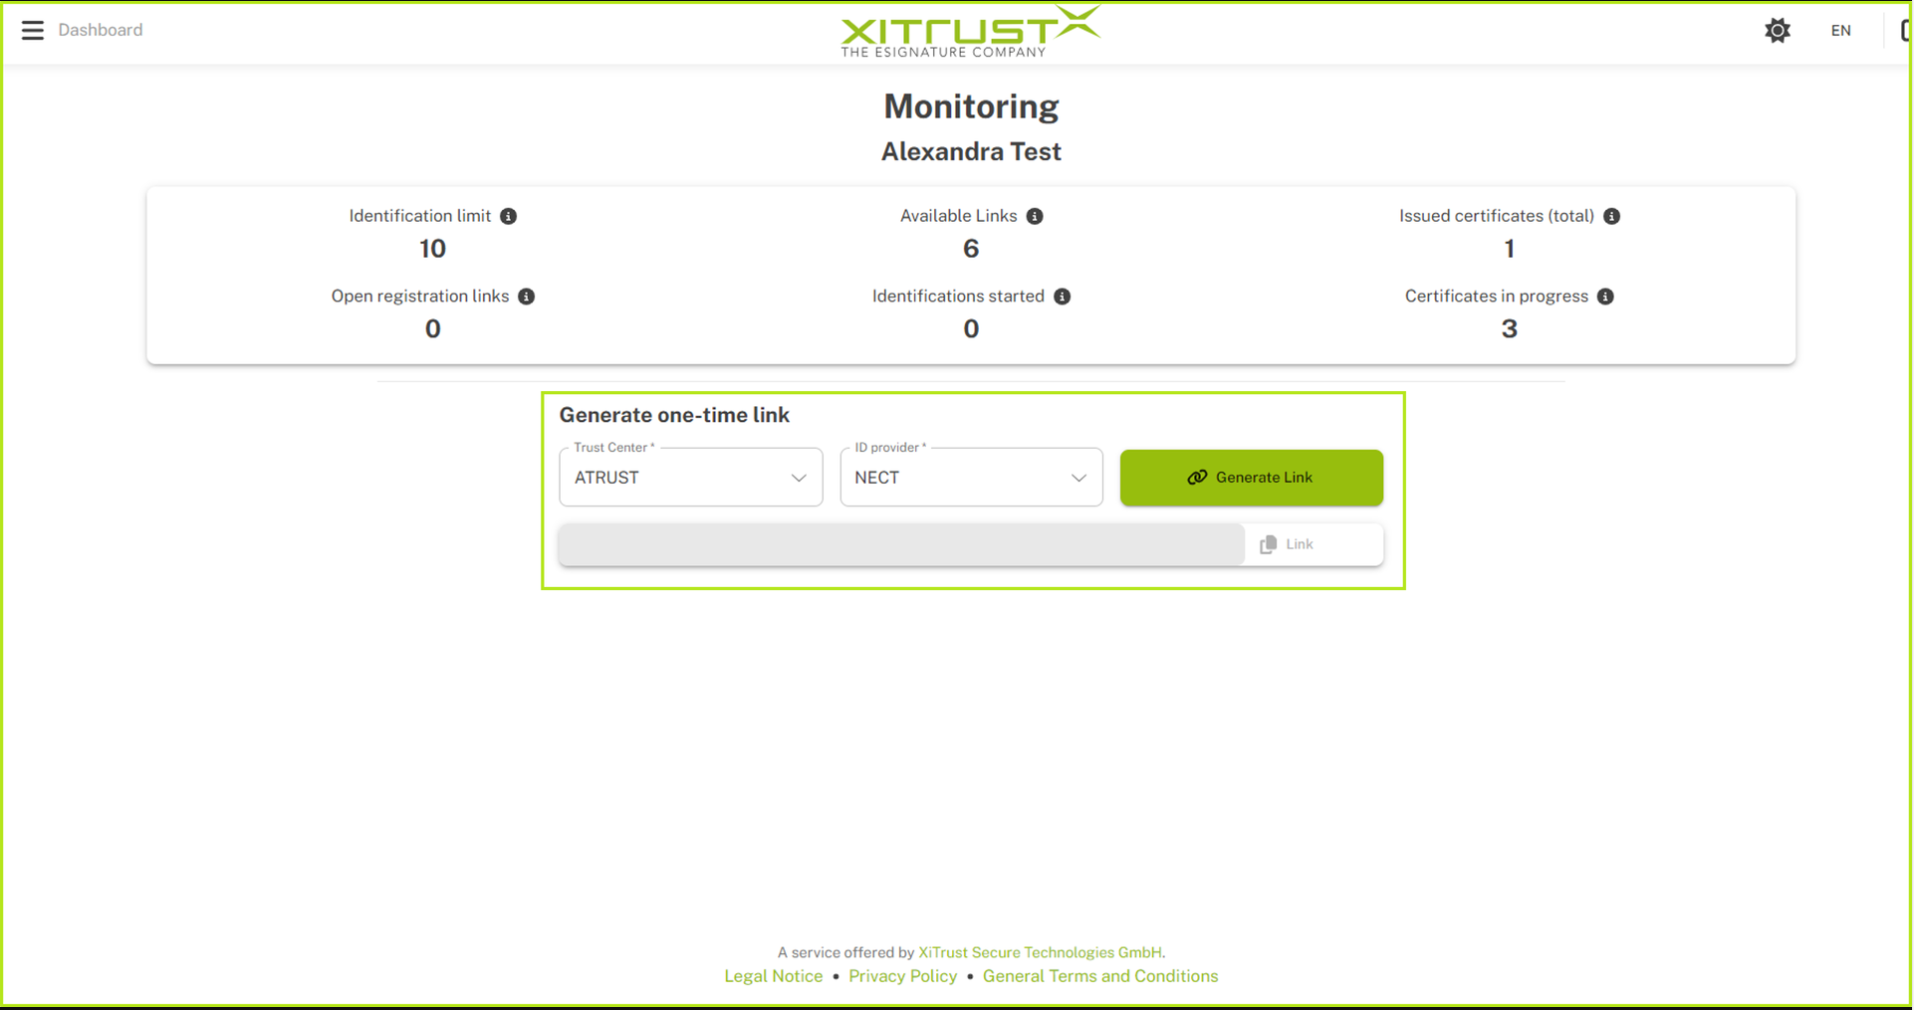
Figure 12: The bottom section allows you to create one-time links for registering digital identities.
To create a one-time link, please proceed as follows:
Step 1: Please select a trust centre using the drop-down menu. At the moment (as of 05/2024) ATRUST is the only choice available.
Step 2: Next, please select an ID provider. The selection of ID providers is currently (as of 05/2024) limited to NECT.
Step 3: Click on the [Generate link] button to create the one-time link. This serves the person who receives it as the basis for registering a digital identity.
5 The XignUp portal: Understanding and analysing XignUp evaluations
This XignUp portal tool allows you to analyse the data stored by the system. The following chapter invites you to take a closer look at analysing data in XignUp. To do this, please open the XignUp analyses as described in chapter 4.1.1.
5.1 How to use XignUp analyses optimally
In the XignUp interface, you analyse the data according to the following criteria (see Figure 13):
date
Identification status
Certificate status
ID provider
Trust Centre
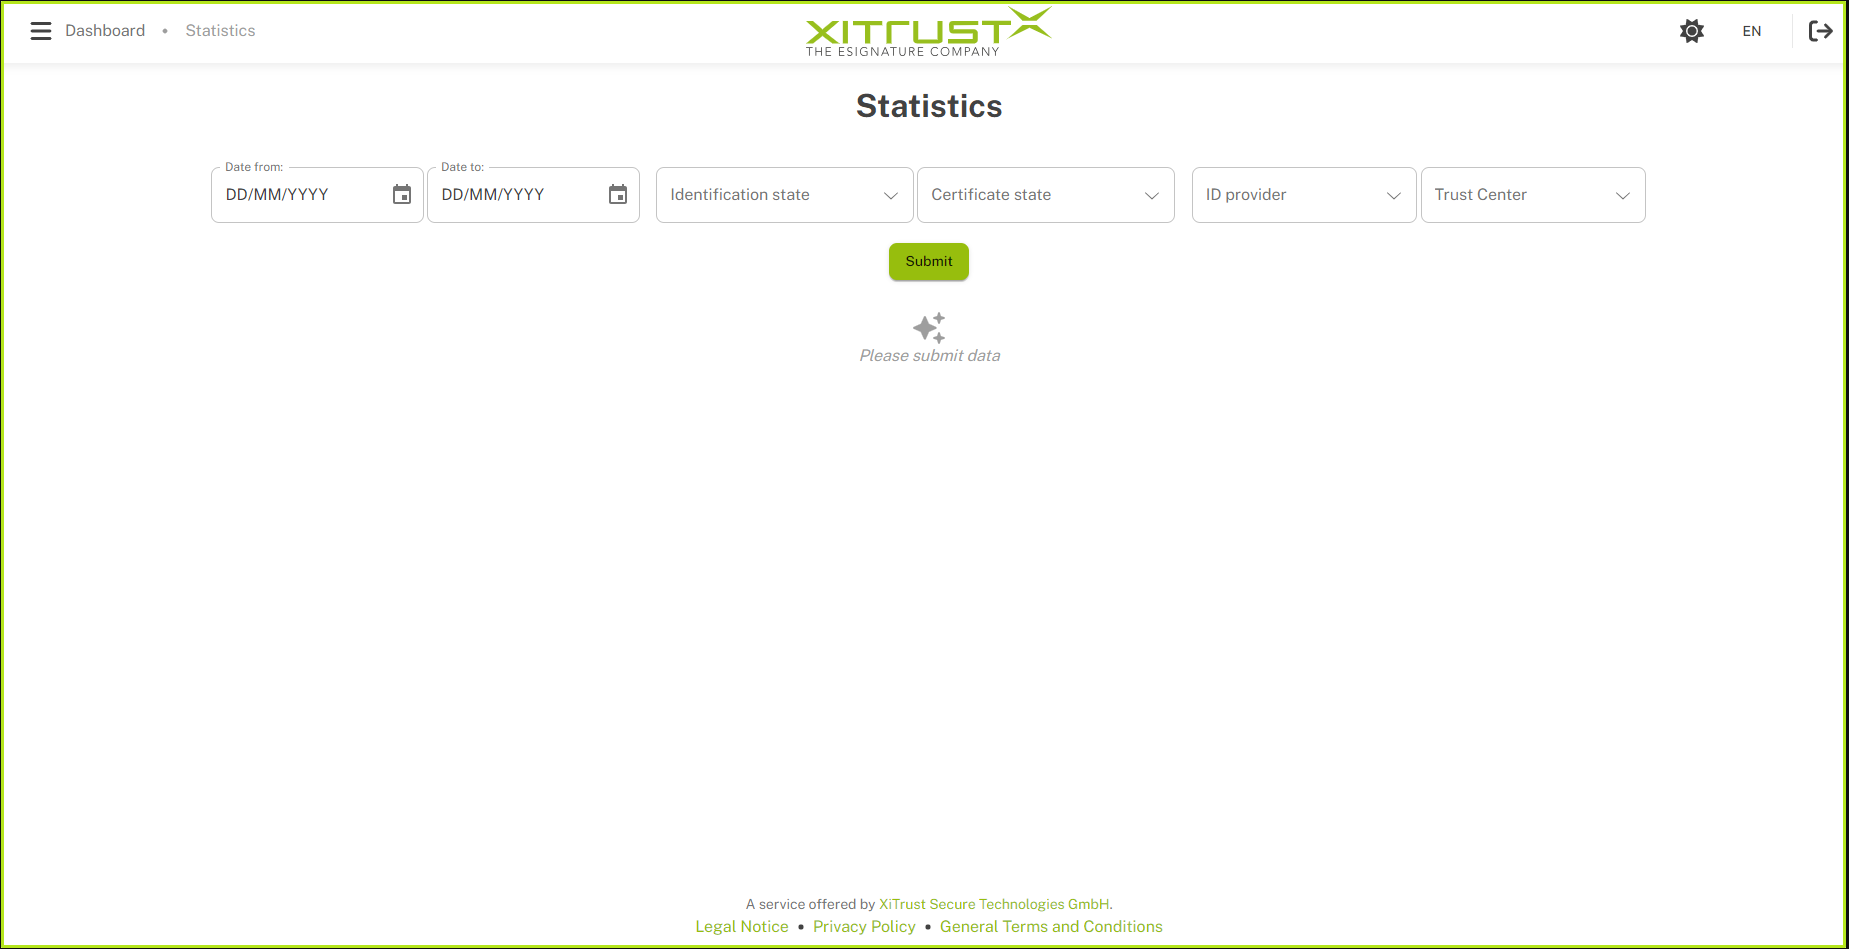
Figure 13: XignUp analysis tool
5.1.1 Step-by-step instructions for analysing data in XignUp
Step 1: Define the criteria according to which you would like to analyse the data records in XignUp . It is possible to define more than one category . The general filling of the fields is optional. To get an overview of the various options, please take a look at Chapter 5.1.1.1.
Step 2: Click on the [Submit] button. Depending on the selected parameters, you will now receive a corresponding evaluation.
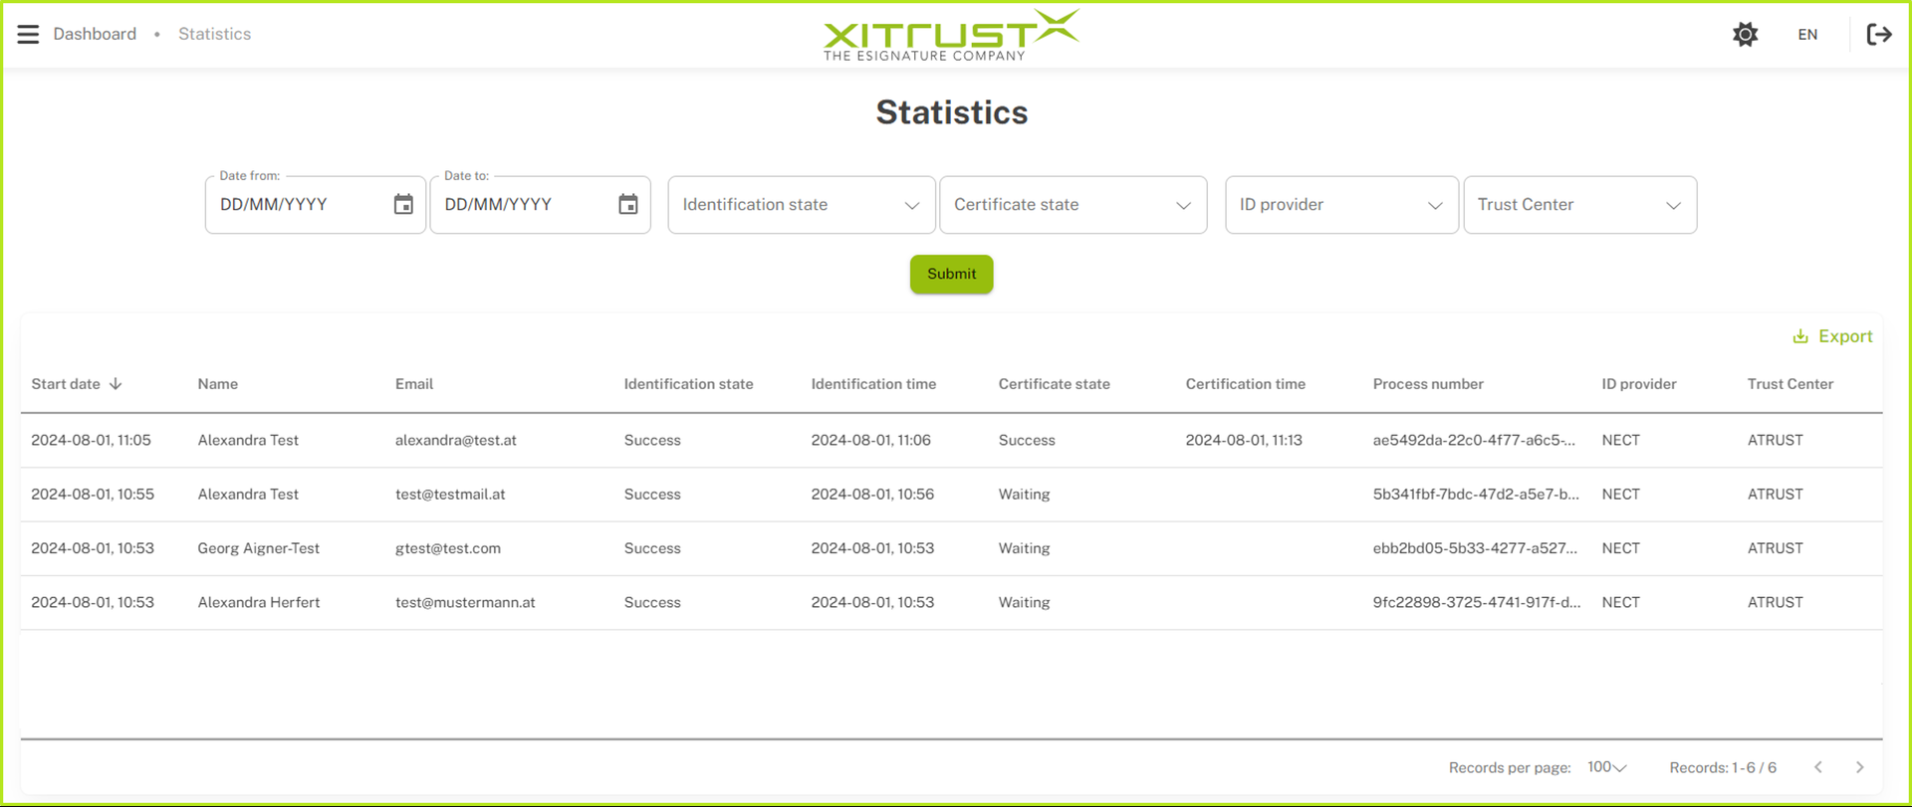
Figure 14: XignUp evaluation after defining various criteria.
XiTip
Clicking on Export allows you to quickly and securely export the analysis to a CSV file for further processing.
5.1.1.1 Evaluation options in detail
How do you determine the evaluation period?
To specify a time period for your analysis, click in the date field. A calendar will then open (see Figure 15). You can now specify the evaluation period here.
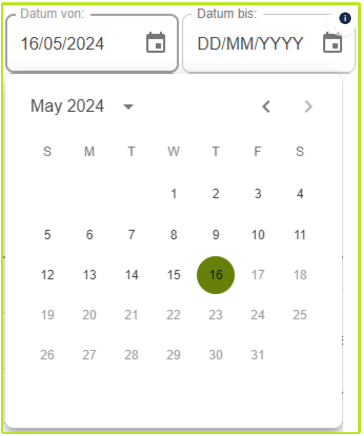
Figure 15: Calendar view in the XignUp analysis tool.
How do you restrict the result to a specific identification state?
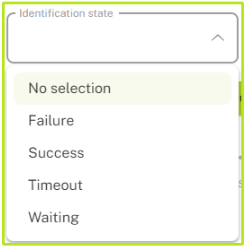
Figure 16: Filter options by identification state.
To analyse your result according to the identification status, open the drop-down menu in the Identification state field (see figure 16). You can restrict the status according to the following criteria:
Success: Link for identification has been created, data has been transferred to the identity provider.
Waiting: Link for identification and data transfer to the identity provider are in progress.
Timeout: The data transfer was cancelled. There is a timeout.
Failure: Link for identification was not issued, the data transfer to the provider has failed.
How do you filter the result according to a specific certificate state?
To analyse your result according to the state of the certificates, open the drop-down menu in the Certificate state field (see figure 17). You can filter according to the following criteria:
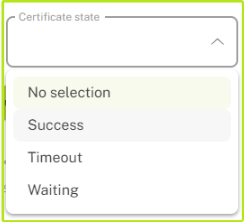
Figure 17: Filter options according to certificate status
Success: Here you will find an overview of all successful and therefore billable certificate issues.
Waiting: This selection shows you all certificates in progress, i.e. they have not yet been created.
Timeout: The certificate issue was cancelled. There is a timeout.
How do you select an ID provider?
To filter your selection by a specific ID provider, open the drop-down menu in the ID provider field and select the appropriate one (see figure 18).

Figure 18: Filter options according to certificate status
XiTip
The selection of ID providers is currently (as of 05/2024) limited to NECT, but expansion is planned. If you have any questions about the XignUp ID providers and the planned measures, please get in touch with your XignUp contact person. We will be happy to inform you about the next steps.
How do you evaluate the results according to a specific trust centre?
To display the result sorted by a Trust Centre, open the drop-down menu in the Trust Centre field and select the desired centre (see figure 19).
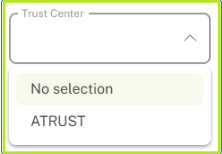
Figure 19: Filter options by trust centre
XiTipp
The selection of trust centres is currently (as of 05/2024) limited to ATRUST, but expansion is planned. If you have any questions about the XignUp ID providers and the planned measures, please get in touch with your XignUp contact person. We will be happy to inform you about the next steps.