
[BC Admin Guide] Biometrics
Content
To ensure a secure signature process, biometrics can be used as an additional user authentication method. Biometrics is an additional, optional feature offered by XiTrust. This means that biometrics must be activated when configuring your MOXIS Business Cloud instance in order to use it. This article provides you with more detailed information on the topic.
Only when biometrics is activated can you capture biometric data in MOXIS for certain signature types during the signatury process. Here, for example, the position and speed of the mouse pointer or external input devices such as tablet pens are tracked.
Please note: The collection of biometric data is used for legal certainty (e.g. for submission to technical experts in the event of legal disputes).
1. Requirements for the correct tracking of biometric data
To track biometric data correctly, you must have two components:
a PKCS #12 file
a key
As soon as a PKCS #12 file has been stored in the key management and the checkbox has been set to Active, it is possible for external persons to read released PDFs in order to check the stored biometric data.
1.1. PKCS #12 file
The PKCS #12 format is a binary format for storing cryptographic objects according to RFC 7292. It usually contains the server certificate, possibly intermediate certificates (i.e. the chain of trust) and the private key in a single file. A PKCS #12 file can be encrypted and signed.
PKCS #12 files are created by default with the PFX and P12 extensions. These are also the accepted file formats for key management. The file cannot be uploaded until the password and alias fields (see figure 1 [2]) have been filled in.
1.2. Key
In most cases, the key that corresponds to a certificate, as well as the alias (= name, e.g. ‘Test Key’) and password, are created and imported by our support team. However, as an administrator, you also have the option of entering a key yourself.
1.2.1. Key Management
If biometrics have been activated for your instance, the Biometrics-menu item is displayed in the administration menu (see figure 1 [1]). You can apply changes to the configuration under the Key Management- (see figure 1 [2]) and the Check PDF- (see figure 1 [3]) tab.
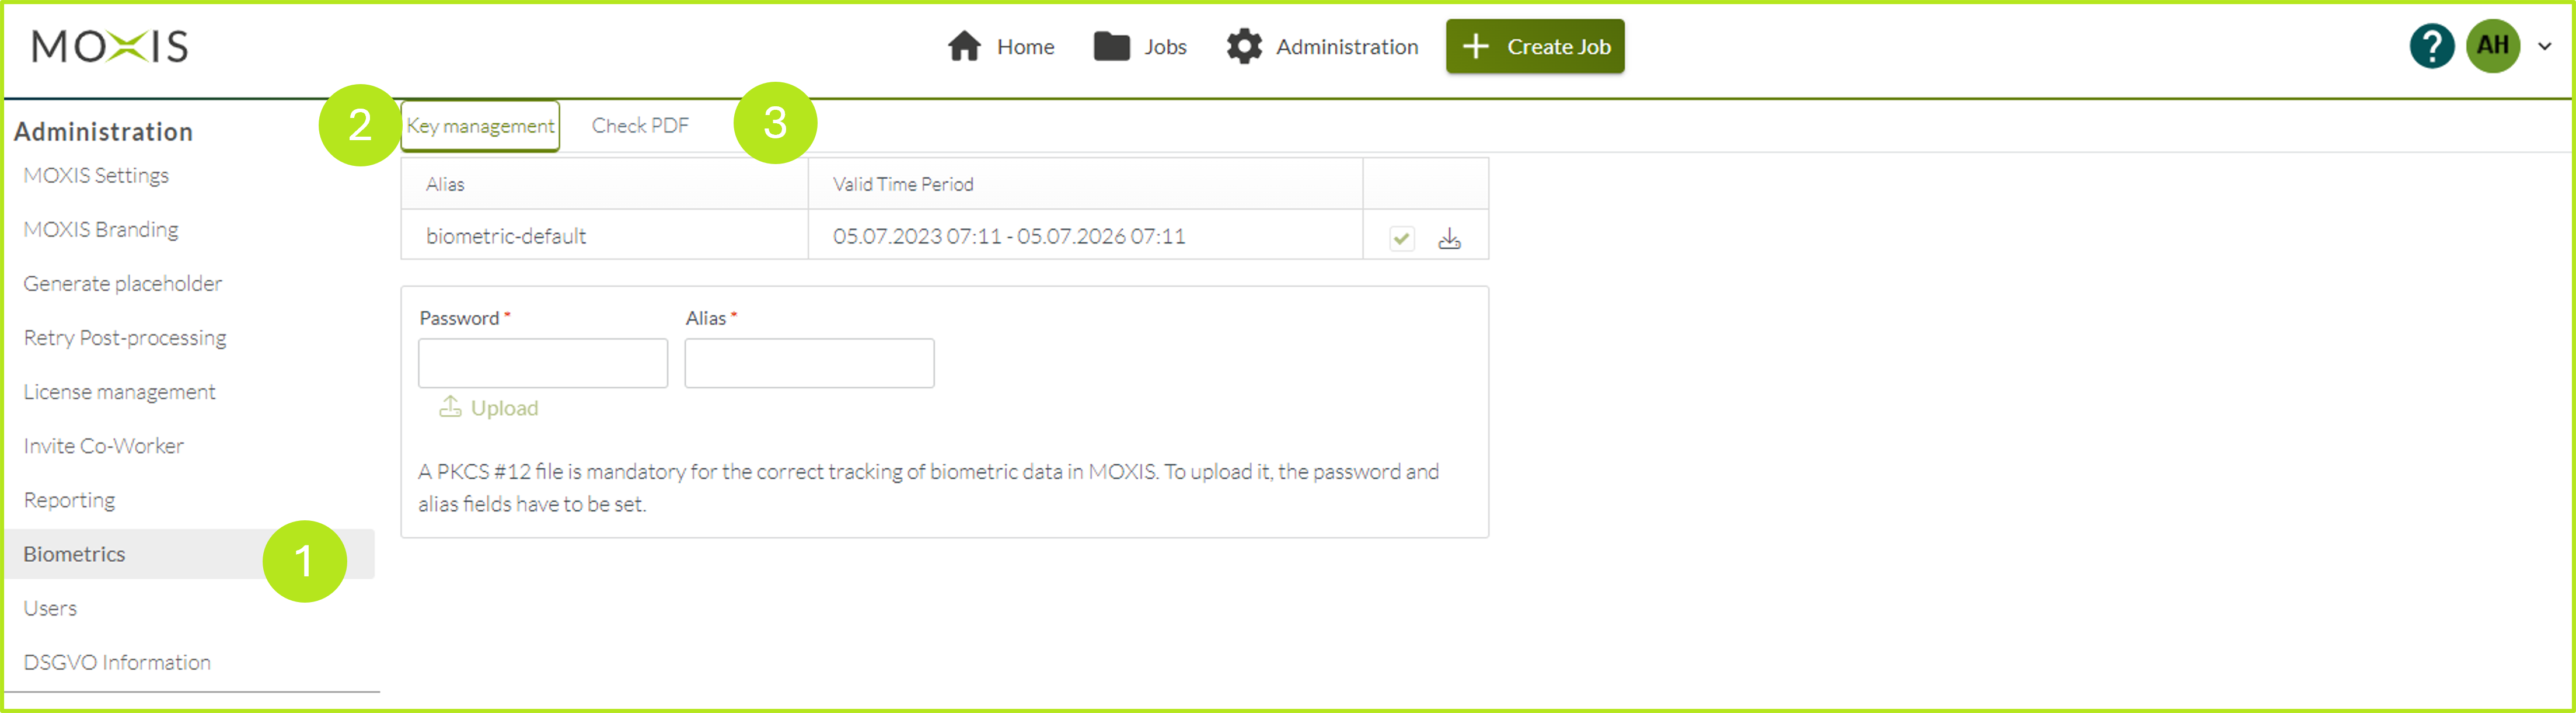
Figure 1: Biometrics in the administration panel
2. How to create and activate a key
Please follow the step-by-step instructions below to create a key.
Step 1: Open the Biometrics tab in the administration (see figure 2 [1]).
Step 2: Enter a password and an alias in the fields provided (see figure 2 [2]).
Step 3: Click Upload and upload the PKCS #12 file.
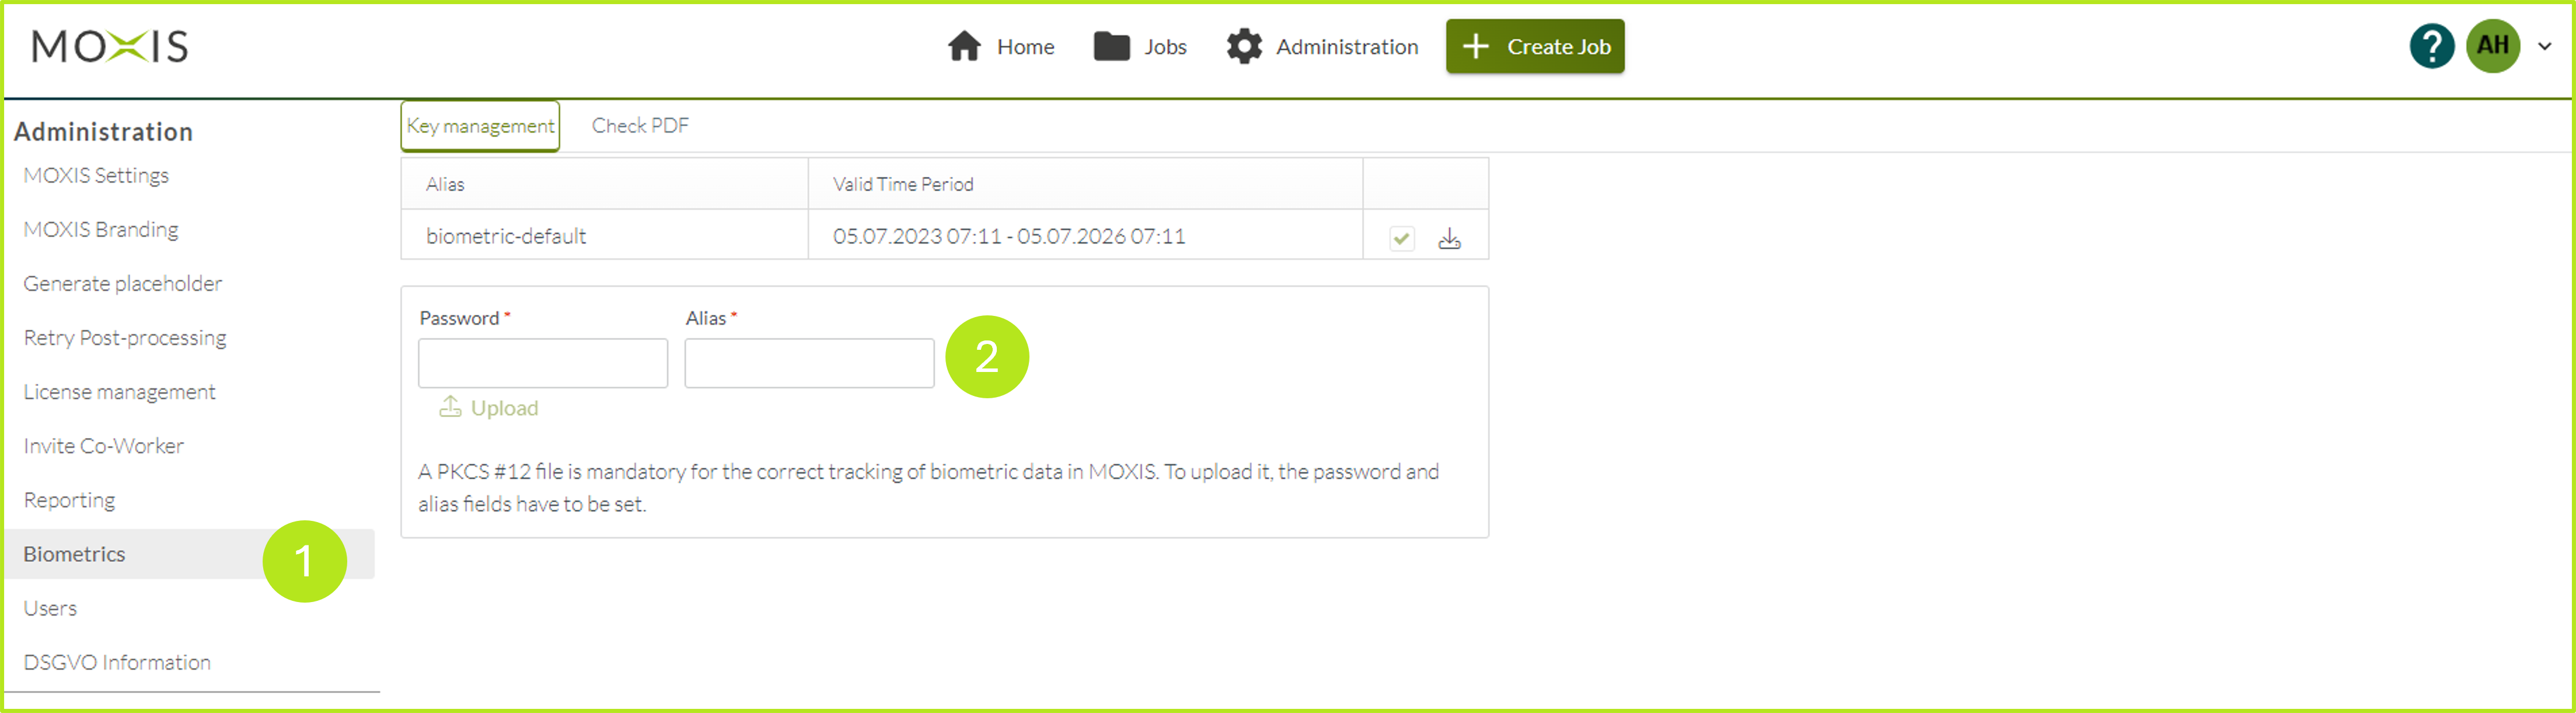
Figure 2: Key management in MOXIS Business Cloud
Step 4: The entry can now be seen in the key management with the alias name and the validity period (see Figure 3 [1]). To activate a key, tick the checkbox in the processing column for the corresponding key (see Figure 3 [2]).
Please note: Once this has been done, you can no longer deactivate the key.
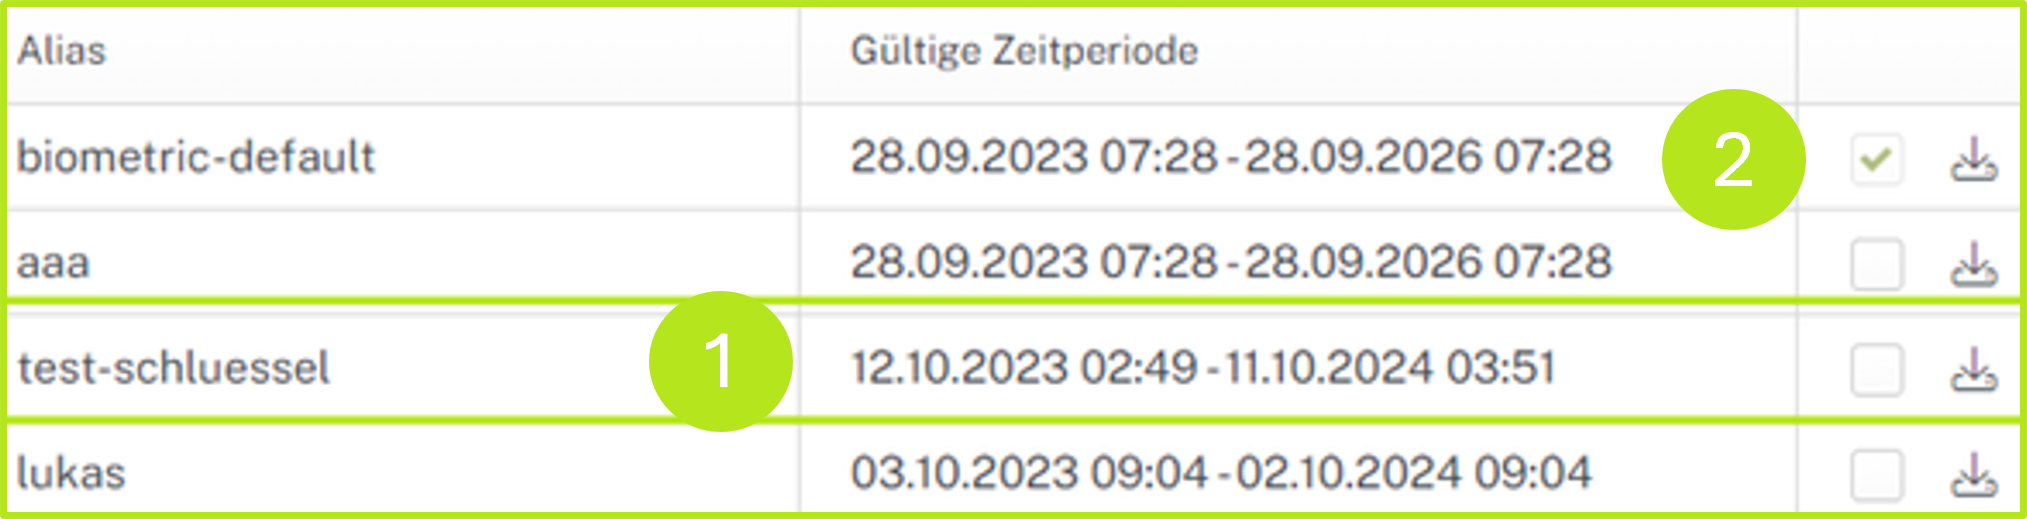
Figure 3: Key validity period and activation
Congratulations! You have created your first key.
3. Schritt-für-Schritt Anleitung: PDF prüfen in der MOXIS Business Cloud
Please follow the step-by-step instructions below to check a PDF.
Step 1: Open the PDF checking tab (see figure 4 [1]) and upload a PDF to be checked by clicking on Upload (see figure 4 [2]).
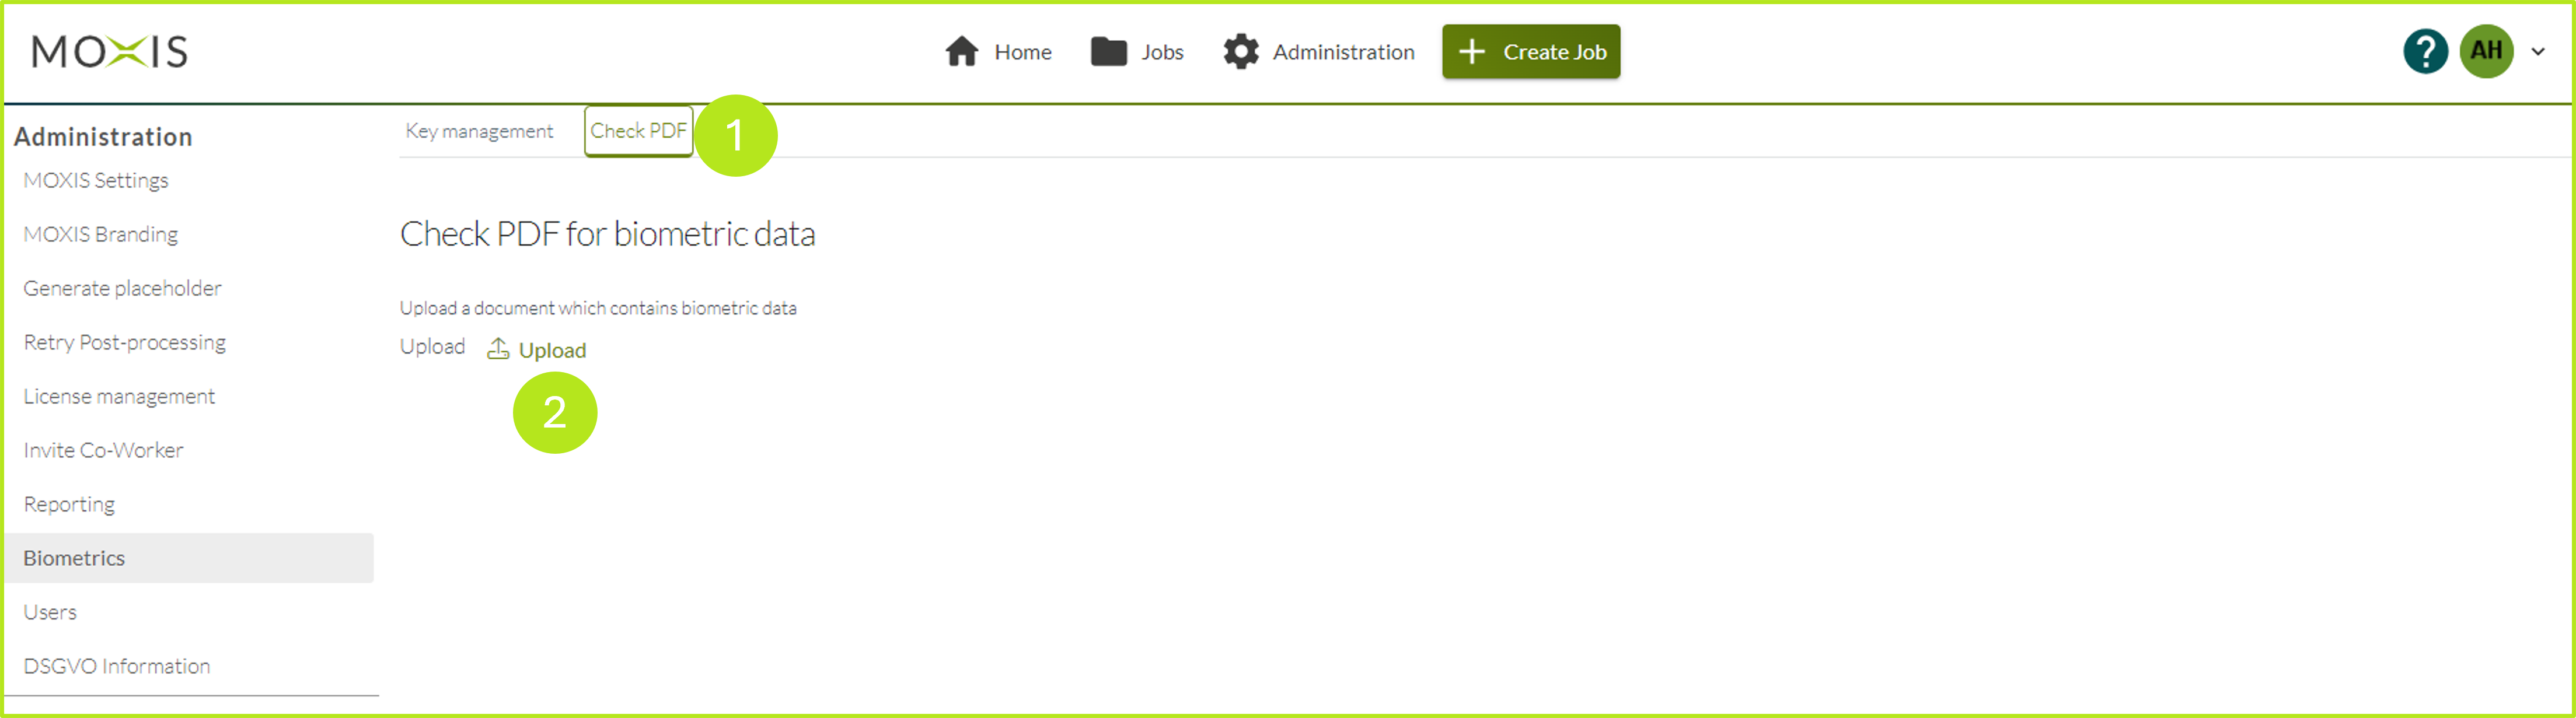
Figure 4: Check PDF-tab
Step 4: Now there are two possibilities. The PDF may or may not contain biometric data (see Step 4a or Step 4b).
Step 4a: If the document contains biometric data, a book icon is displayed. You can click on this to see a simulation of the biometric data (see figure 5).
.png?inst-v=d601b899-05f7-48b8-bb07-f142edd7f092)
Figure 5: Simulation of biometric data
Step 4b: If the document does not contain any biometric data, an info icon will be displayed and you will not be able to access a simulation.
4. Instructions: Saving biometric data
When a PDF is read, a BIN file is generated at the same time that can be saved.
Please note: This file format does not include any simulation. With the help of the data that is read with a decoder (e.g. Lapo.it, see figure 6), the vectors of a signature can be recreated based on the sequences.
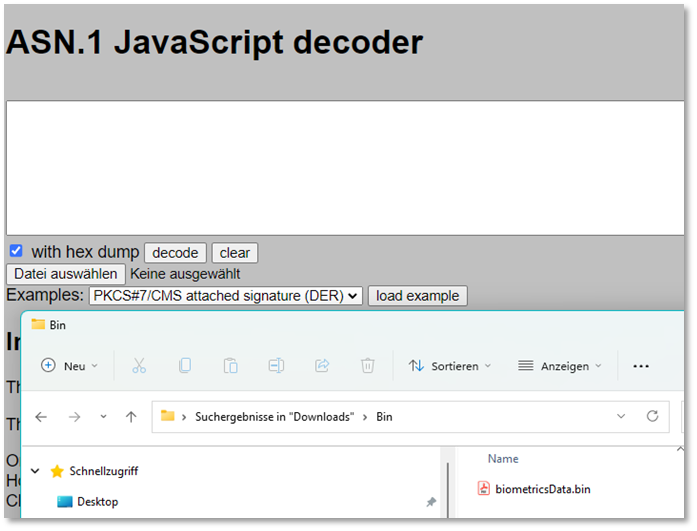
Figure 6: Java Script Decoder; Upload BIN file to decoder
Figure 7 and 8 show how the file is read. A superordinate sequence corresponds to a continuous line (bar). The position (coordinates) of the drawing and the time of the signature are recorded. Optionally, the pressure can be recorded as well.
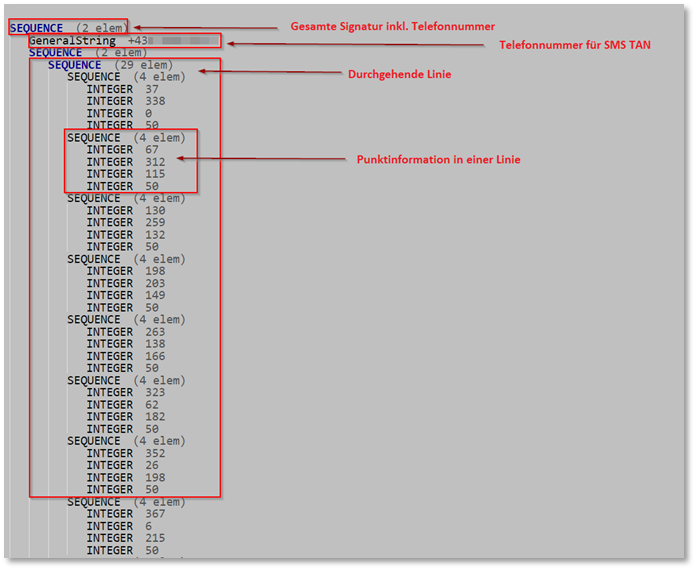
Figure 7: Decoded data
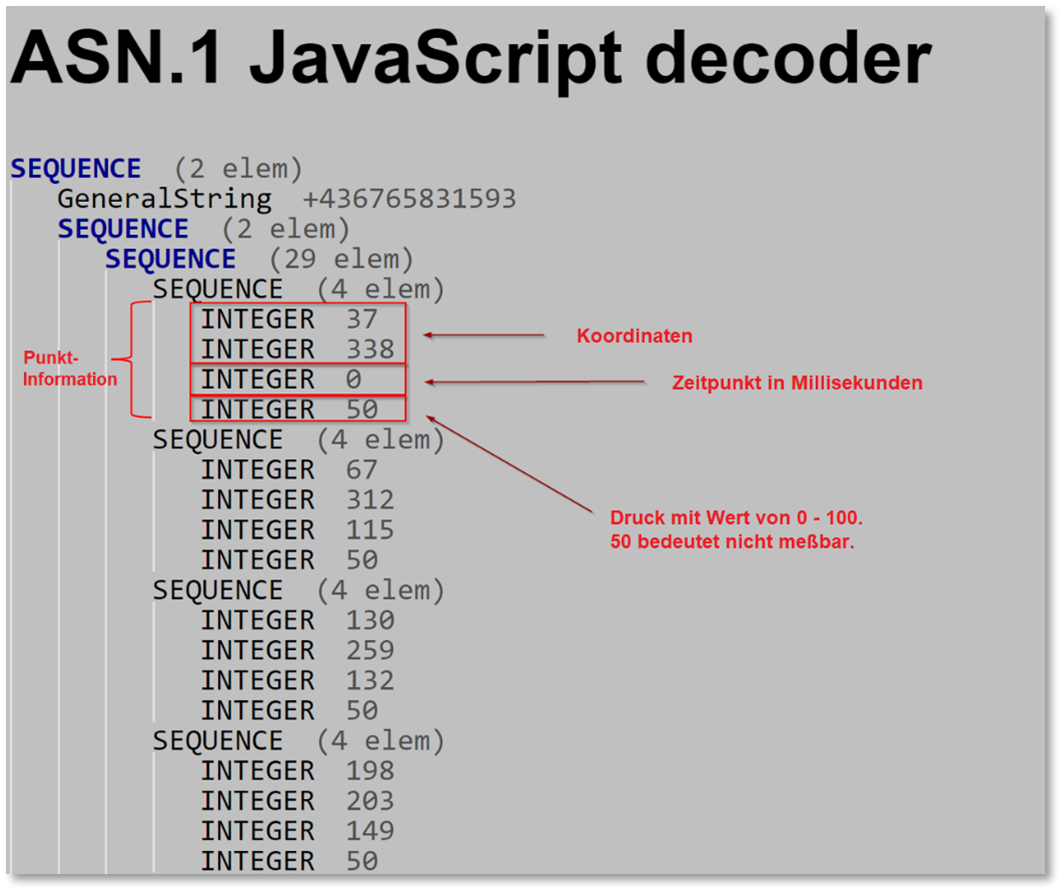
Figure 8: Decoded data in detail