
[v4.53] Creating a job using a template
Content
A new job from an existing template can be created in two ways:
Selecting the template when creating the job
Starting the template from the template management
This article introduces you to both options for creating a job using a template.
1. Step-by-step guide: selecting a template when creating a job
1.1 Step 1: Upload document and select template
To generate a job based on a template during job creation, start the creation of the job as usual. However, instead of selecting the recipient, etc., simply upload the document of your choice and click on Select template (see figure 1 [1]).
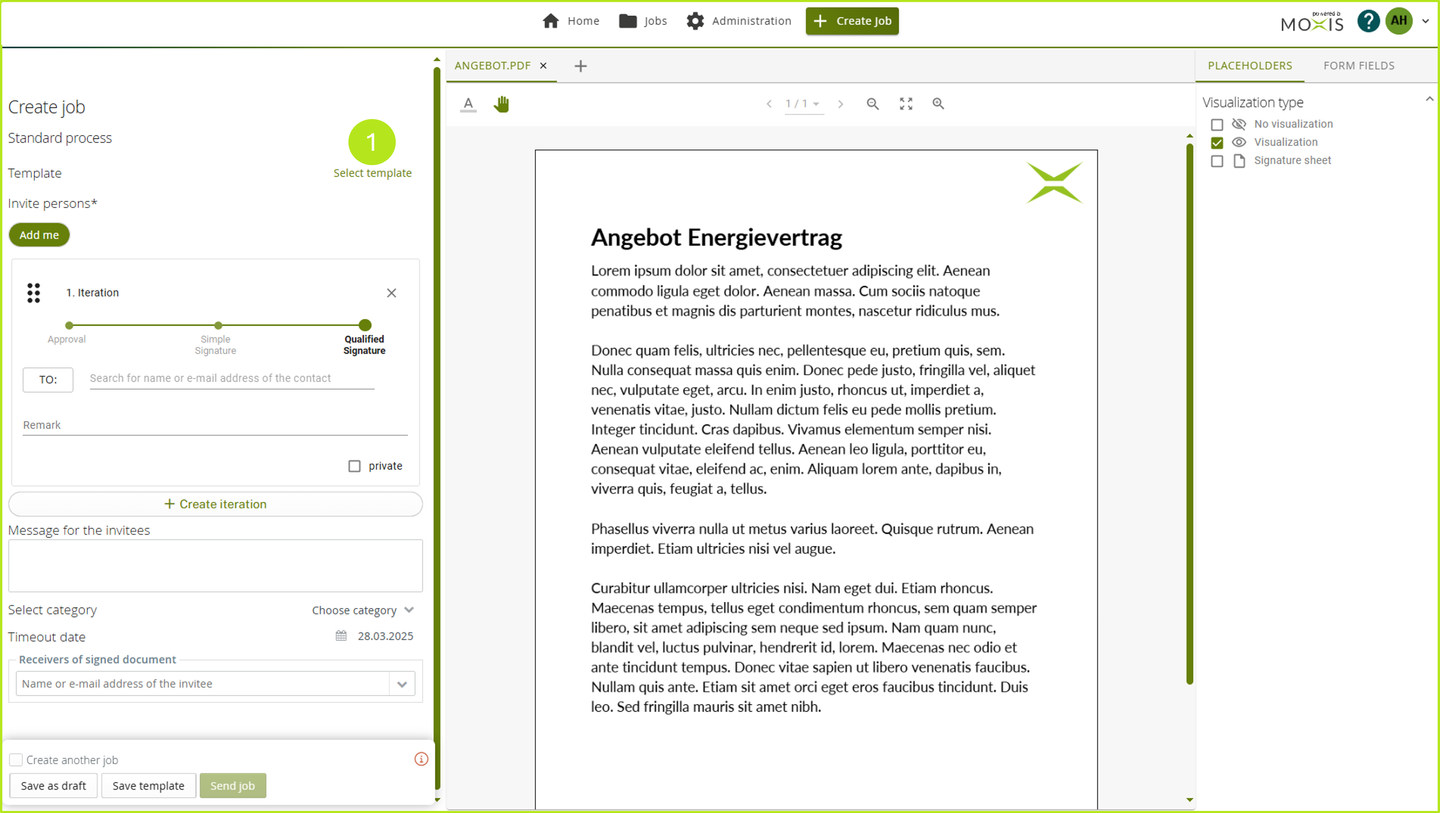
Figure 1: Selecting a template while creating a job
1.2 Step 2: Select template
A window will now open showing you all the templates. You now have the following options:
(1) Templates: Here you will find an alphabetical overview of all the templates available to you.
(2) Filter by template name: Enter the template name here and filter the results accordingly.
(3) Creator: This field provides you with an overview of the creators of the respective template.
(4) Action: Start a job based on a template by clicking on the arrow in the corresponding row. The job will then be automatically created with the data stored in the template.
(5) [Cancel]-button: Click this button to cancel the process.
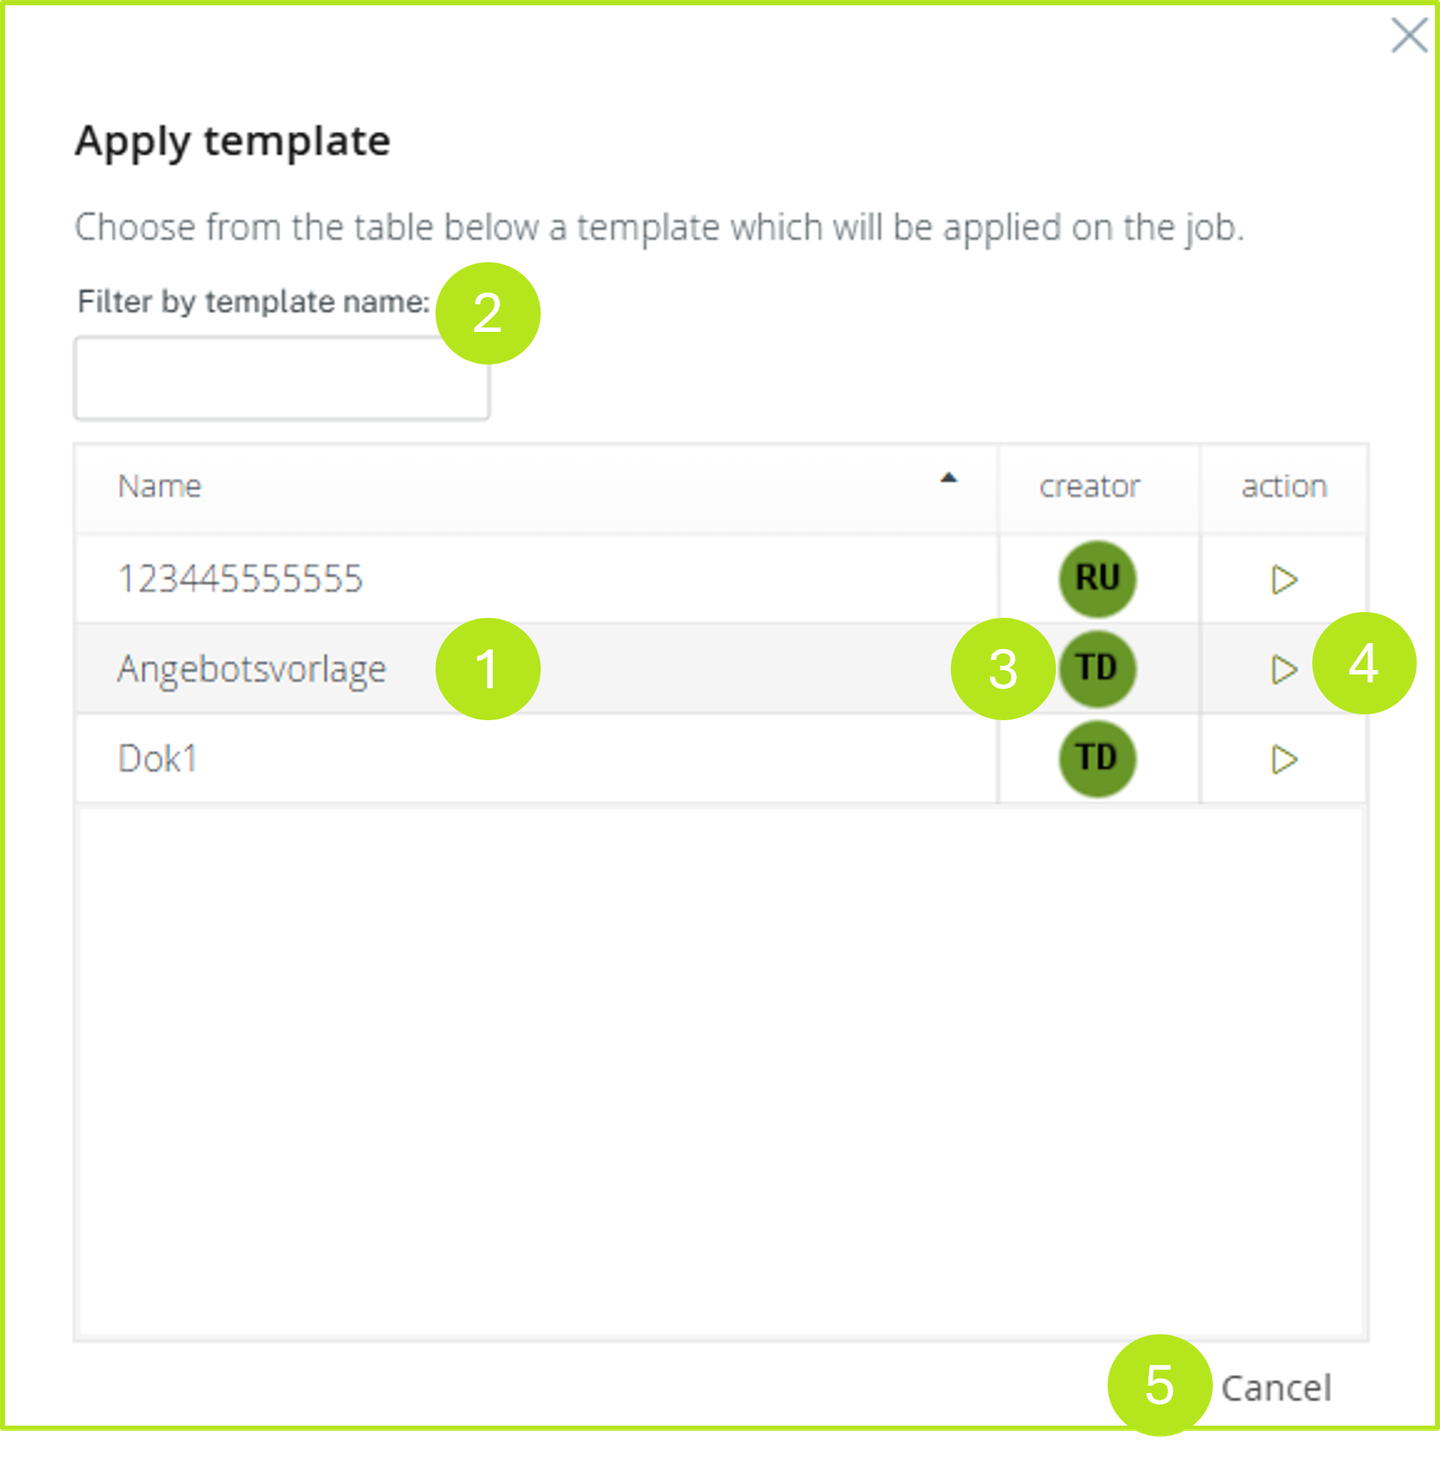
Figure 2: Select templates in the MOXIS template management
1.3 Step 3: Apply template
Click on the grey arrow in the line where your desired template is stored (see figure 2 [4]). The template is now visible in the Job creation section in the Template selected section (see figure 3 [1]). The job is now automatically filled with iteration levels (see figure 3 [2]) and recipients (see figure 3 [3]).
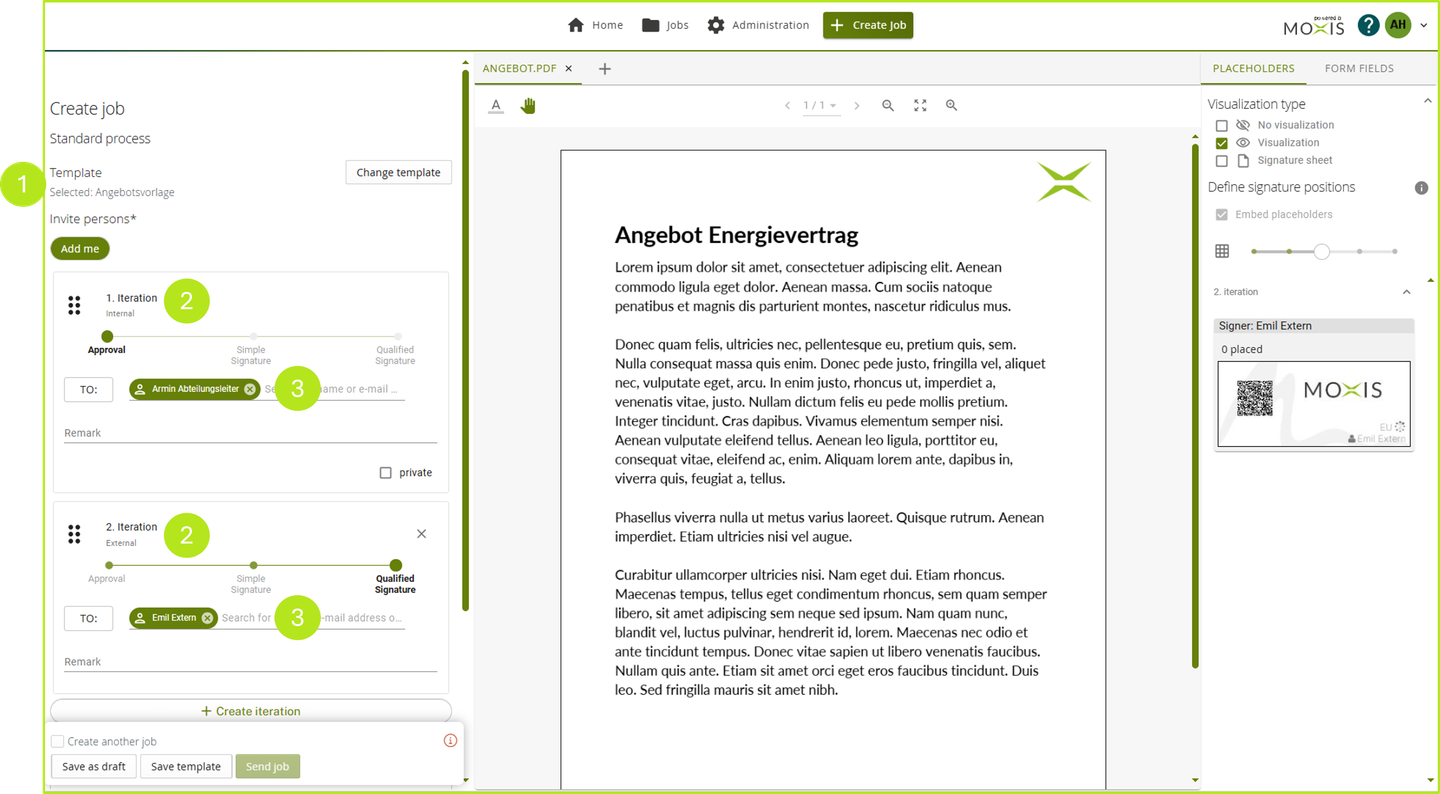
Figure 3: Creating a job based on a template
2. Starten der Vorlage aus der Vorlagenverwaltung
To start a template from the template management, please open the user settings in MOXIS and then click on the menu item Manage templates (see figure 4 [1]). Alternatively, you can open the user settings with a single click (see figure 4 [2]) and then click on Manage templates (see figure 5 [1]).
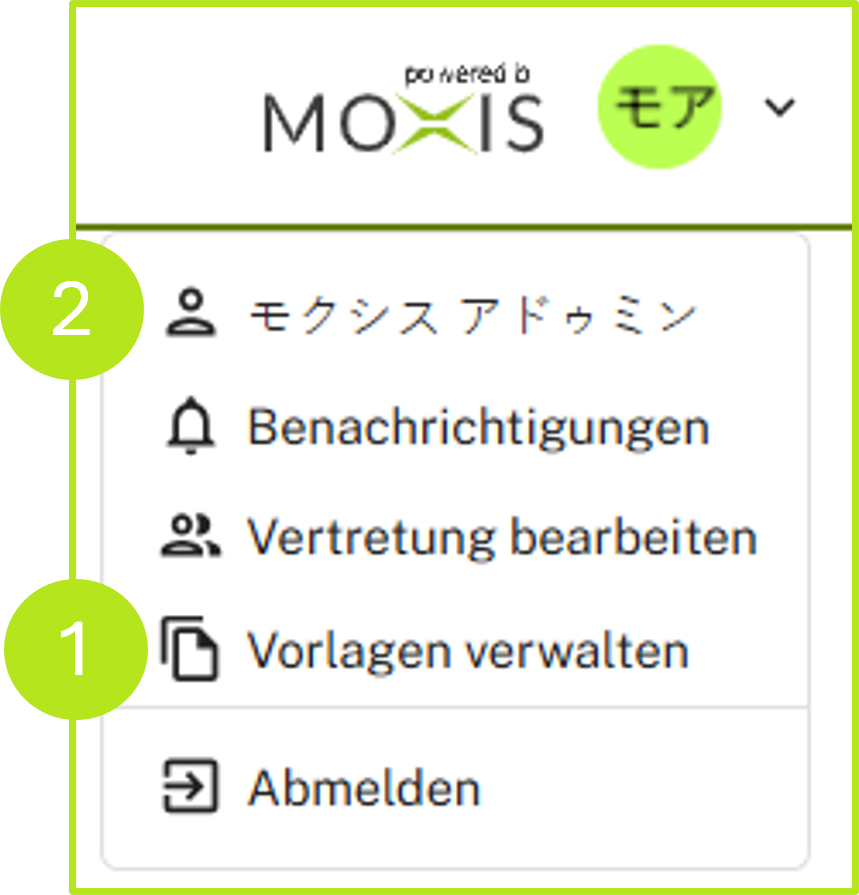
Figure 4: Manage templates in MOXIS
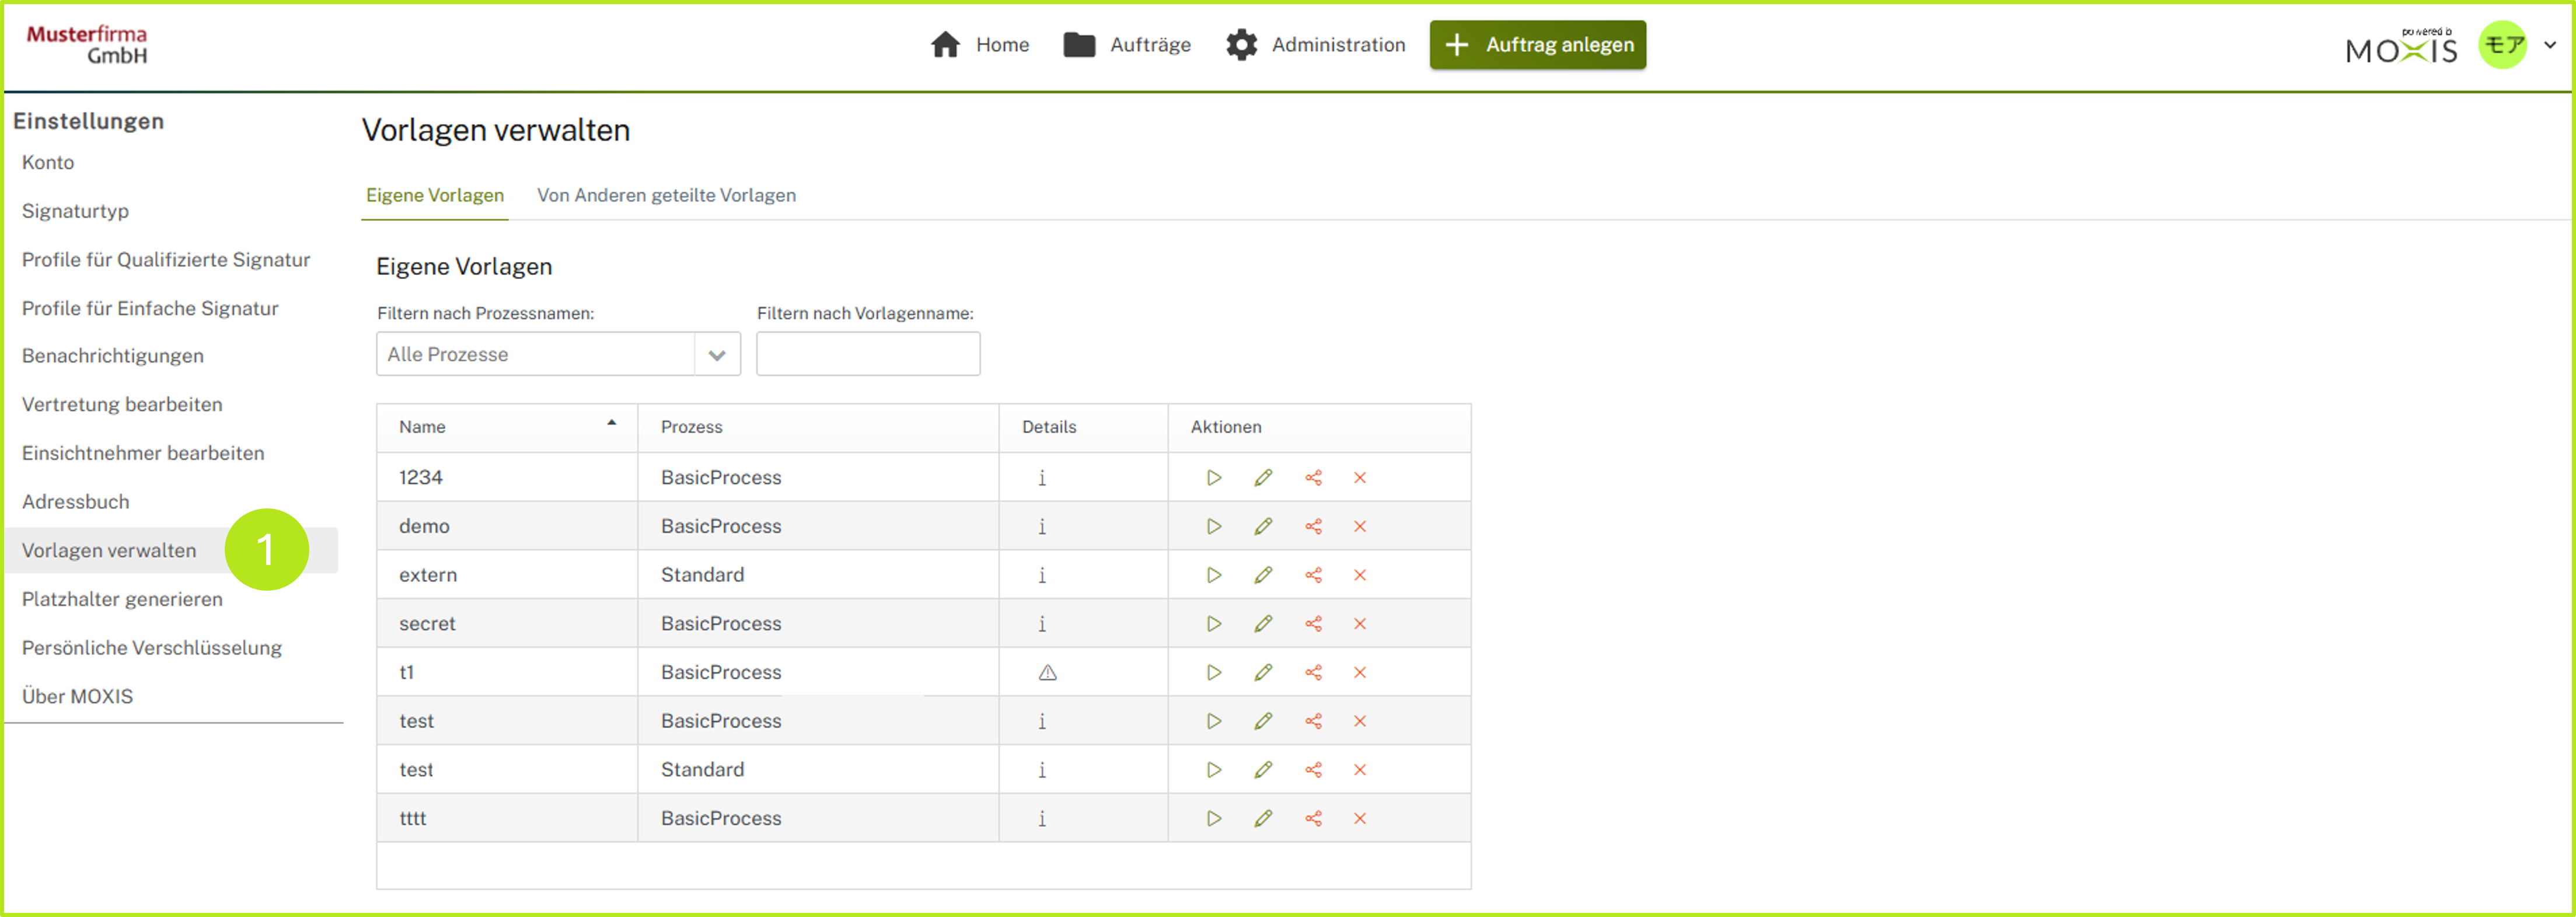
Figure 5: Managing open templates overview in MOXIS
In the template management (see figure 6), you can
view template details (see figure 6 [1])
or
start templates by clicking on the green arrow (see figure 6 [2]),
edit them by clicking on the green pencil (see figure 6 [2]),
share them by clicking on the red share icon (see figure 6 [2])
or delete them by clicking on the red X (see figure 6 [2]).
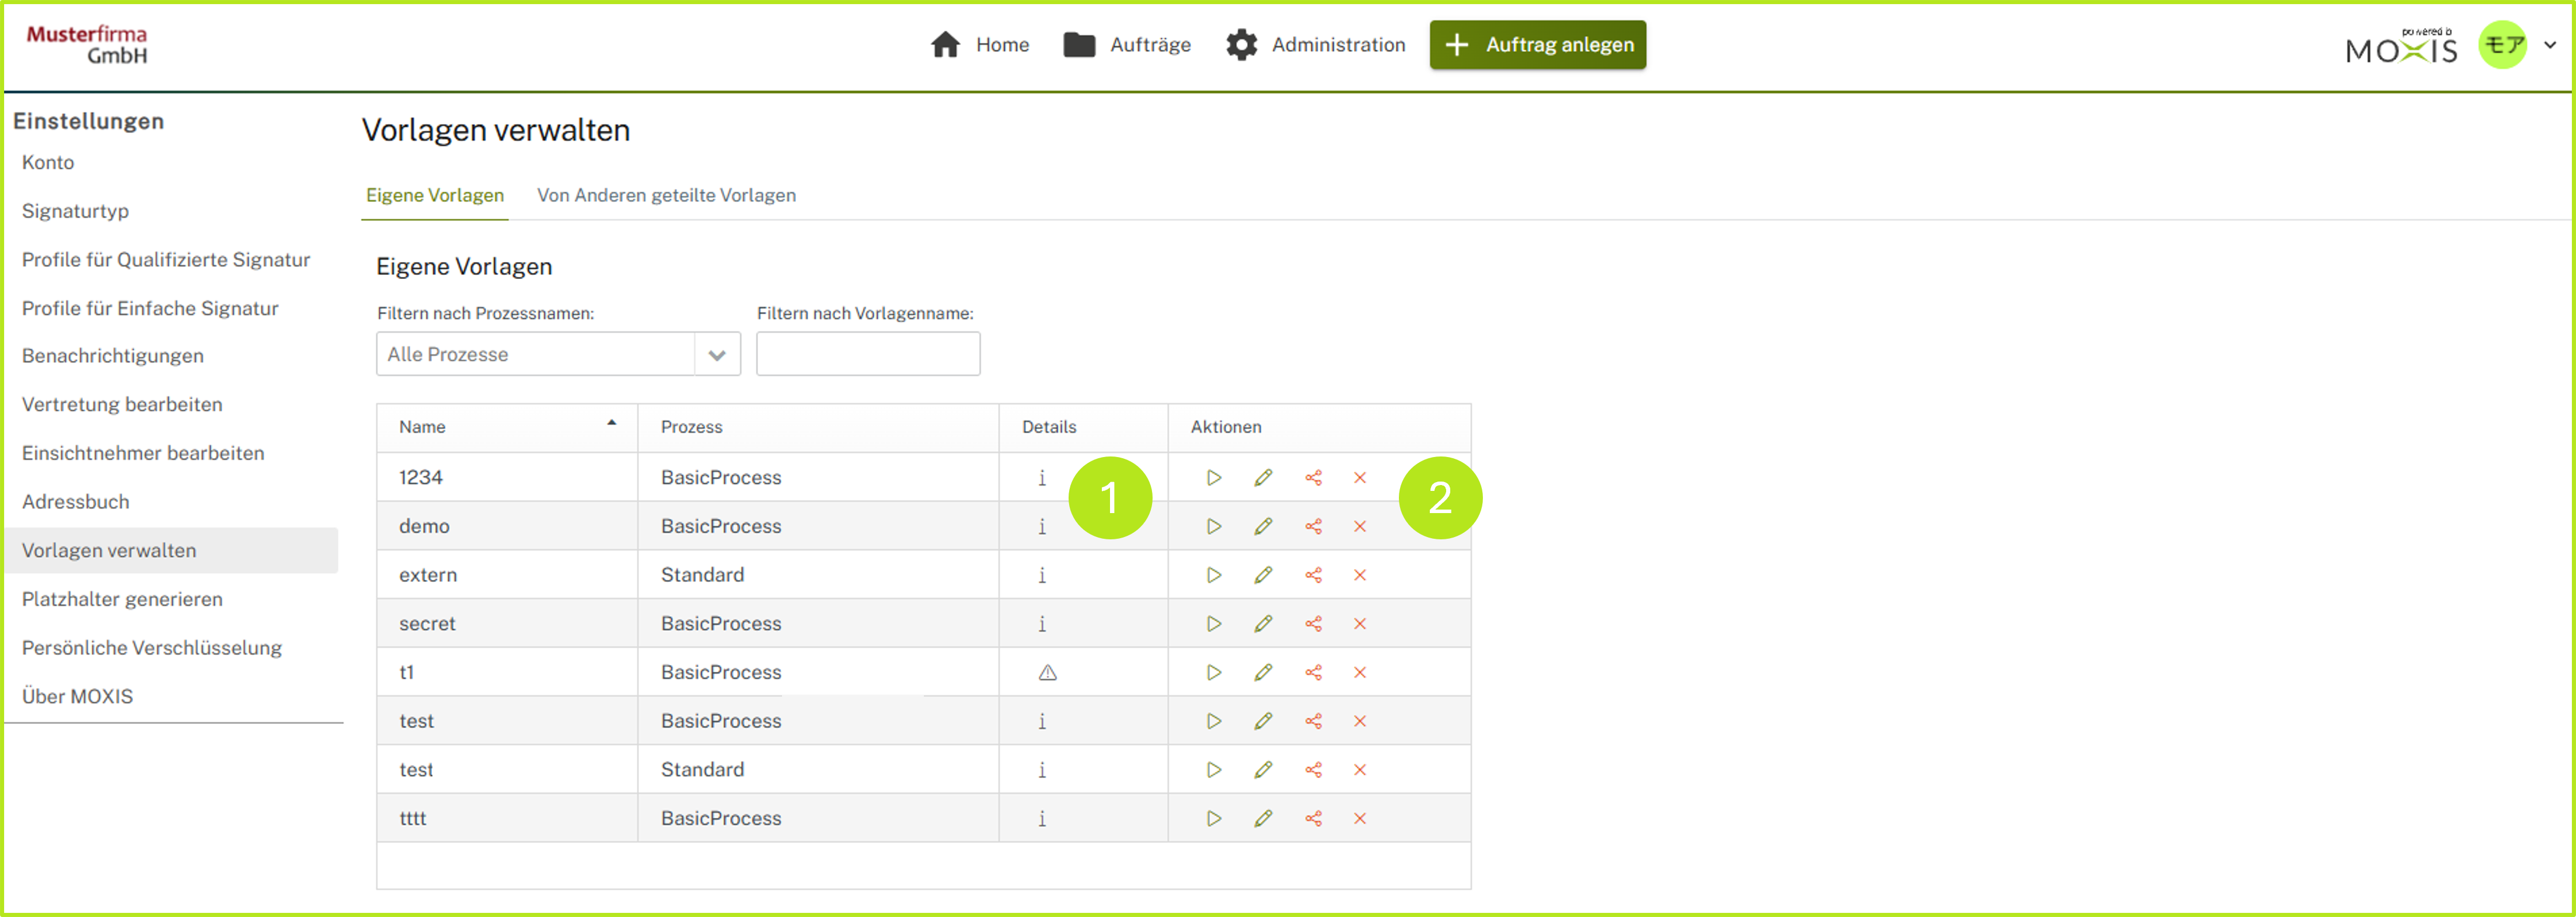
Figure 6: Starting a job based on a template from the template management
Once you have selected a template, you will be prompted to select a document (see figure 7). Upload one and continue processing the job as usual. All further steps are the same as those described in Chapter 1 of this article.
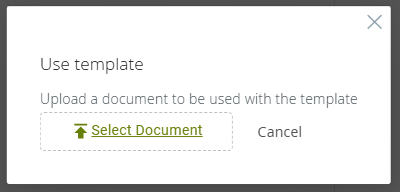
Figure 7: Upload a document for a template to use it