
[v4.52] A-Trust signing process
Content
This article will guide you through the process of signing in via ID Austria with basic functions. The other processes differ slightly and a note will be displayed at each step to indicate the difference.
1. General
The A-Trust signing process is the last step in completing the digital signature.
XiTip
Please note: In order to use A-Trust for a successful digital signature, you must have a digital identity. You can get one from ID Austria, with the mobile phone signature (to be discontinued, as of 10/24) or xIDENTITY. If you do not have a digital identity, you will not be able to sign a document online. You also need the A-Trust app to sign online with A-Trust.
There are currently two ways to execute the signature via A-Trust:
via ID Austria (full or basic function)
via xIDENTITY
2. Step-by-step instructions: The A-Trust signature process
Step 1: As soon as the Sign button in MOXIS is clicked, a pop-up window opens, in which the connection to the A-Trust data centre is established to apply the signature to the documents. Enter your telephone number and your signature password (see Figure 1 [1] and [2]) and click on the [Identify]-button (see Figure 1 [3]). The mobile phone number is used for identification with:
ID Austria with the basic function
xIDENTITY
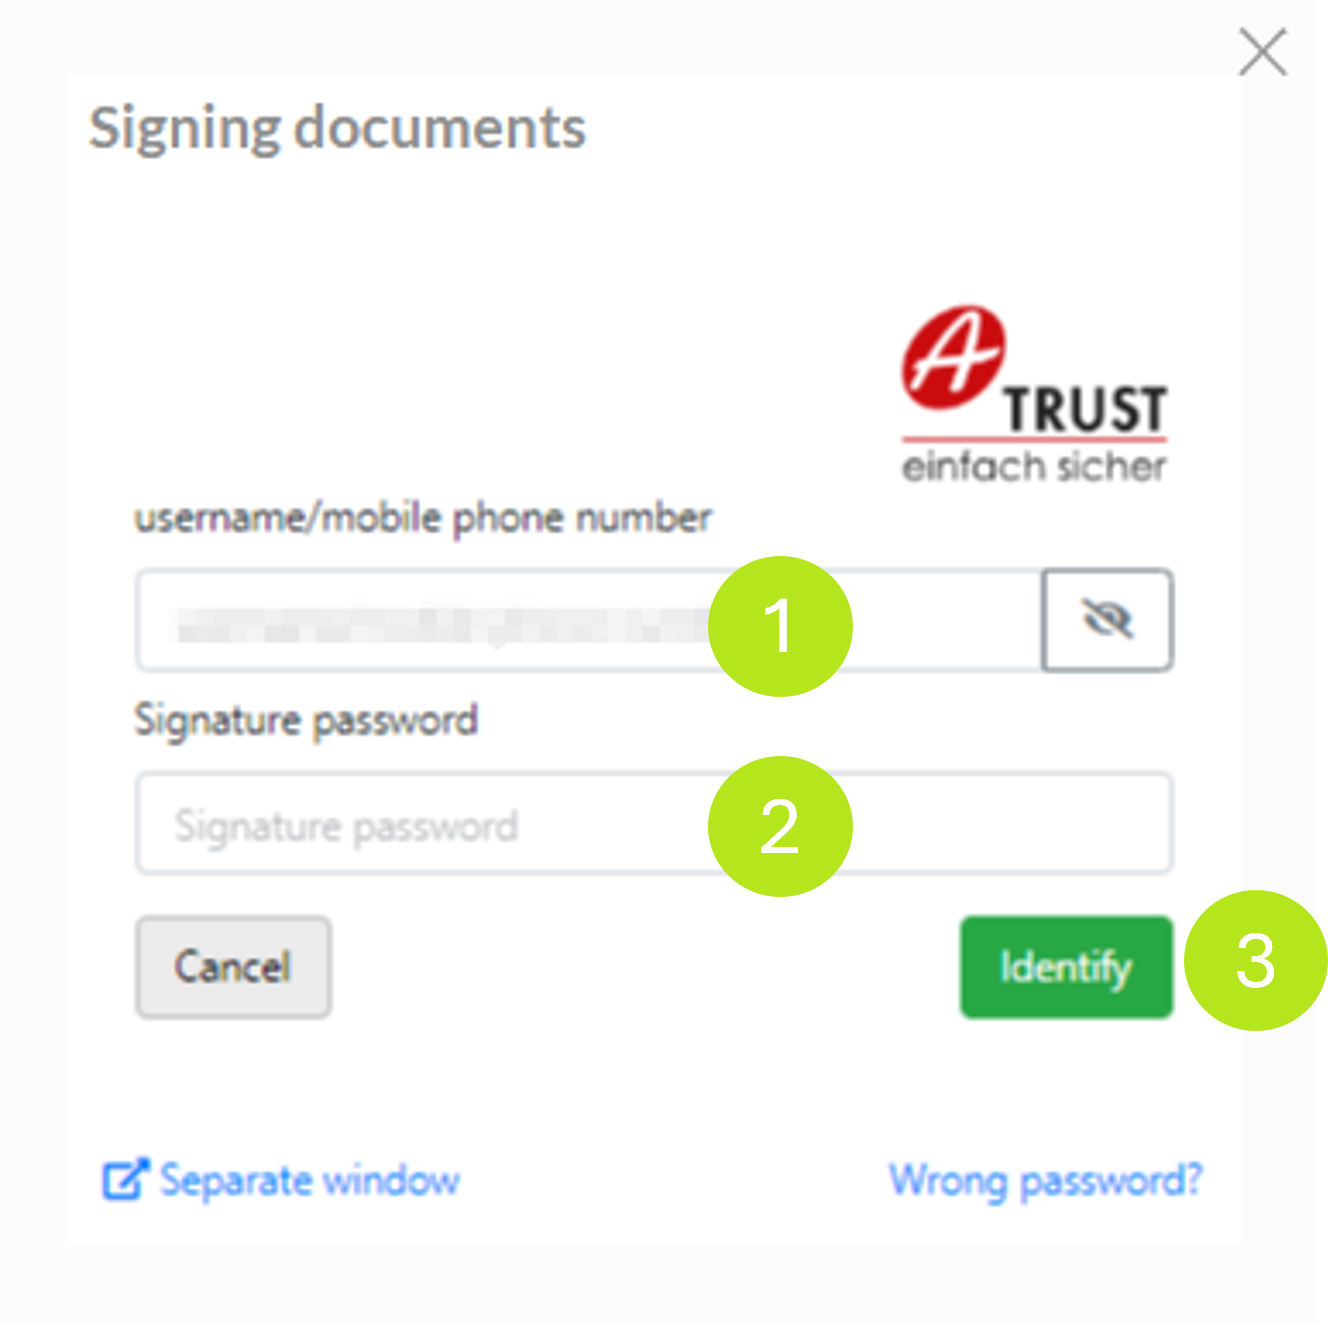
Figure 1: Sign documents with the A-Trust App
Please note: If you use ID Austria with full functionality, you must enter your ID Austria username in the login screen.
XiTip
If you save your mobile phone number in your signature type menu, the mobile phone number will already be pre-filled and you will not need to re-enter it each time.
Step 2: Now the comparison value is compared and the signature is confirmed using the A-Trust app. Please open the app and compare the comparison value displayed on the screen (see figure 2 [1]) with the one displayed in the app. If they match, there is nothing to prevent you from signing.
Please note: The signature is confirmed with ID Austria with full or basic function via the A-Trust app. In the basic version, the signature can alternatively also be confirmed via SMS-Tan (see Figure 2 [2]).
Step 3: Now exclude the signature in the A-Trust app. The process varies depending on the functionality of the mobile phone. You can choose between two different options:
SMS TAN: After clicking on TAN via SMS (see Figure 3 [1]), you will receive the comparison value and the TAN (see Figure 3 [2]) and enter the 6-digit TAN (see Figure 3 [3]). The signature is thus completed.
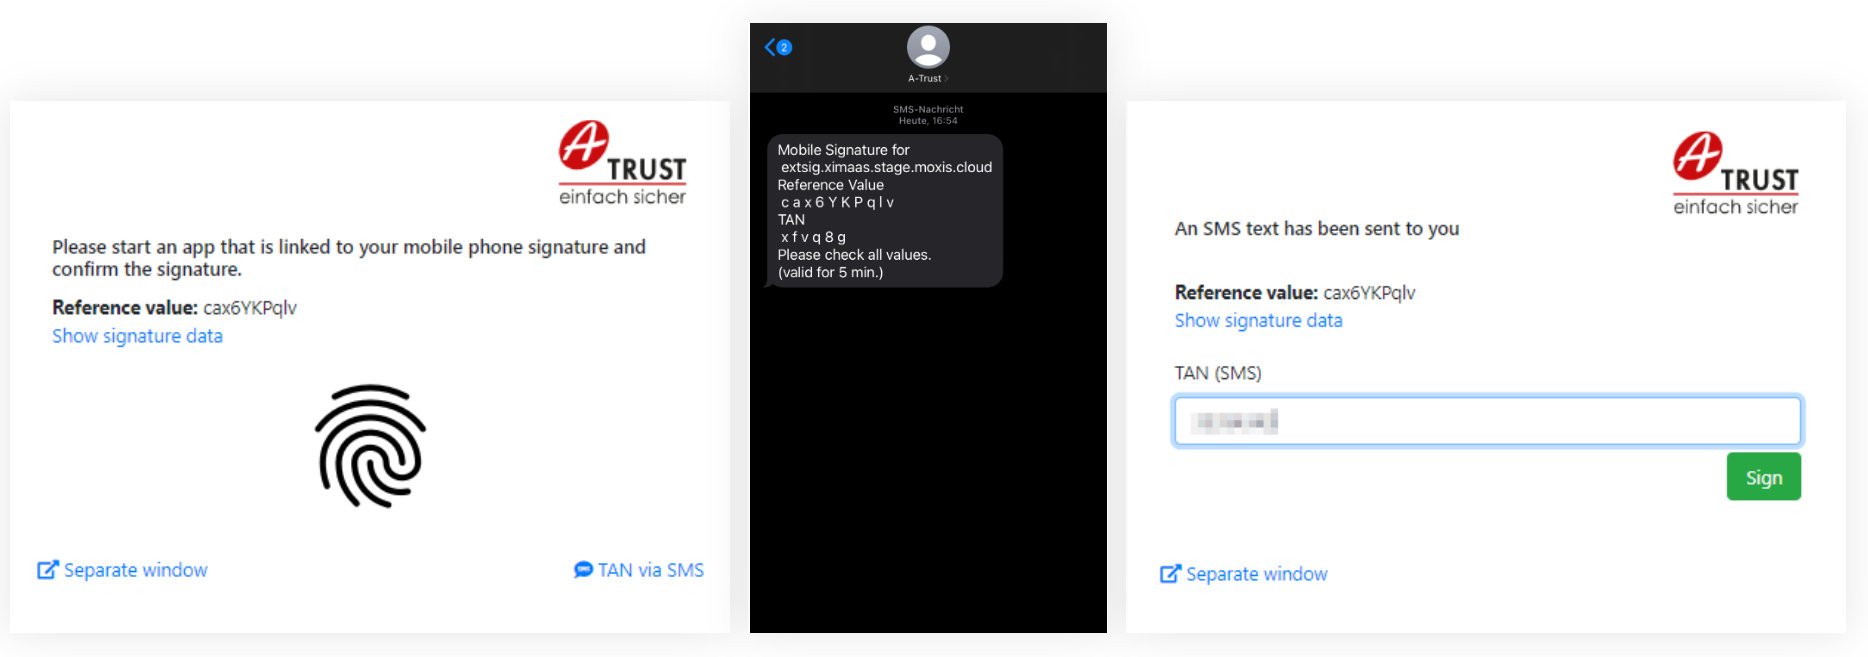
Figure 2 (from left to right): App with comparison value | TAN received via SMS | Enter 6-digit TAN
A-Trust app: The app allows you to finalise the signature via fingerprint (see figure 4), Face ID or by scanning the QR code. To do this, click on the [Sign]-button. The actual signature is then made by comparing the fingerprint (see figure 4). The signature is now complete.
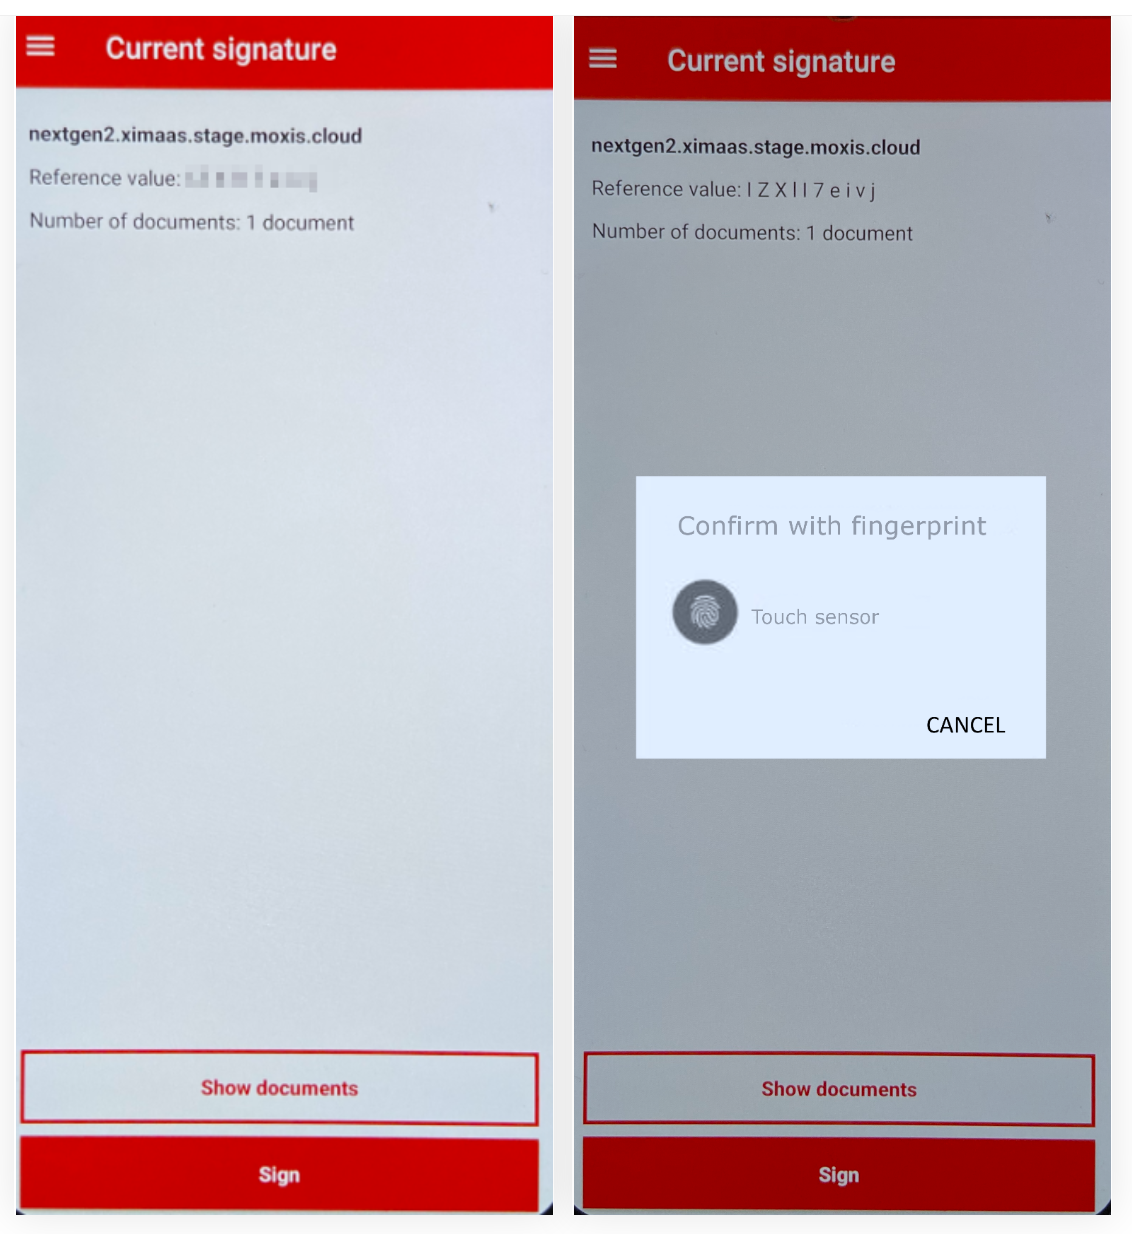
Figure 3: Finalisation of the signature via fingerprint
Successfully signed orders can be found in the order overview under Received orders > Completed. Here you can download the document again and check the status of the signature in the details.
You will also receive an e-mail with an attachment. The e-mail contains another overview of the signature details and an attachment with the MOXIS data protocol.