
Activating the issue of an xIDENTITY with a token via A-Trust NECT
An xIDENTITY can be created in a number of ways, for example via the XignUp portal. Another way is to activate it via the A-Trust NECT activation. Here you can register for the NECT identification process. This article explains the best way to proceed when registering.
1. Requirements for registration via NECT activation
To issue an xIDENTITY via A-Trust NECT activation, you need a so-called token. This is unique and can only be used once. You can obtain it from your XiTrust contact person.
You will also need the following documents, apps and devices:
You have downloaded the following apps: the NECT Wallet and the A-Trust signature app.
Your personal or work smartphone (ideally with fingerprint or facial recognition function) is ready.
You have a valid passport, ID card or residence permit for the identification process and have one of these documents ready to hand. You can find out which documents you can use here.
In addition to a smartphone, you also have a PC or laptop available. Please note: The registration process will only work smoothly if you carry it out using two end devices. It will NOT work if you only use a smartphone.
2. Activating your xIDENTITY via A-Trust NECT
To activate NECT using a token, please open the NECT activation page (see figure 1), enter the token and click on the [Next] button.
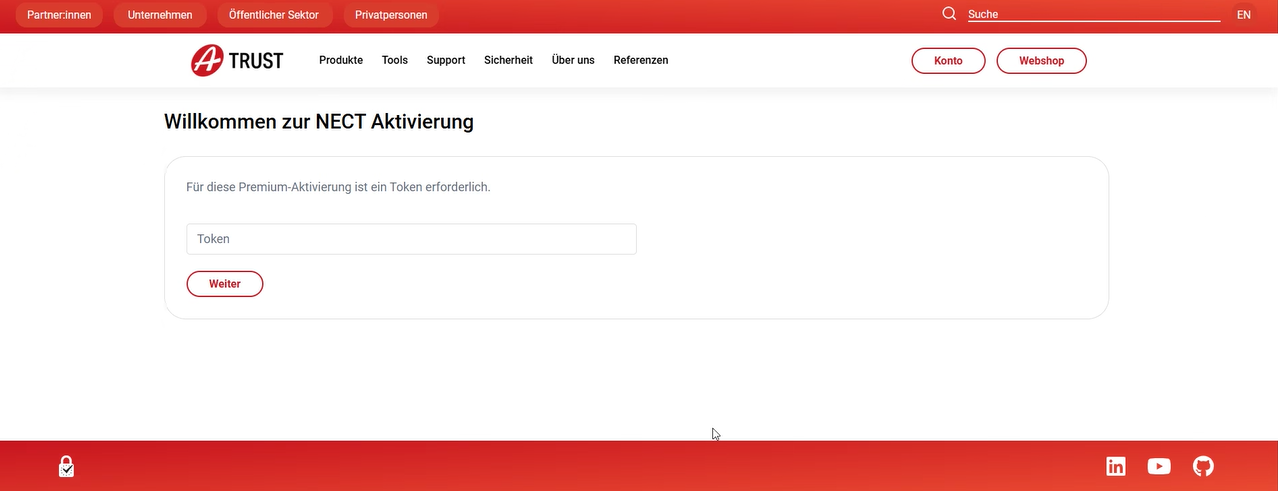
Figure 1: NECT activation page
You will then be redirected to the NECT registration process.
3. Step-by-step guide to the NECT registration process
Step 1: After opening the app, start the identification process by clicking on the [Get started]-button (see figure 2). Another click on the [Next]-button (see Figure 3) confirms your registration.

Figure 2: Click on the [Get started]-button to start the identification process
XiTip
Please remember to keep your browser window open!
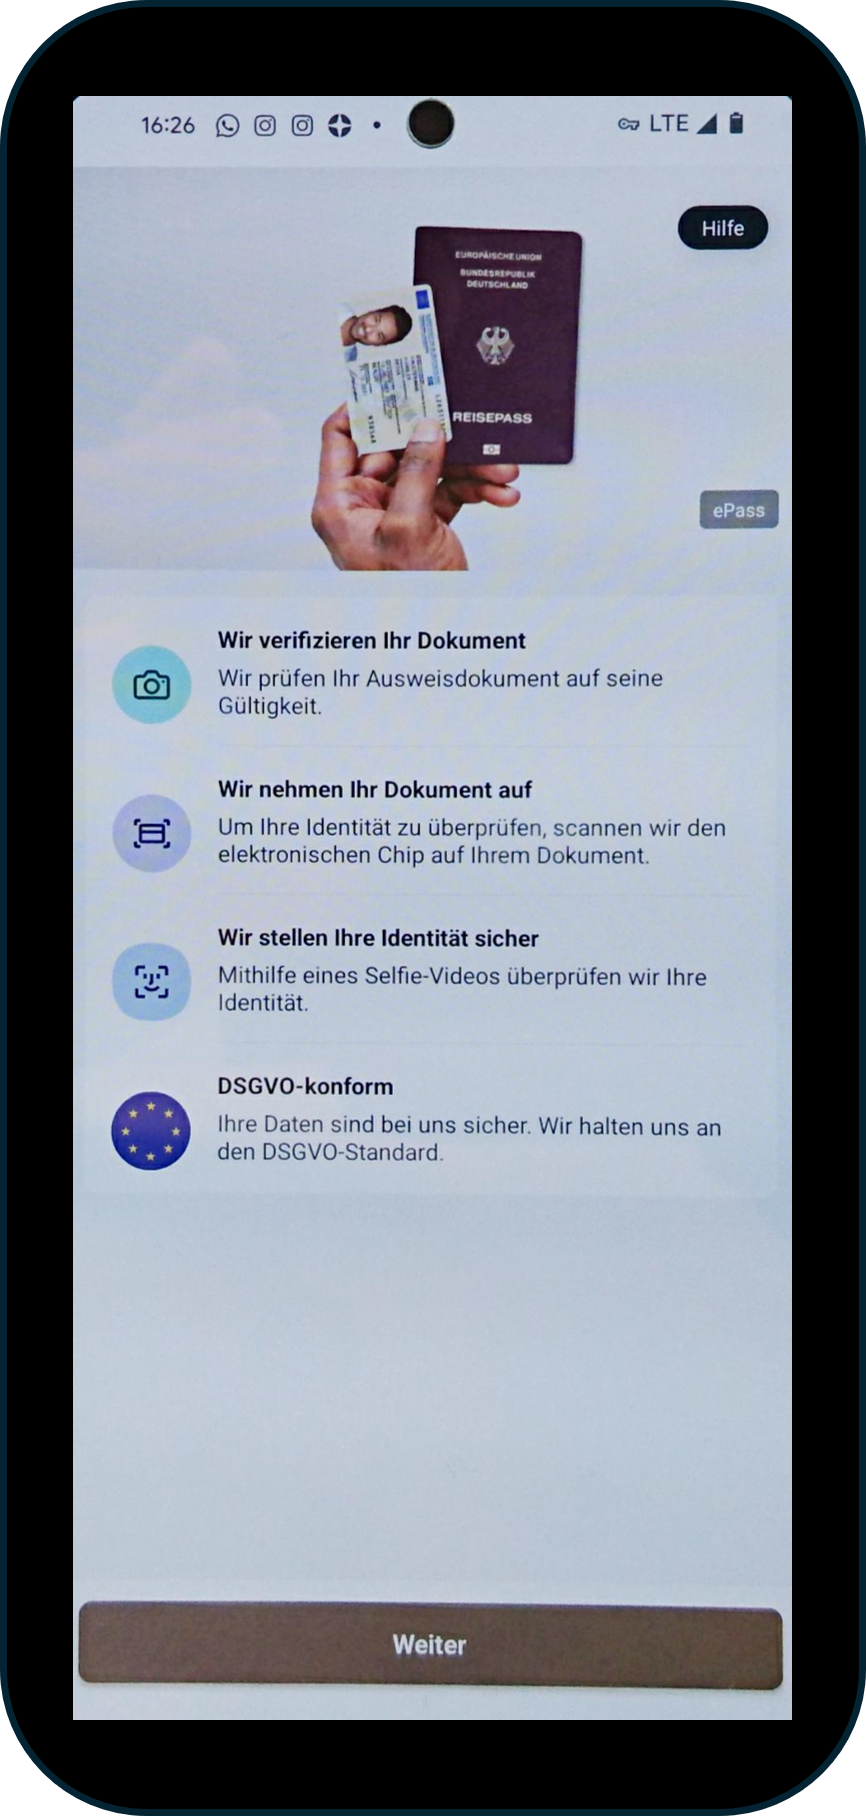
Figure 3: Confirm registration
Step 2: Please confirm the processing of your personal data, data protection information and the general terms and conditions by clicking on the [I agree]-button (see figure 4).
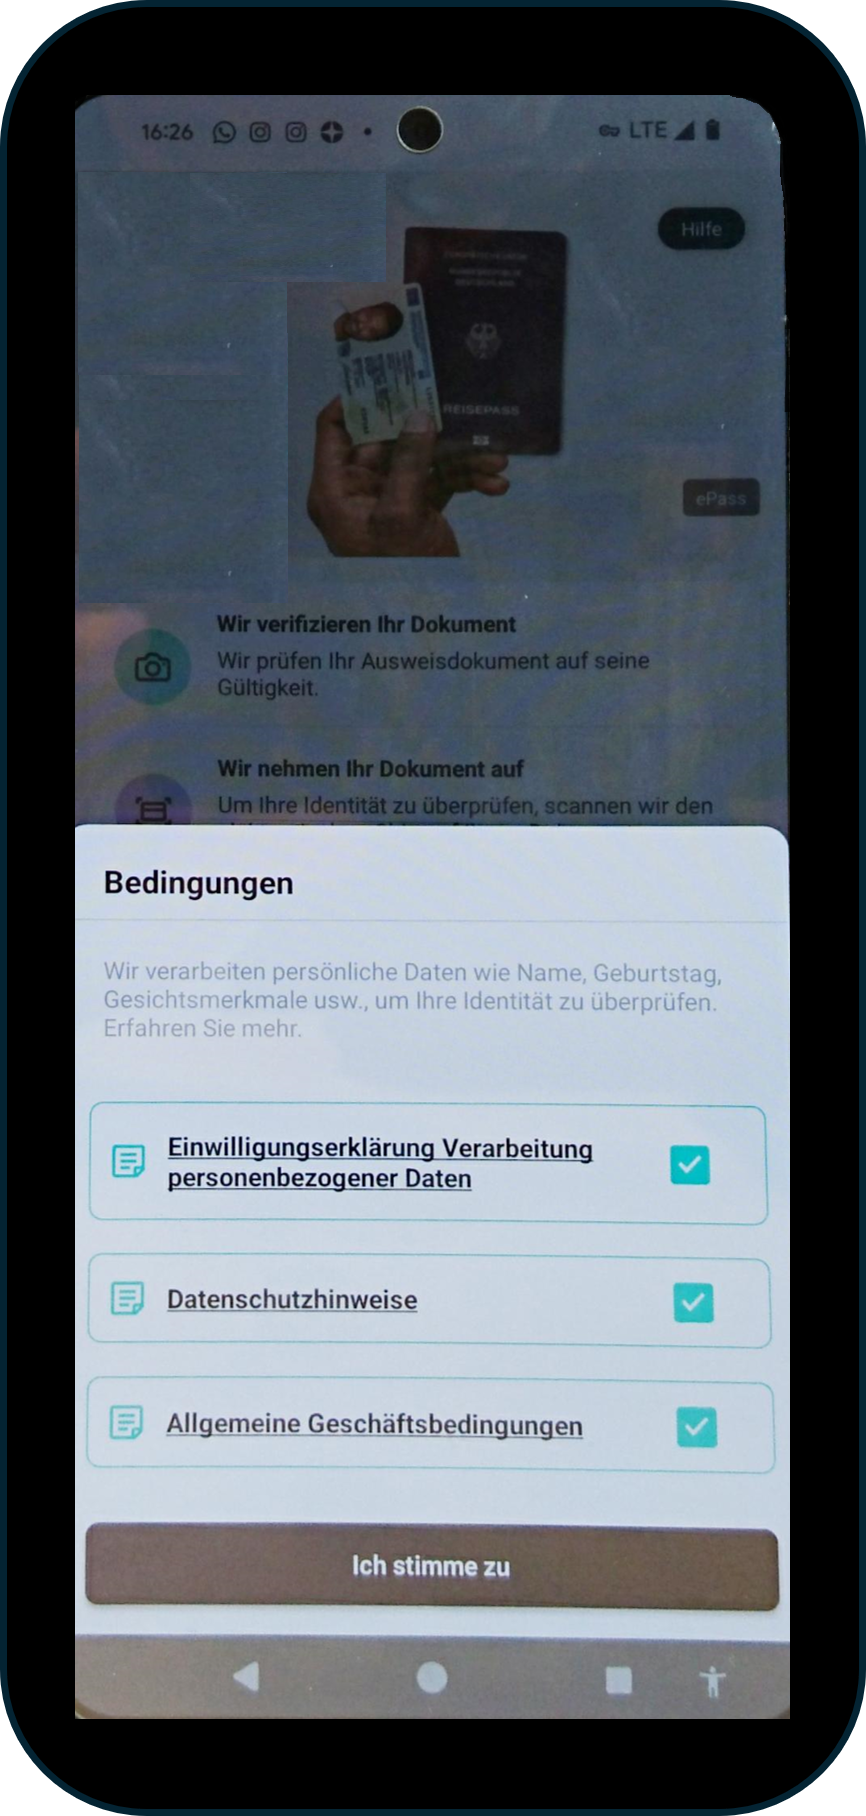
Figure 4: Please confirm the app's terms of use by clicking on the [I agree]-button.
Step 3: The NECT Wallet app offers an explanatory video that introduces you to the process. You can watch the video or skip it by clicking on the [Skip video]-button (see figure 5). We recommend that you watch the video.
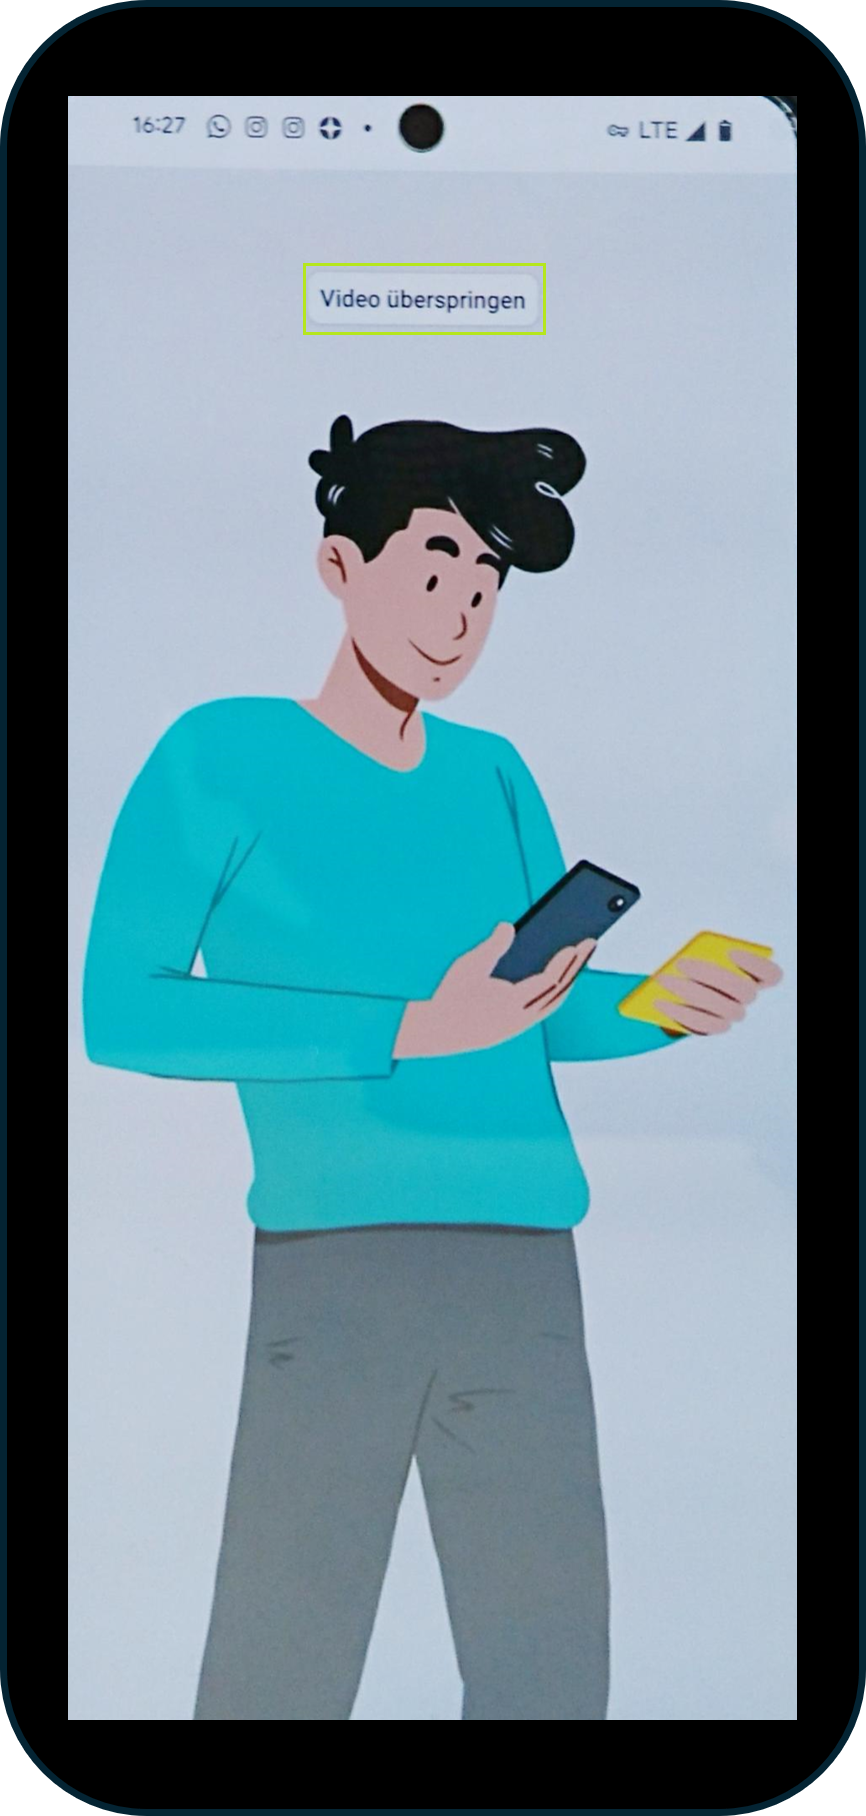
Figure 5: The explanatory video supports you in the identification process (skip by clicking on [Skip video])
Step 4: You will now be asked to identify yourself. This is first done using your ID document. Please follow the app 's instructions exactly and click on the [Next]-button (see figure 6).
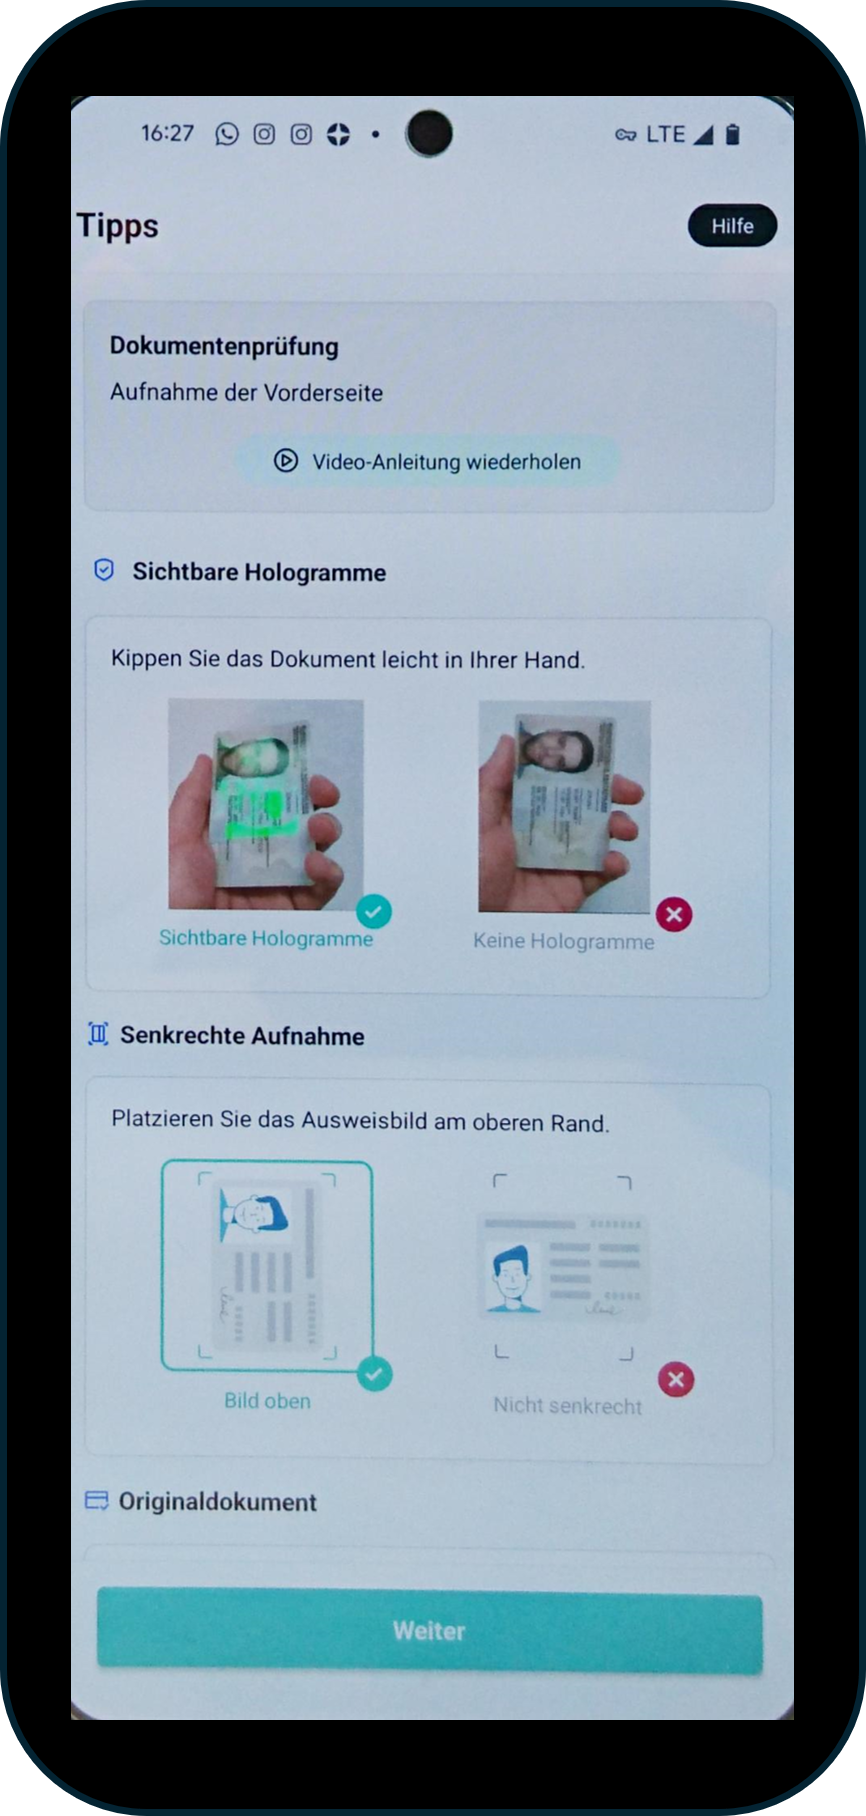
Figure 6: The first part of the identification process consists of checking your ID document
Step 5: Please authorise the app to take pictures and videos (see figure 7). Please note: The online identification process will not work without this authorisation.
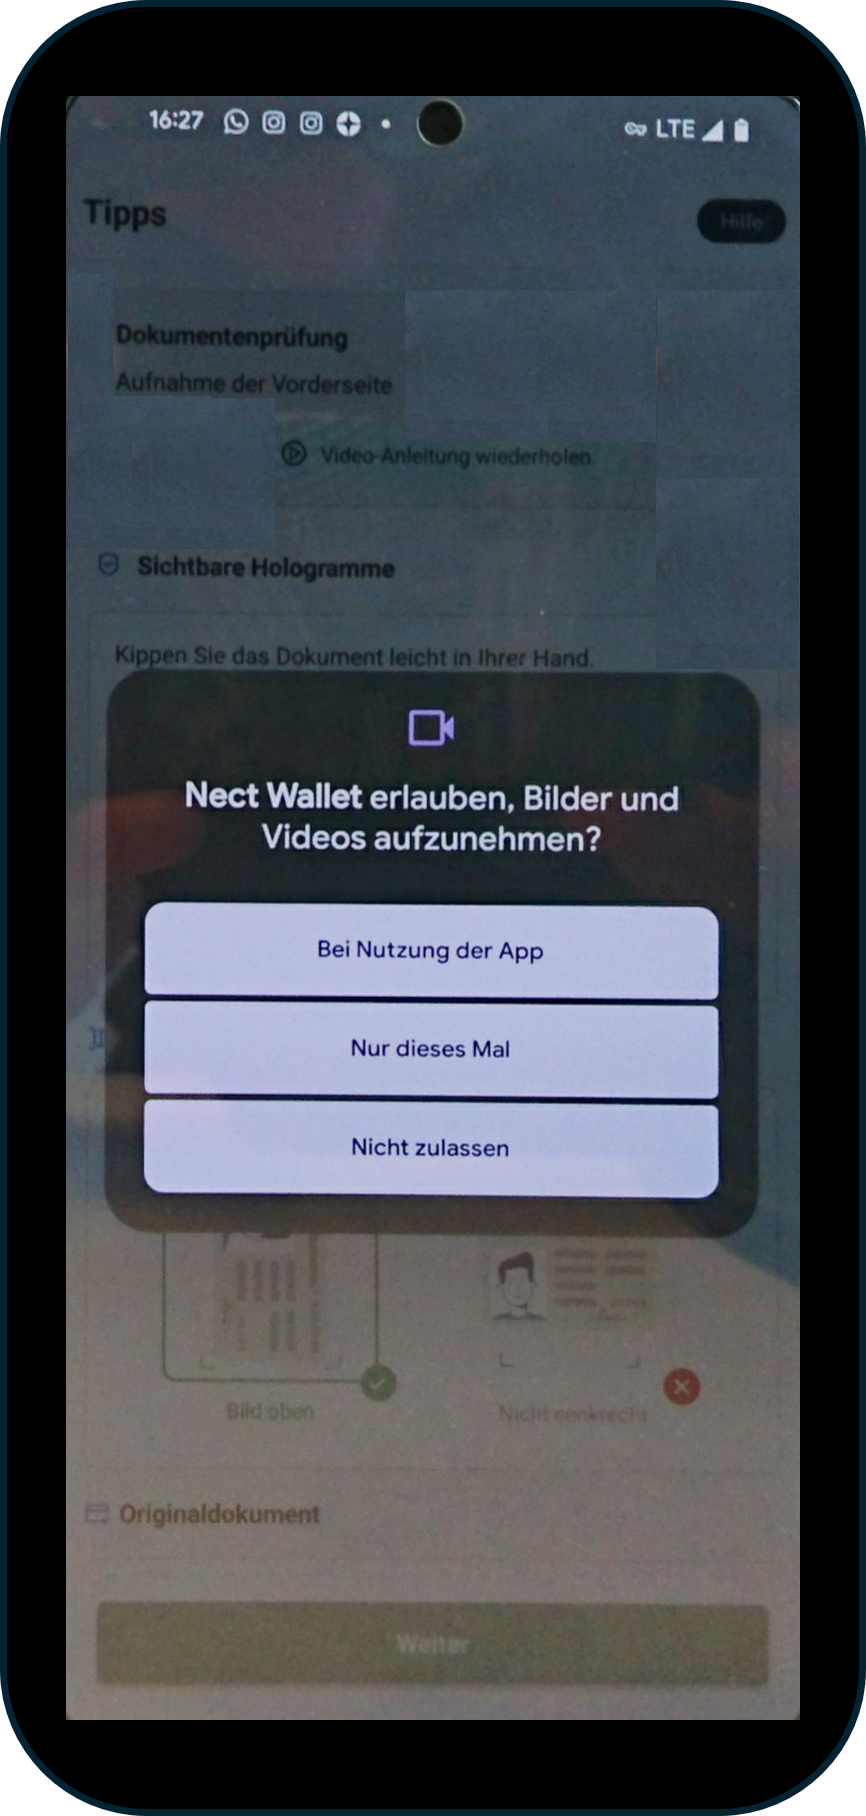
Figure 7: Please allow the NECT Wallet to take pictures and videos.
Step 6: Place your selected ID document with the photo as prescribed by the app (see figure 8). Then click on the red [button] to take a picture.
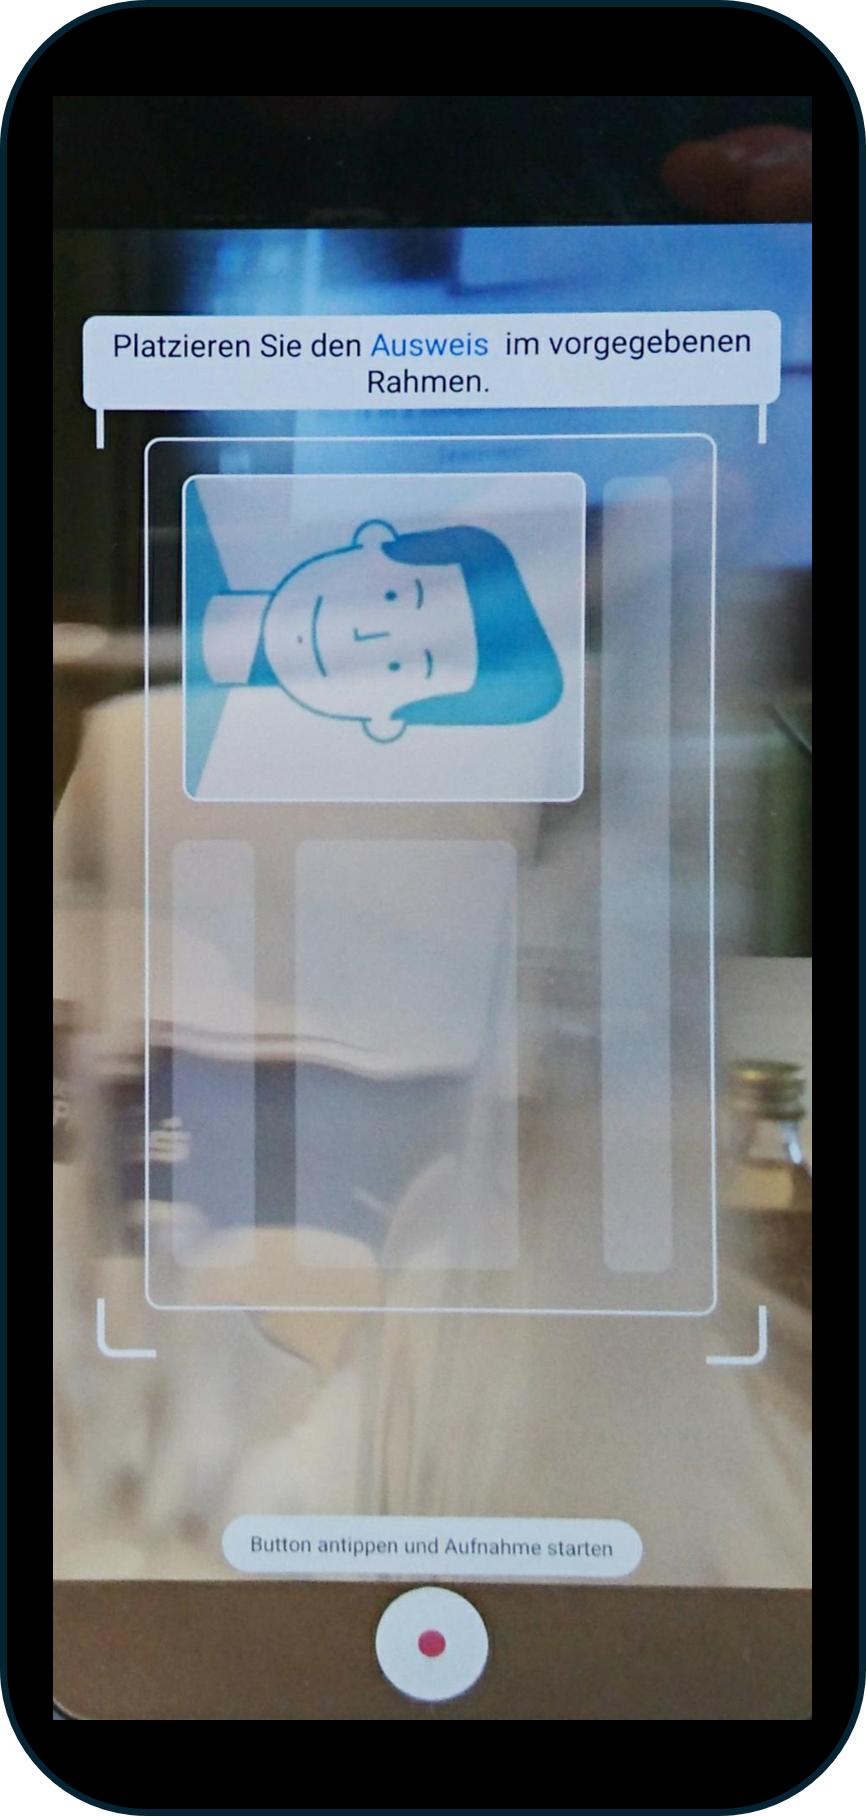
Figure 8: Place the ID document in the specified frame.
Step 7: Once you have successfully photographed the image, please scan your ID document (in our example, a passport) to confirm its authenticity. To do this, please follow the app's instructions and click on the [Start scan]-button (see figure 9).
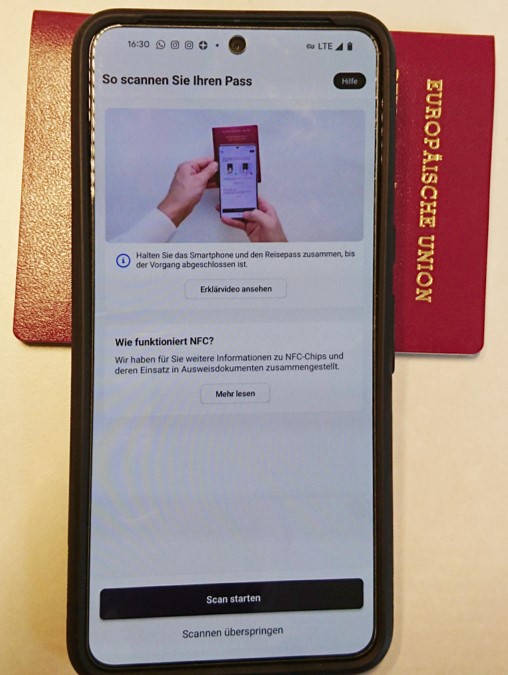
Figure 9: Scan your ID document by placing it under the camera and clicking on the [Start scan]-button.
Step 8: After the scan, you will be asked to take a selfie video. Here, too, the NECT Wallet app offers video instructions, which we are happy to recommend. However, you can also skip the instructions by clicking on the [Skip video] button (see figure 10). After the video, you will receive further instructions from the app (see figure 11). Please pay attention to the following points when creating the video:
Ensure that the lighting is sufficiently bright.
Hold the smartphone at eye level as shown.
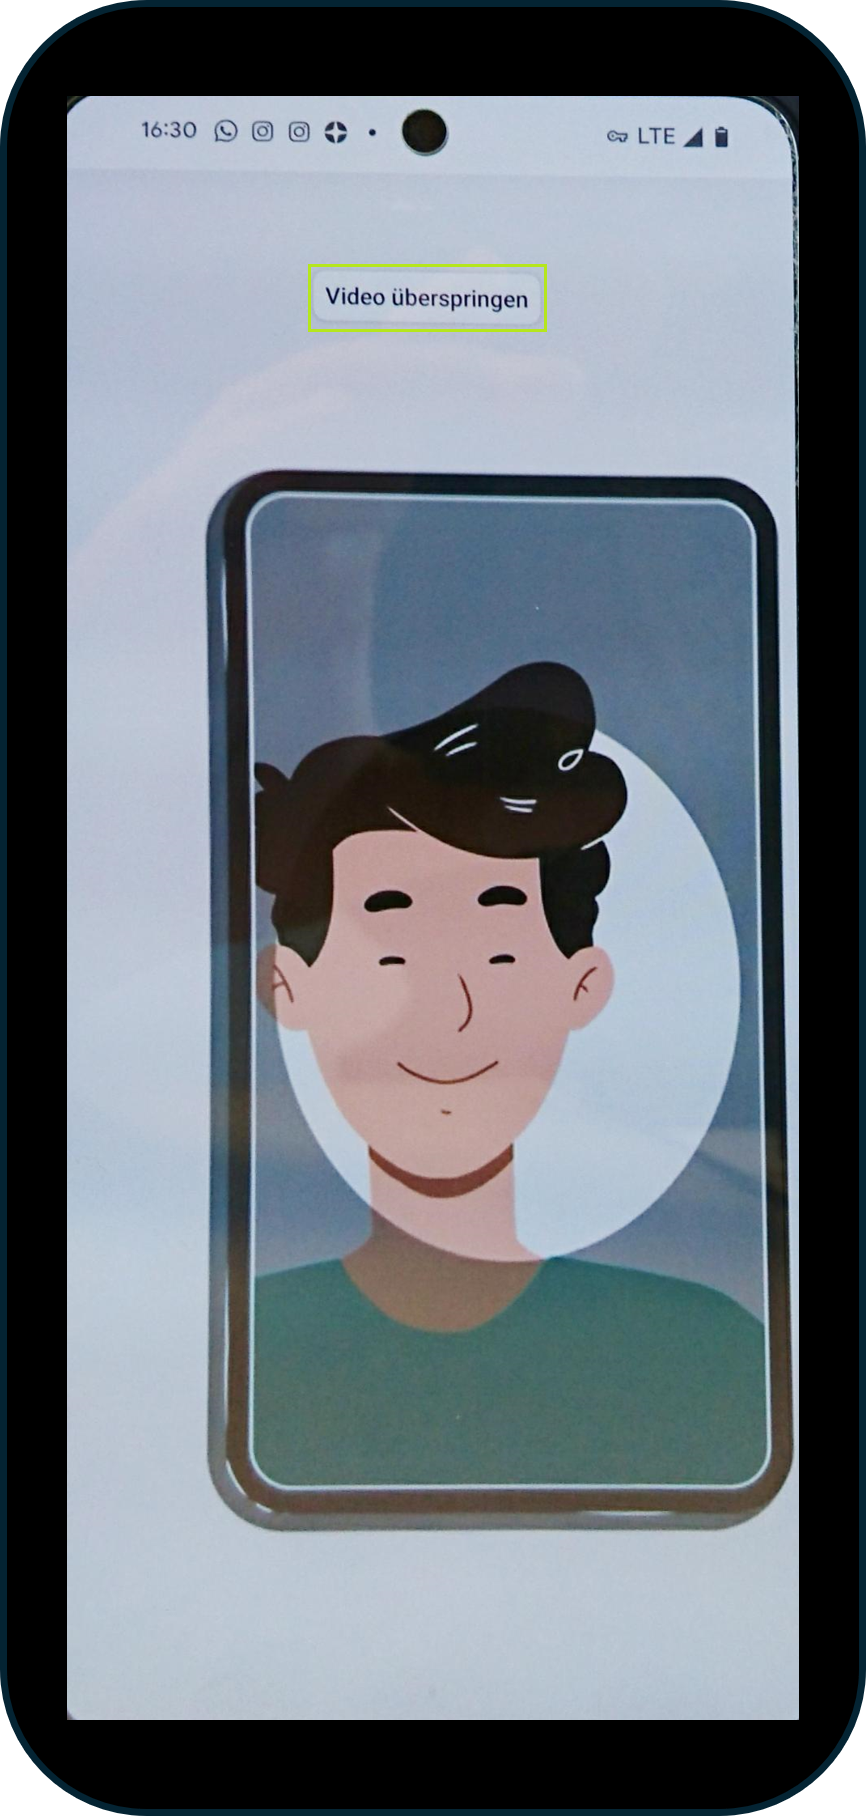
Figure 10: Video on how to make a selfie video. Skip possible by clicking on [Skip video].
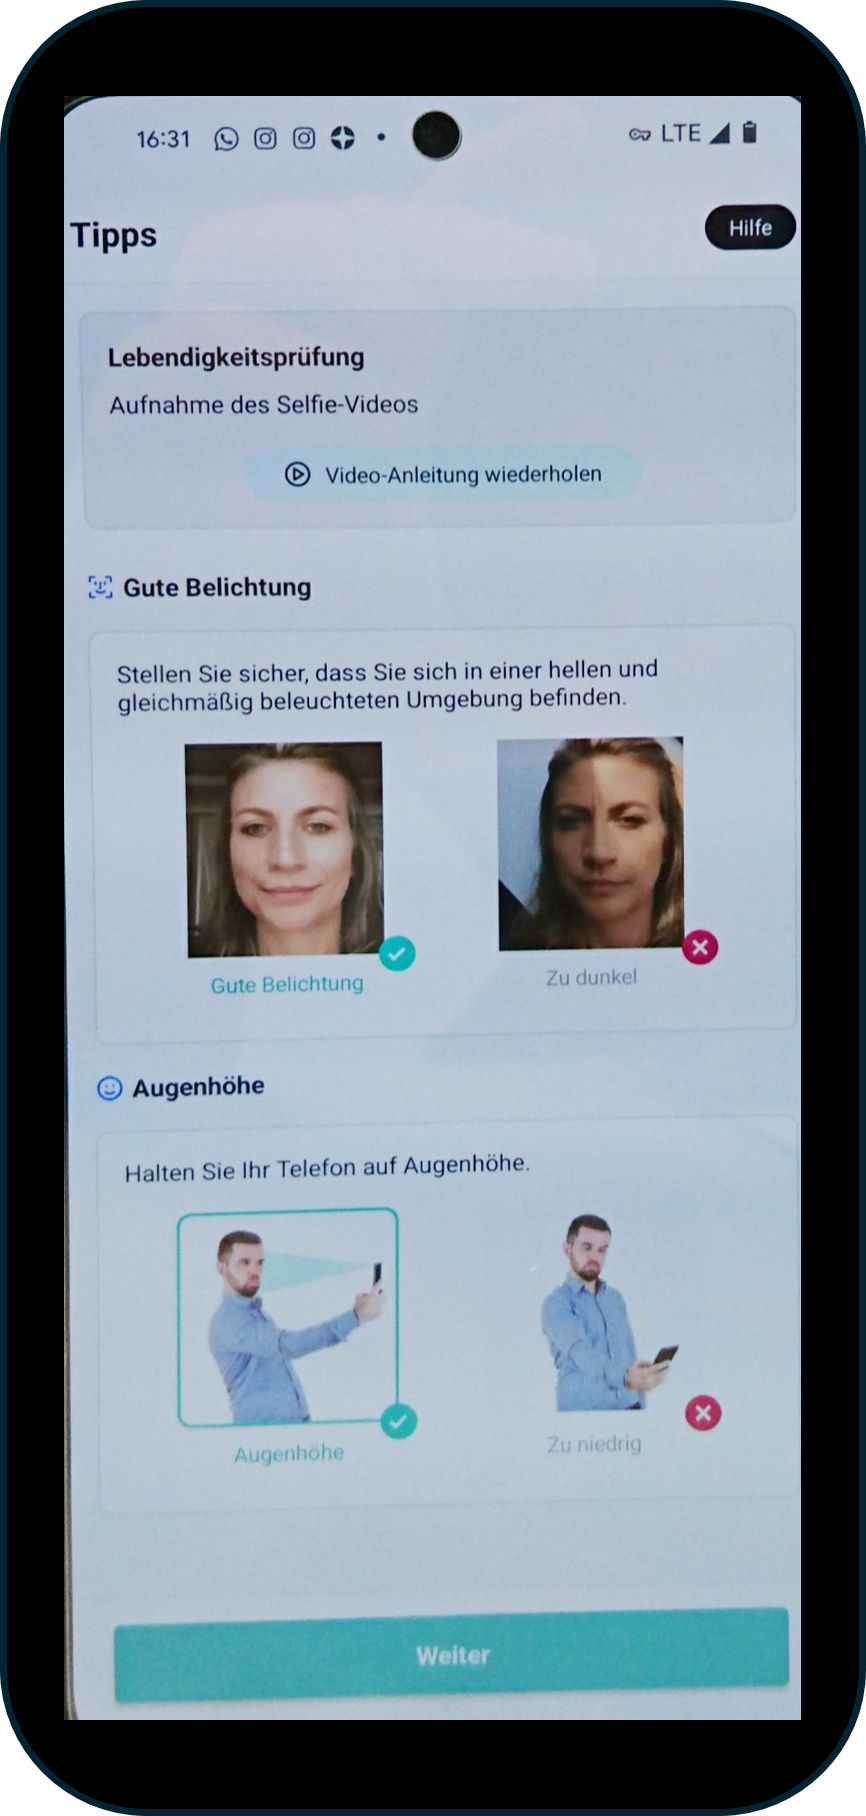
Figure 11: Further instructions for creating your selfie video
XiTip
Please remember to keep your browser window open!
Step 9: You've almost done it! The data is now being uploaded (see figures 12 and 13). The browser window now also shows a different status (see figure 14)
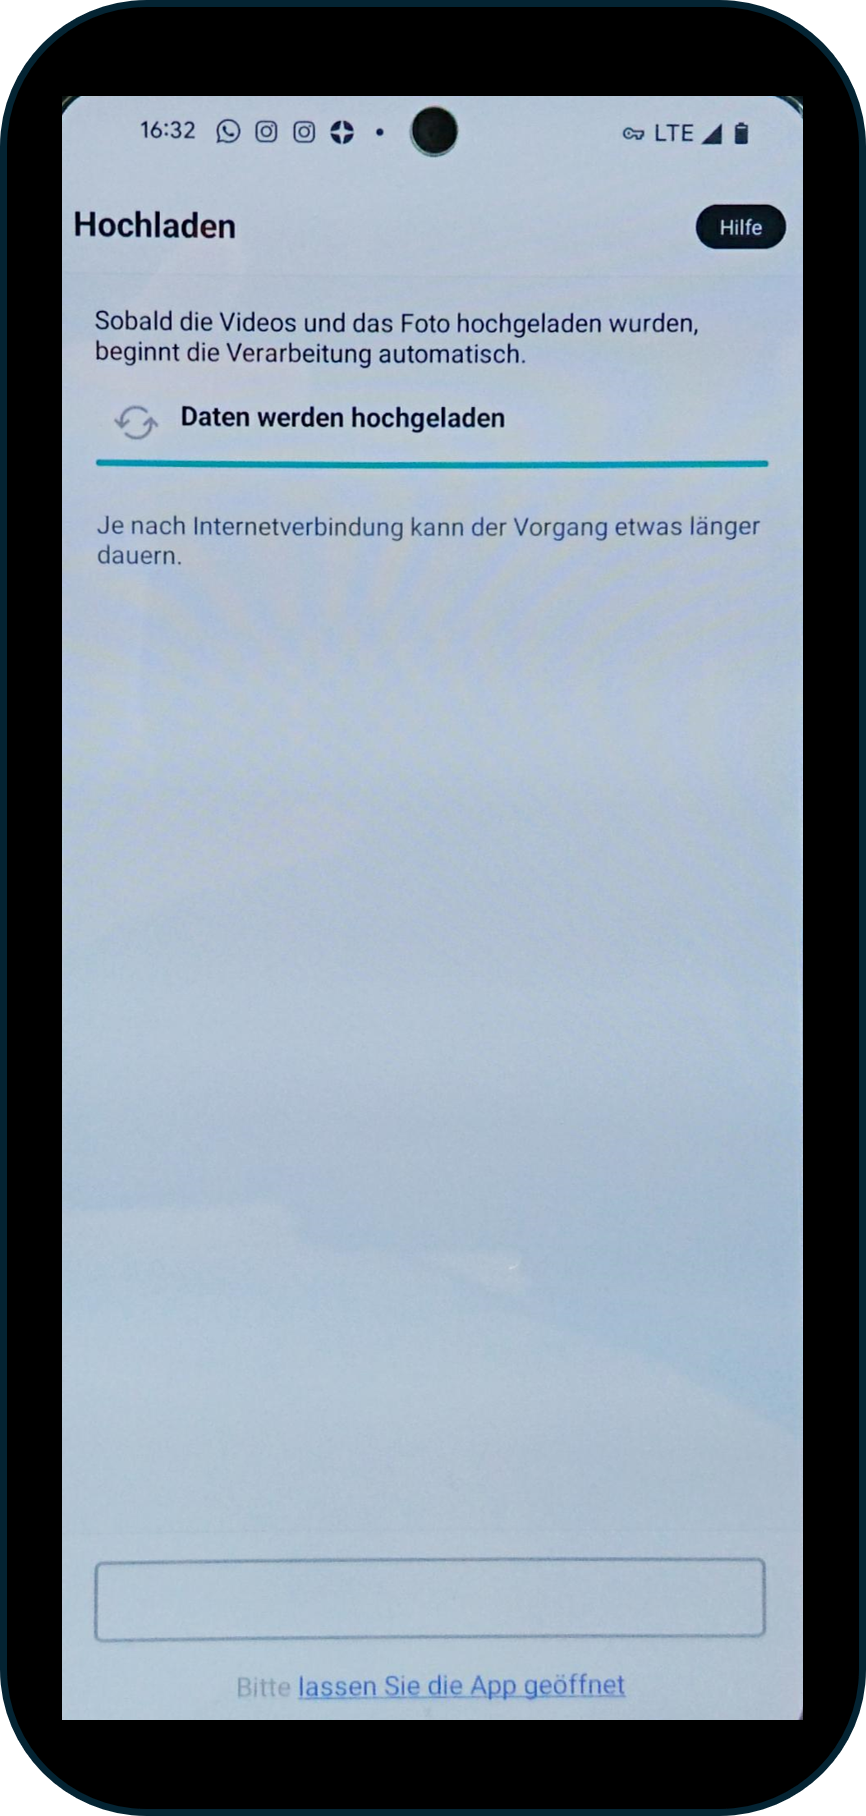
Figure 12: Upload your data. The duration of the process varies depending on the internet speed.
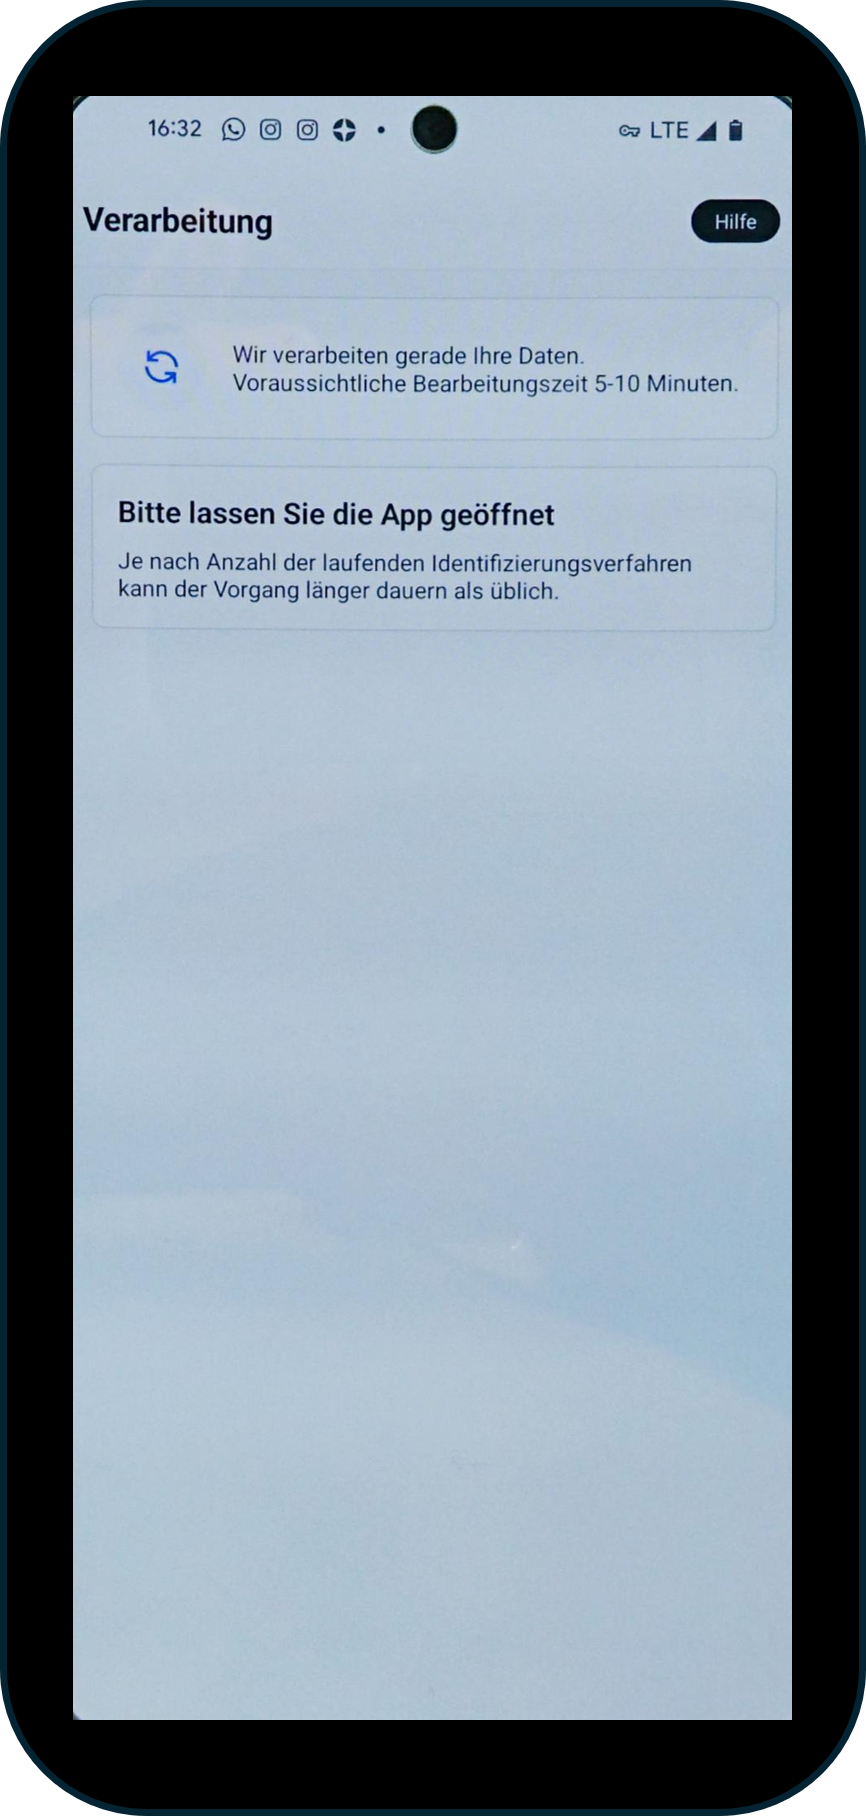
Figure 13: Upload your data. Another reminder to keep the app open, including the expected processing time.
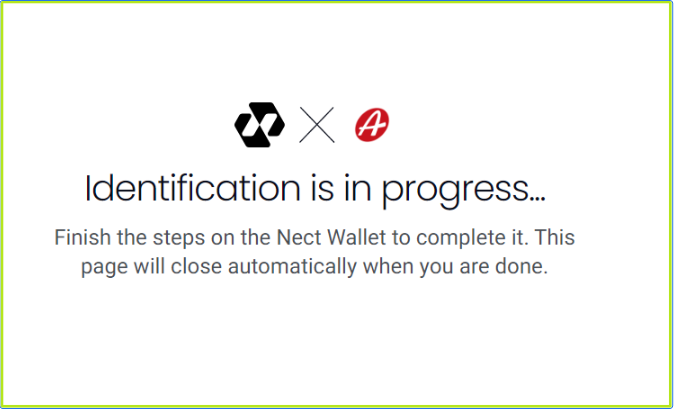
Figure 14: Browser window during the registration process.
XiTip
If the window no longer responds, this could be due to your firewall settings. You can find out how to fix the problem at here.
Step 10: Congratulations! You have successfully completed the identification process on your smartphone (see Figure 19). Now continue in the browser window (see figure 15).

Figure 15: Completed identification process
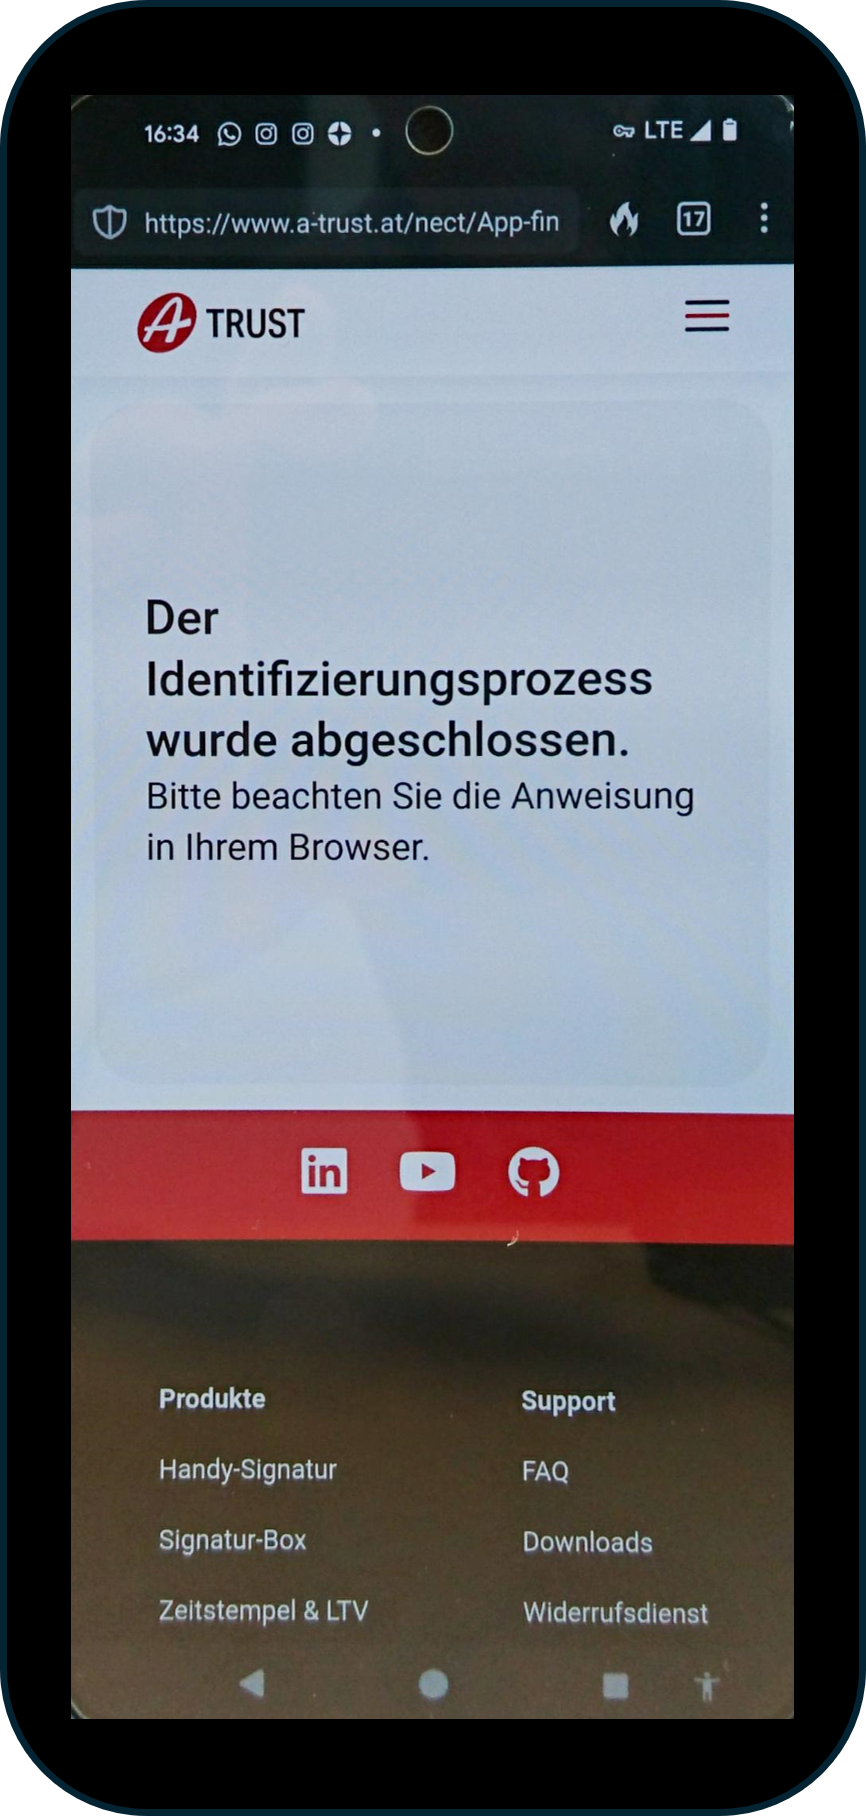
Figure 16: Please return to the browser window.