
SharePoint to MOXIS Manual
After integrating SharePoint, jobs from MOXIS can be processed directly from SharePoint. This manual explains the advantages this offers and how best to proceed.
1. What are the advantages of SharePoint integration?
The integration of a collaboration tool such as SharePoint is the logical extension of a comprehensive solution for digital signature processes such as MOXIS. Once SharePoint has been successfully connected to MOXIS, it offers the following advantages:
Faster turnaround times
The seamless integration of SharePoint into the MOXIS signature folder leads to faster order processing.
Display of document status in SharePoint
Documents and their status are synchronised between SharePoint and MOXIS, providing a quick overview
Archiving of documents in SharePoint possible
Since MOXIS is not an archiving tool, SharePoint is suitable for managing signed jobs and documents with other statuses.
2. Requirements for integrating SharePoint into MOXIS
XiTip
At least one MOXIS 4.52 instance is required for SharePoint to MOXIS to function fully.
The rest is very simple, as XiTrust takes care of the integration for you.
However, there are a few points that you should clarify before integration and provide to our support team. This will help reduce the time required for setup.
These include:
Name of the SharePoint domain to which MOXIS is to be connected.
A list of the pages on which SharePoint to MOXIS is to be activated.
The app has already been registered in Microsoft Entra.
For further information on the MOXIS web service user, please contact your XiTrust contact person directly.
3. Secure integration and first steps
3.1. Integrating SharePoint into MOXIS
SharePoint is integrated via app registration in Microsoft Entra. Subsequent communication takes place via the Microsoft Graph API (interface) and the MOXIS web service.
The integration of SharePoint takes approximately 60 minutes and is carried out by XiTrust in the customer instance. In addition, the app in Microsoft Entra, the MOXIS web service and the SharePoint to MOXIS permissions are configured. Furthermore, the previously specified SharePoint sites are integrated (see figure 1).
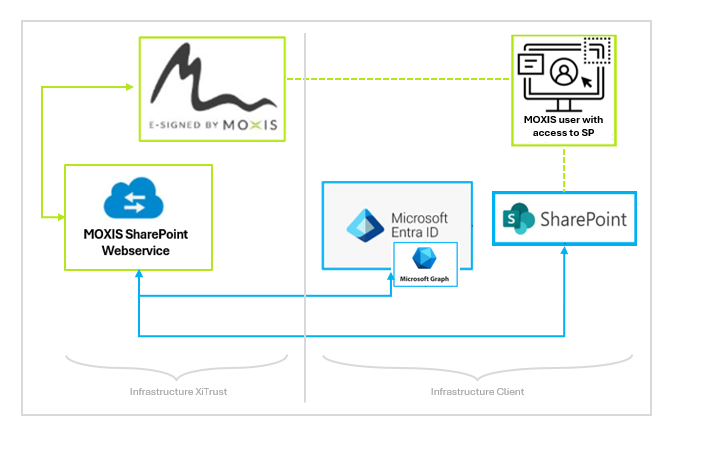
Abbildung 1: Verbindung MOXIS to SharePoint
3.2. Getting started with SharePoint to MOXIS
Once the integration is complete, SharePoint to MOXIS is easy and intuitive to use. In the following chapters, you will learn more about how to use SharePoint to MOXIS.
3.3. Step-by-step instructions for using SharePoint to MOXIS
3.3.1. Step 1: Upload documents for signing
Upload at least one document that you want to sign using SharePoint to MOXIS to SharePoint.
3.3.2. Step 2: Create a draft in SharePoint
To do this, select the document you want to release for signing (see figure 2 [1]). Then right-click. In the window that opens, click on Create MOXIS draft (see figure 2 [2]).
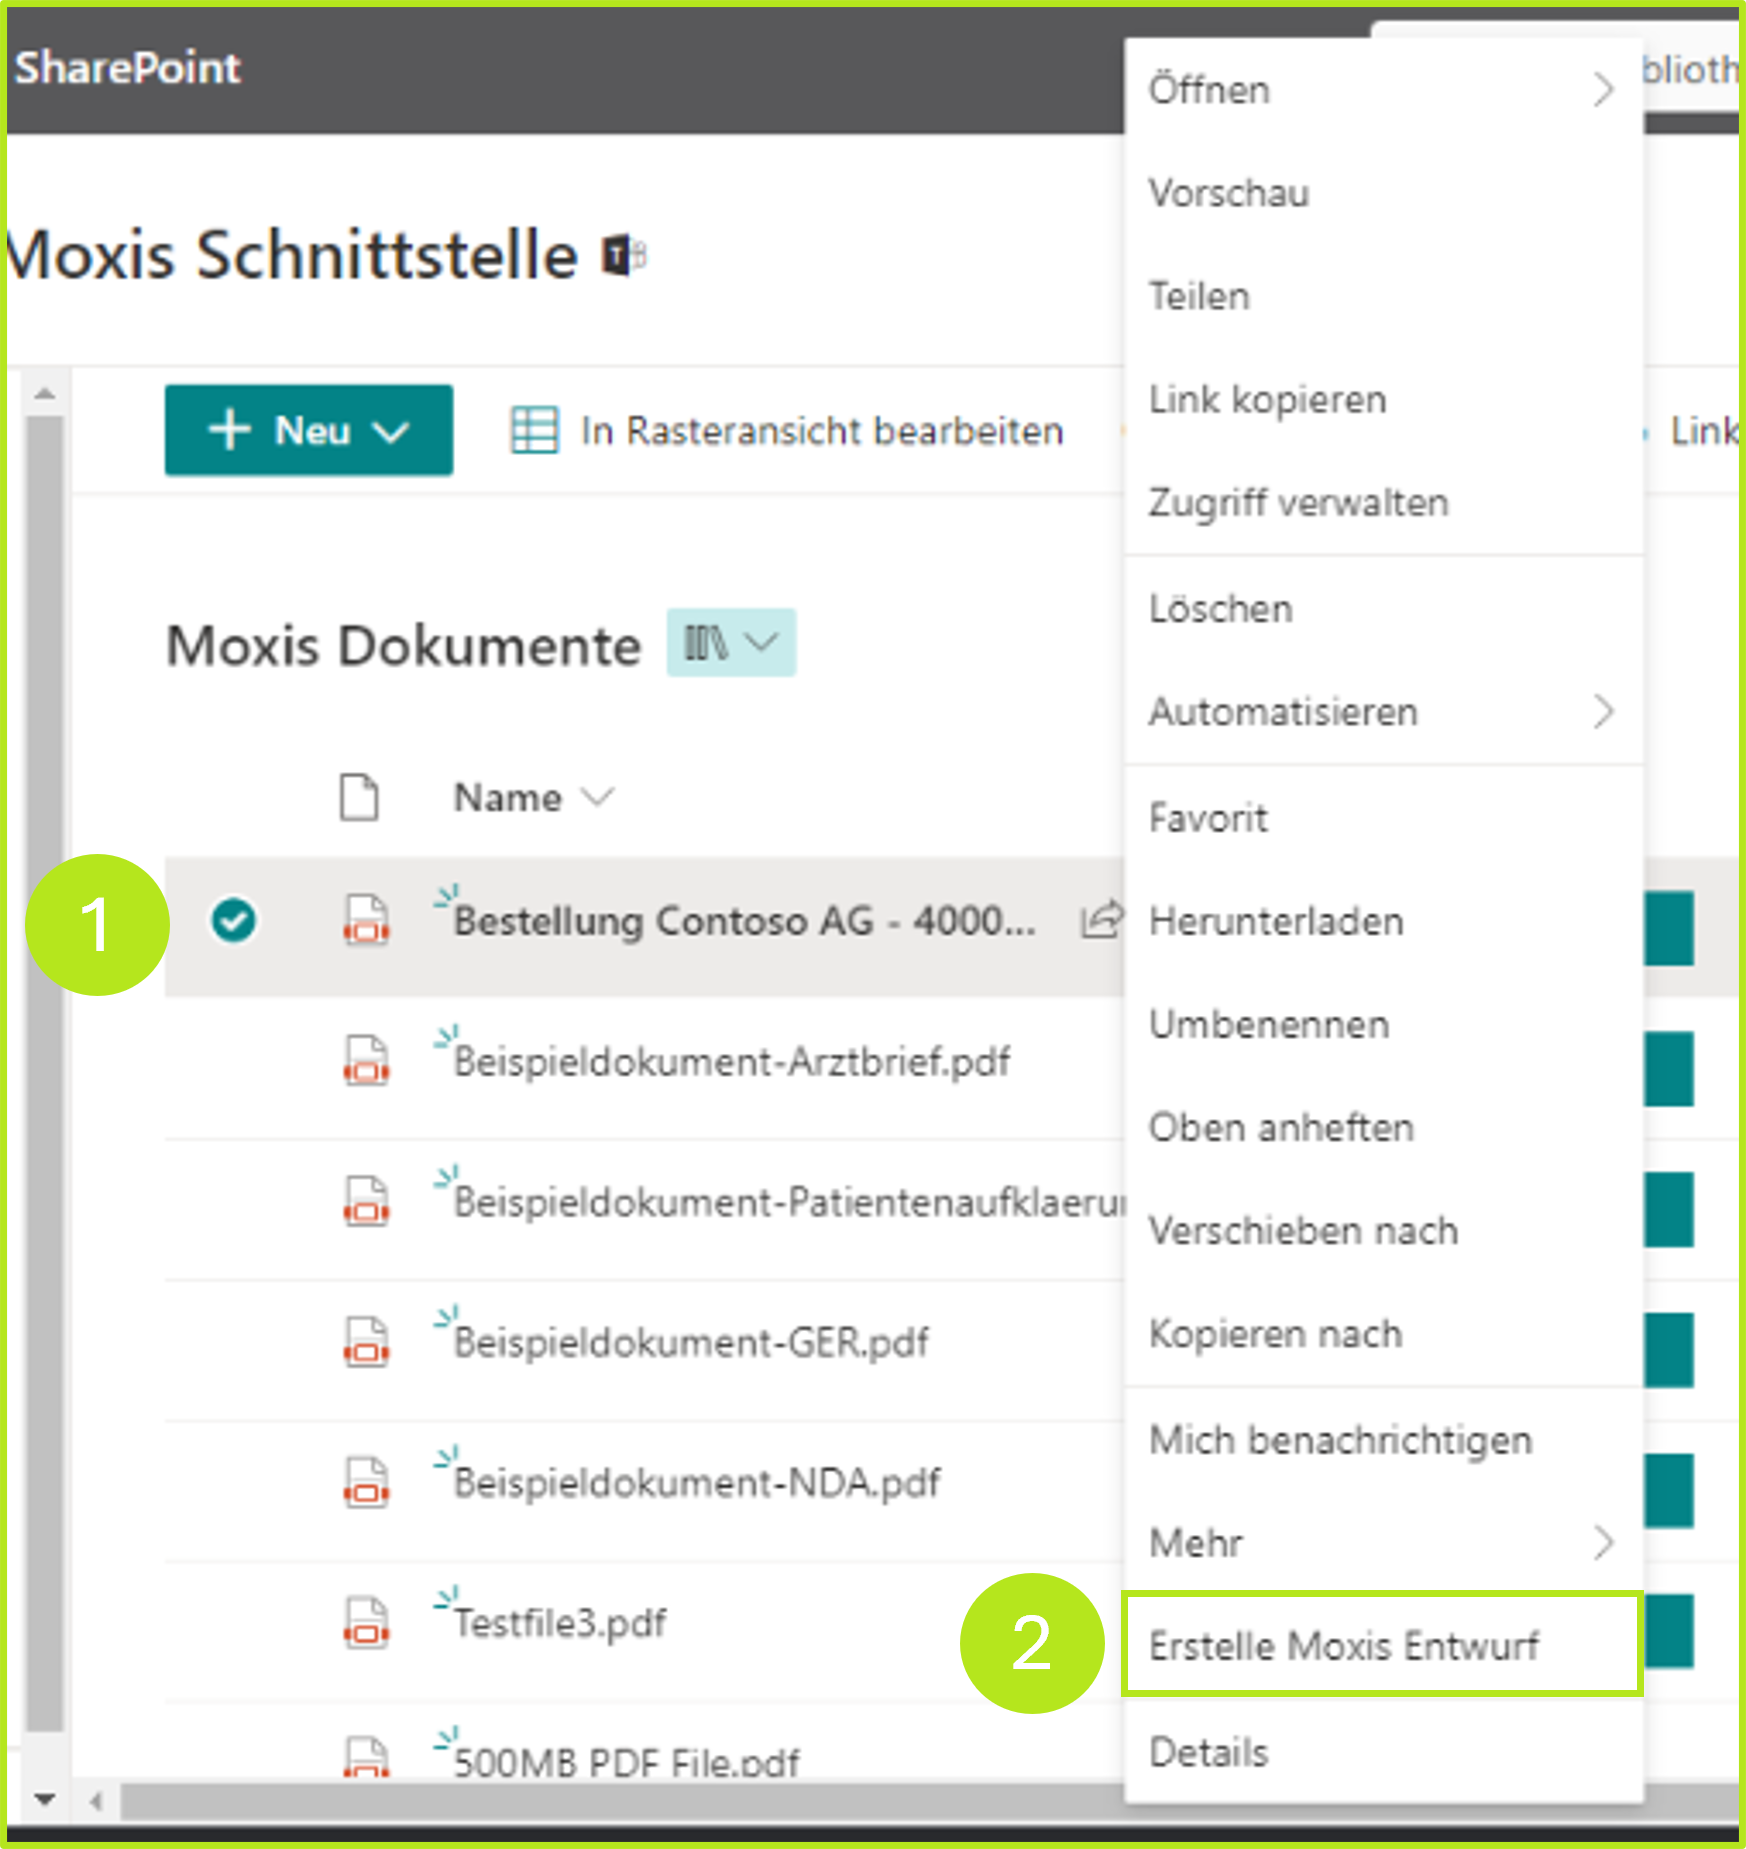
Figure 2: Creation of a MOXIS draft in SharePoint
3.3.3. Step 3: Complete the draft in MOXIS
Edit the draft created in this way as usual in MOXIS and send the jobs.
Designs and sent orders are marked accordingly in SharePoint in the MOXISStatus column.
You can continue editing a draft in MOXIS at any time from SharePoint by clicking the [Open MOXIS]-button (see figure 3 [1]).
The status of a job that has already been sent is also displayed in MOXIS (see figure 3 [2]).
XiTip
Please note: The order status in SharePoint is updated automatically.
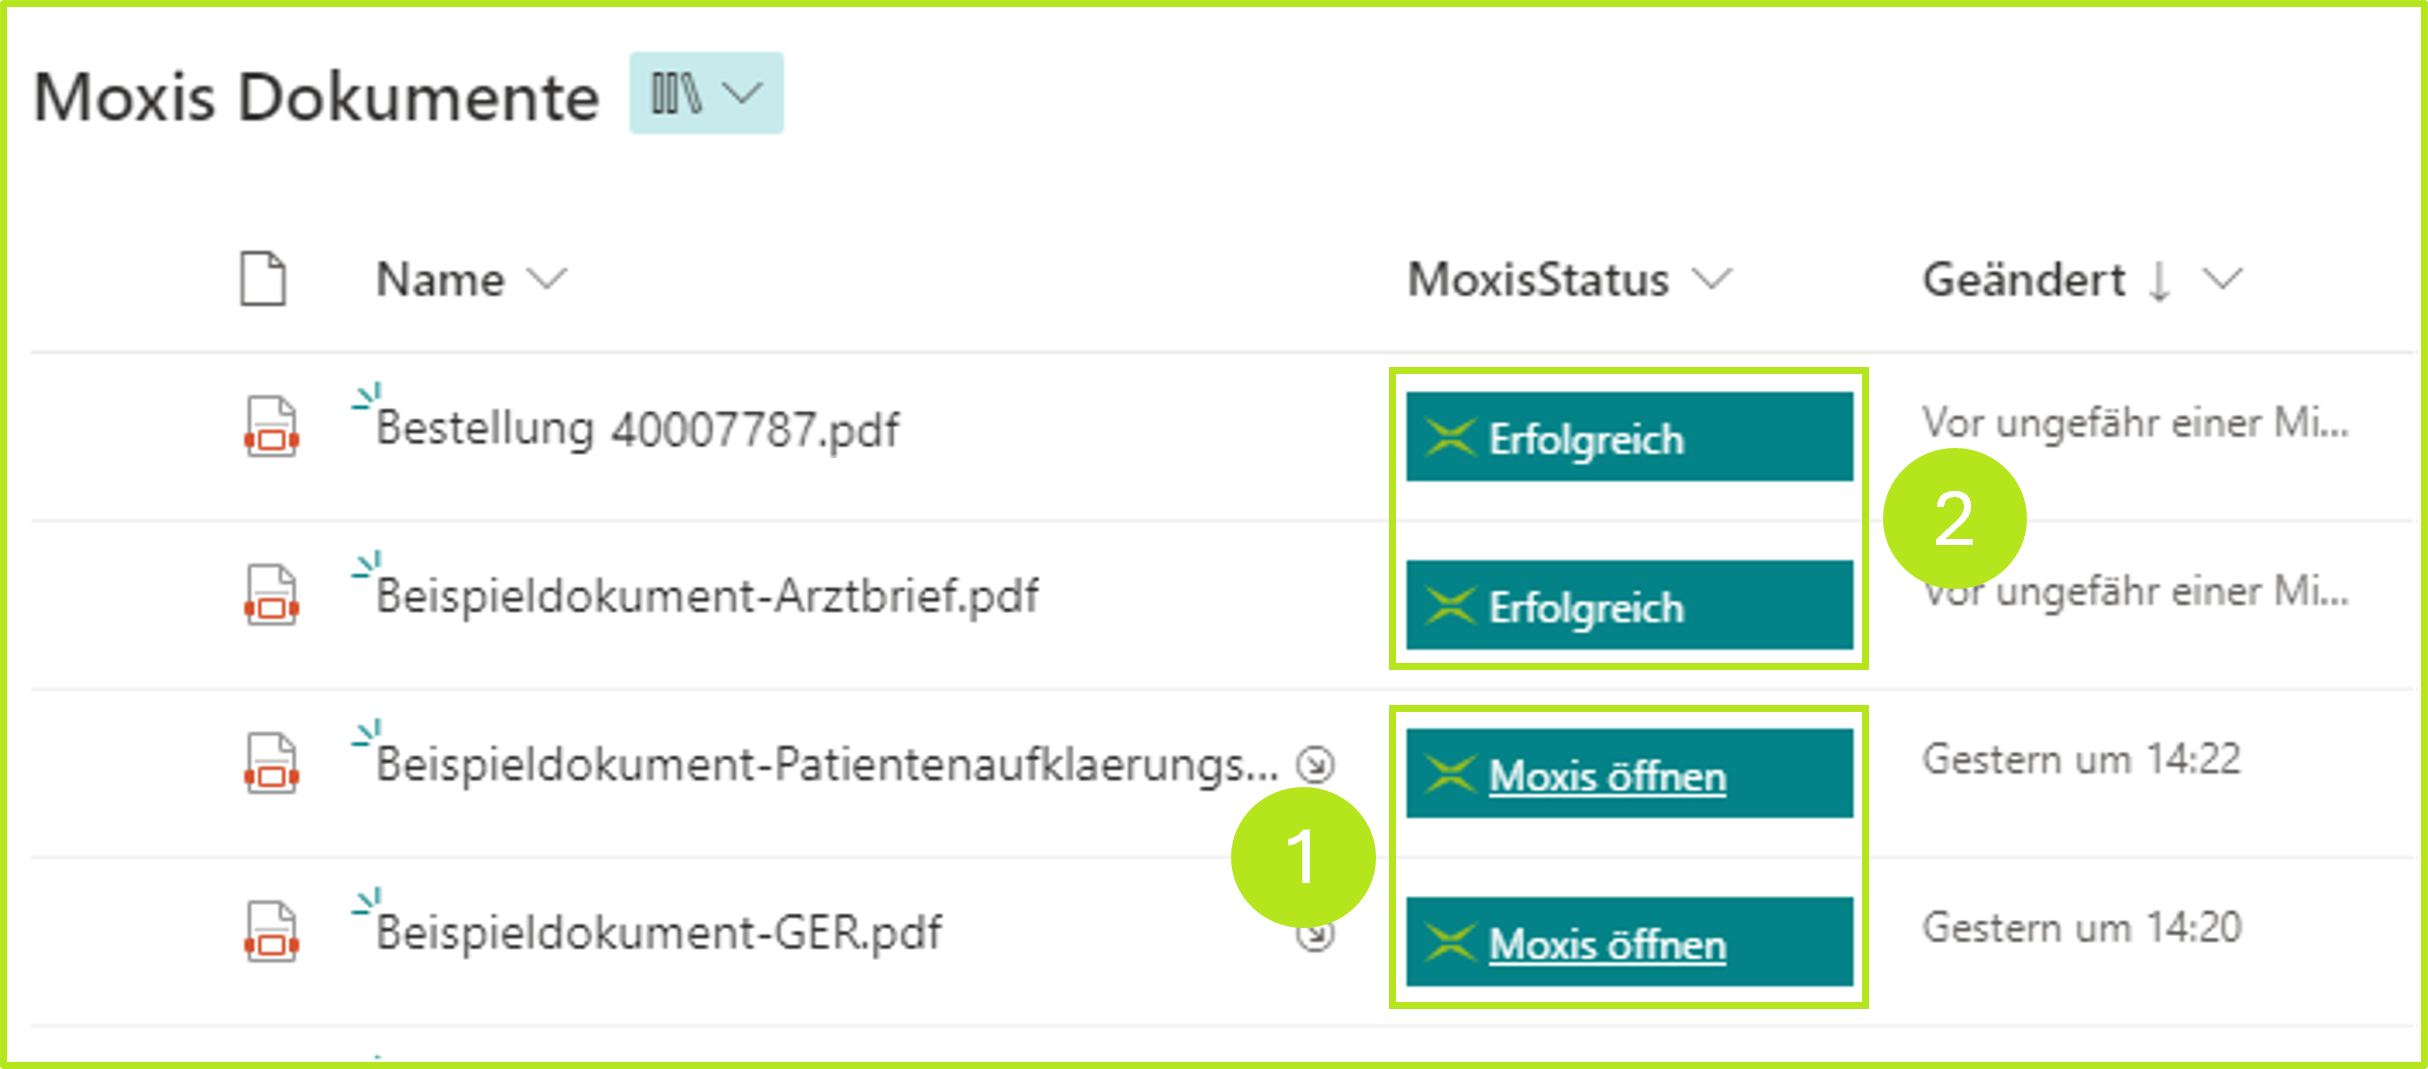
Figure 3: Overview of the various orders in SharePoint
3.3.4 Step 4: Check the status of your sent jobs in SharePoint
There are various statuses that are displayed in SharePoint to MOXIS (see figure 4 [1]). These include, for example:
Open MOXIS (editing possible)
Draft rejected (job not sent)
Rejected (job sent but rejected)
Successful (job successfully signed)
The overview allows you to see the status of your current jobs at a glance.
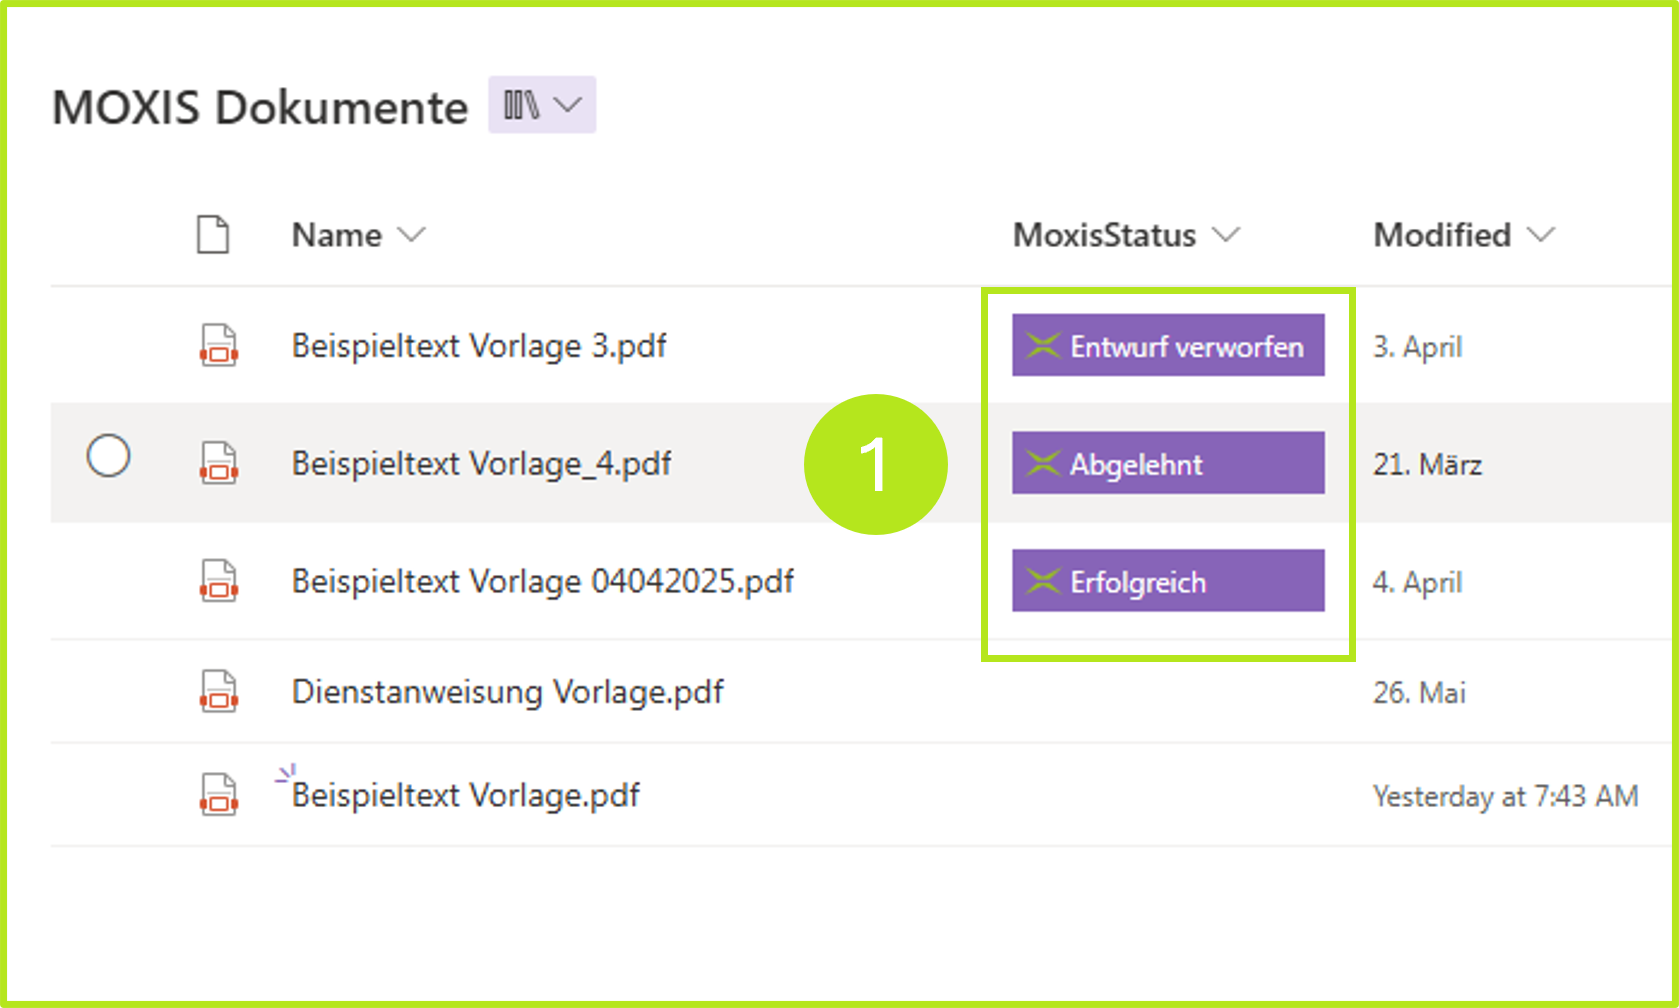
Figure 4: Job status in SharePoint to MOXIS
XiTip
If a job is not created correctly, the status [Error] will be displayed. If the error cannot be resolved with the help of your local administrator, please contact the XiTrust support at servicedesk@xitrust.com.