
Explorer to MOXIS Manual
Content
The following manual provides you with an overview of the current Explorer to MOXIS add-on from XiTrust. Explorer to MOXIS allows you to efficiently organise your workflows and to operate MOXIS directly via the browser (Explorer).
1 Useful information about Explorer to MOXIS and installation
1.1 Terms and conditions of use of Explorer to MOXIS
XiTip
Please note: Explorer to MOXIS can be downloaded for free from the Microsoft Store, but an active MOXIS subscription together with acceptance of the MOXIS cloud service terms is required.
If you are new to MOXIS and want to speed up your signing processes by up to 90%, register here for a free demo of the MOXIS Business Cloud. Our sales representatives will be happy to advise you on how you can use MOXIS profitably for your business.
If you already have a MOXIS subscription, the use of the Explorer to MOXIS add-in and the associated processing of personal data is subject to the MOXIS terms and conditions, including the data processing agreement applicable to the MOXIS versions purchased:
MOXIS Cloud Service Provisions,
Enterprise On-Prem Perpetual License Provisions
or Enterprise On-Prem Subscription Provisions
XiTip
Please note: Windows 11 is required for installation.
1.2 The basic functions of Explorer to MOXIS
XiTip
Explorer to MOXIS is a legally compliant e-signature solution for Explorer. It is an efficient tool that saves time, effort and thus costs.
Explorer to MOXIS allows you to upload your PDF documents securely to MOXIS, where you process them with the highest legal standards in terms of signature quality. This way, you can increase the efficiency of your workflows for electronic signatures with a simple right-click in Explorer.
1.2.1 Explorer to MOXIS: Quick guide
Step 1: Conveniently create your PDF documents as usual and sign them.
Step 2: Then seamlessly switch to any signing method available in MOXIS via the Explorer to MOXIS add-in from XiTrust.
Step 3: Use the MOXIS options to customise the signature process according to your requirements:
set up signature quality,
define decision levels,
determine recipients
and much more.
Step 4: Send the link to the document by email to internal and external signatories in compliance with the highest legal and security standards. As soon as the signing process is complete, you can download the document and save it in a location of your choice.
1.3 Step by step to Explorer to MOXIS: Installation
This guide will help you with the initial installation of Explorer to MOXIS.
XiTip
Please make sure you have .NET 8.0. Alternatively, you can download the programme here (for Linux, macOS or Windows):https://dotnet.microsoft.com/en-us/download/dotnet/8.0
Please restart your application after installing .NET 8.0 to ensure everything is working properly.
Step 1: Explorer to MOXIS can be installed via the Microsoft Store. To perform the installation, please open the following link ExplorerToMOXIS – Free download and installation on Windows | Microsoft Store and click the [View in store]-button (see figure 1 [1]).
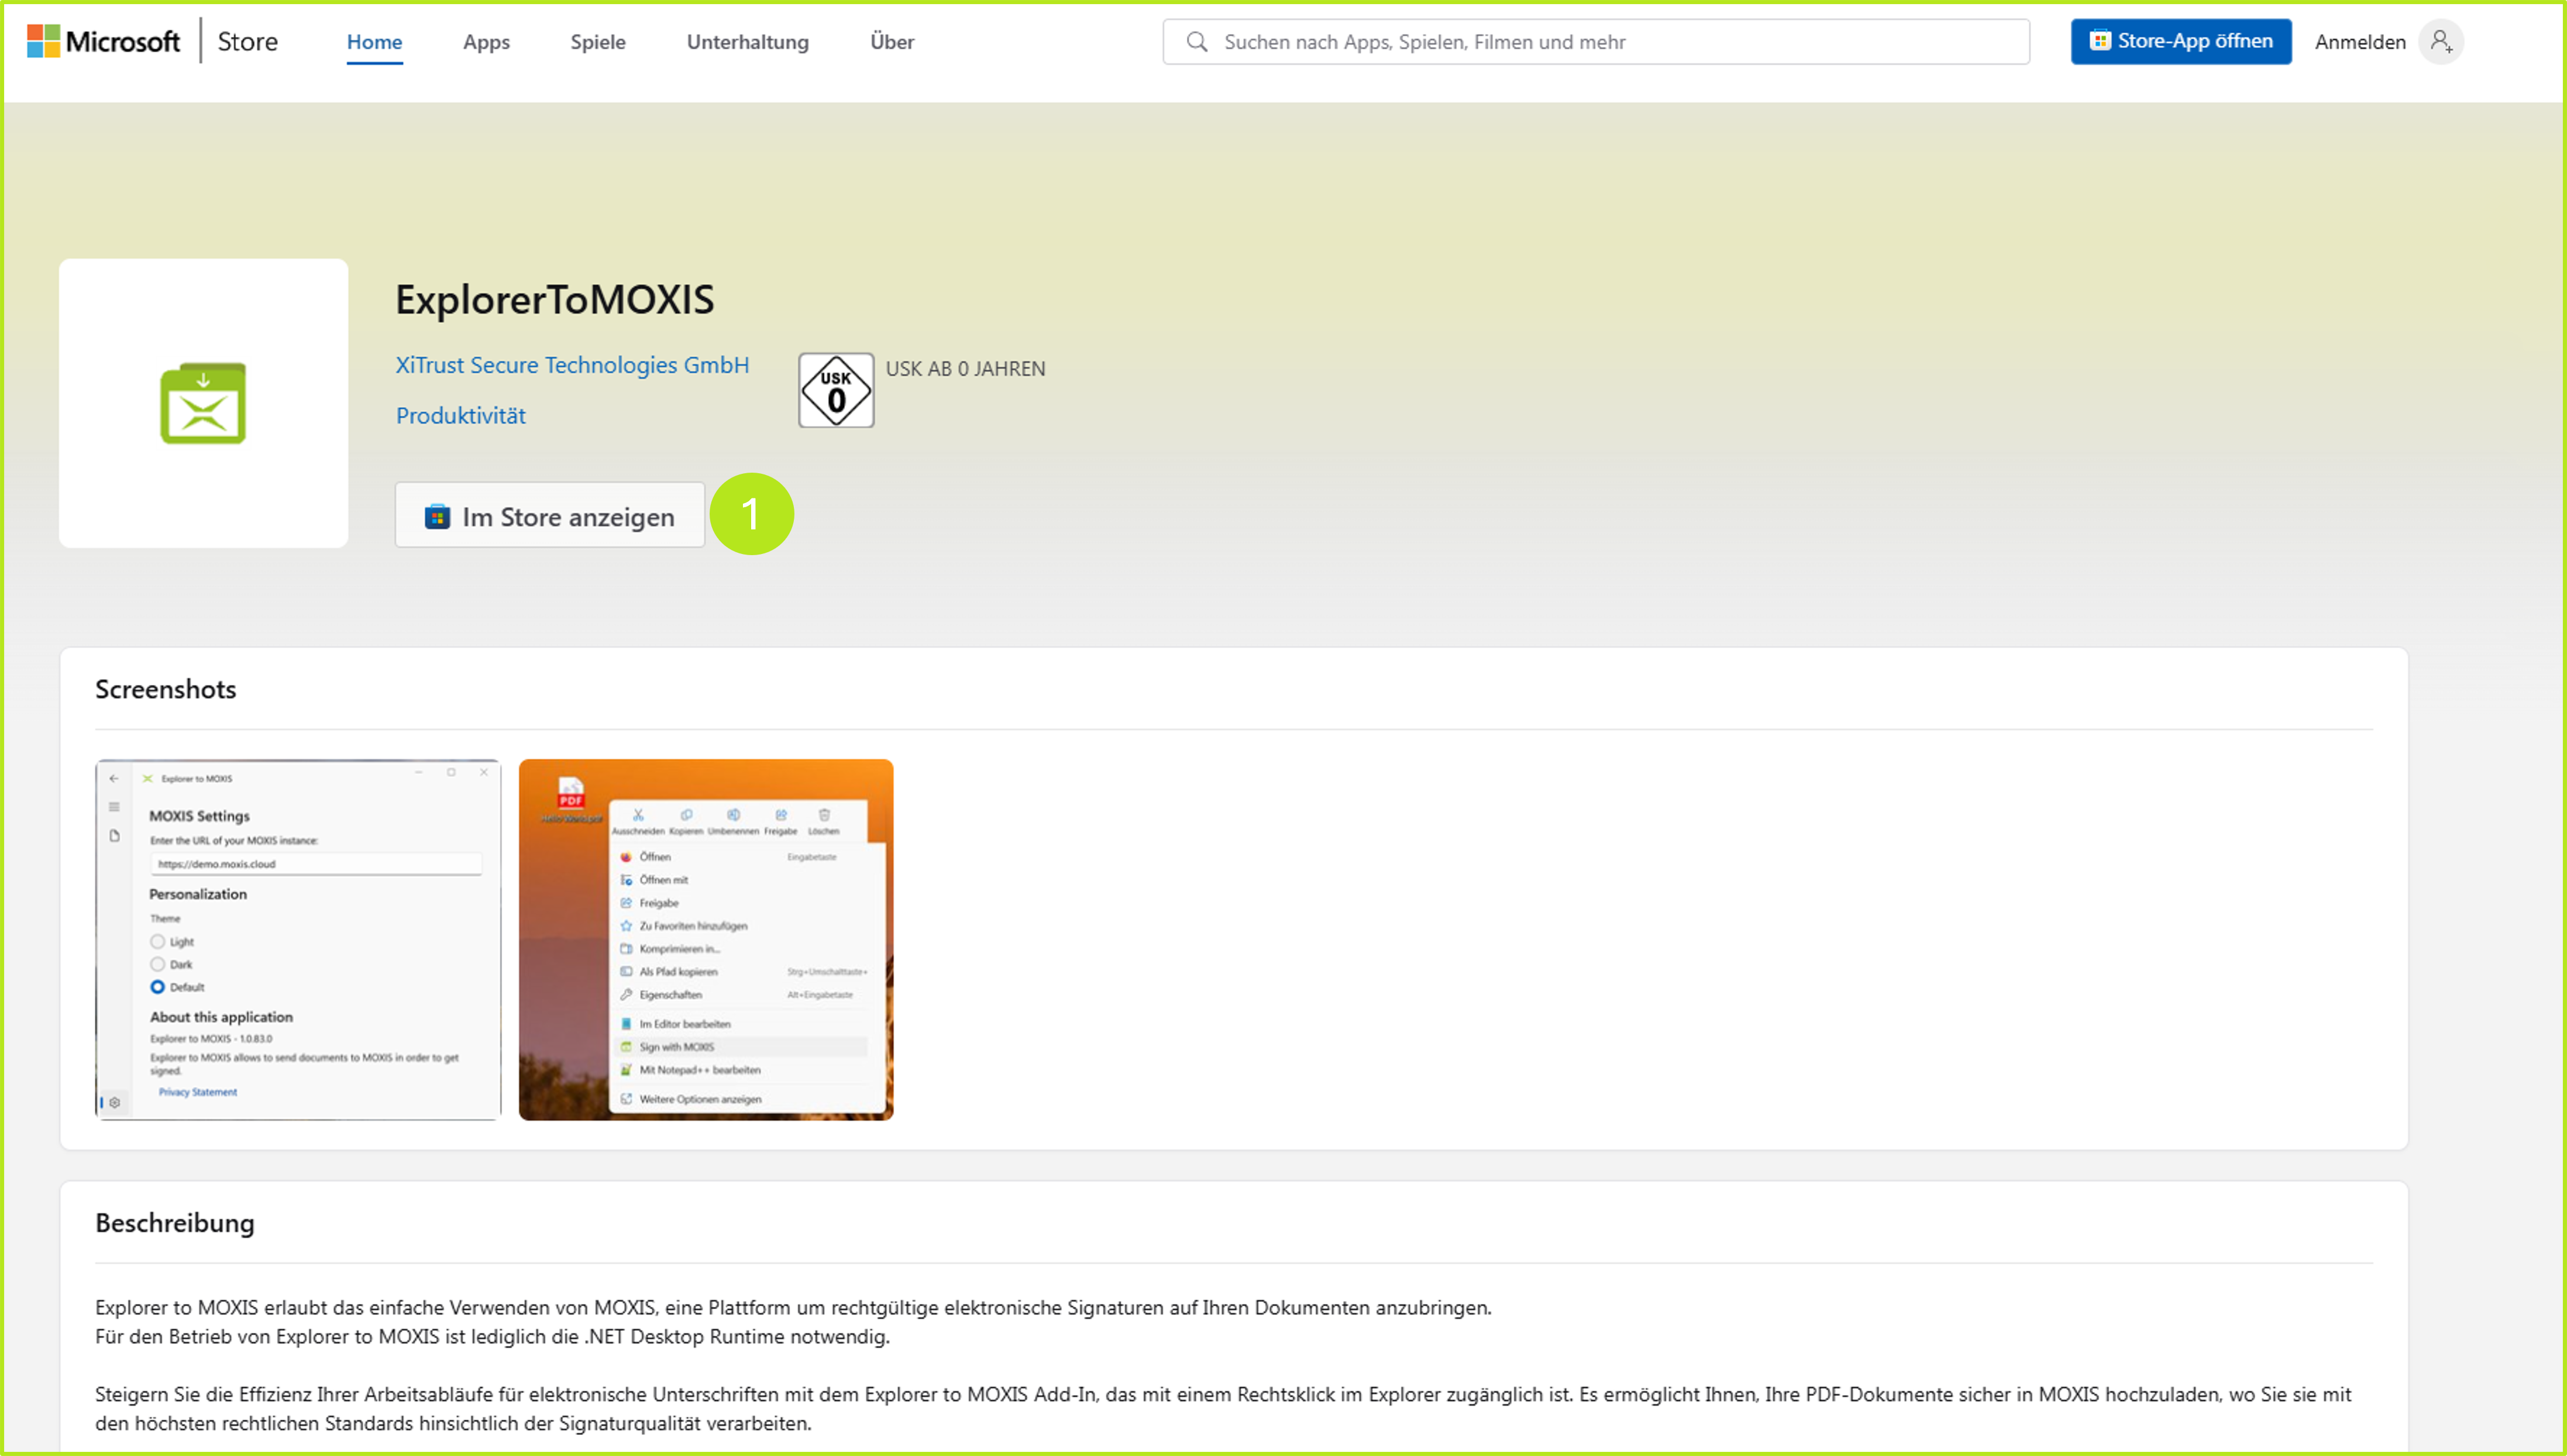
Figure 1: ExplorerToMOXIS on the Microsoft Store
Step 2: Download the plug-in from the store by clicking the [Download]-button (see figure 2 [1]).
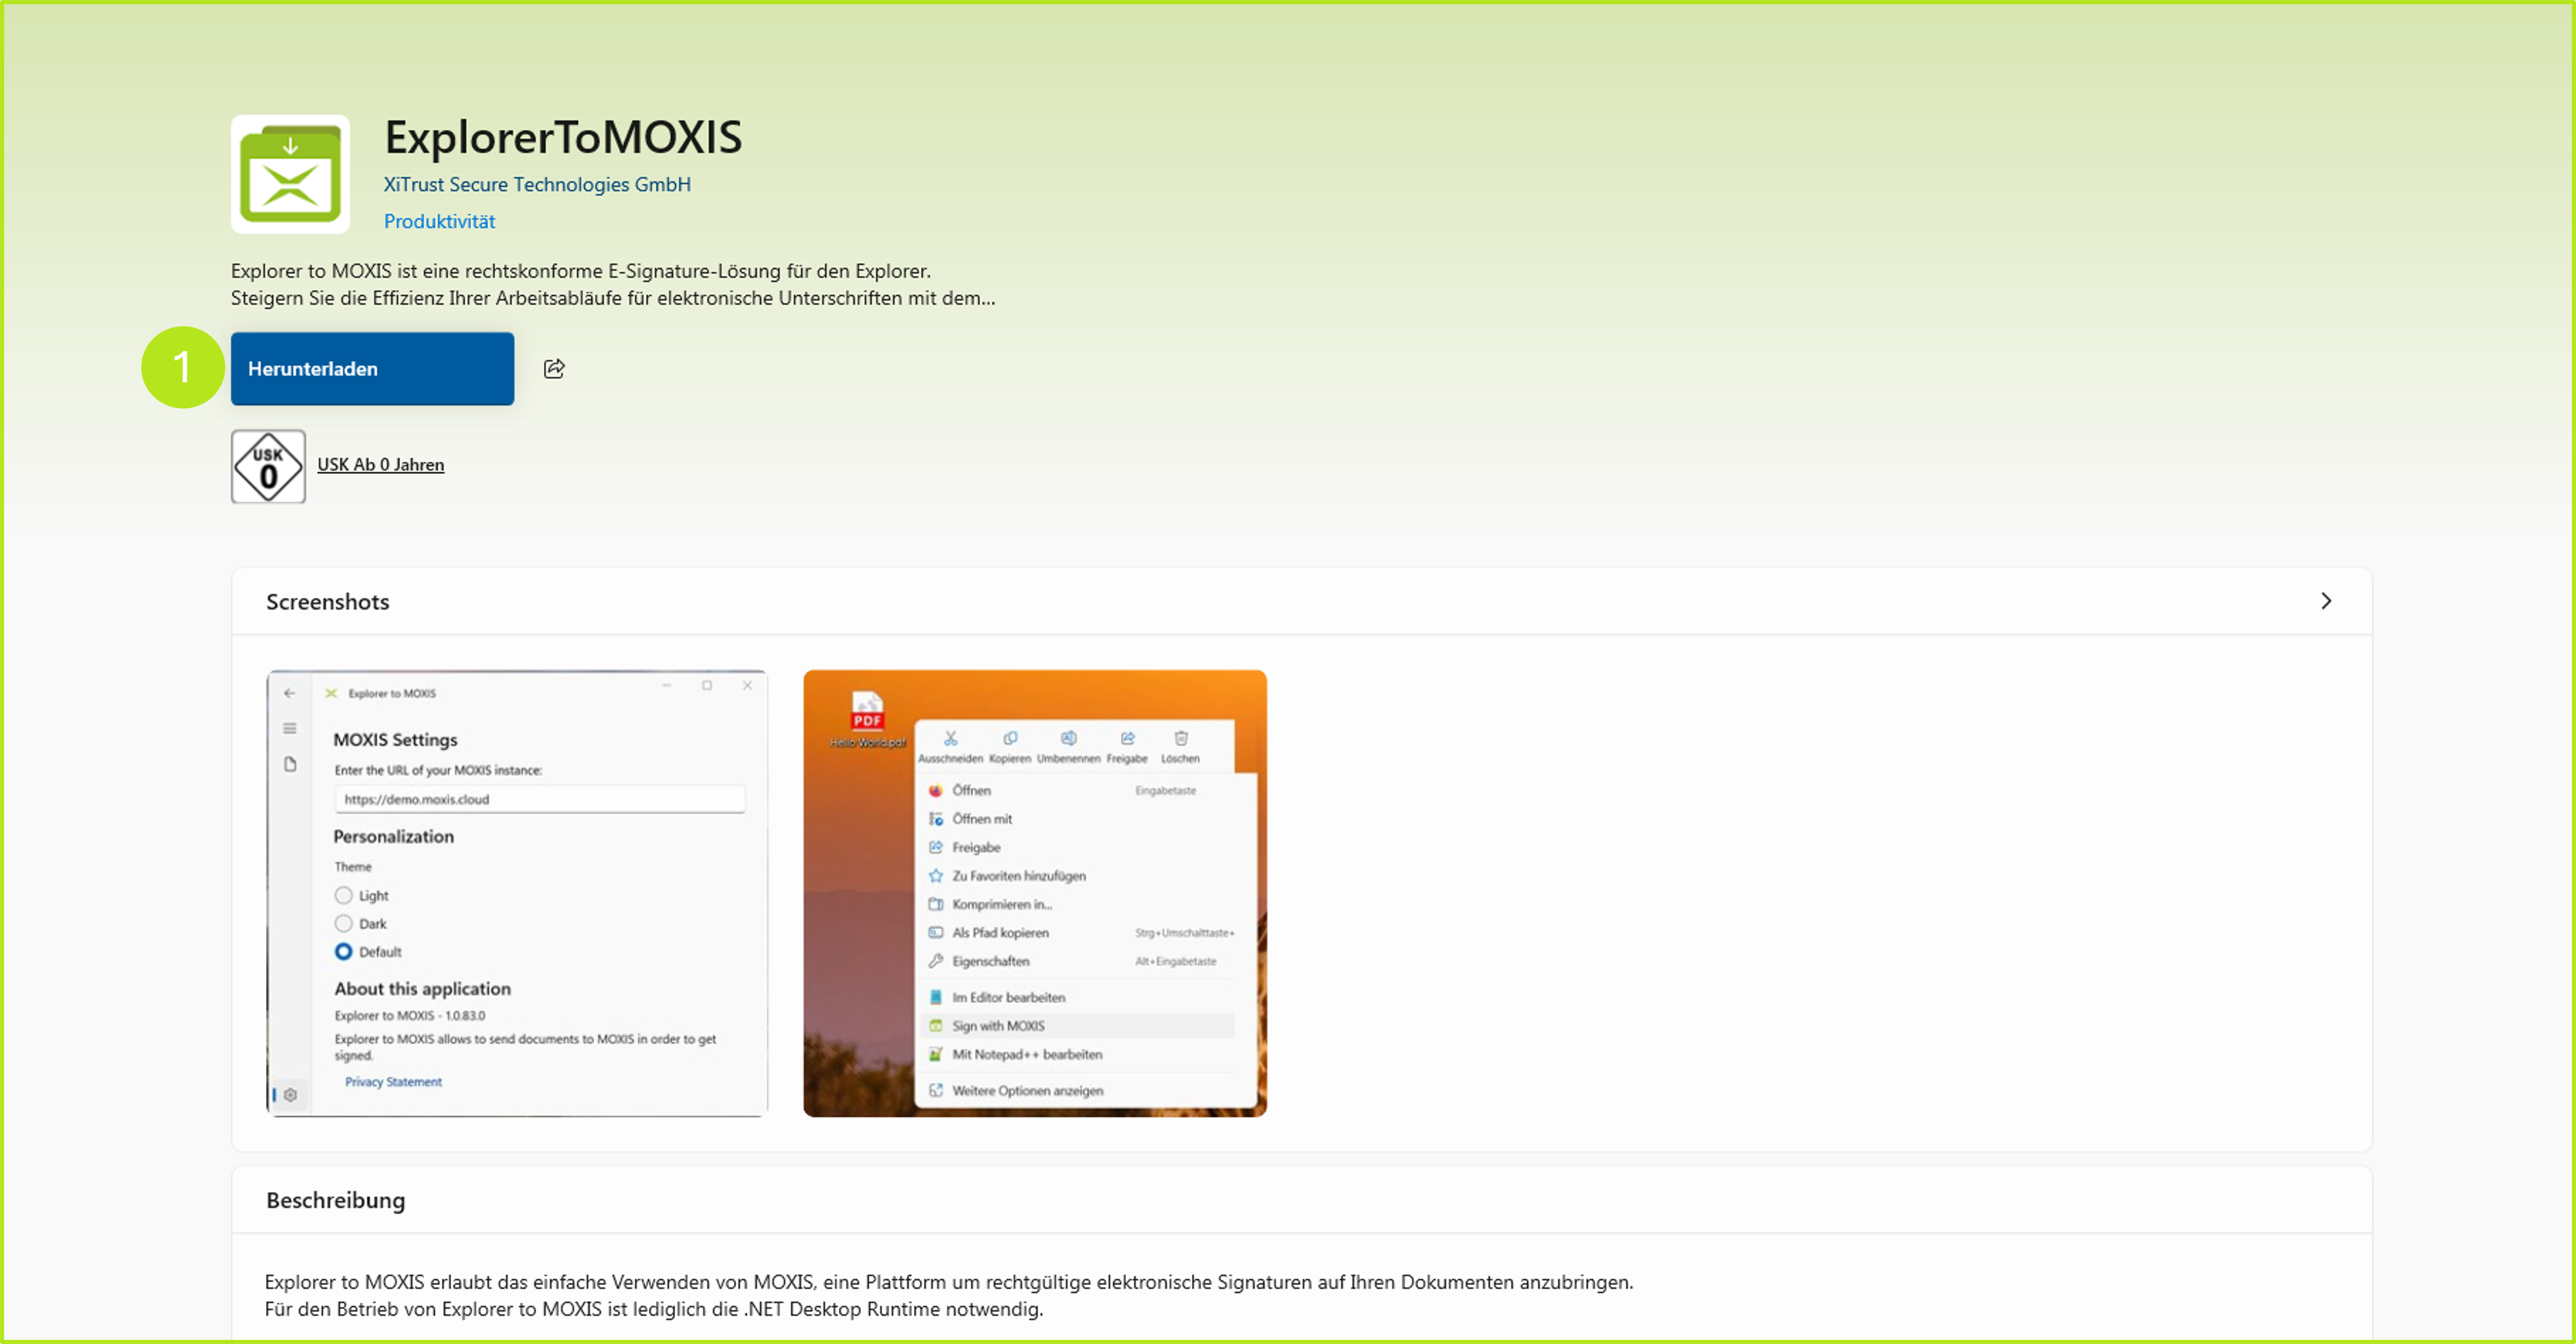
Figure 2: Download ExplorerToMOXIS
Step 3: As soon as Explorer to MOXIS is available, the [Download]-button will change into an [Open]-button (see figure 3 [1]) and you will receive a notification from the Microsoft Store that the installation is complete and you can now try out the plug-in by clicking on the [Start]-button (see figure 3 [2]). Please select one of the two options to start the plug-in.
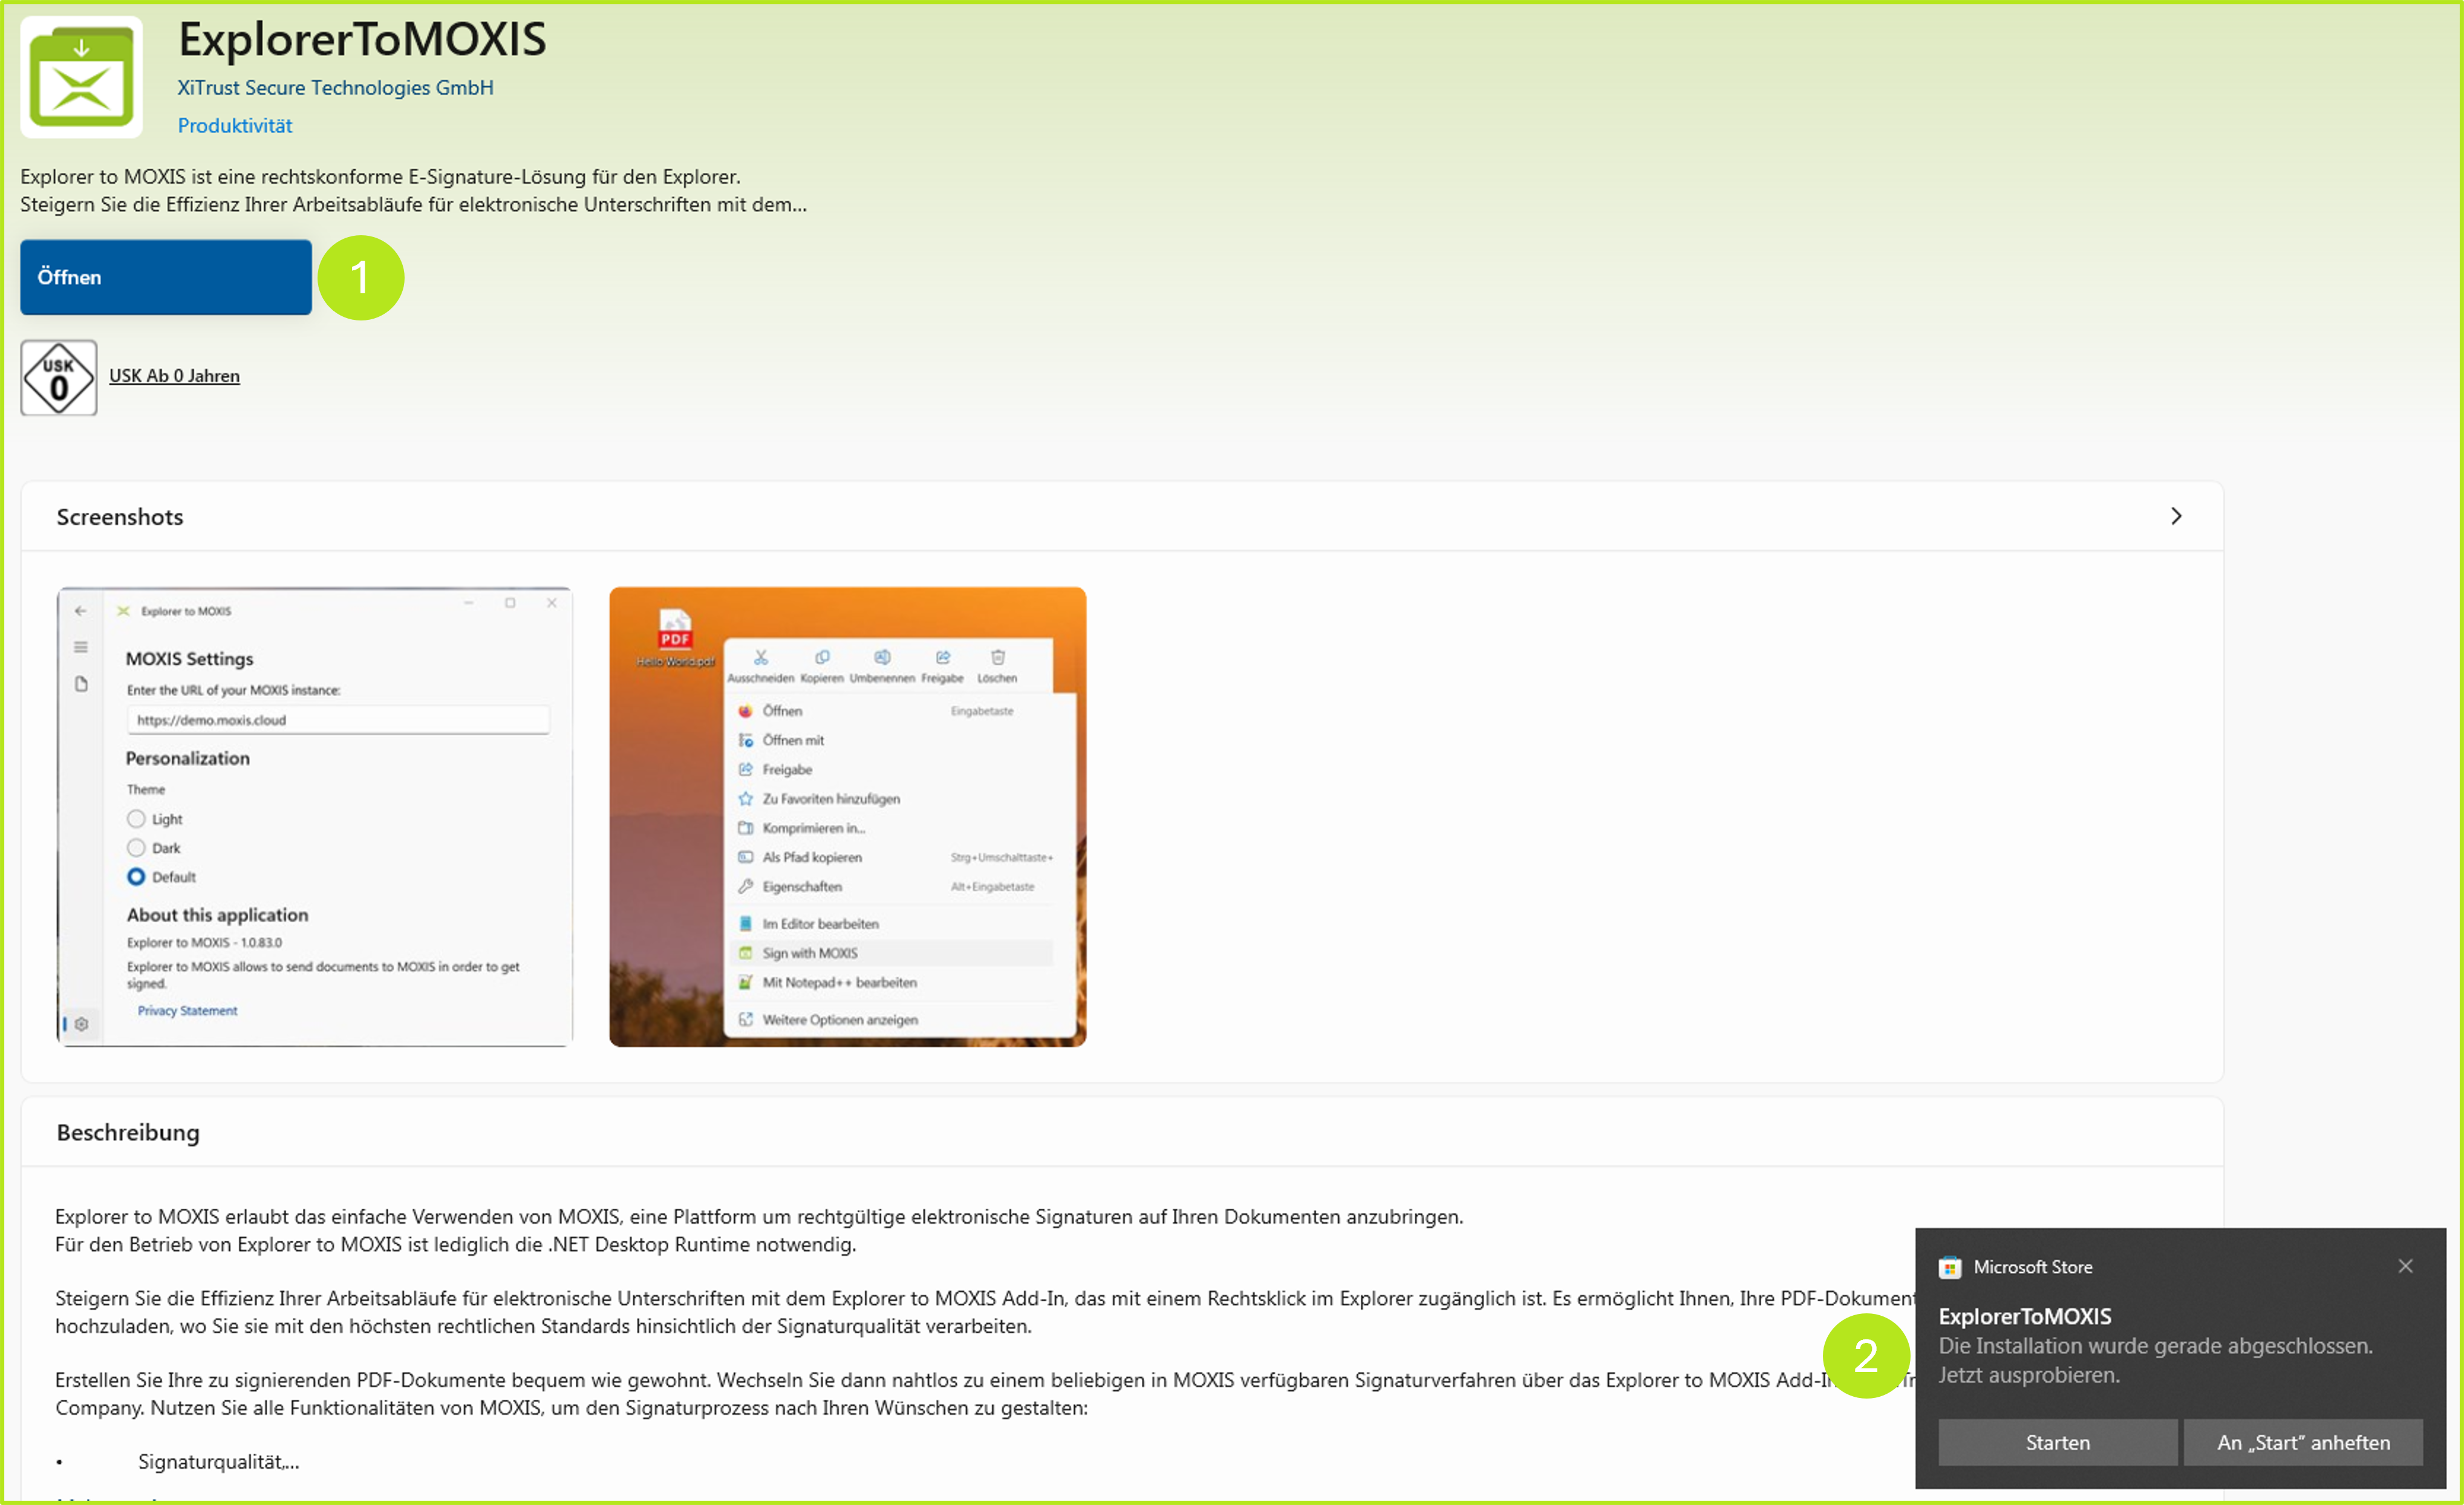
Figure 3: Open ExplorerToMOXIS
Step 4 (OPTIONAL): If you do not yet have .NET 8.0, you will now be prompted to install it. To do so, click the [Download it now]-button (see figure 4).
XiTip
If you have already installed .NET 8.0 in advance, please jump to step 5.
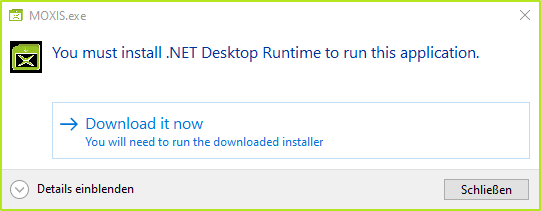
Figure 4: Download .NET 8.0 (optional)
As soon as the download is complete, you will receive a confirmation (see figure 5).
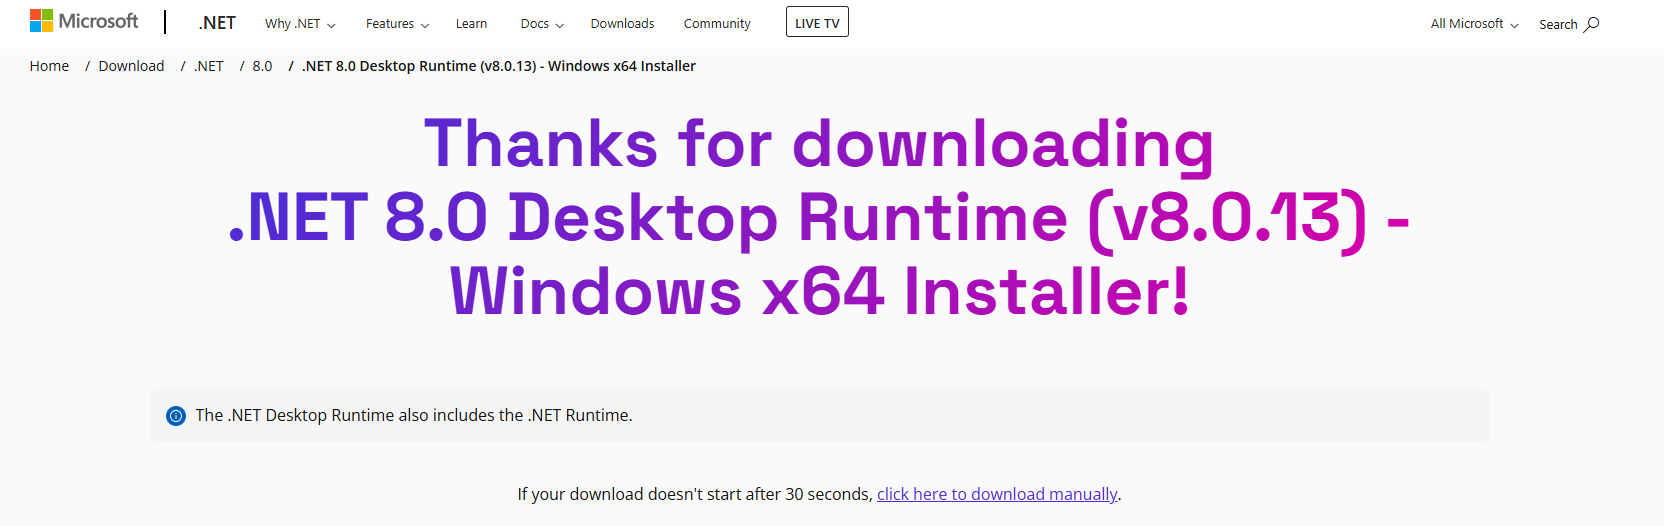
Figure 5: Confirmation of download (optional)
Please execute the.exe file so that the programme is installed (see figure 6 [1])
XiTip
After that, restart your computer to make sure everything is working properly.
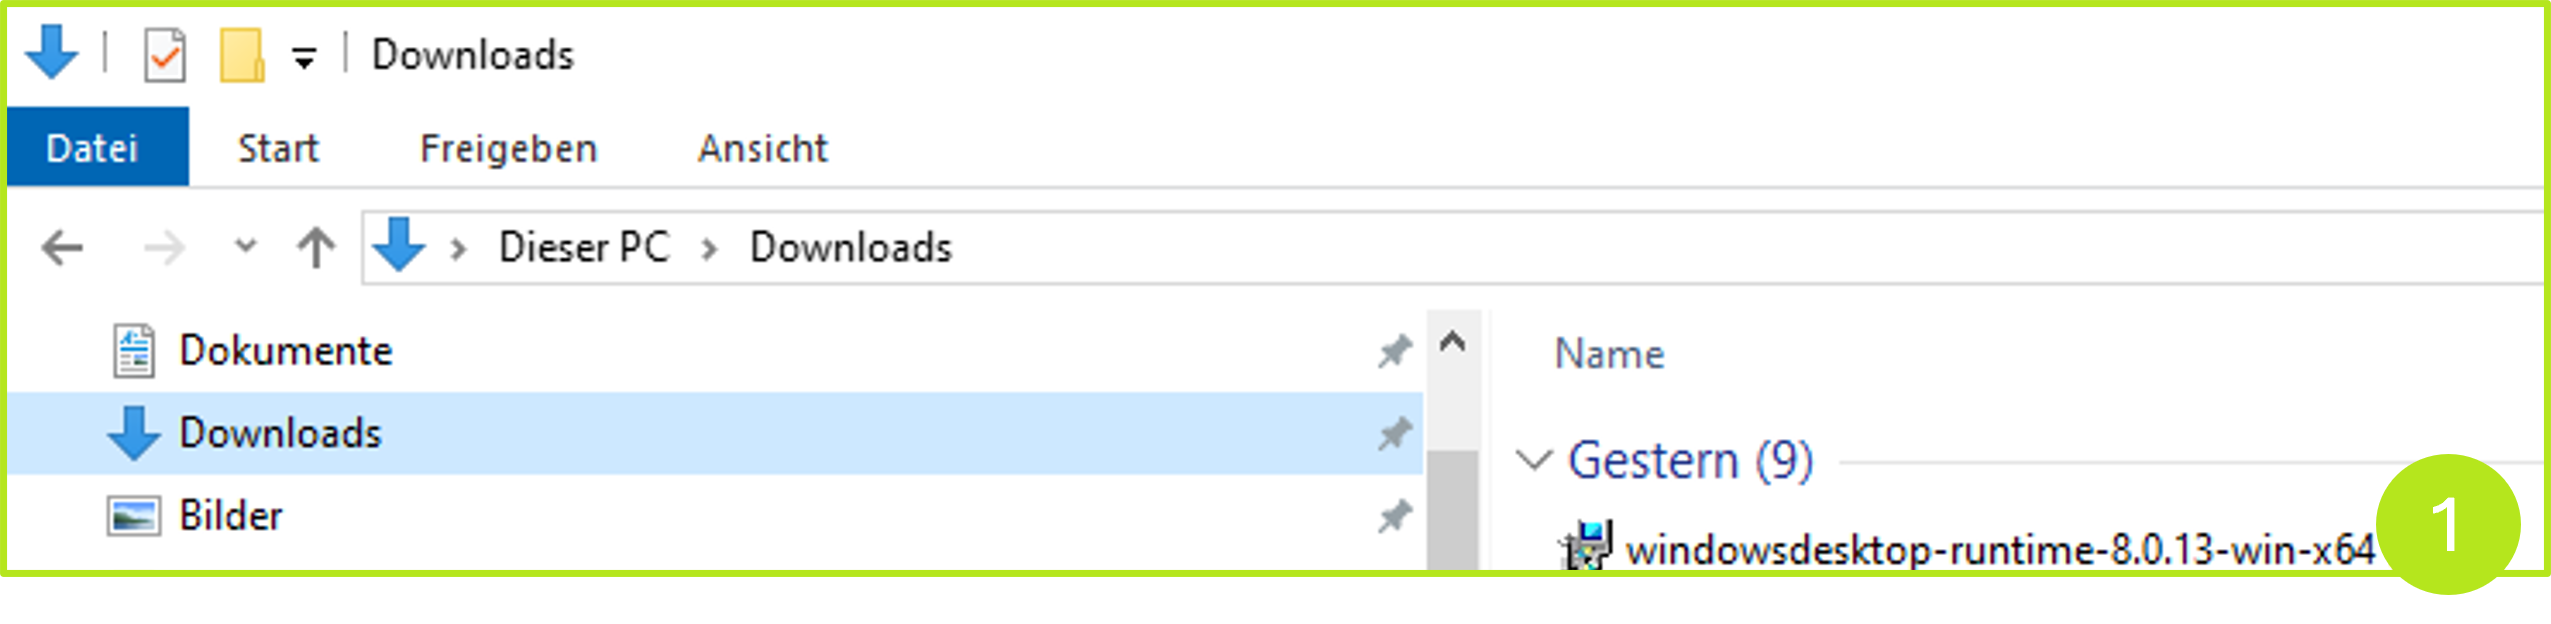
Figure 6: Execute .exe-file
Step 5: To launch Explorer to MOXIS for the first time, please open the Windows search bar and search for Explorer to MOXIS (see figure 7).
XiTip
Pin Explorer to MOXIS to the Start bar with a click on ‘Pin to Start’ (see figure 7) so that you can always access it conveniently.
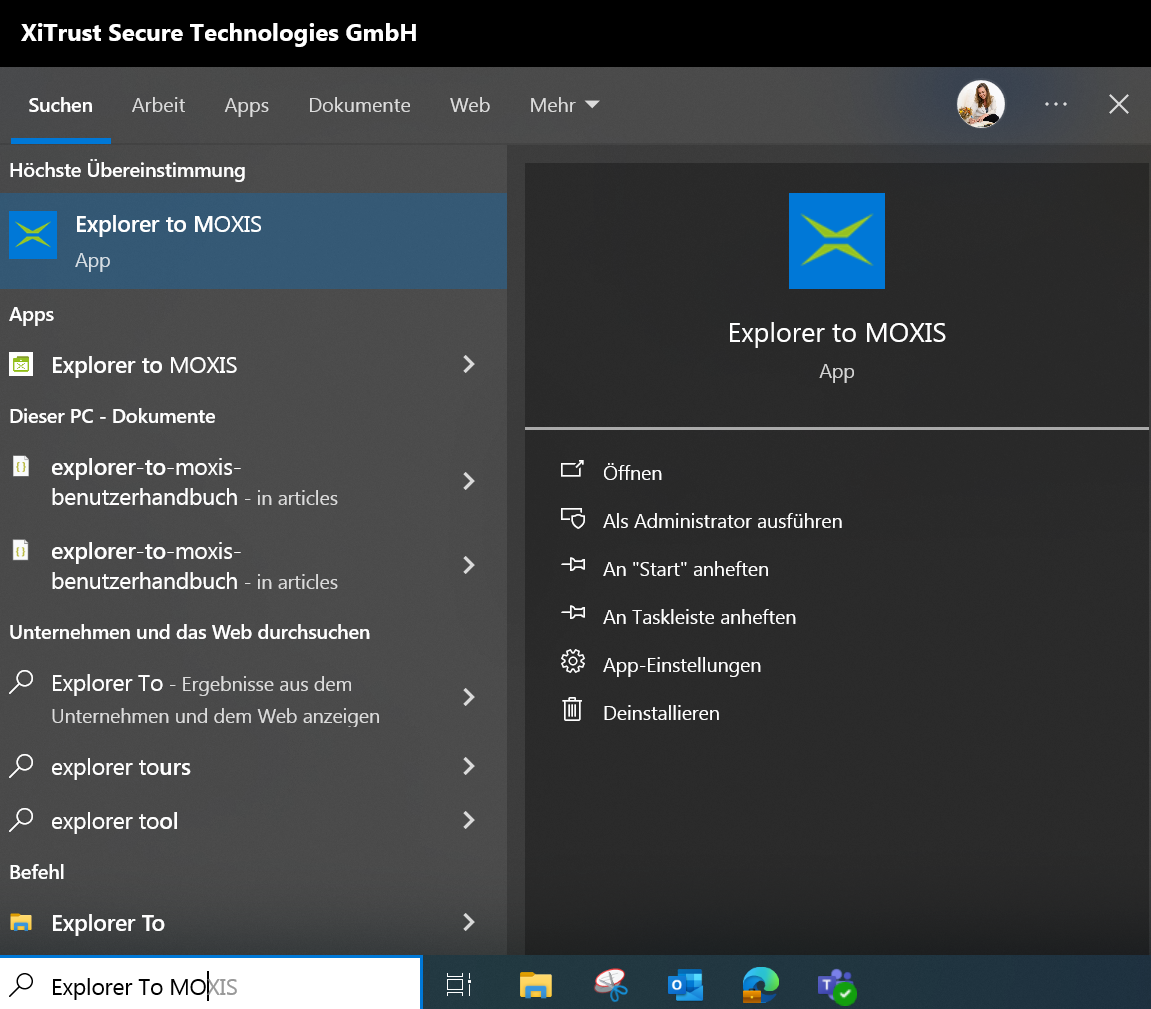
Figure 7: Open Explorer to MOXIS for the first time and pin it to Start
Now you just need to connect your MOXIS instance to Explorer to MOXIS. The next section provides information on the individual steps.
2. How to connect Explorer to MOXIS with your MOXIS instance
The linking of your MOXIS instance via URL is only necessary the first time you use the add-in or if the MOXIS URL changes. To link MOXIS with Explorer to MOXIS, please follow the step-by-step instructions.
Step 1: Open Explorer to MOXIS as described in the previous chapter.
Step 2: Click on the cogwheel icon (see figure 8 [1]) to open the settings on the plug-in dashboard. Here you can connect Explorer to MOXIS to your current MOXIS instance.
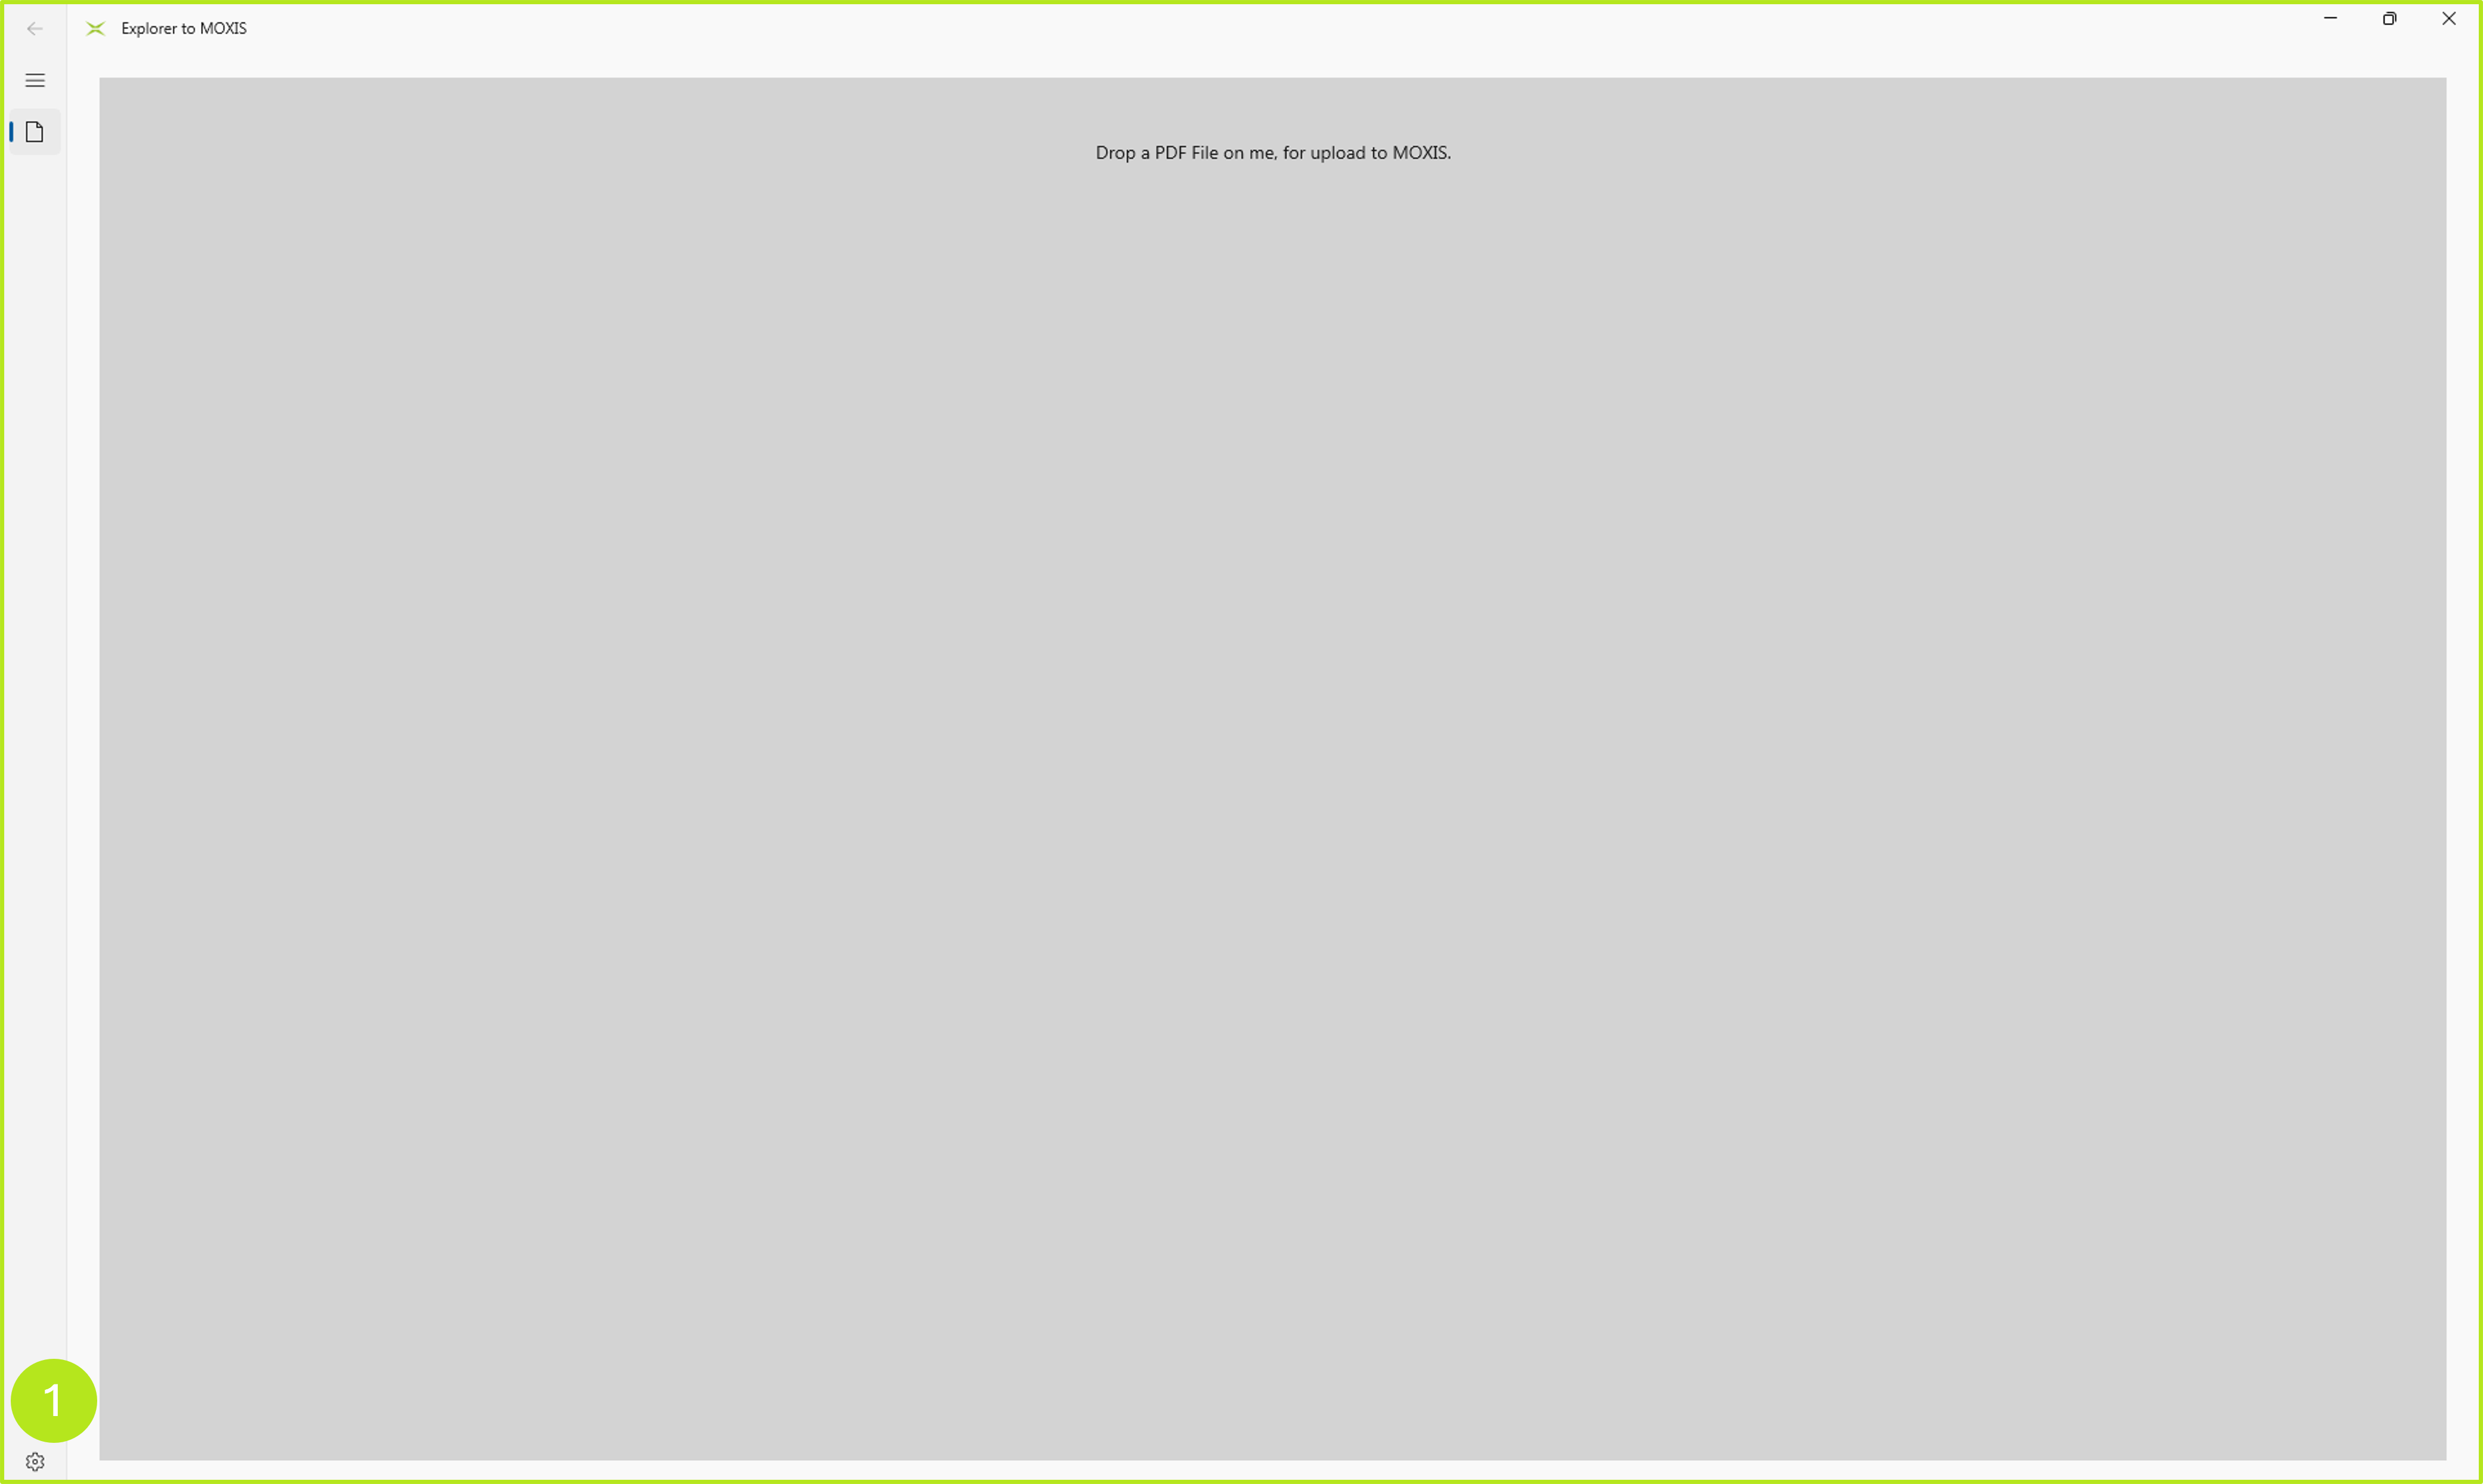
Figure 8: Open Explorer to MOXIS settings
Step 3: Now enter the URL of your MOXIS instance in the settings (see figure 9 [1]) and click on the [Save]-button (see figure 9 [2]). If your instance is successfully connected, you will receive a corresponding success message in green (see figure 9 [5]).
XiTip
Please note: Use only the SHORT FORM of the URL (WITHOUT ui/protected/#!dashboard), as this represents your instance! If you use the long form, the connection will fail and you will receive an error message.
In our example, we therefore enter the following short form of the URL in the MOXIS settings: https://demo50.moxis.cloud (see figure 10)
The long form (which is displayed in the browser by default) is: https://demo50.moxis.cloud/ui/protected/#!dashboard (see figure 10)
Apart from the connection between your MOXIS instance and Explorer to MOXIS, you have the following options in the settings:
set your preferred theme (light - dark - default; (see figure 9 [3]))
get information about your Explorer to MOXIS version (see figure 9 [4])
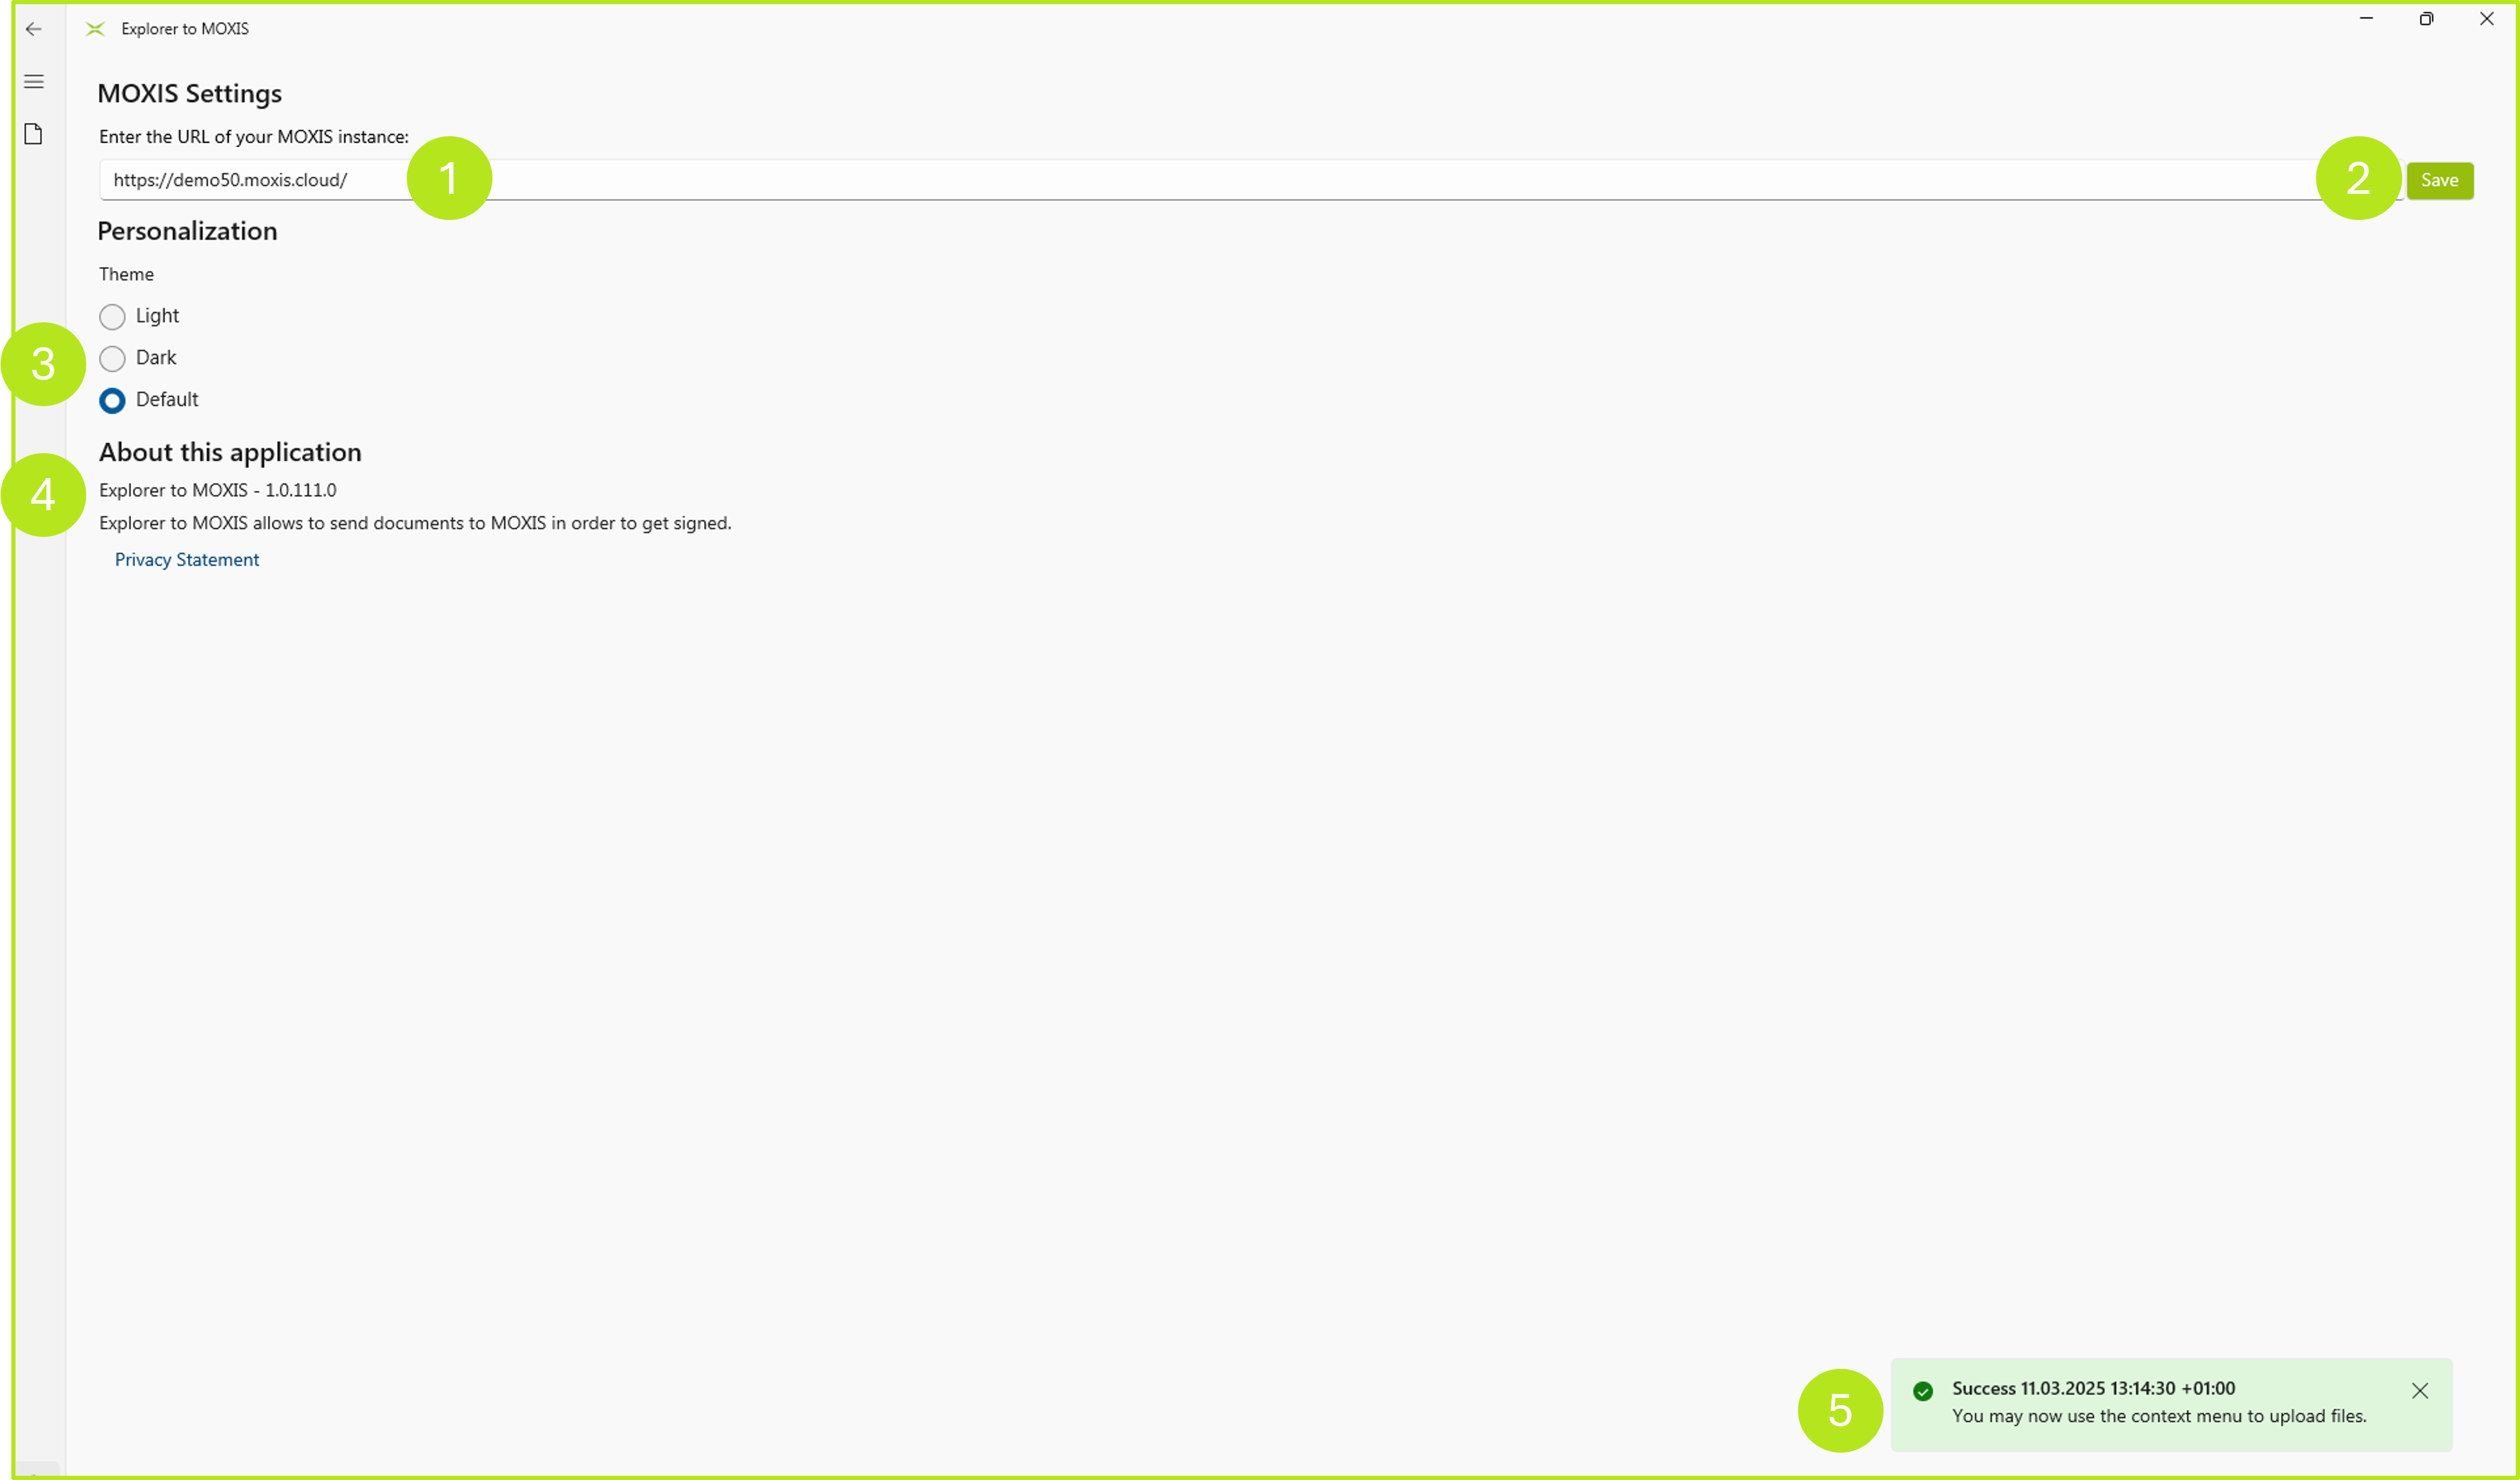
Figure 9: Explorer to MOXIS Settings

Figure 10: Short form (correct) vs. long form (highlighted in blue) of the URL – please use only the short form
Step 4: Congratulations! You have successfully connected your instance to Explorer to MOXIS
3. Simple signing with Explorer to MOXIS – this is how you start the signing process
There are two options for starting signing jobs via Explorer to MOXIS:
directly via the Explorer (recommended) or
via the desktop
The subsequent signing process is always the same.
3.1 Starting the signing process in Explorer to MOXIS via the Explorer (recommended)
Step 1: Open the Explorer and navigate to the document you want to have signed. A simple right-click on the document opens a menu (see figure 11).
Step 2: In the next step, please click on Sign with MOXIS (see figure 11 [1]).

Figure 11: Starting the signature process via Explorer to MOXIS
Step 3: Provided you are logged into MOXIS, the MOXIS interface will now open automatically. Alternatively, you will need to log in briefly as an intermediate step. Either way, please select your desired process in the interface that has now opened (see figure 12).
After that, you can complete the signature job as usual. For a description, see chapter 4.
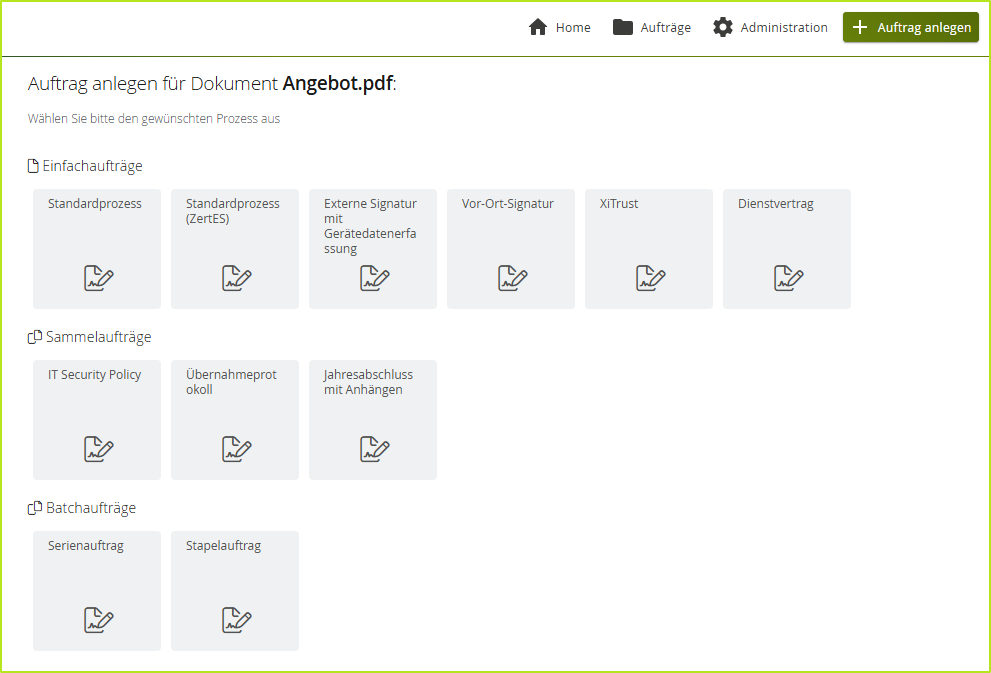
Figure 12: Select a process
3.2 Start the signature process in Explorer to MOXIS via the desktop
Step 1: To initiate a signing job via Explorer to MOXIS via the desktop, open the plug-in and drag the PDF you want to sign into the grey field using drag and drop (see figure 13)
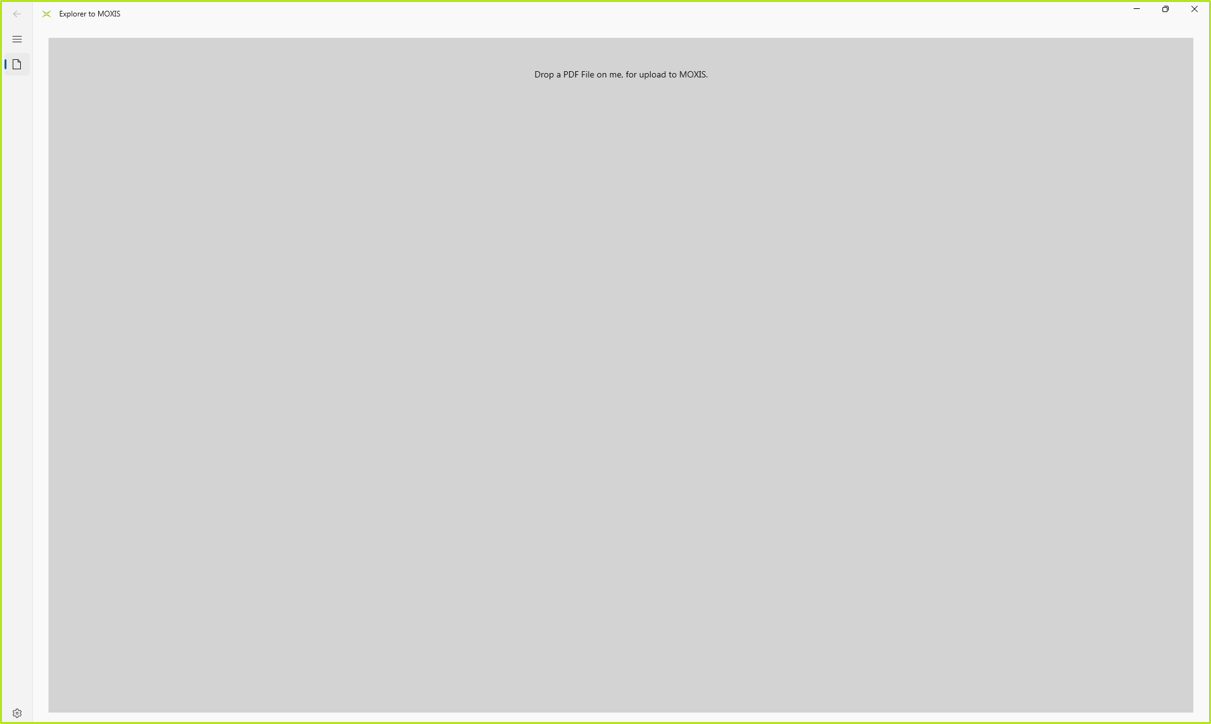
Figure 13: Explorer to MOXIS interface – drag a PDF into the grey field to sign it
Step 2: As soon as you have moved the PDF into the field, the MOXIS interface will open (see figure 14 [2]). At the same time, you will receive a message that the PDF has been successfully uploaded (see figure 14 [1]).
Please note: The prerequisite for the MOXIS interface to open immediately is that you are already logged in to your MOXIS instance. Otherwise, you have to log in in an intermediate step.
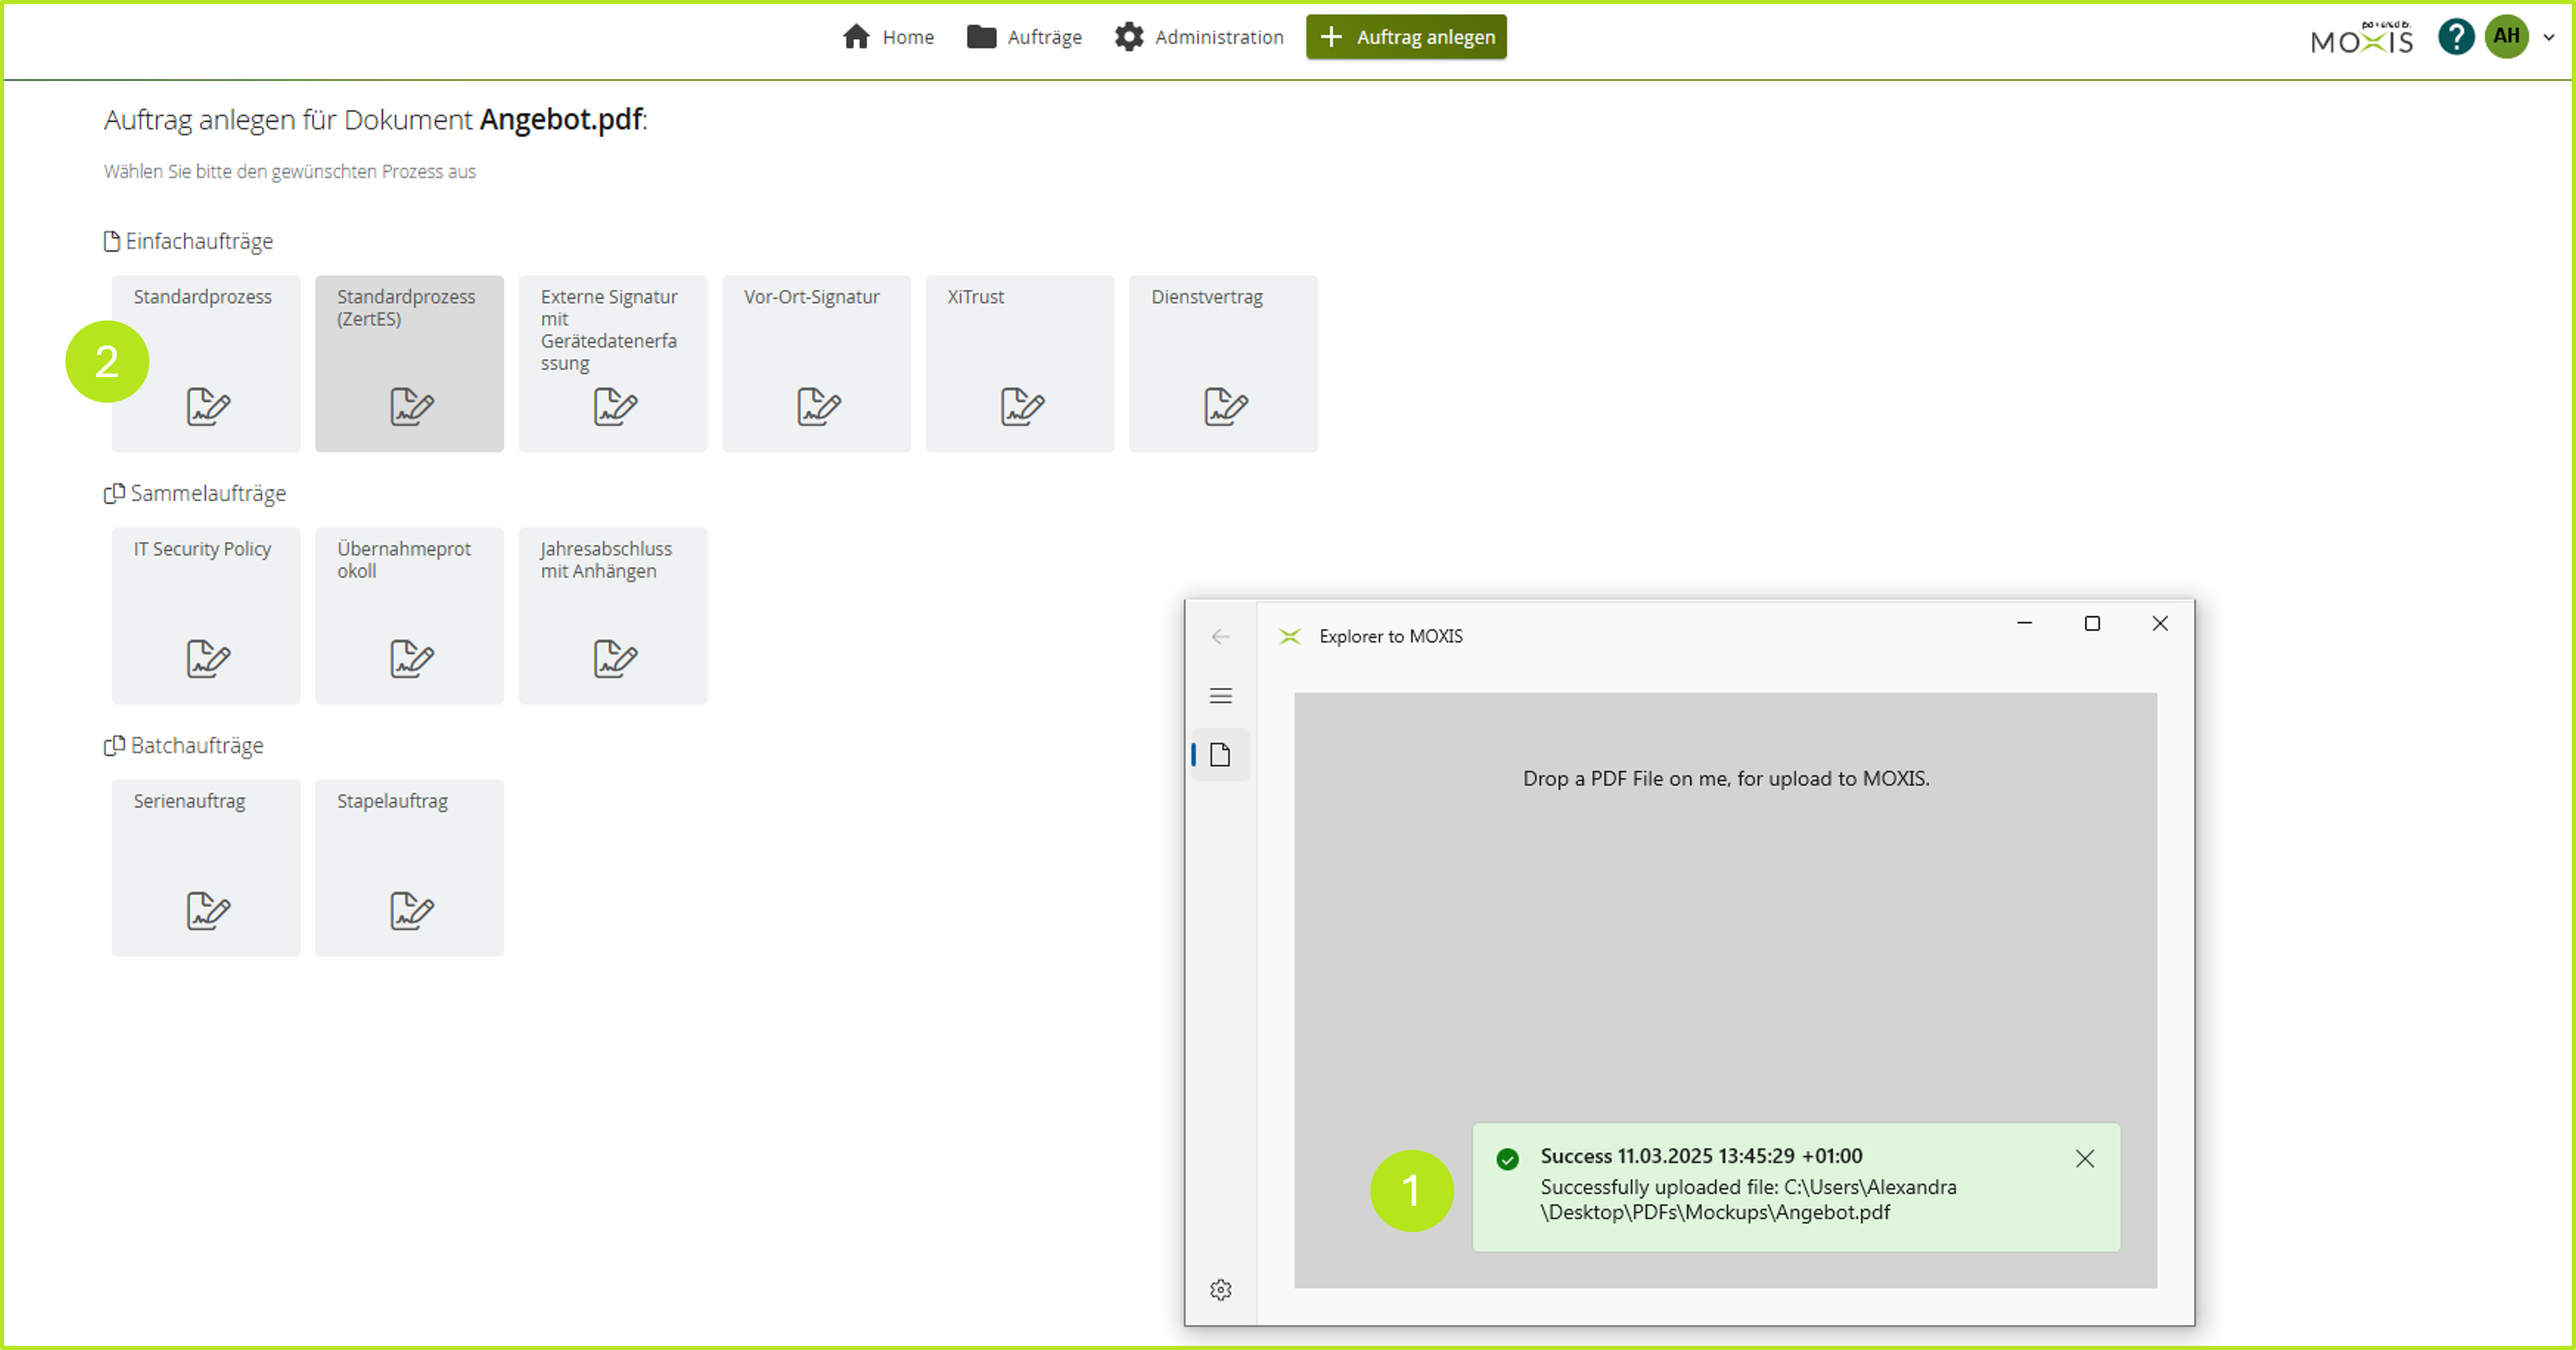
Figure 14: Starting a signing process via Explorer to MOXIS (desktop)
After that, you can complete the signature job as usual. You can find a description of how to do this in the next chapter.
4. How to complete the job
After you have selected the process, the PDF to be signed opens and you can process the document to be signed as usual as a job.
In the course of processing the signing job (see figure 15), please define the following:
whether you need one or more iterations (in our example, there is only one; see figure 15 [1])
the signature quality (in our example, it is a qualified signature; see Figure 15 [2]) and
the number and quality (internal/external) of the recipients
Add one or more placeholders for the signatures and click the [Sign]-button.
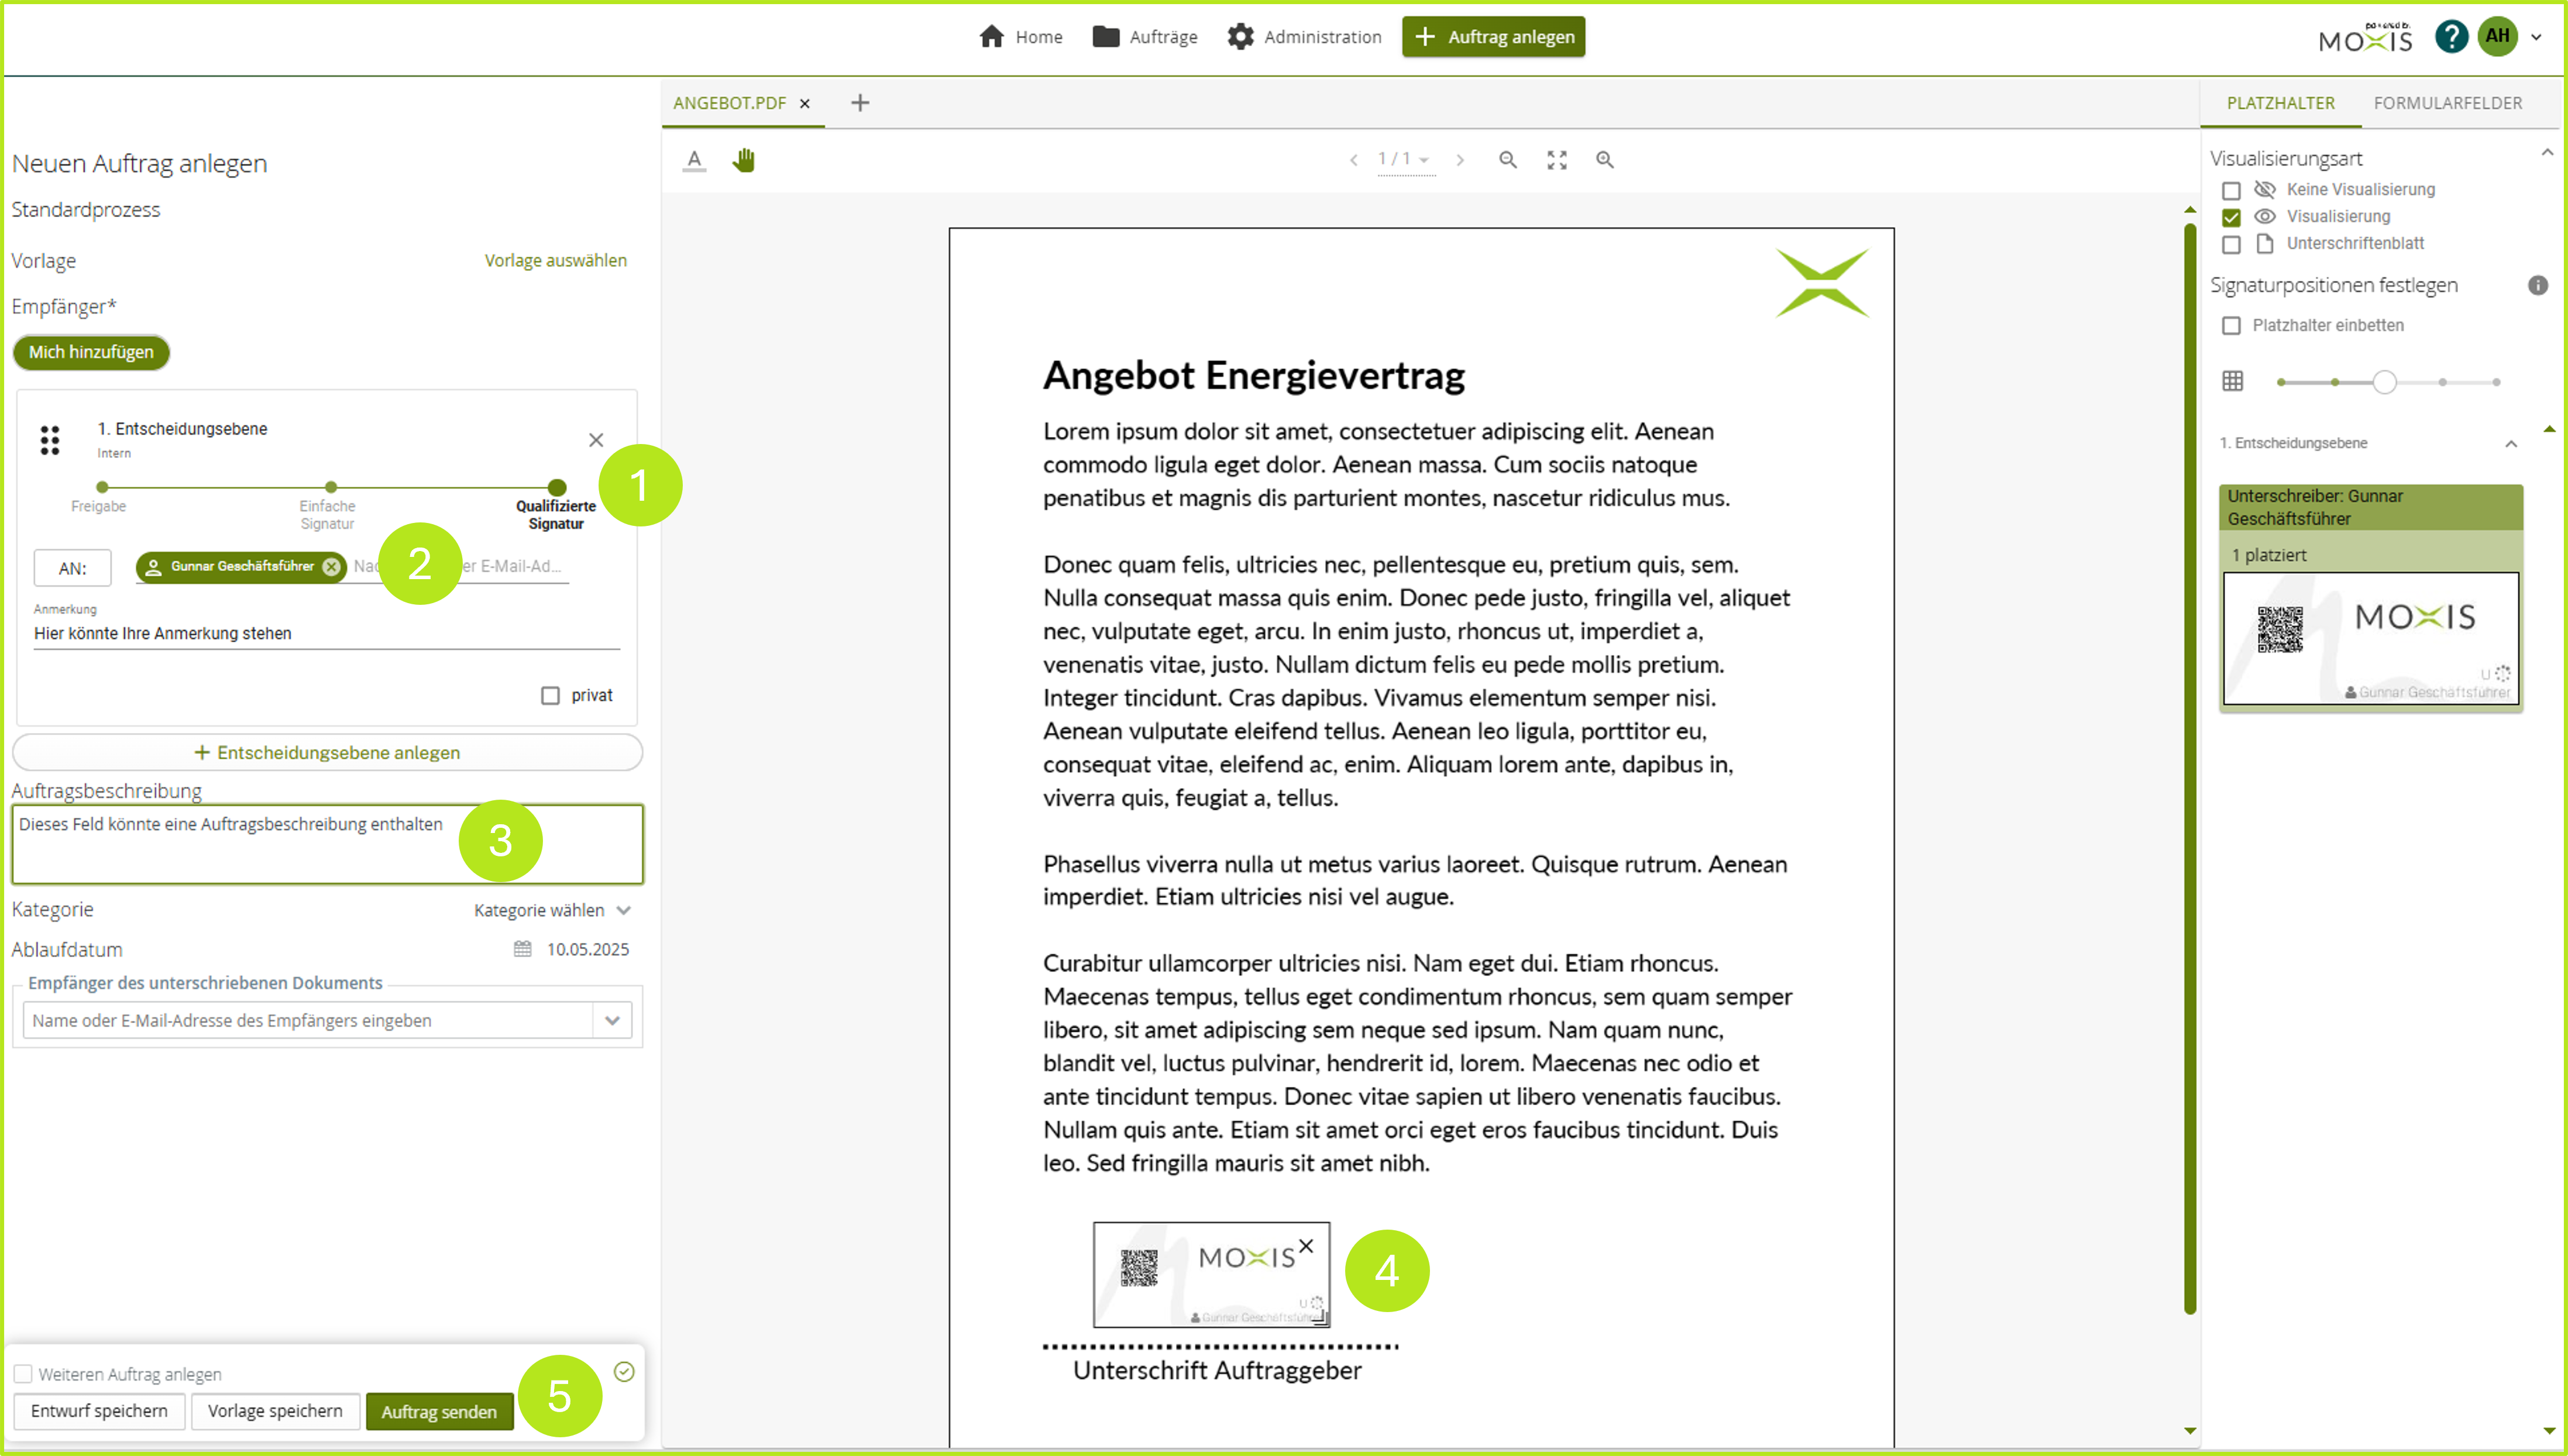
Figure 15: Complete the signing process
You will then be automatically redirected to the sent jobs overview. Here you can see the current job and read the following parameters:
Date of receipt
Time of receipt
Number of signatures
Job number
Expiration date
Expiration time
Congratulations! You have created your first signature job using Explorer to MOXIS.