
[BC Admin Guide] MOXIS Business Cloud: Branding
Content
If you want to offer your MOXIS users a sense of ‘being at home’, you have the option to brand the MOXIS Business Cloud according to your ideas.
Please note: The following instructions refer to the Business Cloud. The instructions are also applicable to the Now Cloud. However, please note that the Now Cloud is limited to the use of approvals, simple and advanced signatures.
This chapter gives you an overview of all the relevant options. Links will also take you to subchapters that explain the individual components of the MOXIS branding in more detail.
1. Branding in the MOXIS Business Cloud
1.1. You can change these settings
MOXIS: You can customise the MOXIS internal area for your users to reflect your corporate identity.
MOXIS Guest: The design can also be customised for external signers. You can configure the default template of the instance or reset it to the default.
Signature profiles: These preconfigured standard templates of the instance are used for the qualified signature and the simple signature. Both standard templates can be individually customised.
E-mail templates: Here you can customise the preconfigured standard template of the instance. It is used for all e-mails.
1.1.1. Customisations in the MOXIS tab
You can make the following changes in this tab:
Header logo (see figure 1 [1])
To change the header logo, click on Upload logo under the grey text field in the header logo area and upload a logo in the appropriate size.
Favicon (see figure 1 [2])
To change the favicon, please click on Upload logo under the grey text field in the favicon area and upload a logo in the appropriate size.
Make sure you have a logo in the appropriate format before uploading the file, as images that are too large will be adjusted. The maximum size for favicons is 32px x 32px. The supported file type for MOXIS is PNG.
Tab title (see Figure 1 [3])
To change the tab title, simply enter your desired tab title in the field provided. Clicking on the [Reset Tab Title]-button (see figure 1 [4]) will return you to the original settings.
If you wish to reset your settings, please click on the [Reset All]-button (see figure 1 [5]). To save your changes, please click on the [Save]-button (see figure 1 [6]).
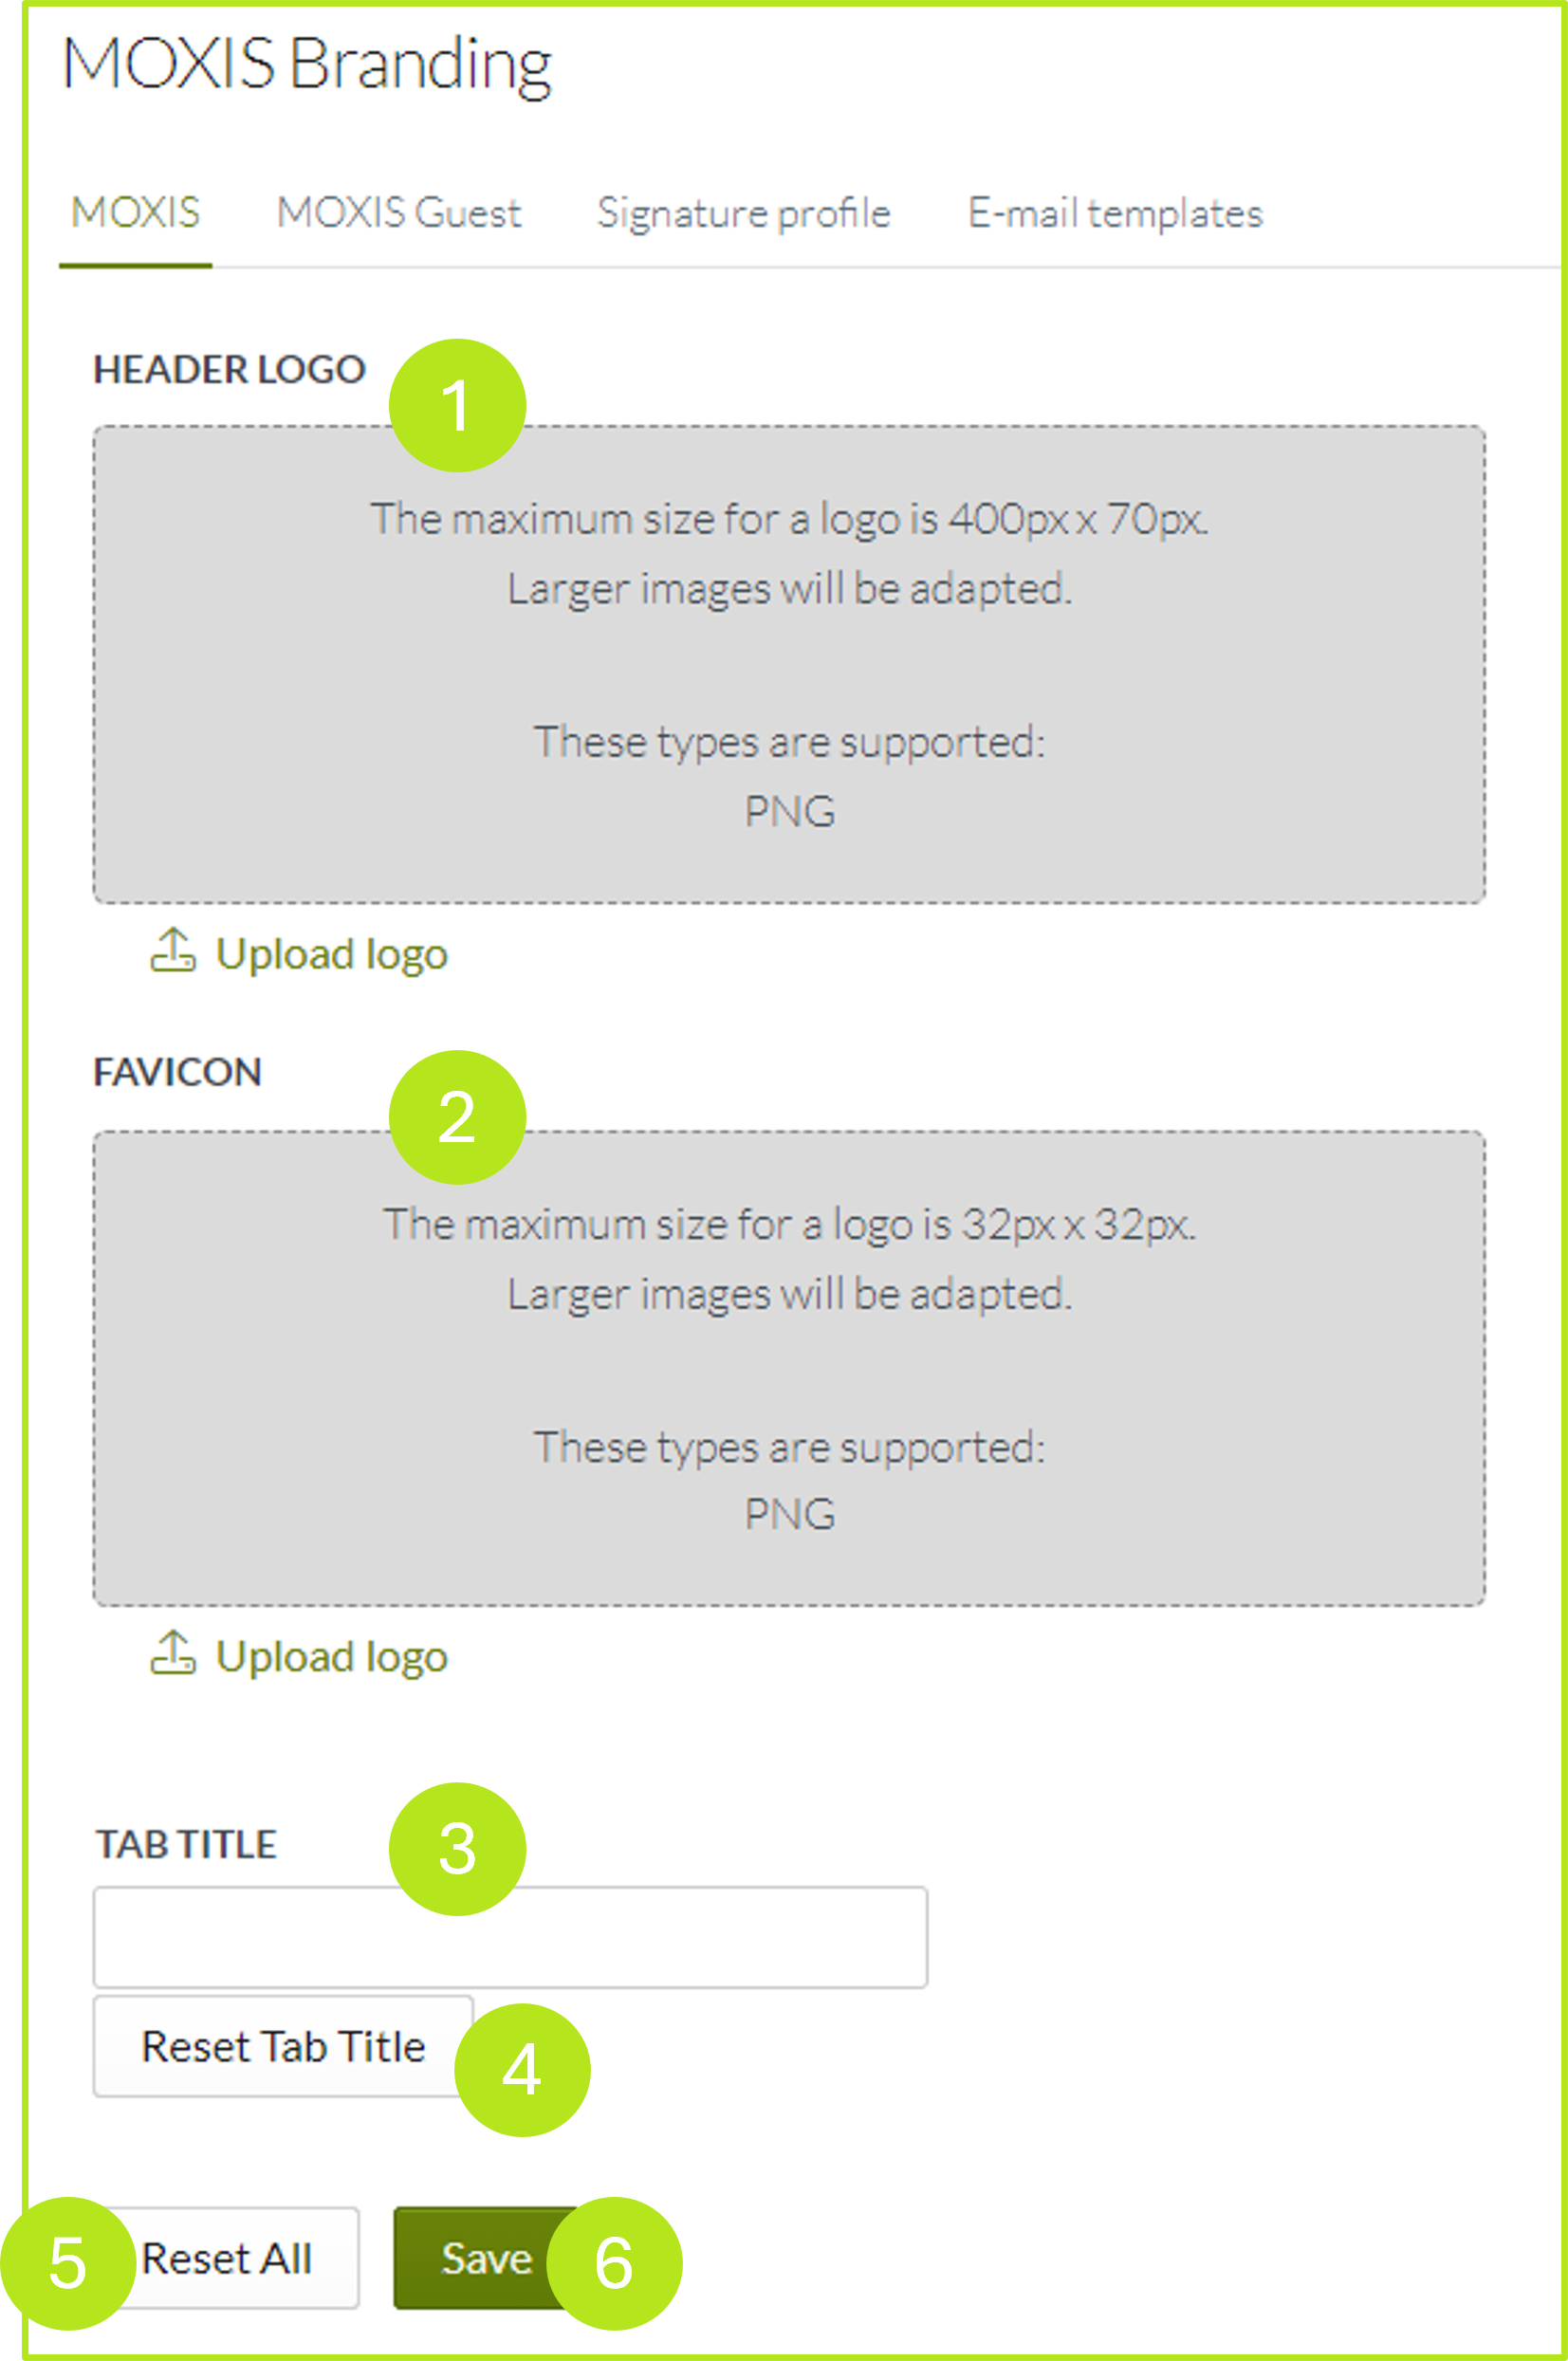
Figure 1: Branding customisations in the MOXIS tab
Once all changes have been successfully saved, the MOXIS interface will look like the one shown in figure 2, where the individual components are shown in the following places:
Logo: see figure 2 [1]
Favicon: see figure 2 [2]
Tab title: see figure 2 [3]
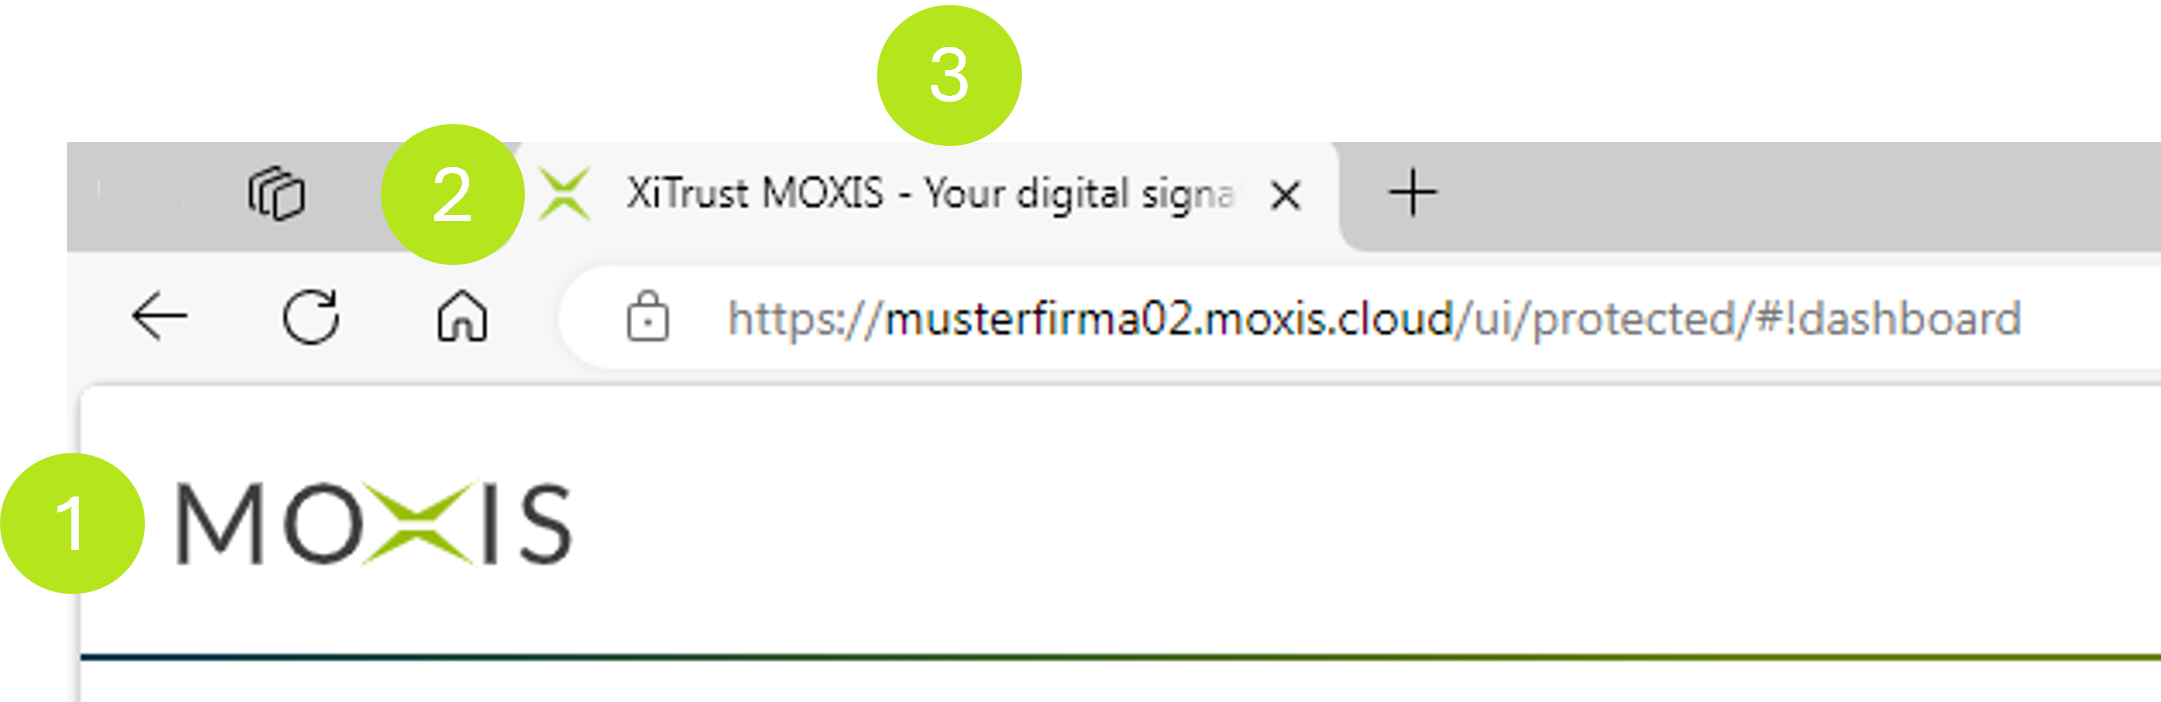
Figure 2: Branding customisations implemented in the MOXIS Business Cloud
1.1.2 Adjustments in the MOXIS Guest tab
MOXIS Guest is an instance of MOXIS that allows you to send orders to external persons. You have the option of customising MOXIS Guest for external signers to your corporate identity (CI).
A consistent CI can lead to greater customer loyalty, higher employee satisfaction and, overall, a higher level of identification with your company. You can customise the logo of your company (see figure 3 [1]), various colours, such as colours of buttons (see figure 3 [2]) or warning colours and text colours (see figure 3 [3]) in MOXIS Guest.
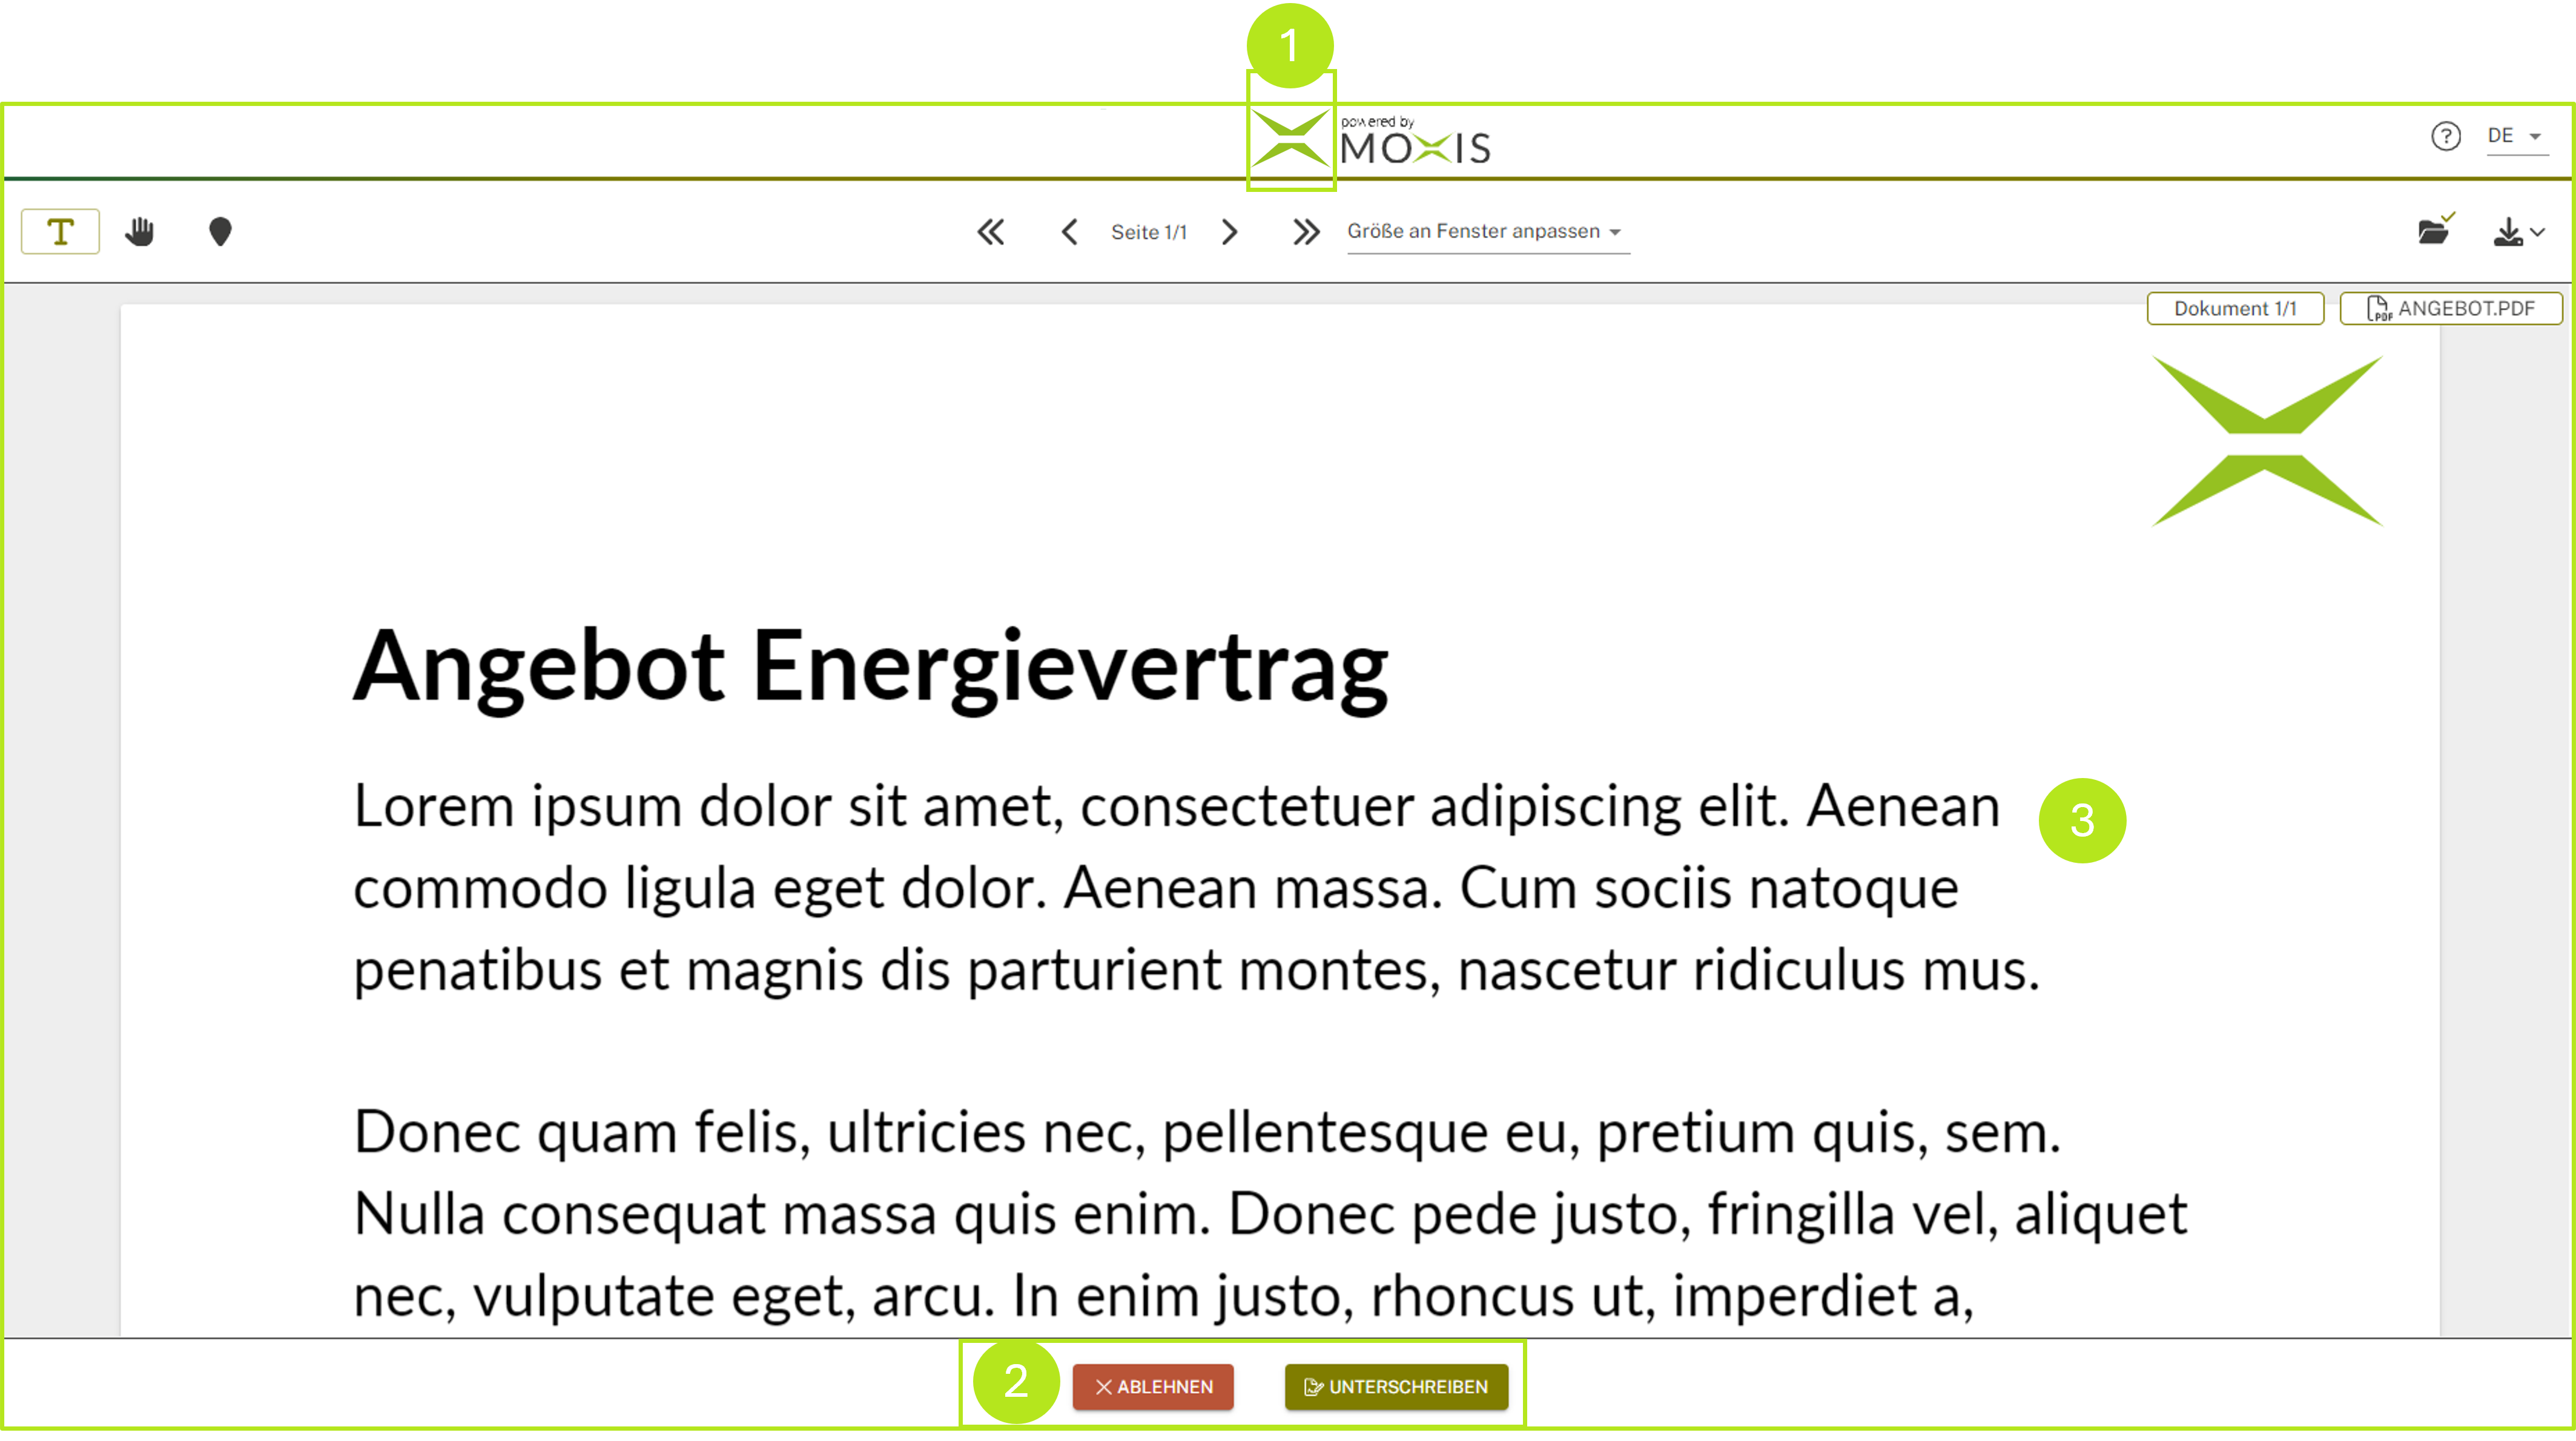
Figure 3: MOXIS Guest from the perspective of external signatories (customised standard template)
Before you release the templates you have customised, send them to an external test user. This way you can see how the external signatories of your company perceive MOXIS Guest.
You can customise the following under the MOXIS Guest tab:
1.1.2.1 Configuring the instance's default template
In the first section of the MOXIS Guest Branding, you have the option to customise the instance's default template. To do this, simply click on the [Modify default template]-button (see figure 4 [1]). If you change your mind and do not want to apply a configuration, you can discard the changes by clicking on the [Reset default template]-button (see figure 4 [2]).
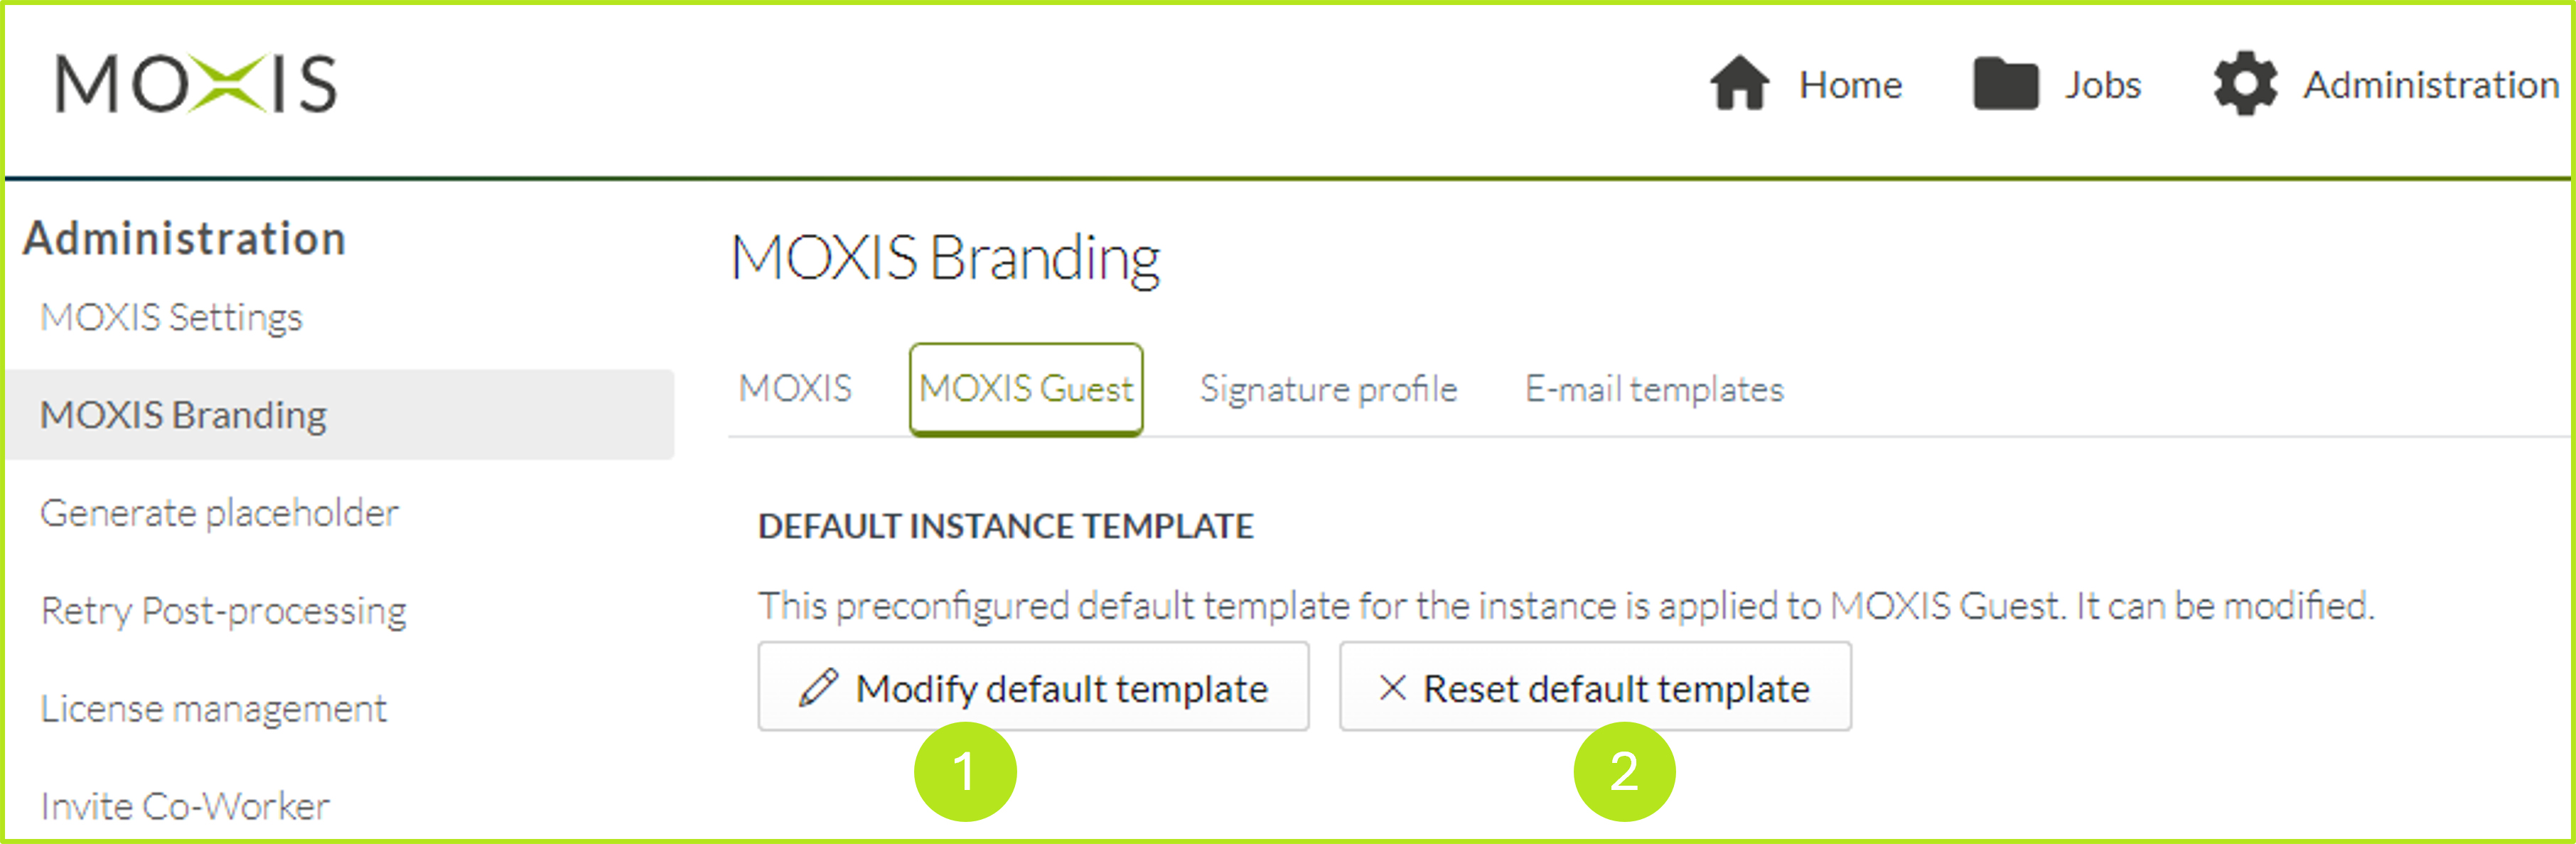
Figure 4: Customising the branding of the MOXIS Guest standard template for the instance
Click on the [Modify default template]-button to open an overview in which you can customise your templates. You have the following options for making changes:
Colours (see figure 5 [1])
Logo (see figure 5 [2])
Click on the [Save]-button (see figure 5 [3]) to save your changes. Clicking on the [Cancel]-button (see figure 5 [3]) allows you to discard your changes.
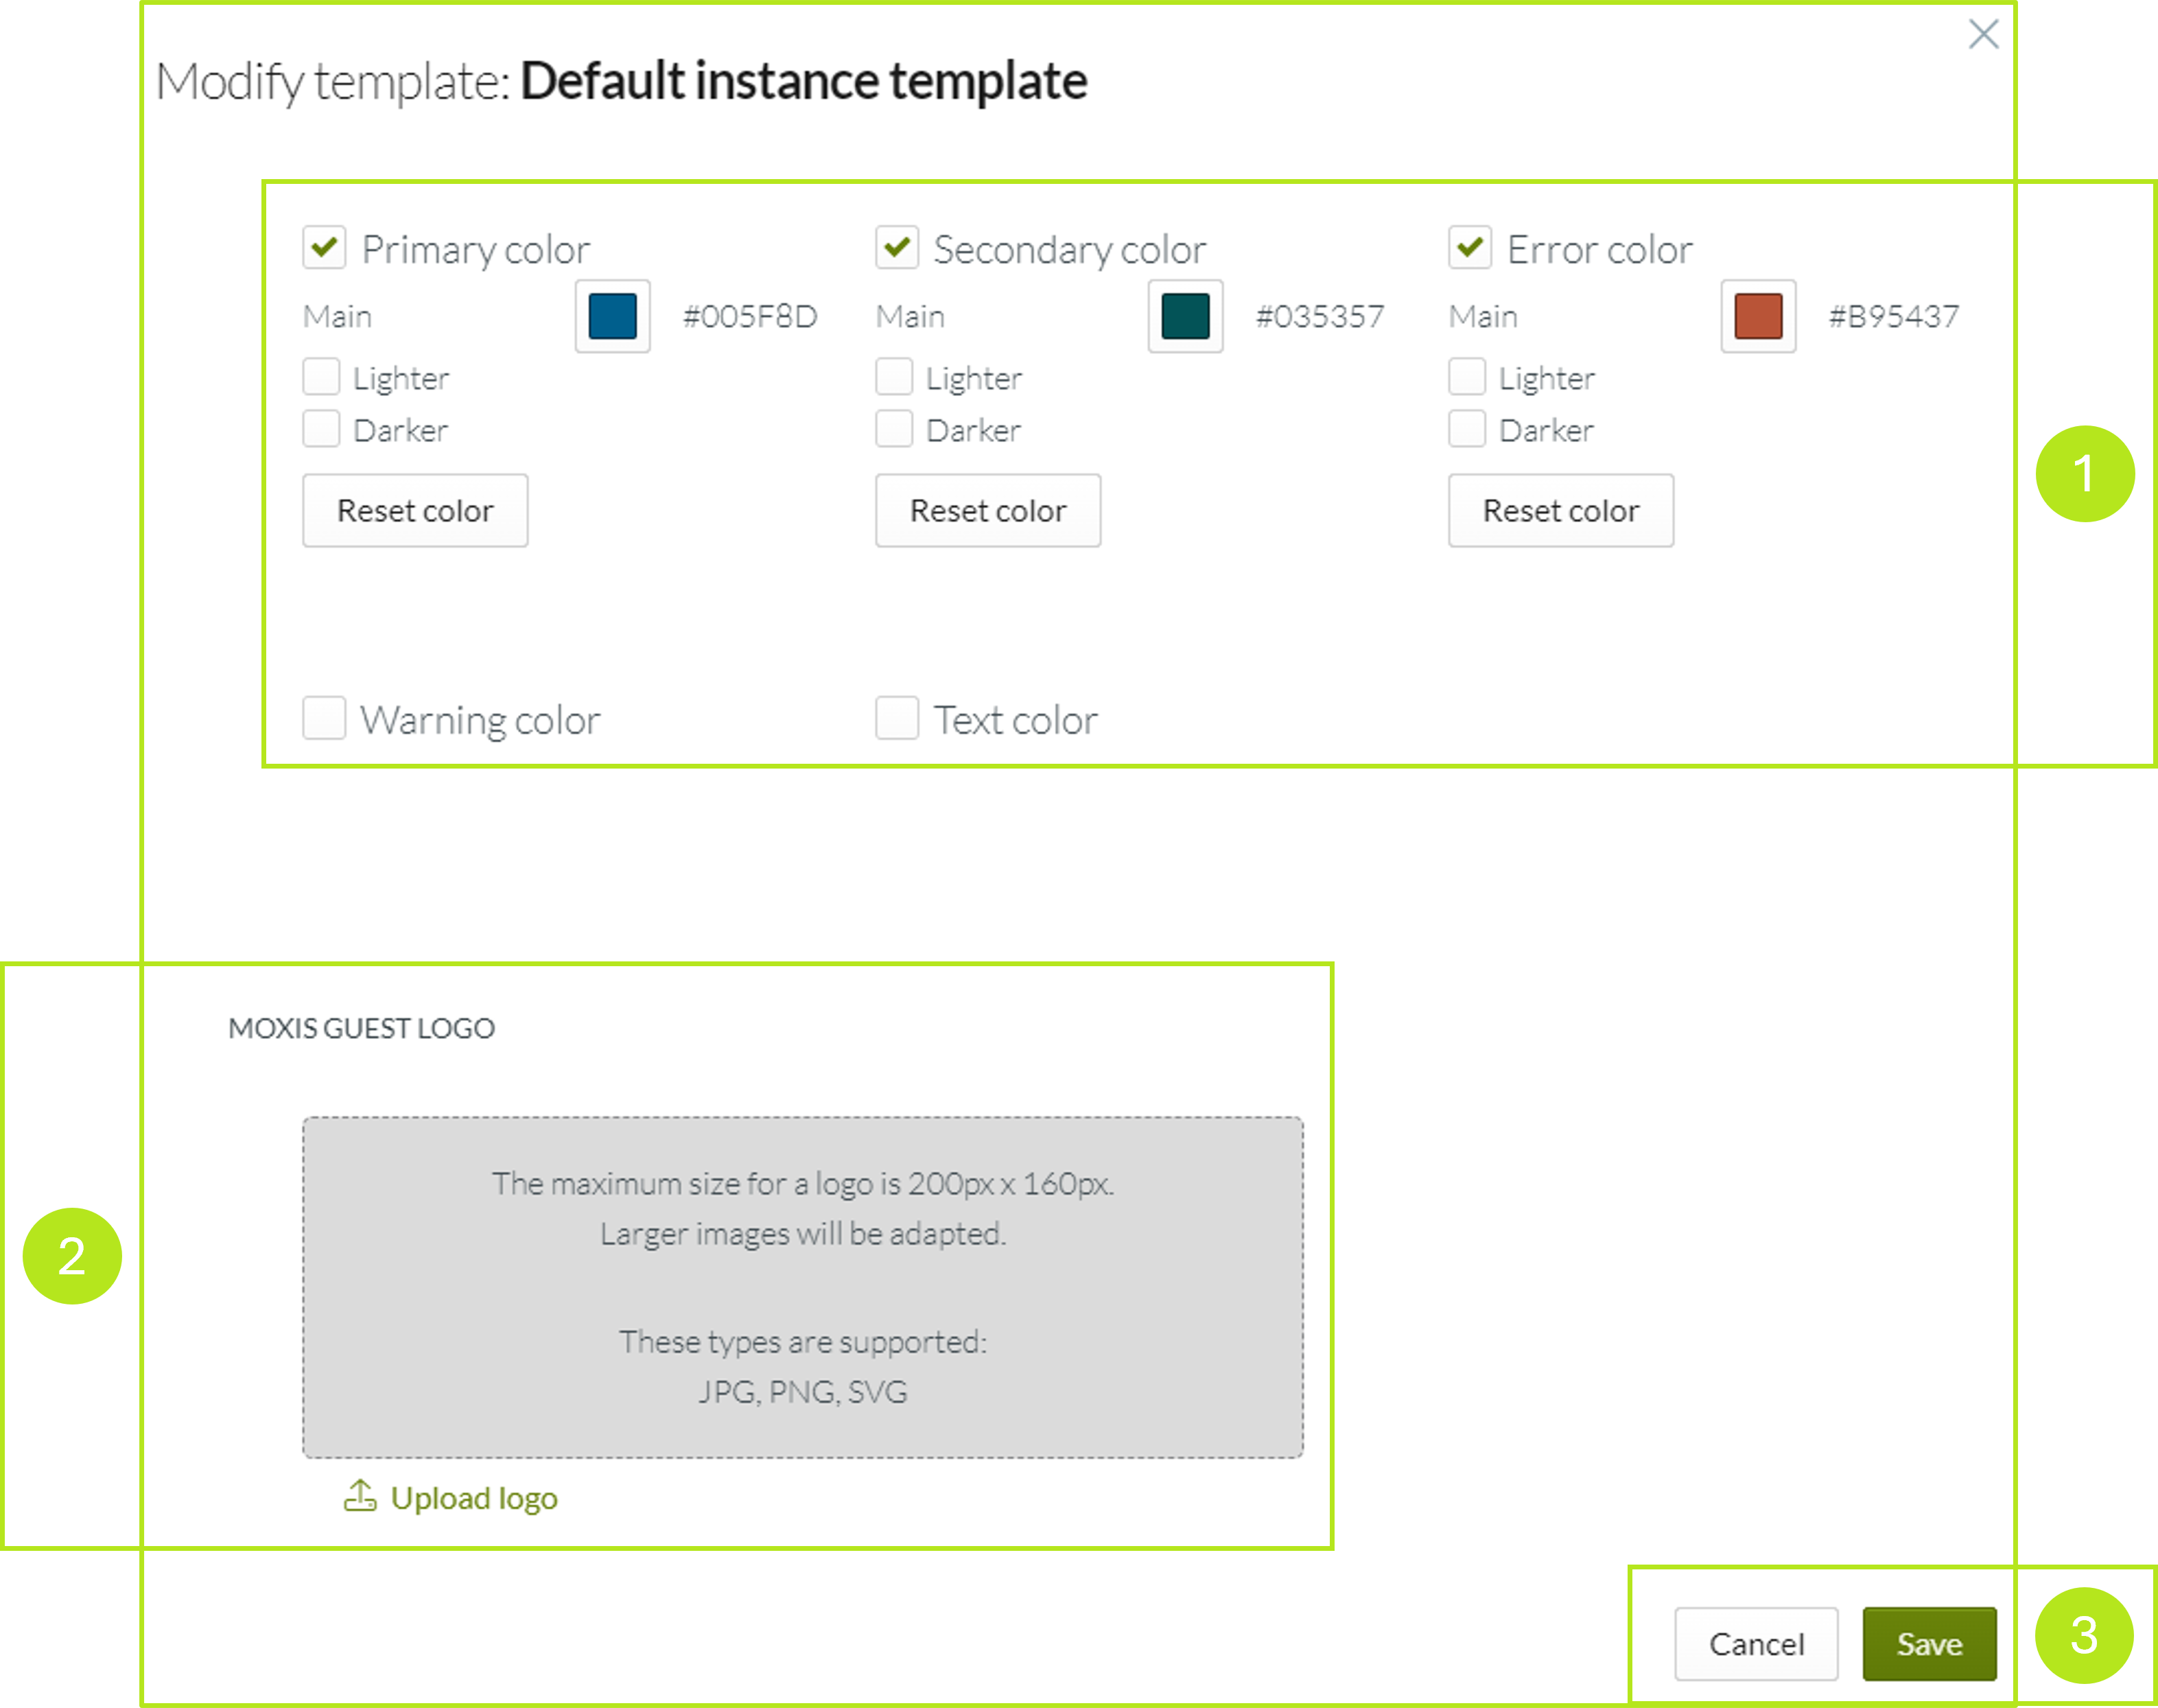
Figure 5: Editing the standard template of the instance in MOXIS with regard to the branding
1.1.2.2 Adjusting colours
To adjust the colours in your default template, please click on the colour field of the colour you wish to configure; e.g. the primary color (see figure 6 [1]).
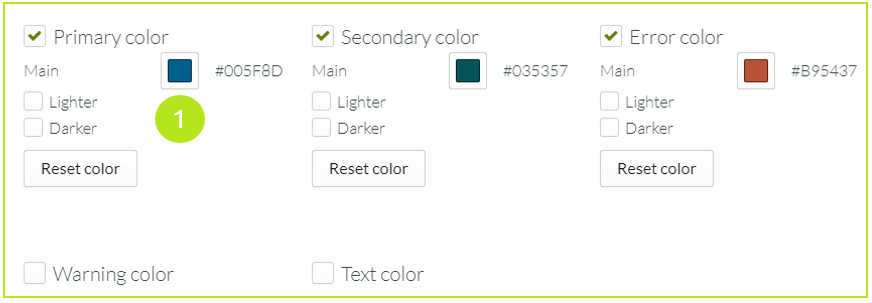
Figure 6: Editing the colours in the default template of the instance
You now have three options for defining your desired colour (see figure 7):
Enter a HEX code (see figure 7 [1]),
select your desired colour from the colour picker (see figure 7 [2]) or
define an RGB (Red/Green/Blue) colour using the sliders (see figure 7 [3]).
Click on the [OK]-button (see figure 7 [4]) to apply the changes. Clicking on the [Cancel]-button discards your changes.
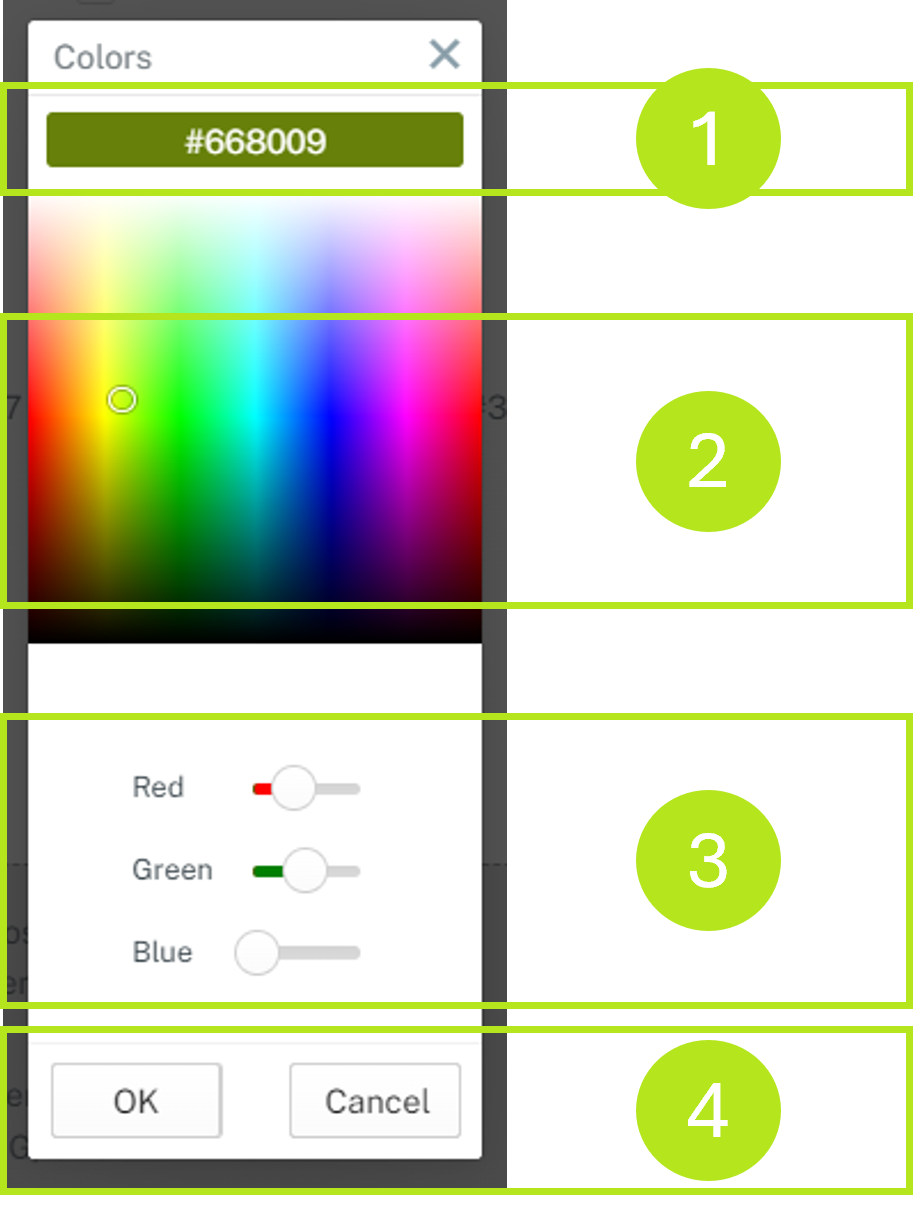
Figure 7: Colour picker in the default template of the instance
In addition, you have the option here of extending the colour profile of a selected colour to include a lighter or darker shade To do this, you can use the checkbox in the complete overview to adjust the colours (see figure 8). The system automatically suggests the default colour profile. However, you can adjust this to match your corporate design, just like the primary colour. Click the [Reset colour]-button to reset the individual colours to their default values.
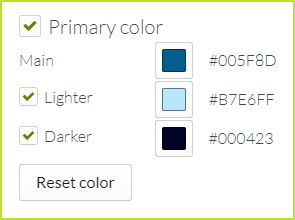
Figure 8: Expansion of the primary colour to include further shades
The text colours are an exception to this. Here you can define a primary and a secondary colour (see figure 9) or use the colour suggested by the system.
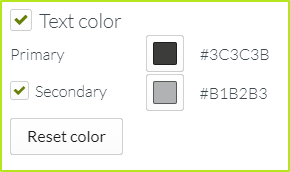
Figure 9: Enhancement of the primary text colour with a secondary colour
1.1.2.3. Uploading a logo
To upload a logo to your default template, please click on Upload logo (see figure 10 [1]). The maximum size of the logo is 200px x 160px. Larger images will be resized. MOXIS Guest supports JPG, PNG and SVG logo files.
Figure 10: Uploading the logo – customising the branding of the standard template for MOXIS Guest in the MOXIS Business Cloud
1.1.3. Adjustments in the Signature Profiles tab
As an administrator, you have the option of customising the default signature profiles for all MOXIS Business Cloud users. The default profile is the display of the signature as inserted in the MOXIS Business Cloud when users have not stored their own profiles.
You can make adjustments by changing the default template of the instance under the respective tab in the administration settings.
Changes to the default settings are global. This means that if you change something here, you automatically change (depending on whether you have selected the qualified or simple signature) the default signature profile of all MOXIS Business Cloud users.
1.1.3.1 Modifying the default signature profile
To customise the instance's default templates, click the [Modify Default Template]-button (see figure 11).
If, while creating the default template, you decide that you want to use the original settings after all, you can do so at any time by clicking on the [Reset default templates] button (see Figure 11). Please note that this will reset all default signatures for all MOXIS Business Cloud users in your instance.
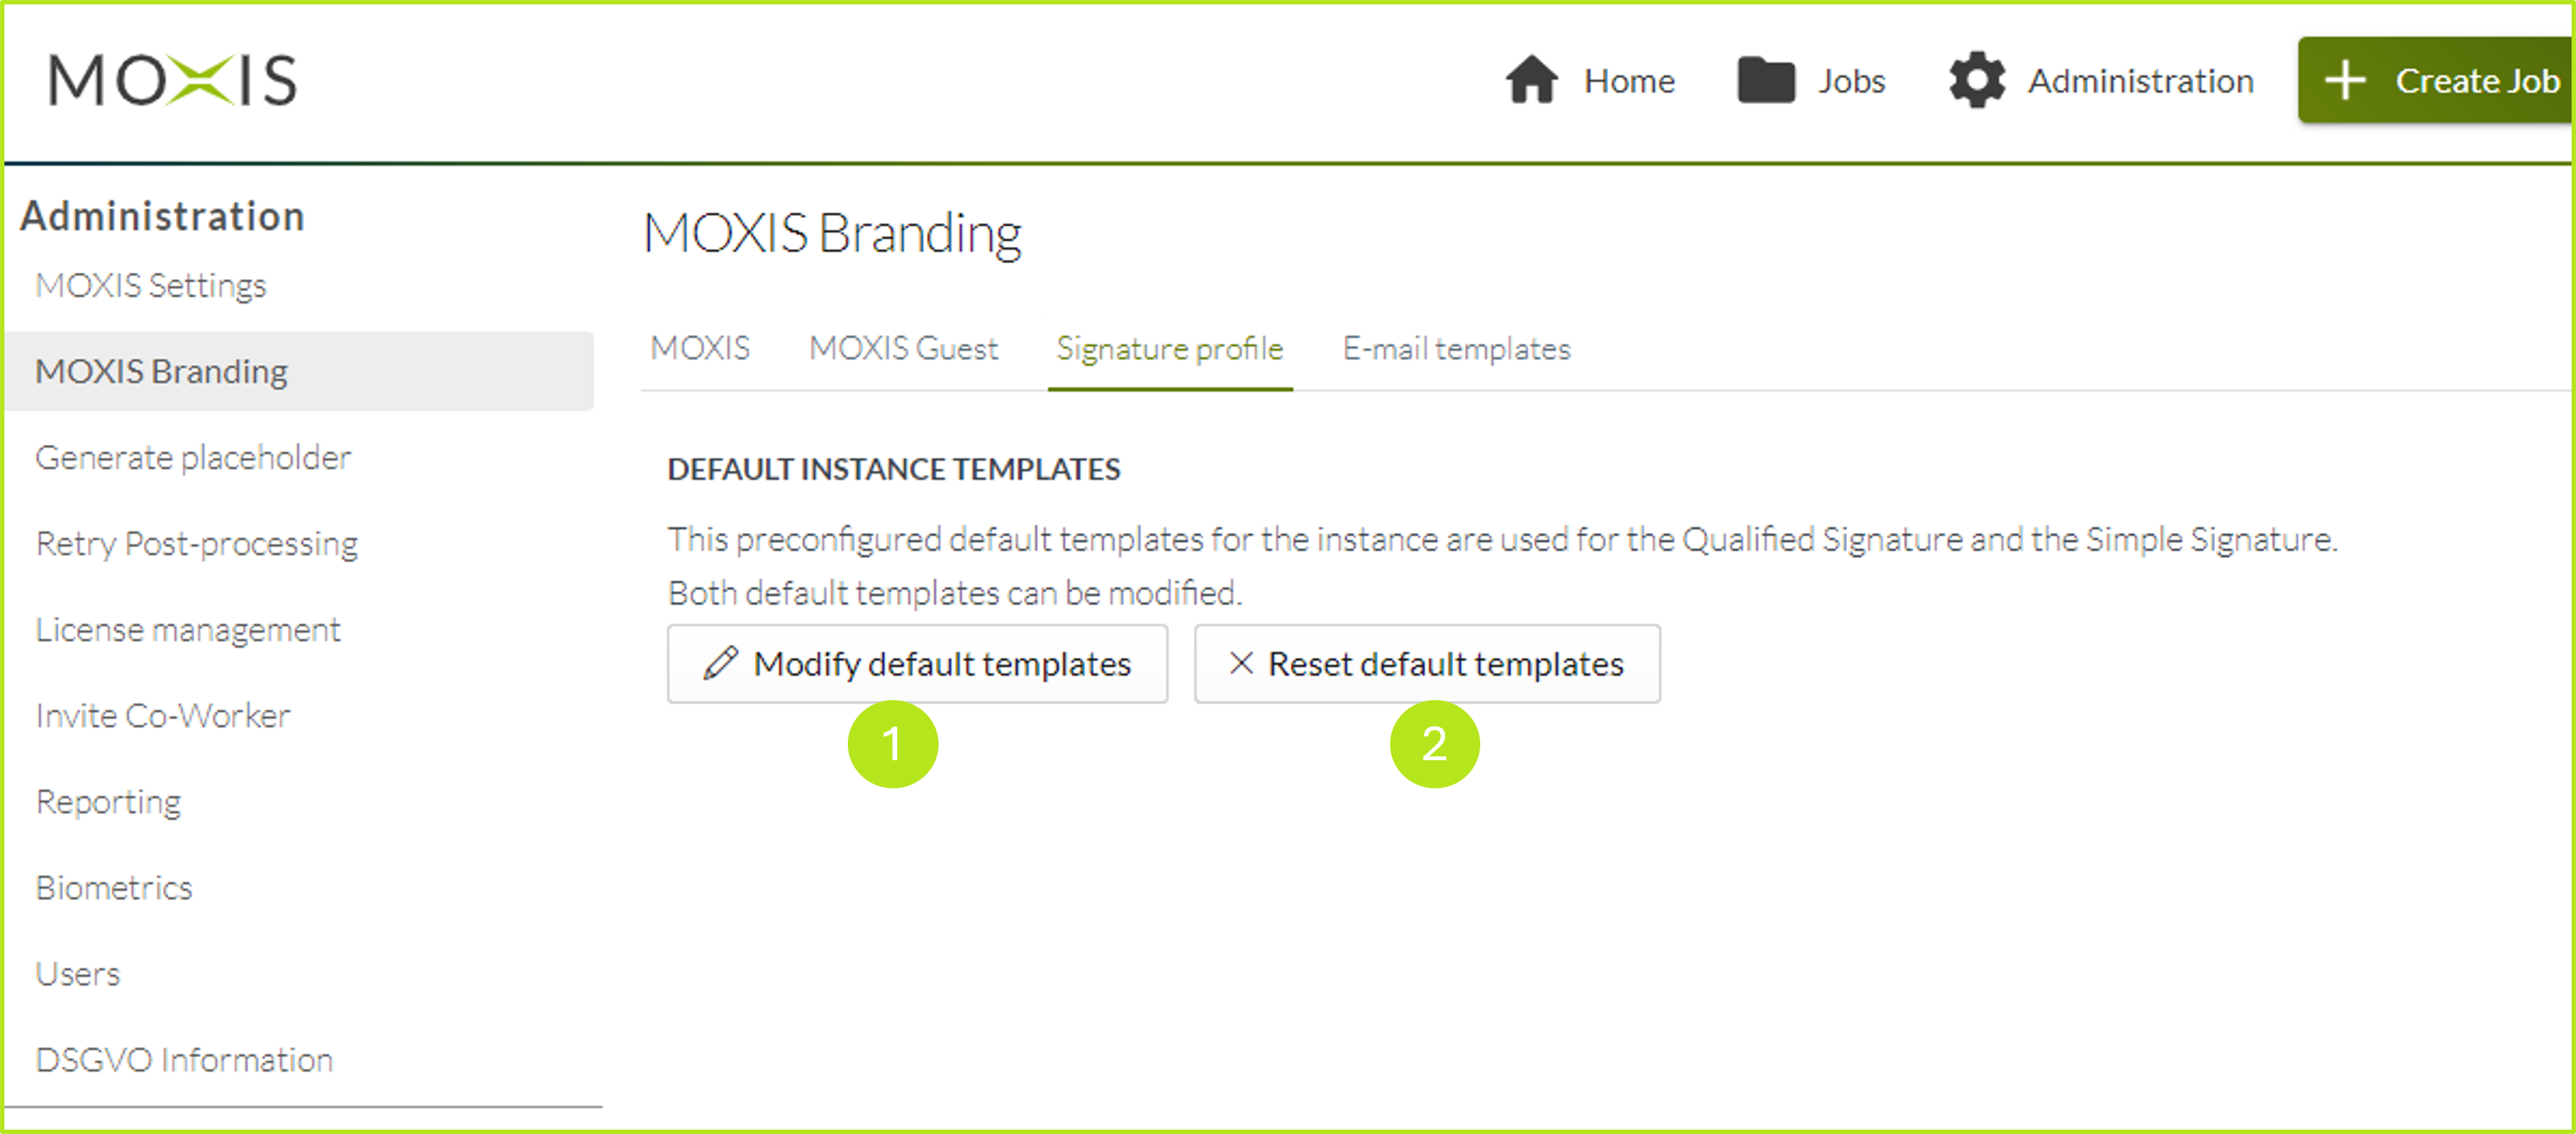
Figure 11: Customising or resetting the instance's default signature profile templates in the MOXIS Business Cloud
Please now select whether you want to edit a signature profile for a simple (see figure 12 [2]) or a qualified (see figure 12 [1]) signature.
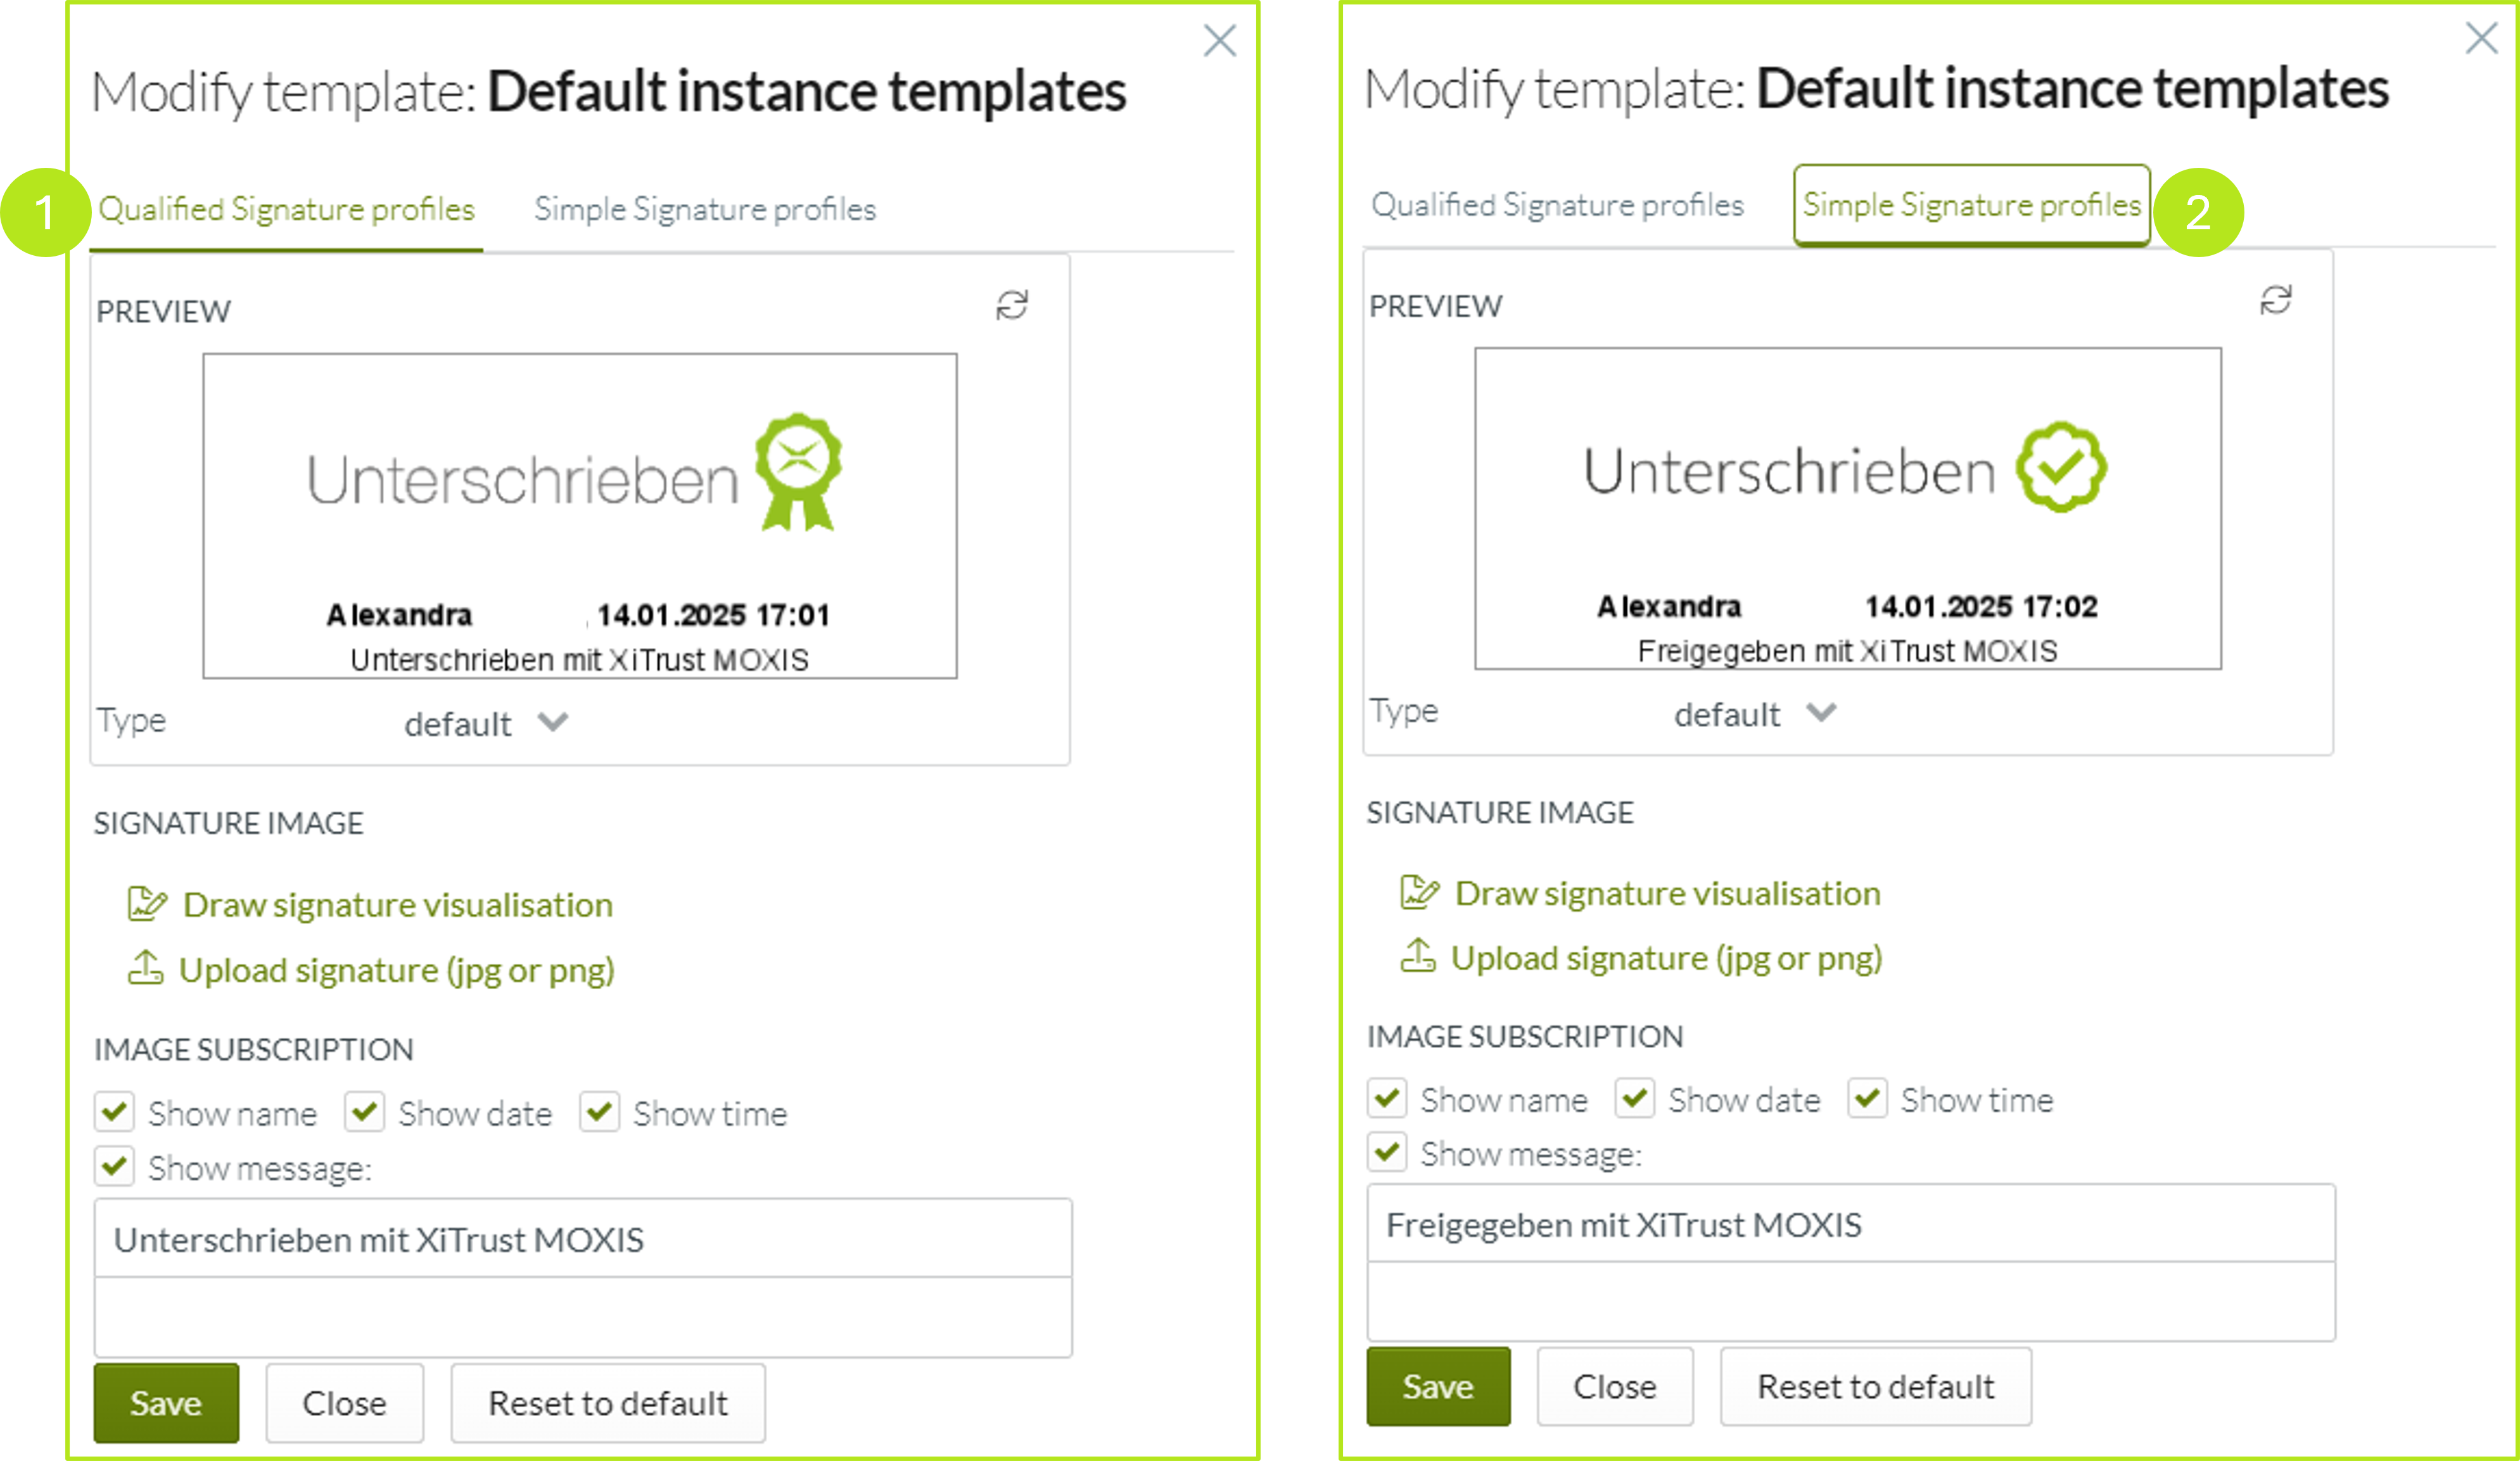
Figure 12: Editing the standard template profile for qualified signatures vs. profile for simple signatures
1.1.3.1.1 Applying changes to the standard signature profile for qualified signatures
In the overview of profiles for qualified signatures, you have the following options for customising the signature:
(1) This window provides you with a live preview of the changes made (see figure 13 [1]).
(2) You can customise the signature image in two different ways (see figure 13 [2]):
By clicking on Draw signature visualisation, you can draw a signature visualisation directly in the MOXIS Business Cloud and save it.
Clicking on Upload signature image allows you to upload a signature image of the desired visualisation of the signature.
(3) Depending on how many details you want the signature visualisation to show, you have the option here of modifying them using the Image Subscription option (see figure 13 [3]):
Show name
Show date
Show time
Show message (please enter your desired text here)
Click the [Save]-button to save your changes. Use the [Close]-button to close the window without saving. Click the [Reset to default]-button to reset the template to the default (see figure 13 [4]).
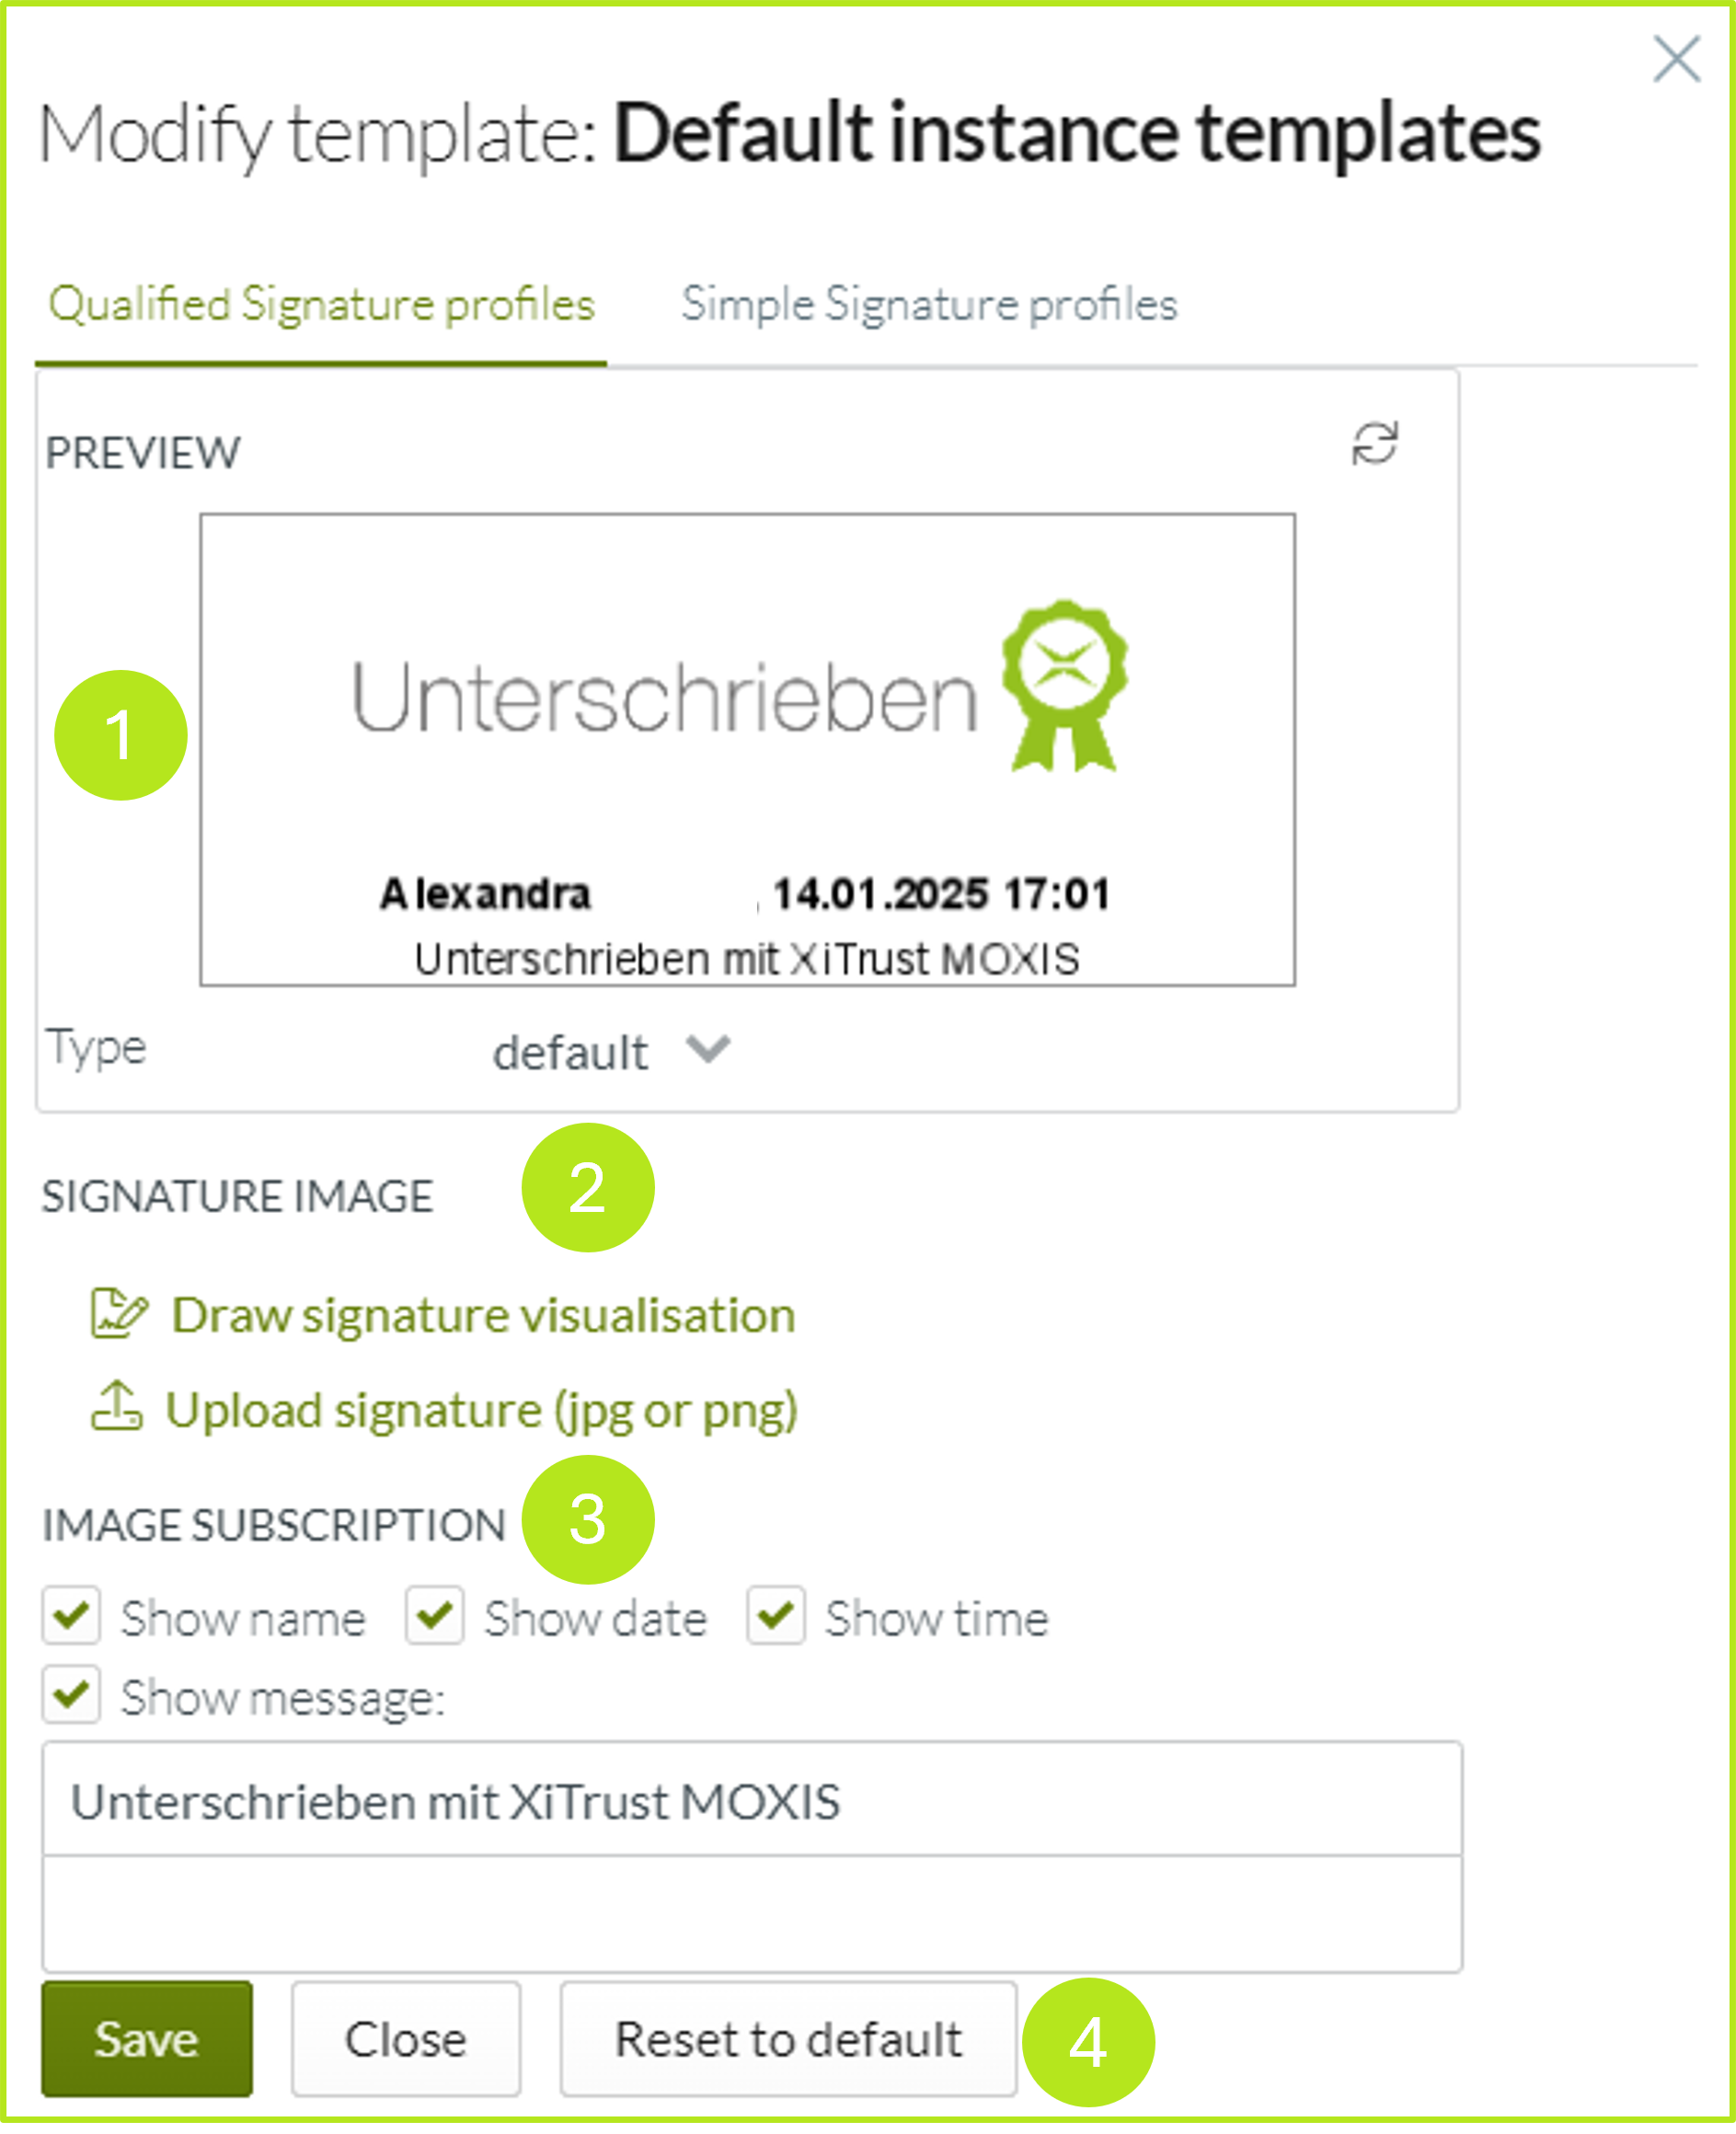
Abbildung 13: Standardvorlage der Instanz für Qualifizierte Signaturen bearbeiten
1.1.3.1.2 Modifying the default signature profile for simple signatures
The signature profile for the qualified signature (see Figure 13 [1 - 4]) is similar to the signature profile for simple signatures (see Figure 14 [1 - 4]).
Here, too, you will see a live preview of the changes made in a window (see figure 14 [1]).
In addition, the signature image can be adapted in two different ways (see figure 14 [2]):
By clicking on Draw signature visualisation, you can draw a signature visualisation directly in the MOXIS Business Cloud and save it
Clicking on Upload signature image allows you to upload a signature image of the desired visualisation of the signature.
Depending on how much detail you want the signature visualisation to have, you have the option here of modifying it using the caption option (see figure 14 [3])
Display name
Display date
Display time
Display note text (Please enter an appropriate text here.
Click on the [Save]-button to save your changes. Use the [Close]-button to close the window without saving. Click on the [Reset to default]-button to reset the template to the default (see figure 14 [4]).
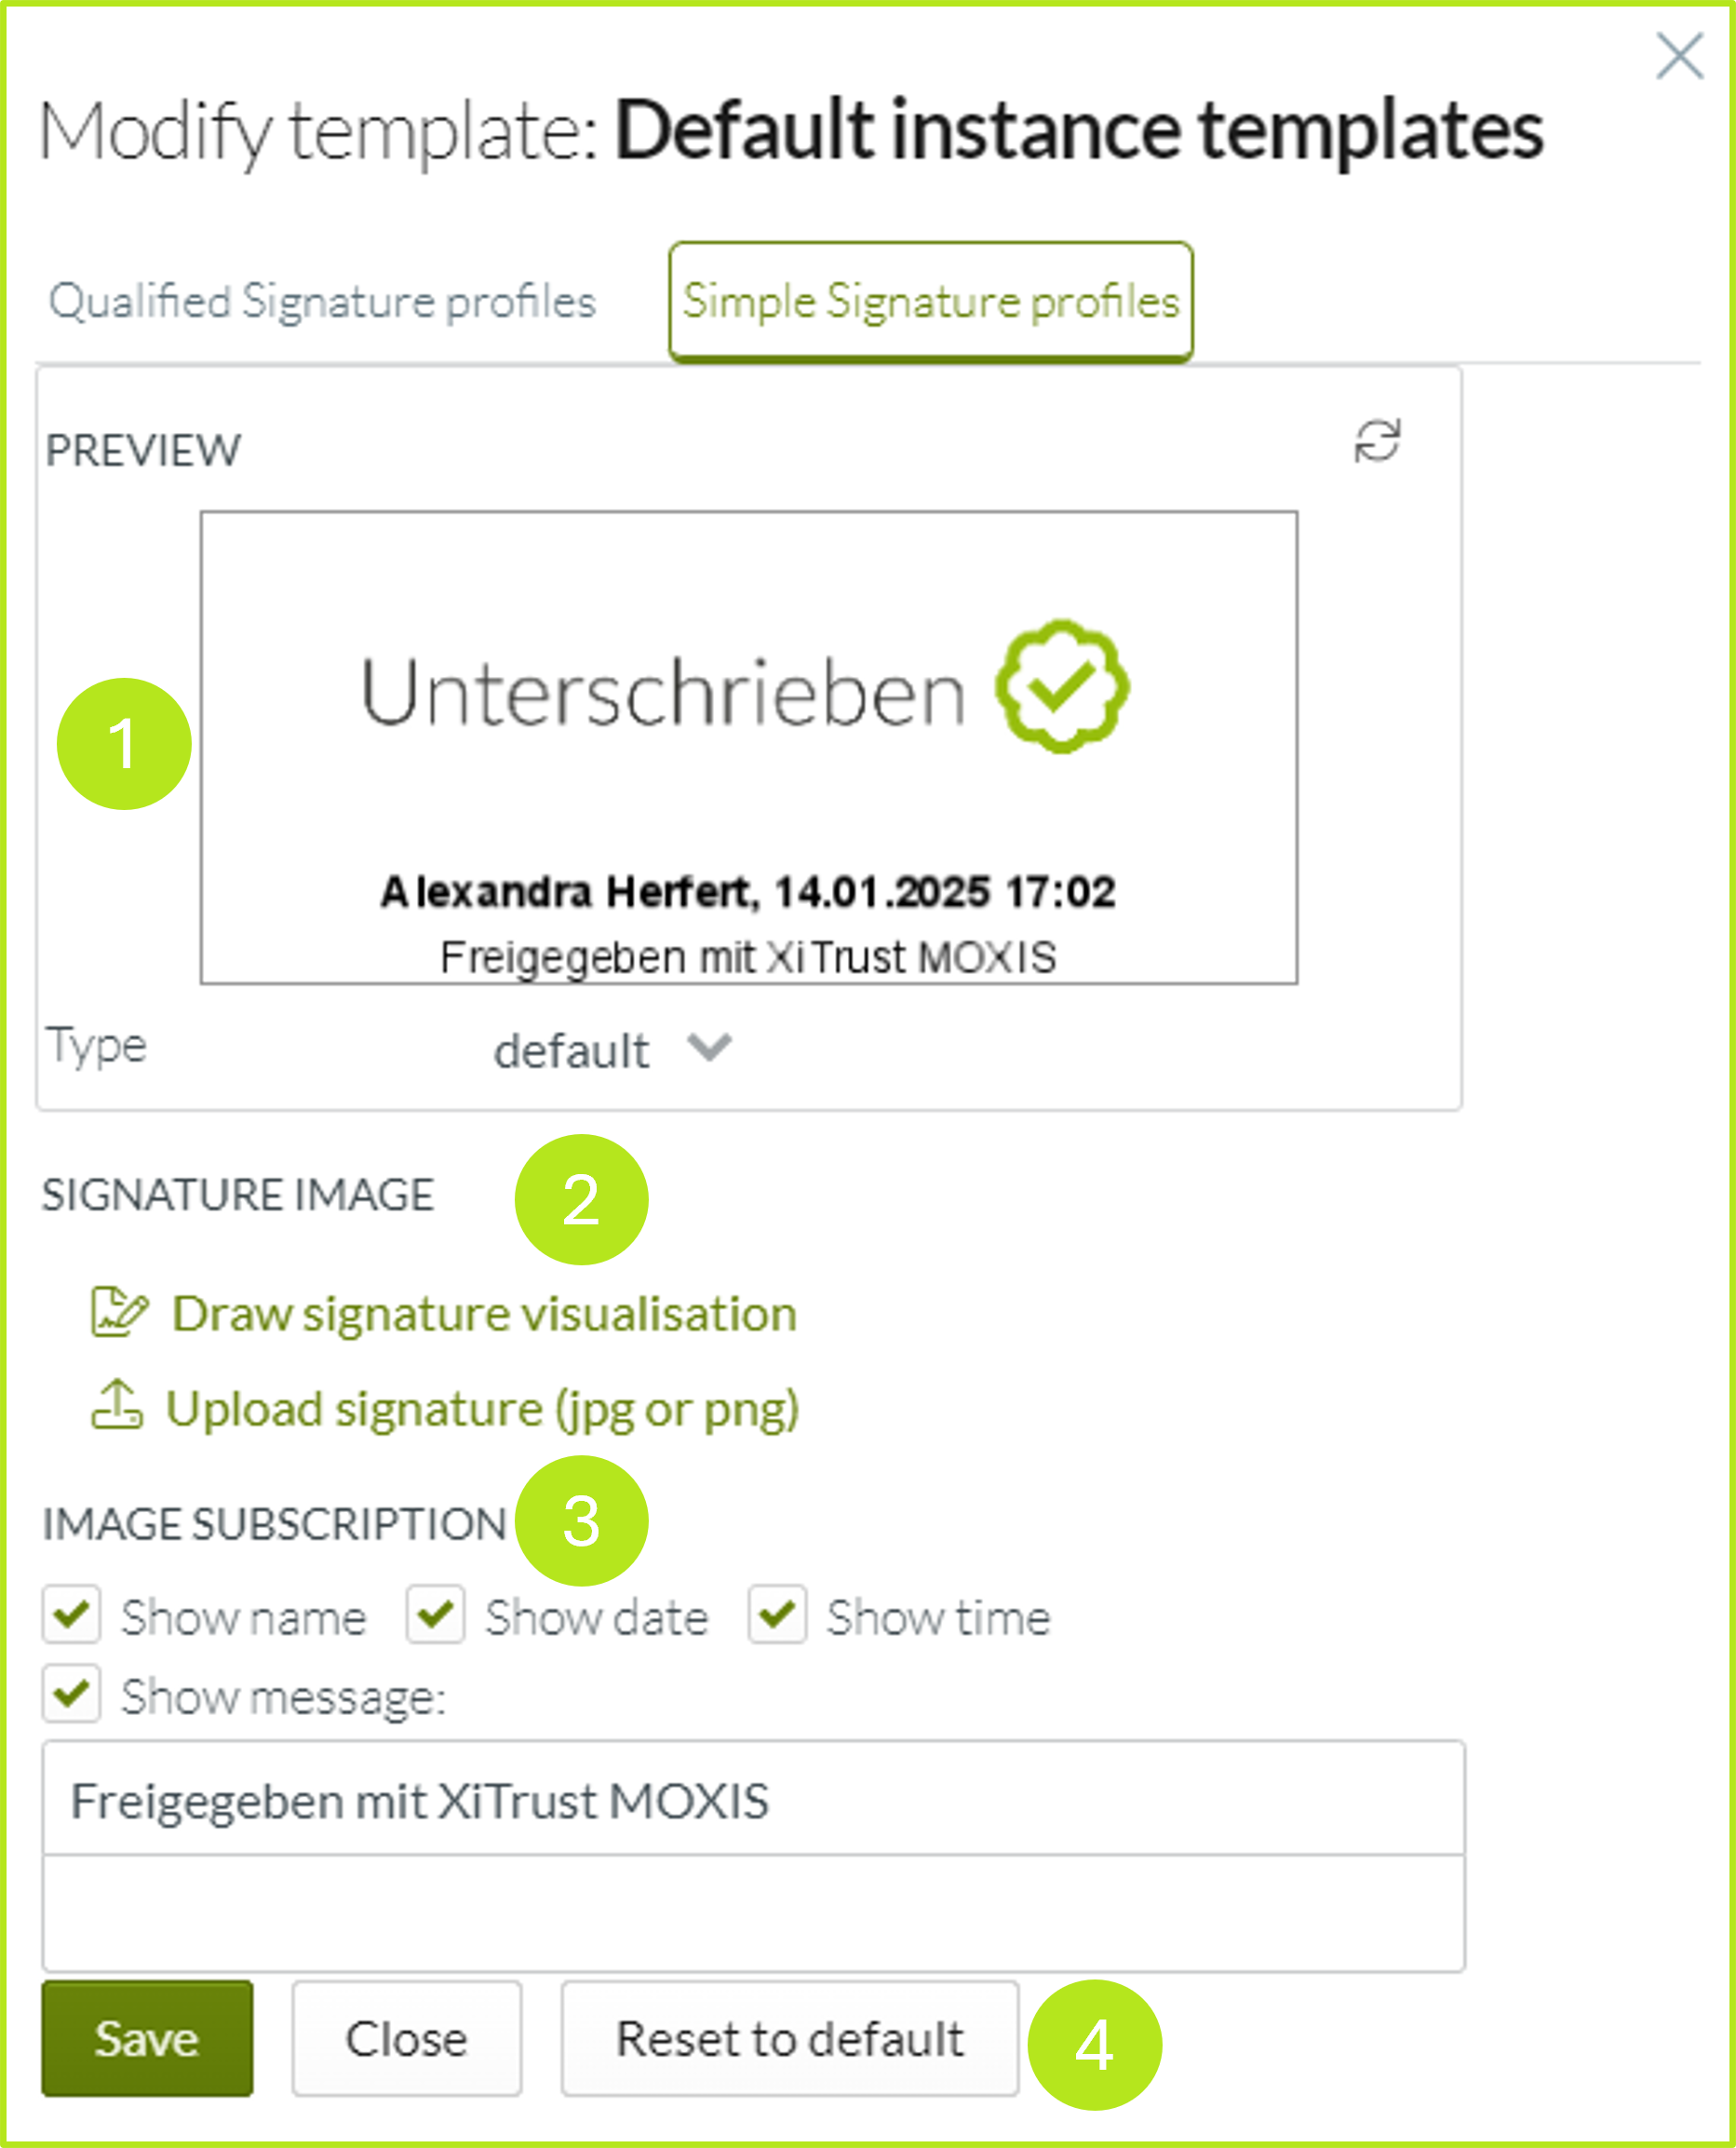
Figure 14: Edit standard template for the instance for simple signatures (approvals)
1.1.4. Email customisation in the email editor
It is now possible to customise the branding for internal and external email notifications (see figure 15).
To do this, click on the three green dots (see figure 15 [1]) in the email editor. A window will open. Here you have three options for continuing:
Edit branding
Edit footer (self-explanatory)
About MOXIS Mail Editor (more information about the MOXIS Mail Editor version)
Please click on the Edit branding option (see figure 15 [2]).
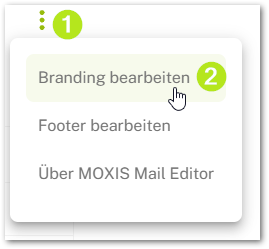
Figure 15: Edit branding in the E-Mail editor
A dialogue box will open. Here you have several options for editing the branding of your emails.
In addition to
the base colour (hex code can be entered or colours can be selected via the colour picker; see figure 17 [1]),
the basic font via the drop-down menu (see figure 17 [2]) and
the email alignment via the drop-down menu (right – centre – left (see figure 17 [3])).
define.
The following settings are also available:
Add a company logo (see figure 17 [6]) or
the name of the company (see figure 17 [7])
Depending on whether you have opened the Internal Email Configuration tab (see figure 17 [4]) or the External Email Configuration tab (see figure 16 [5]), this can be defined for internal or external recipients.
Please note: By default, no entry is stored for the company name (see figure 17 [7]). If you leave the field blank, a space will be displayed in the generated email (see figure 16 [1] and [2]).
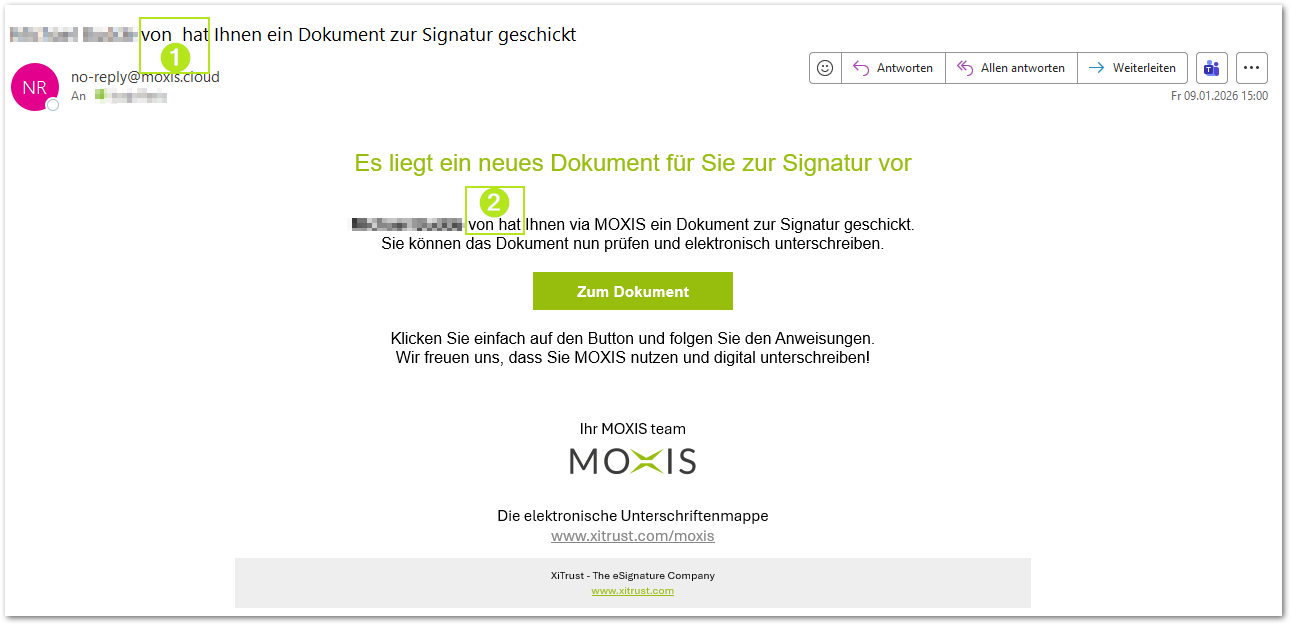
Figure 16: Email template without company name
It is also possible to send a test email in advance. To do this, please click on the [Send test email]-button (see figure 17 [8]) and send an email with the branding you have set.
You can cancel your branding changes during the process by clicking on the [Cancel]-button, reset to the default by clicking on the corresponding button next to it, or click on the [Save]-button. All three buttons are located at the bottom of the Edit Branding dialogue (see figure 17 [9]).
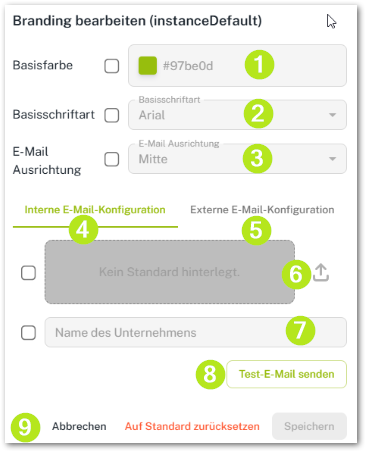
Figure 17: E-Mail Branding-Options