
Customise the signature page
Content
In addition to designing the MOXIS interface, you can also customise signature sheets using the branding options. This article provides an overview of the various options for customising signature sheets in MOXIS.
1. Adaption of signature pages
As an administrator, you have the option of creating signature sheets yourself and uploading them as individual defaults. The default profile is the display of a signature sheet as it is inserted in MOXIS if no custom signature sheets have been stored for MOXIS as a whole or per tenant. A customised signature sheet, on the other hand, can contain a logo or the company design, for example.
Figure 1 shows such a customised signature sheet with a logo on which a signature has been stored (see figure 1 [2]). The actual space intended for the signature remains empty (see figure 1 [1]).
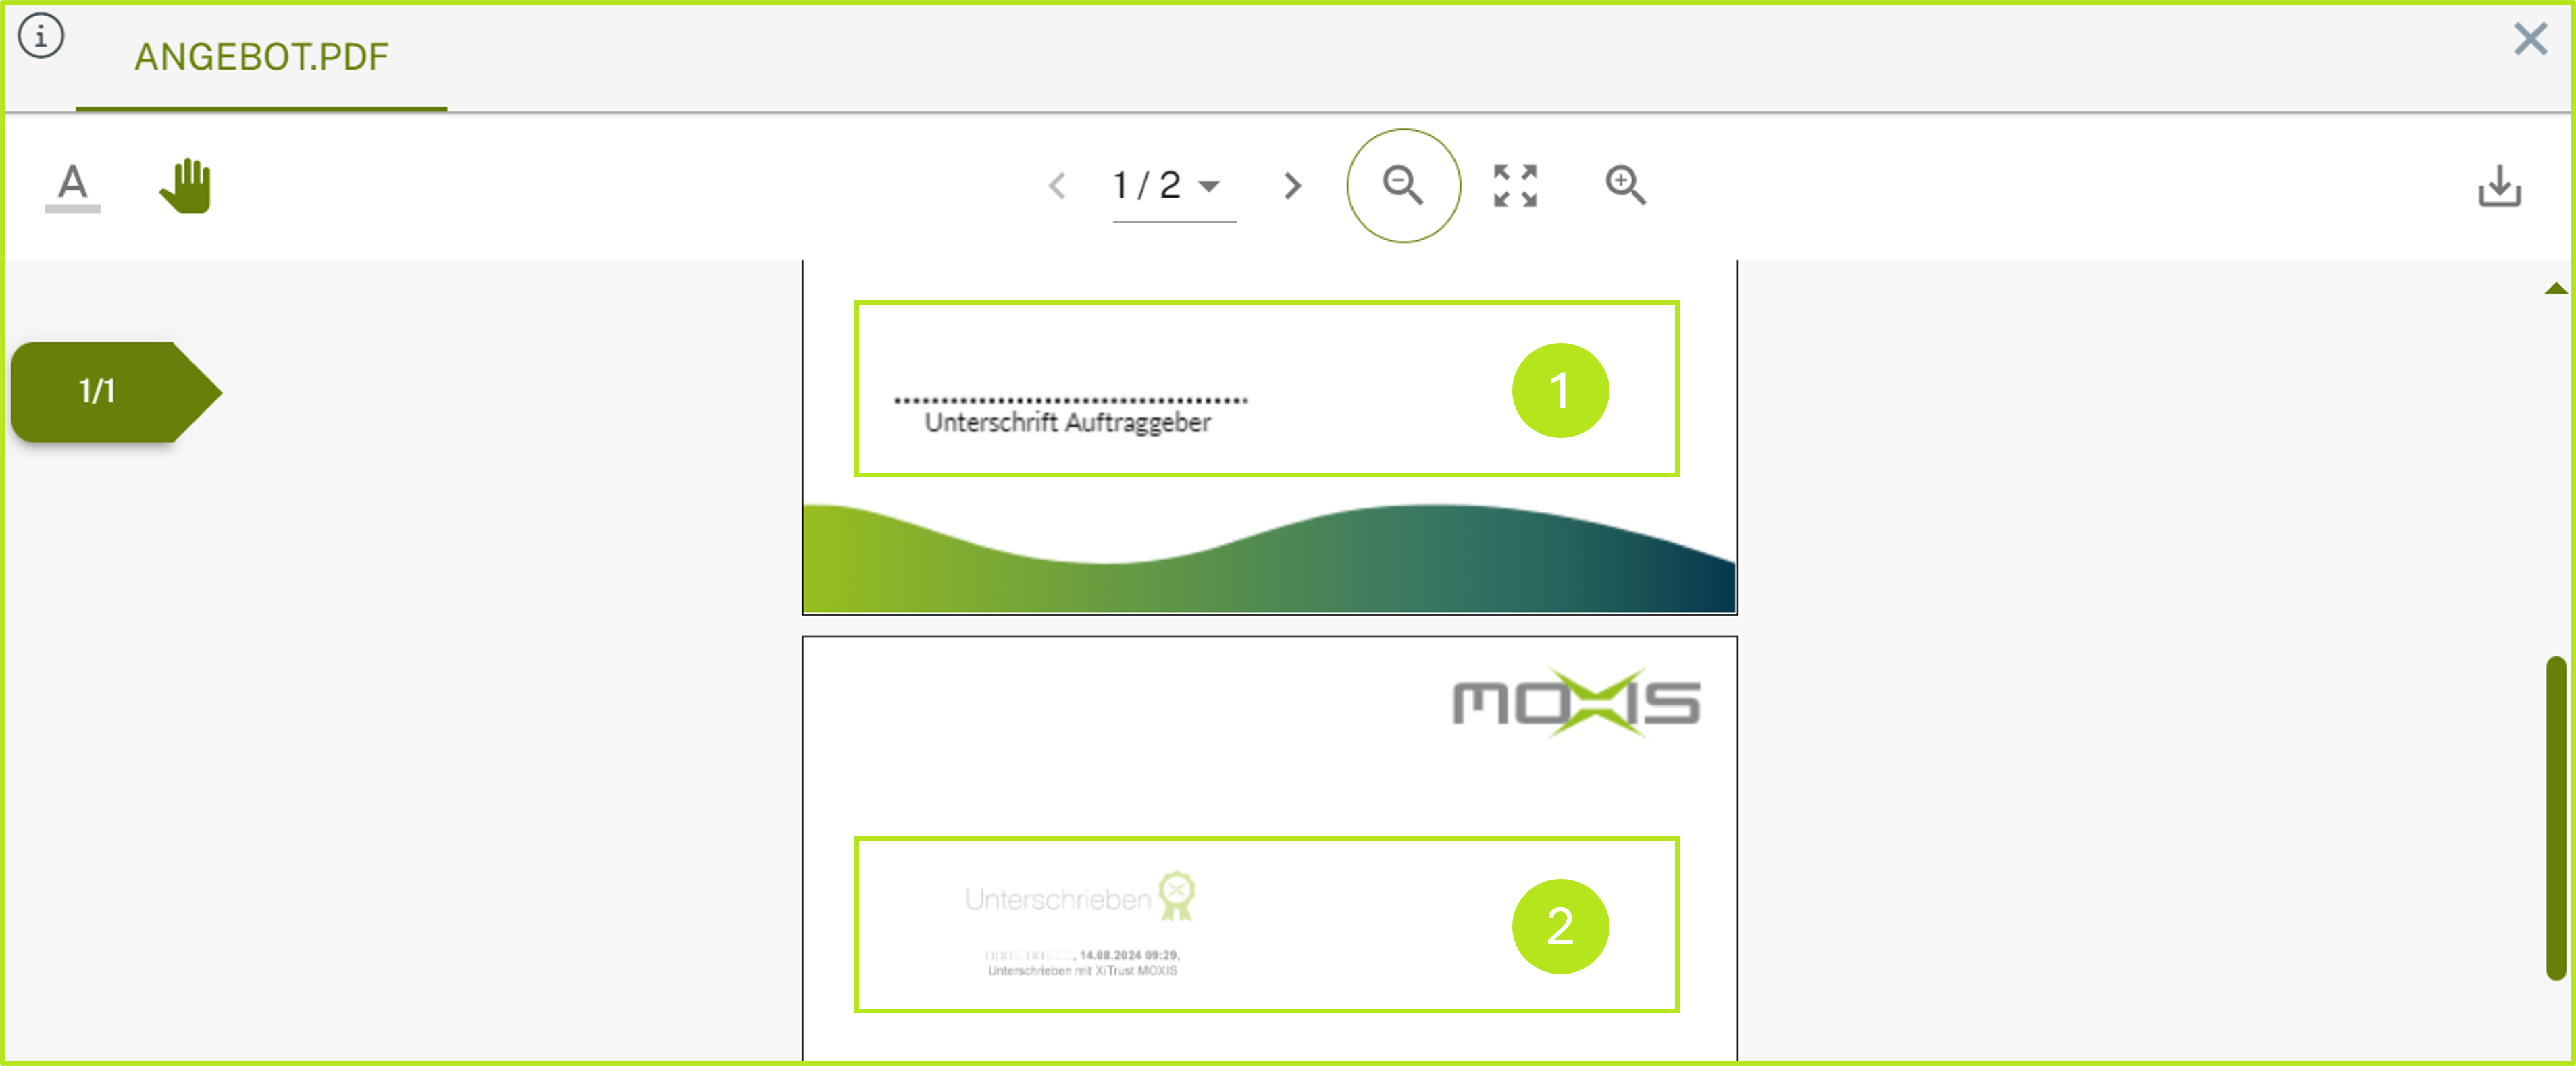
Figure 1: Example for a signature page
1.1. Step-by-step instructions: Making changes to the standard signature sheet profile in MOXIS
Step 1: Go to the Administration area and open the MOXIS Branding tab. Then navigate to the Signature page-tab (see figure 2 [1]).
Step 2: The interface is divided into two sections. In the first section, you can customise the default templates for the instance. In the second section, you can add custom templates for a specific client:
Default instance siganture page (see figure 2 [2]) and
To customise a default template, prepare a signature sheet and upload it using the [Go to the document]-button.
Custom signature page per tenant (see figure 2 [3])
To assign a signature page to a tenant (for more information on tenants, see here), please upload a signature page of your choice under Upload signature sheet in the line with the desired tenant.
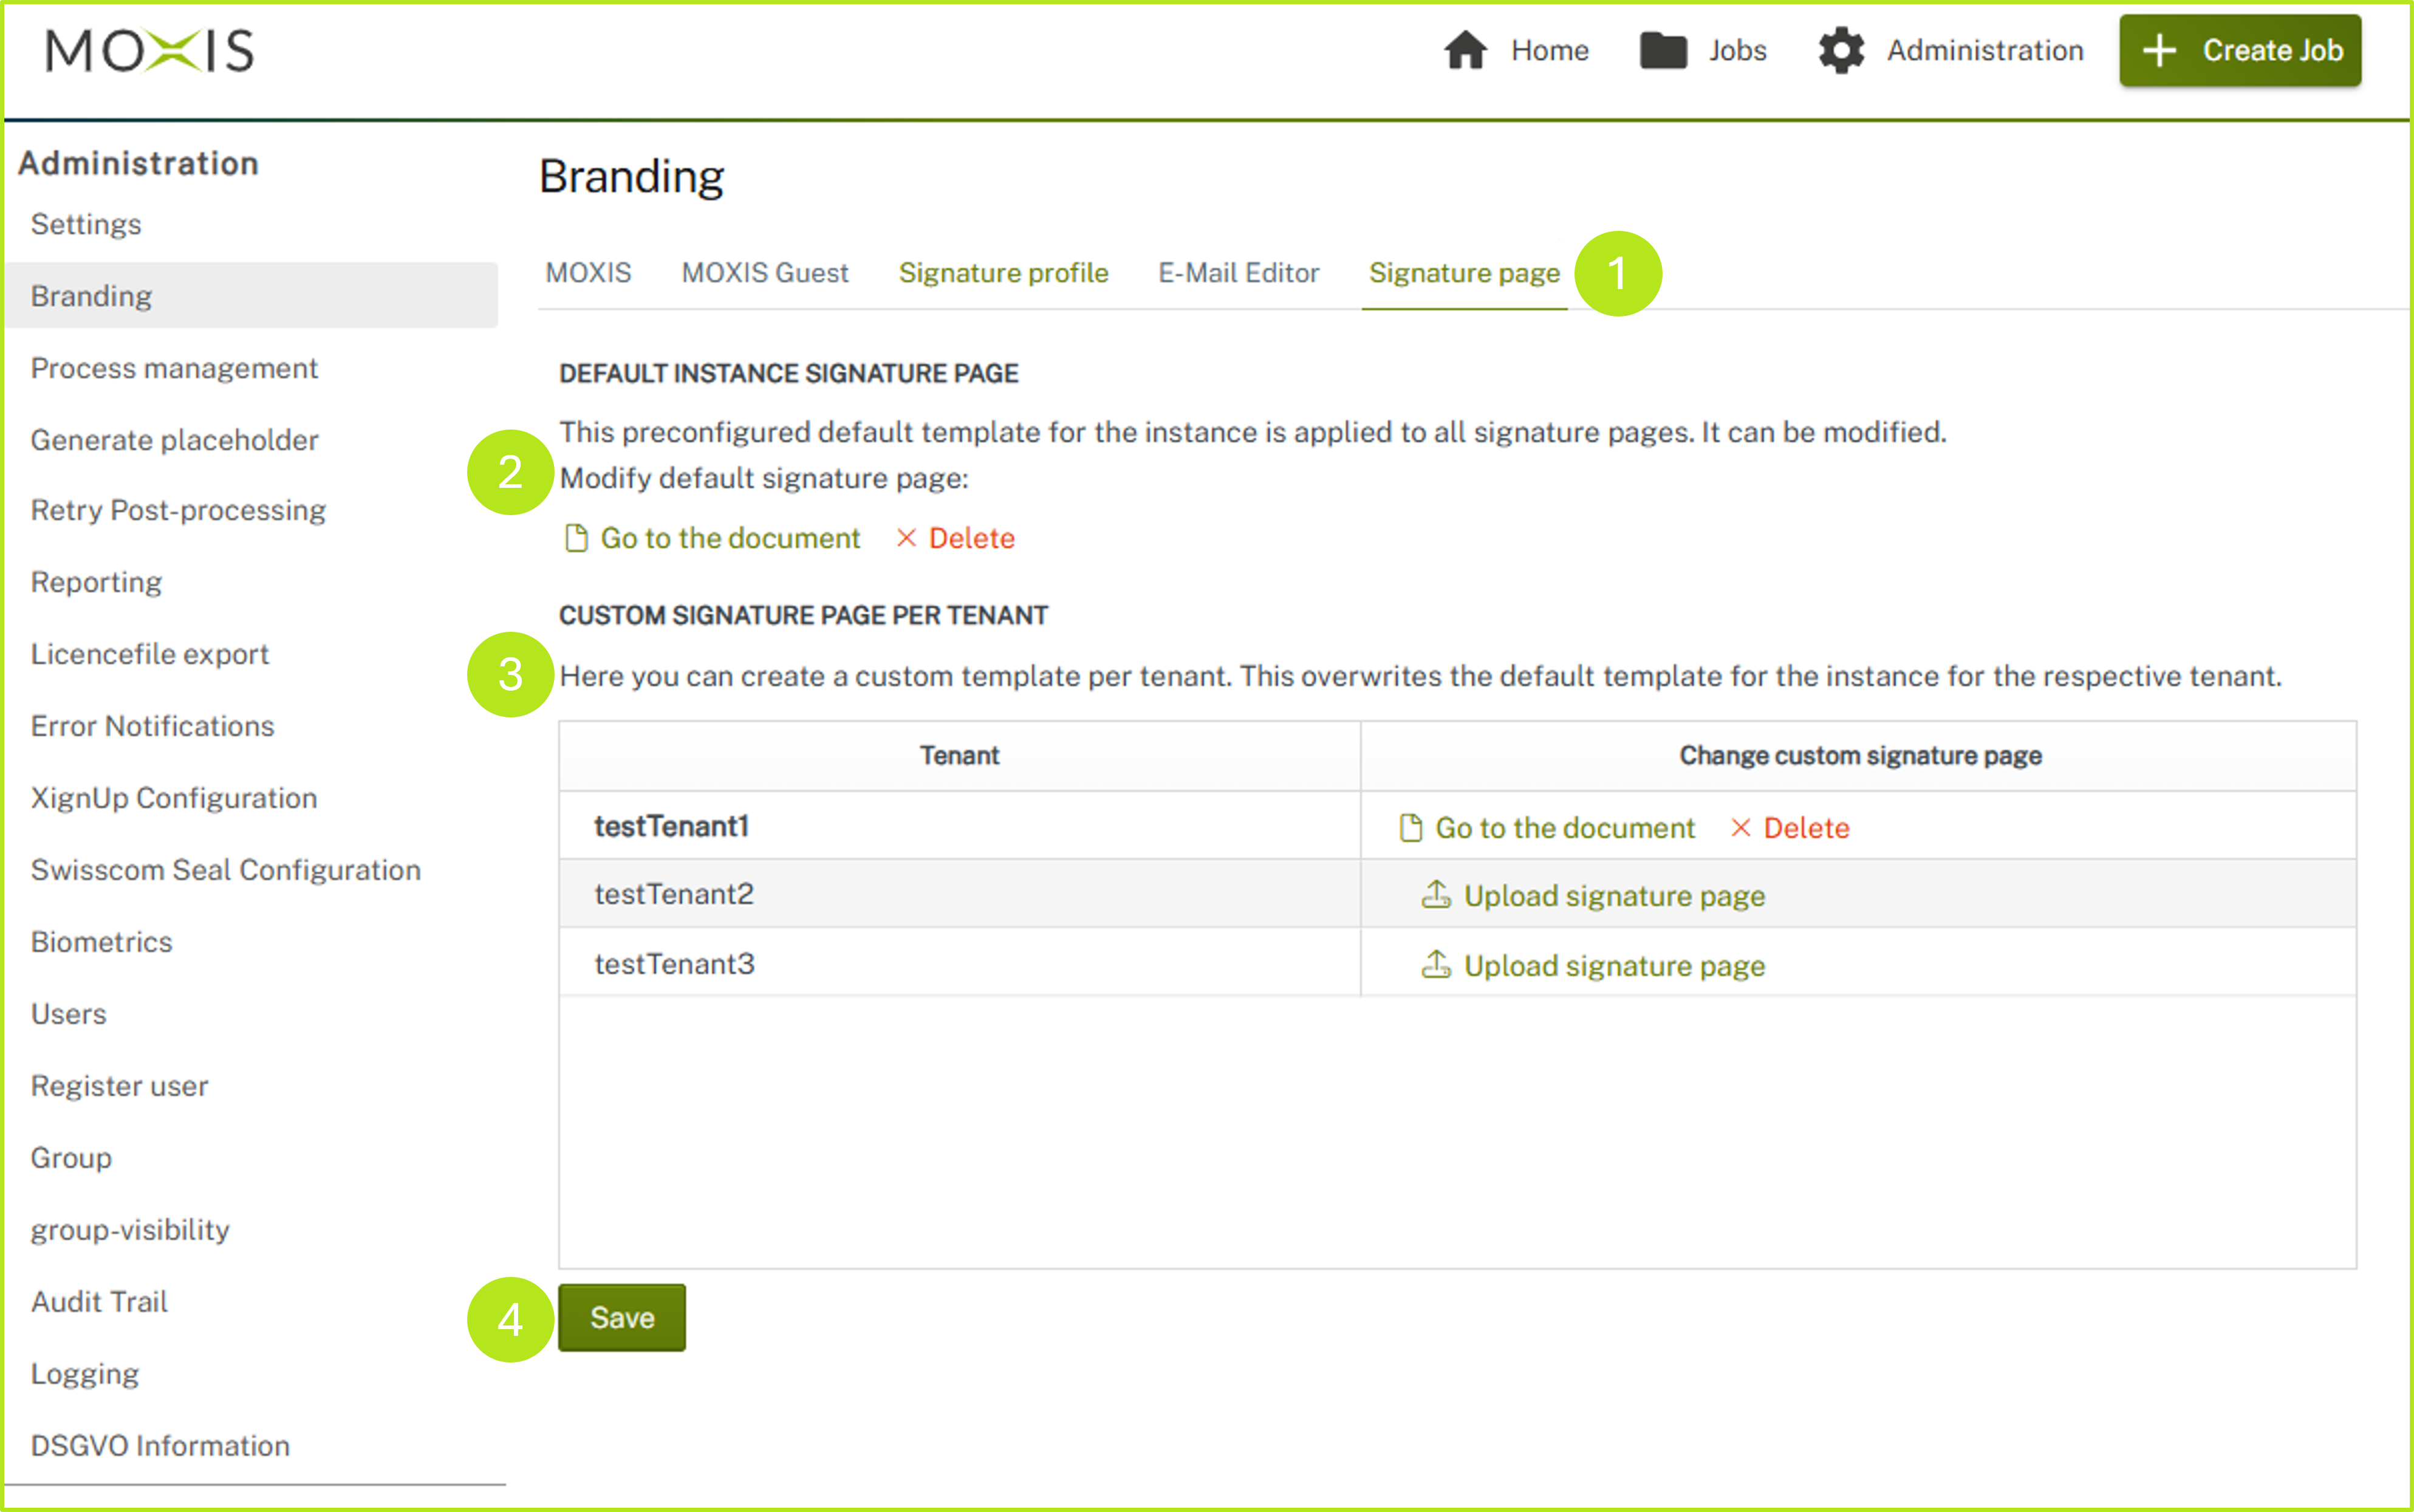
Figure 2: Changes on the signature page in MOXIS Branding
Step 3: Once you have made all the changes, click on the [Save]-button (see figure 2 [4]).