
Key Management
Content
To ensure a secure signature process, biometrics can be used as an additional user authentication method. Biometrics is an additional, optional feature offered by XiTrust. This means that biometrics must have been activated during the configuration of your MOXIS instance in order for you to use it.
Only when biometrics is enabled can you capture biometric data in MOXIS during the signature process for external signatures. Here, both the position and speed of the mouse pointer or external input devices such as tablet pens are tracked. This article provides detailed information on this topic.
1. Requirements for the correct tracking of biometric data
To correctly track biometric data for external approvals, you must have two components:
A PKCS #12 file
A key
1.1. PKCS #12 file
The PKCS #12 format is a binary format for storing cryptographic objects according to RFC 7292. It usually contains the server certificate, any intermediate certificates (i.e., the chain of trust), and the private key in a single file. A PKCS #12 file can be encrypted and signed.
PKCS #12 files are created with the extensions PFX and P12 by default. These are also the accepted file formats for key management. The file can only be uploaded once the password and alias fields (see Figure 1 [2]) have been filled in.
1.2. Key
The key corresponding to a certificate, as well as the alias (= name, e.g., “Test Key”) and password, are in most cases created and imported by the XiTrust Customer Operations Team (CO Team). However, as an administrator, you also have the option of entering a key yourself.
1.2.1. Key management
If biometrics has been activated for your account, the menu item Biometrics will be displayed in the administration menu. Changes to the configuration can be made there. The menu item Biometrics (see figure 1 [1]) contains the tabs Key Management and Check PDF (see figure 1) .
2. Step-by-step instructions: Key creation and activation
Step 1: Open the Biometrics-tab (see figure 1 [1]) in the MOXIS Administration and open the Key management-tab (see figure 1 [2]).
Step 2: Enter a password (see figure 1 [3]) and an alias (see figure 1 [4]) in the fields provided.
Step 3: Click Upload (see figure 1 [5]) and upload the PKCS #12 file.
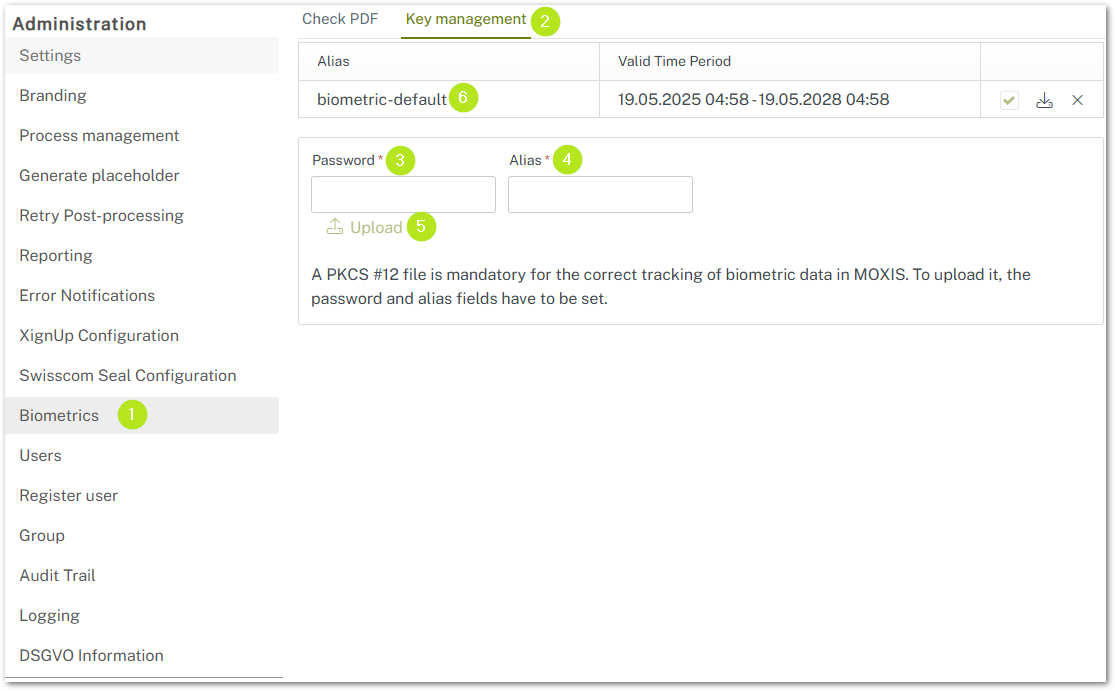
Figure 1: Create and activate a key
Step 3: The entry is now visible in the key management with the alias name and the validity period (see figure 1 [6]).
Step 4: Check the box in the editing column (see figure 1). This ensures that this key is also activated for external signatures.
XiTip
Please note: Once you have checked the box, you can no longer deactivate the key, only delete it.
Congratulations! You have created your first key.
2.1. Deleting a key
To delete a key, click on the x icon in the edit column (see figure 1). Please note: If you delete a key, all biometric data that was encrypted with it can no longer be read.
This is why when you click on the X, a pop-up window will open informing you that existing PDFs with biometric data can no longer be read.