
Visual design of the signature profile
Content
In addition to designing the MOXIS interface, you can also use the branding options to customise signature profiles. These can be configured for both qualified and simple signatures. This article provides an overview of the various options for customising signature profiles in MOXIS.
1. Change to the standard profile for qualified and simple signatures
As an administrator, you can customise the default signature profiles for all MOXIS users. The default profile is how signatures appear in MOXIS if users have not saved their own profiles.
You can make adjustments by changing the default template for the instance under the respective tab in the administration settings. The following step-by-step instructions provide an overview of your options.
XiTip
Changes to the default settings are global. This means that if you change something here, you will automatically change the default signature profile for all MOXIS users (depending on whether you have selected the qualified or simple signature).
1.1. Step-by-step instructions: Making changes to the signature standard profile in MOXIS (qualified signature)
Step 1: Go to the administration area and open the MOXIS Branding tab (see figure 1 [1]). Then navigate to the Signature Profiles tab (see figure 1 [2]).
Step 2: The interface is divided into two sections:
Standard templates for the instance (see figure 1 [3]) and
In the first section, you can customise the standard templates for the instance.
XiTip
You can as well modify customized signature profiles for tenants. However, the function that allows you to add user-defined templates to a specific client (tenant) must be configured in your instance. If the function is not configured, you will only be able to modify the default instance templates (see figure 1).
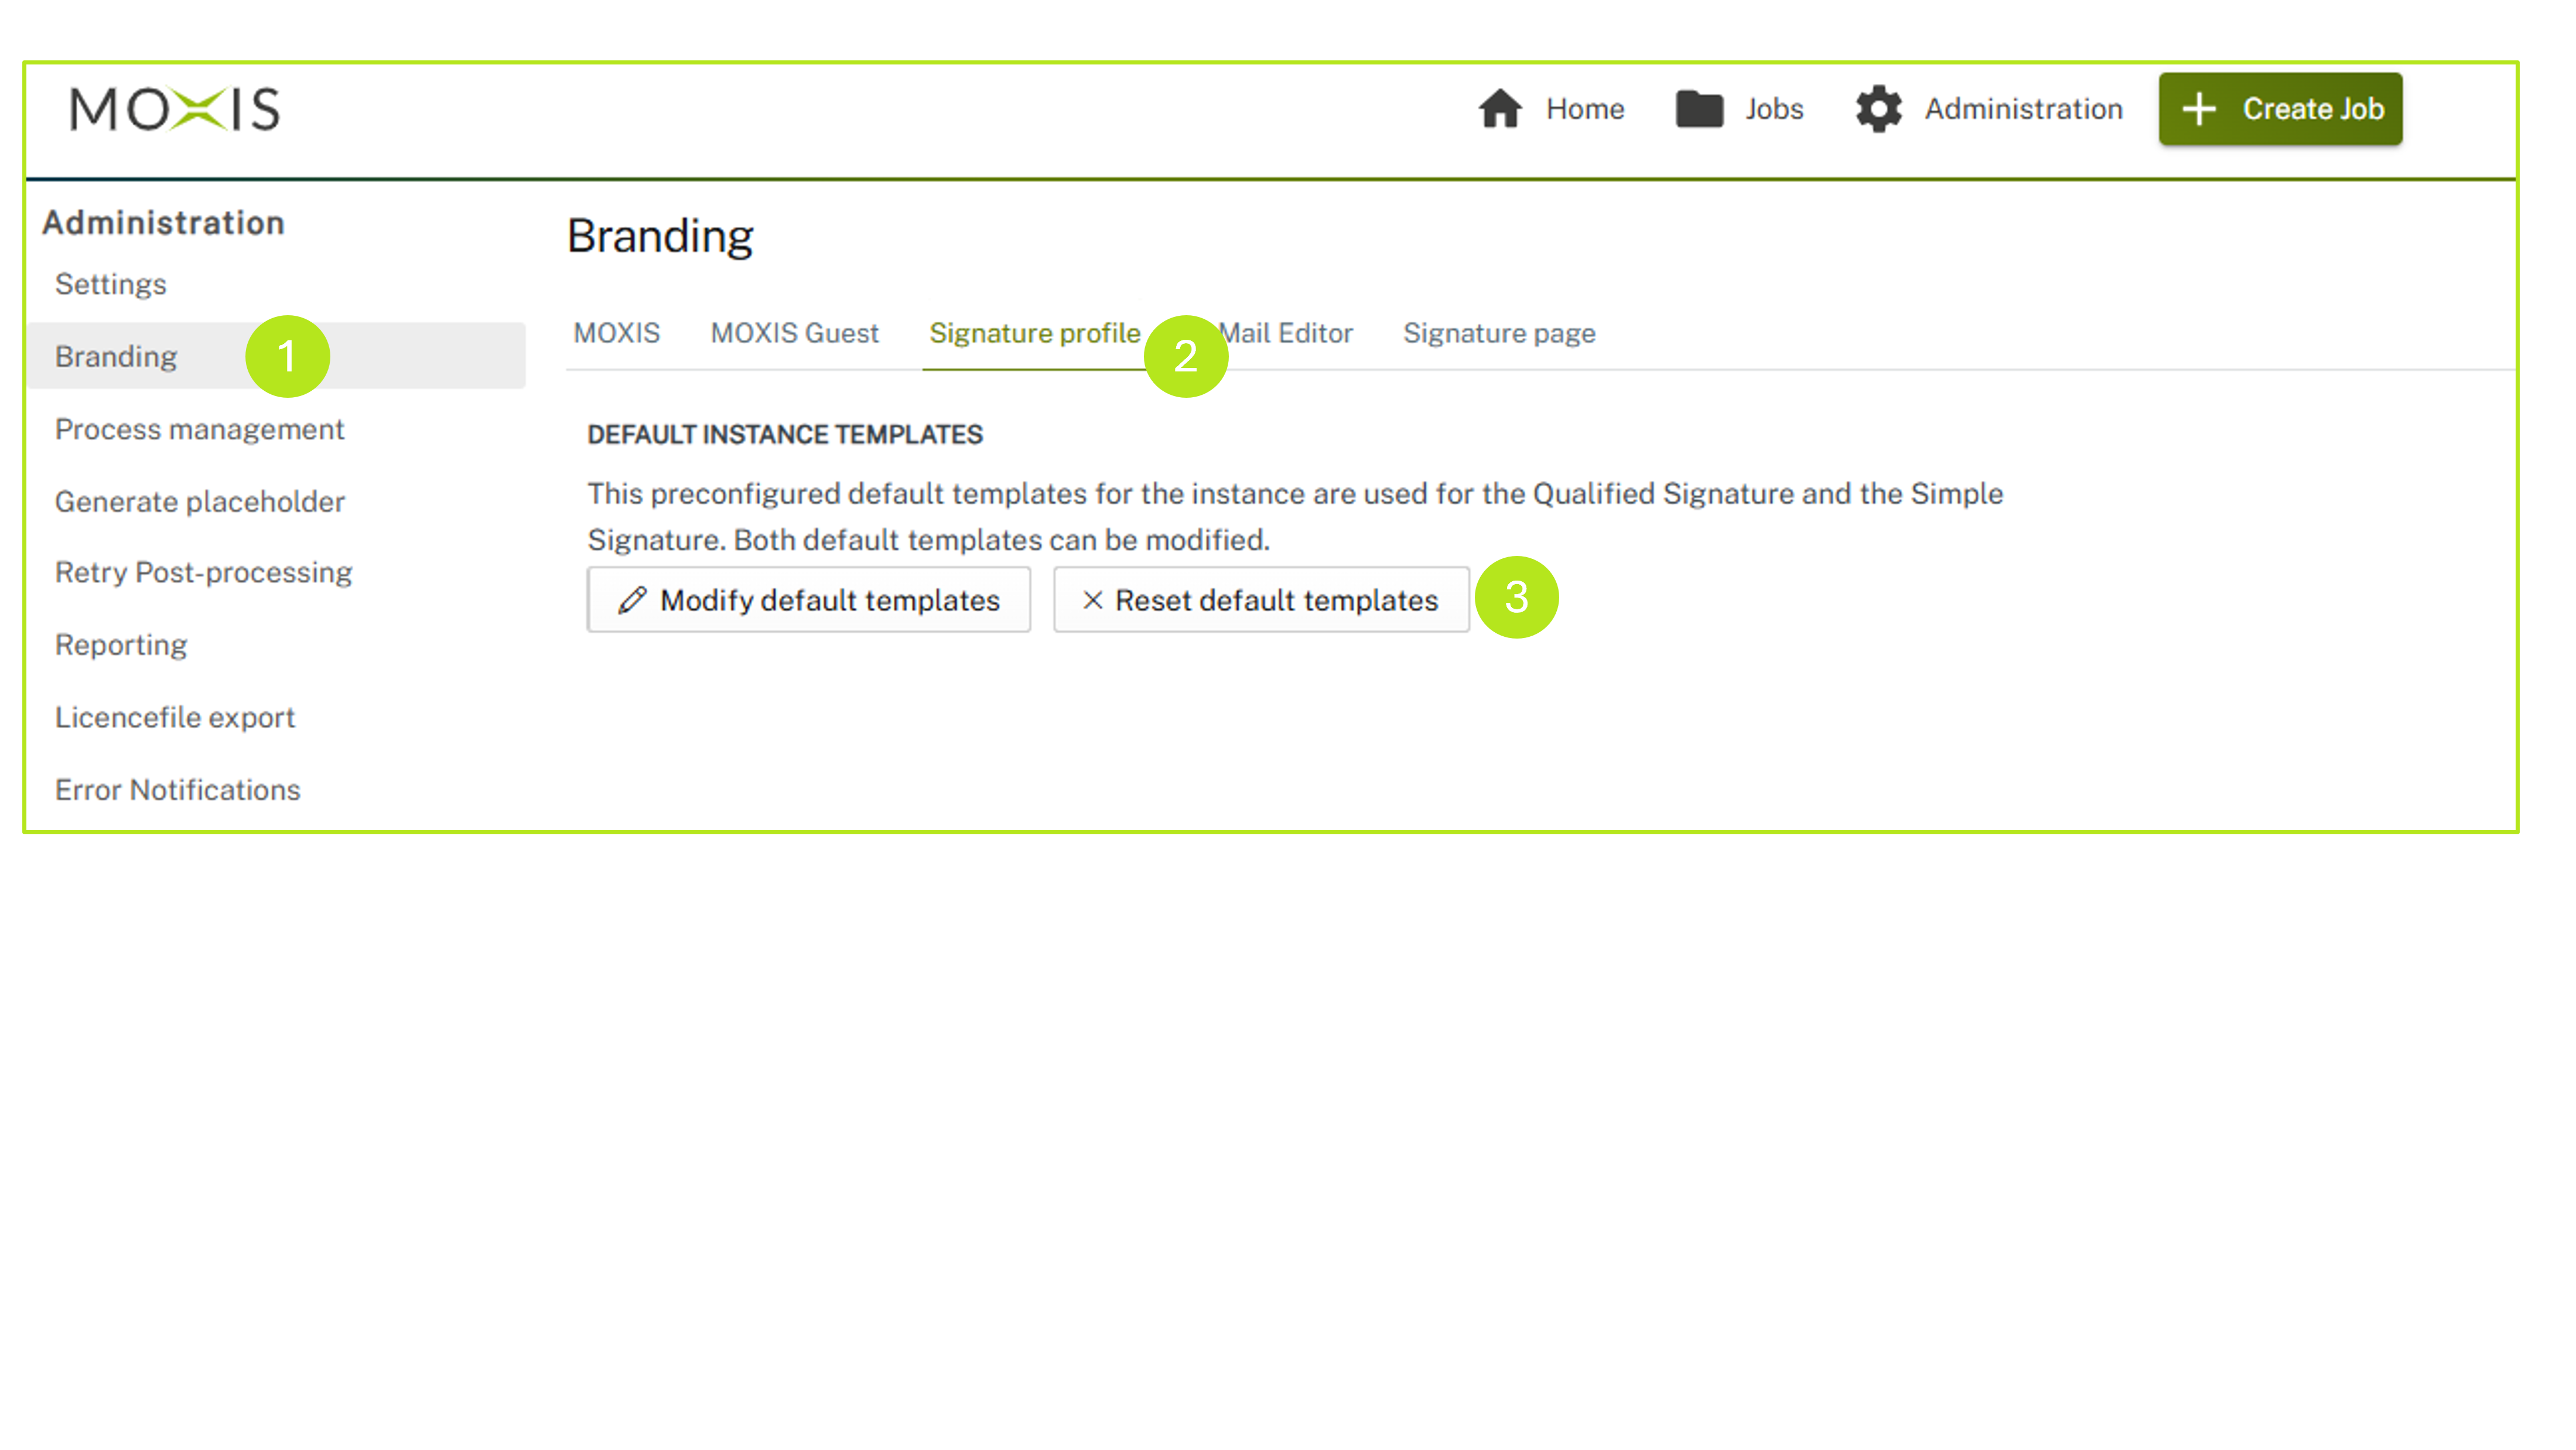
Figure 1: Default instance templates
XiTip
Tenants are created for you by XiTrust. If you are interested in working with tenants, please contact your XiTrust contact person. We will be happy to advise you.
Step 3: Create a standard template. You can use this standard template for simple or qualified signatures. To do this, first click on the [Modify default templates]-button (see figure 1 [3]).
Please note: If, while creating the standard template, you decide that you would like to use the original settings after all, you can do so at any time by clicking on the [Reset default templates]-button (see figure 1 [3]).
Step 4: Now select whether you want to edit a signature profile for a simple or qualified signature. If you want to edit a qualified signature profile, continue with Step 5. If you want to edit a simple signature profile, go to section 1.2.
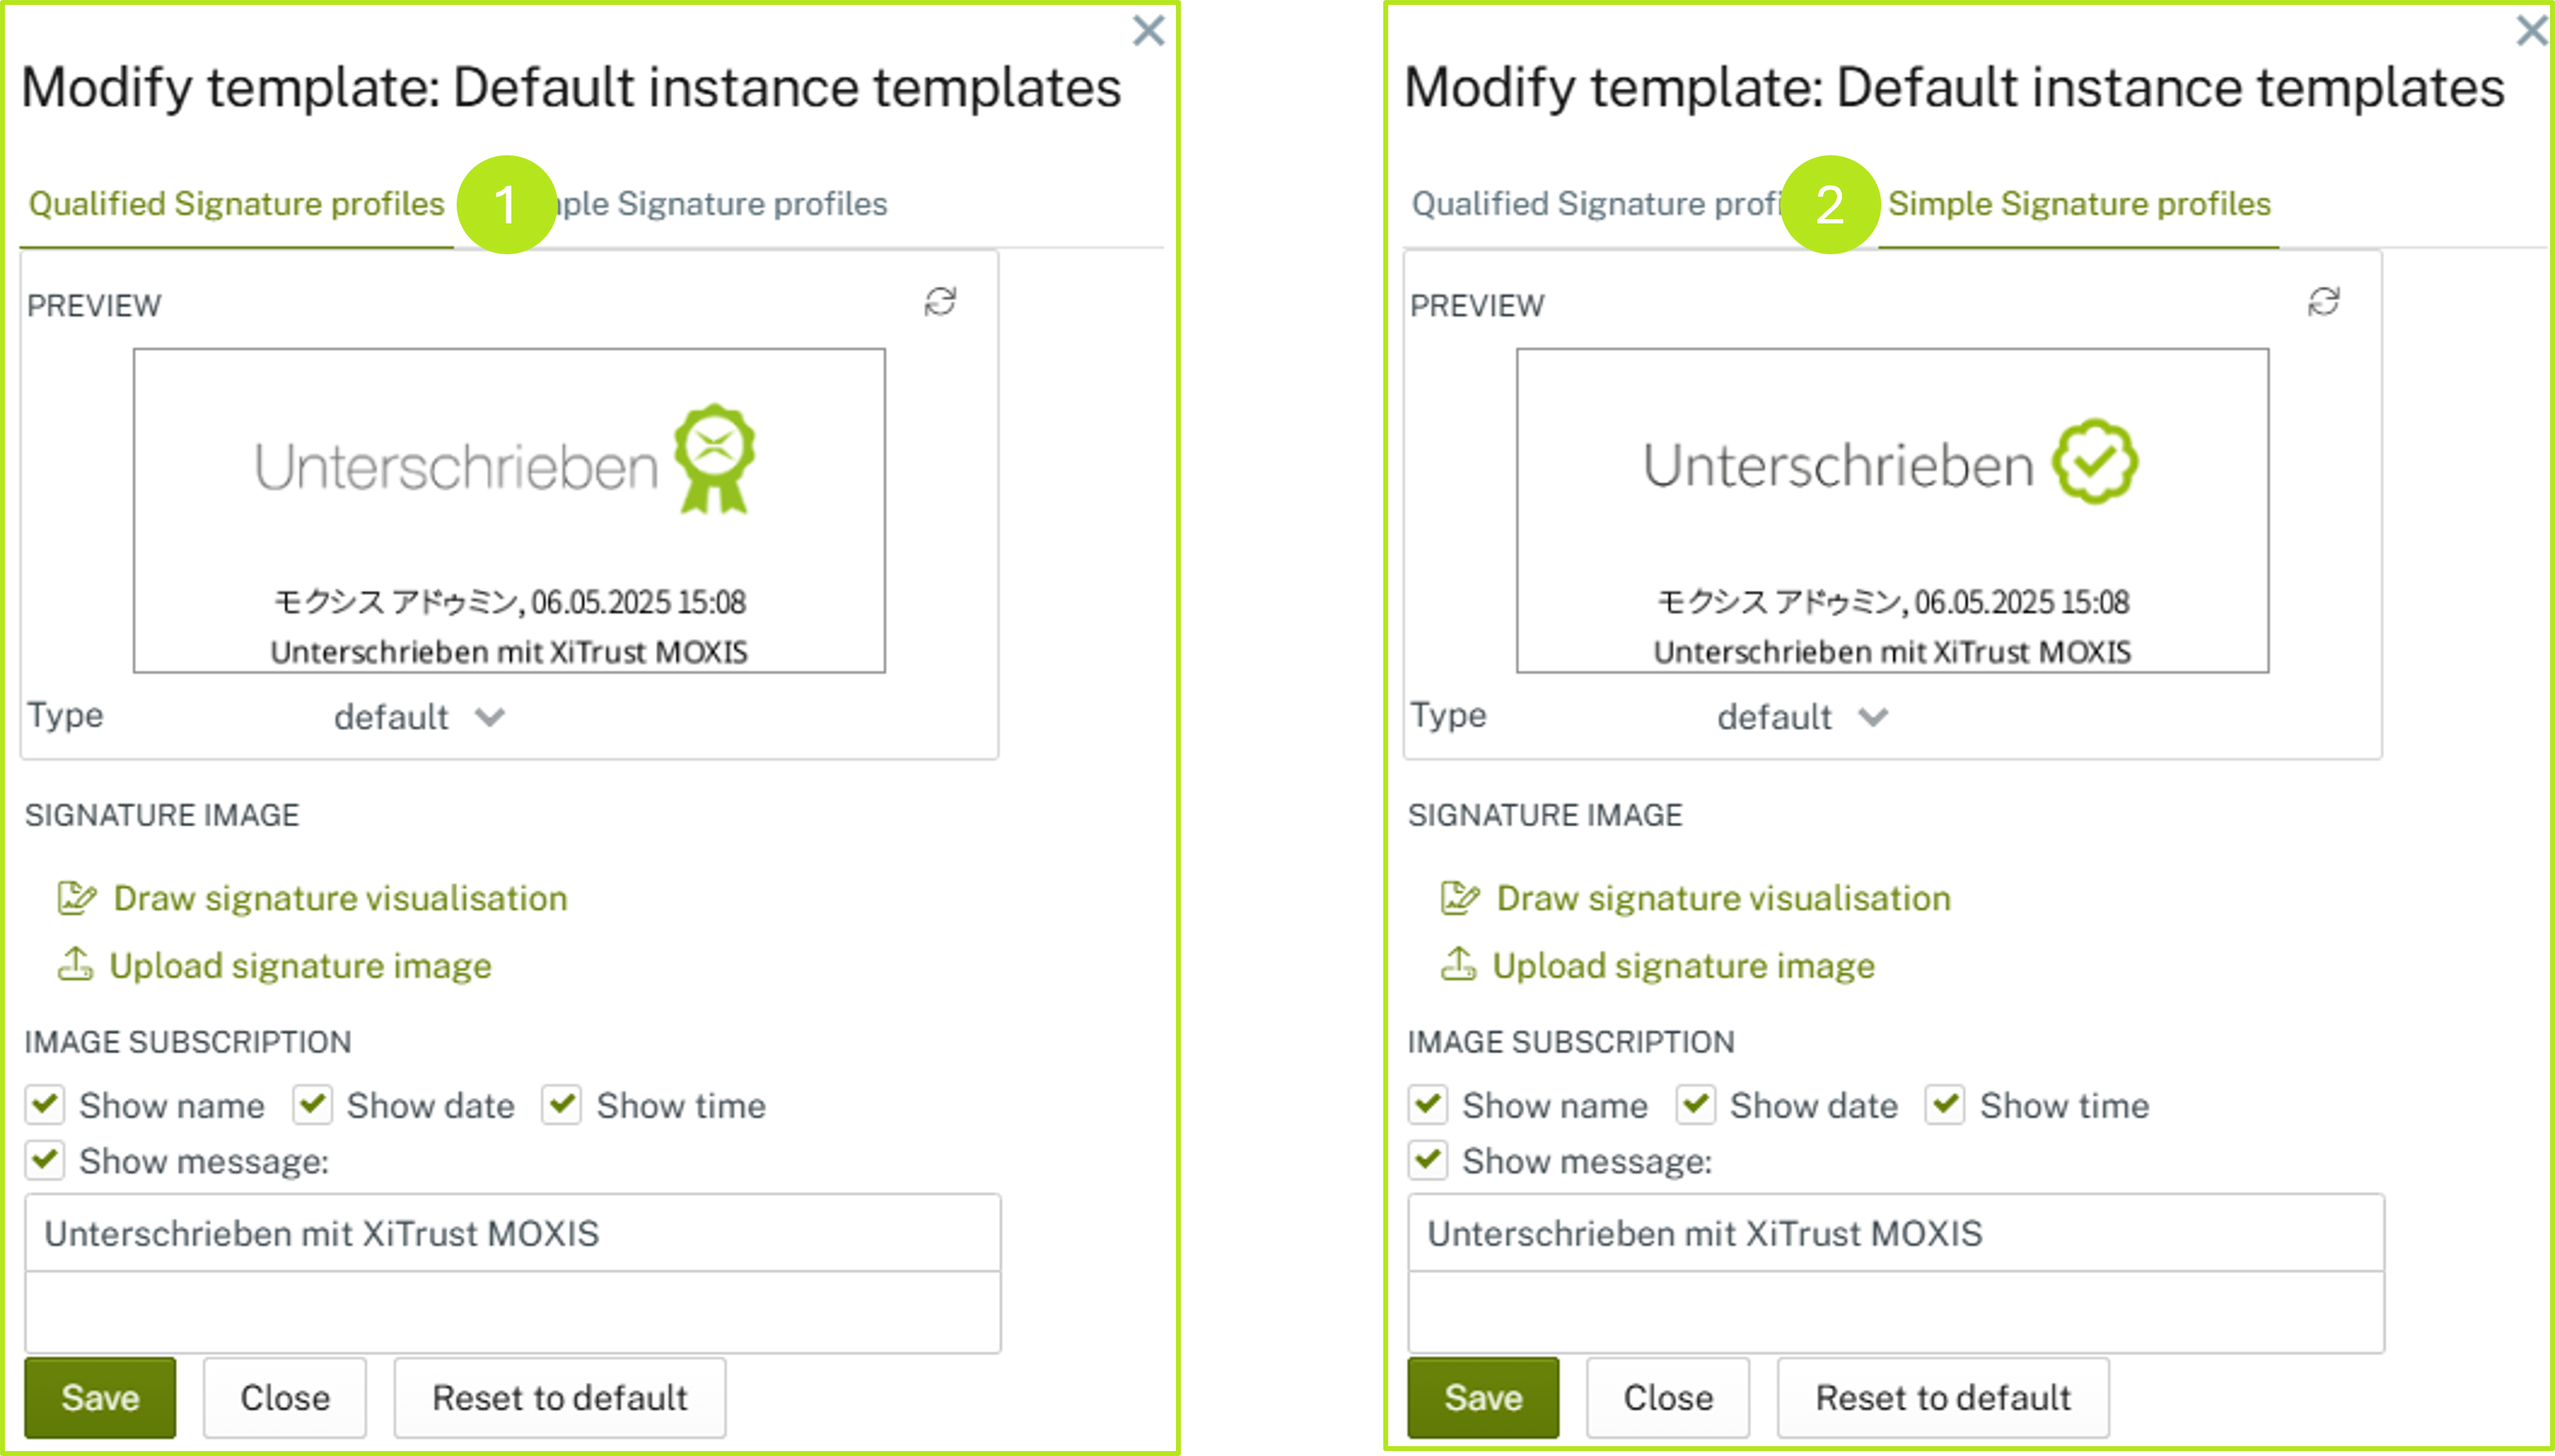
Figure 2: Default instant template for qualified signature vs profile for simple signature
Step 5: In the overview for Profiles for qualified signatures, you have the following options for customising the signature:
(1) This window shows a live preview of the changes you have made (see figure 3 [1]).
(2) You can customise the signature image in two different ways (see figure 3 [2]):
By clicking on Draw signature visualisation, you can draw a signature visualisation directly in MOXIS and save it.
By clicking on Upload signature image, you can upload a signature image of the desired visualisation of the signature.
(3) Depending on how much detail you want the signature visualisation to show, you can modify this here via the Image subscription option (see figure 3 [3]):
Show name
Show date
Show time
Show message (please enter the relevant text here).
XiTip
The message can be customized so that it is displayed individually for each user. You can either control this yourself using so-called resolvers or contact your responsible XiTrust contact person, who will be happy to help you.
Step 6: Click the [Save]-button to save your changes. The [Close]-button closes the window without saving. The [Reset to default]-button resets the template to the default settings (see figure 3 [4]).

Figure 3: Modify template: Default instance template for qualified signature profiles
1.2. Step-by-step instructions: Making changes to the signature standard profile in MOXIS (simple signature)
Similar to the signature profile for the qualified signature (see figure 3 [1 - 4]), the signature profile for simple signatures must also be edited (see figure 4 [1 - 4]):
Step 1: This window shows a live preview of the changes you have made (see figure 4 [1]).
Step 2: You can customise the signature image in two different ways (see figure 4 [2]):
By clicking on Draw signature visualisation, you can draw a signature visualisation directly in MOXIS and save it.
By clicking on Upload signature image, you can upload a signature image of the desired visualisation of the signature.
Step 3: Depending on how many details you want the signature visualisation to show, you can modify these here via the Image subscription option (see figure 4 [3]):
Show name
Show date
Show time
Show message (please enter the relevant text here).
Step 4: Click on the [Save]-button to save your changes. The [Close]-button closes the window without saving. The [Reset to default]-button resets the template to the default settings (see figure 4 [4]).
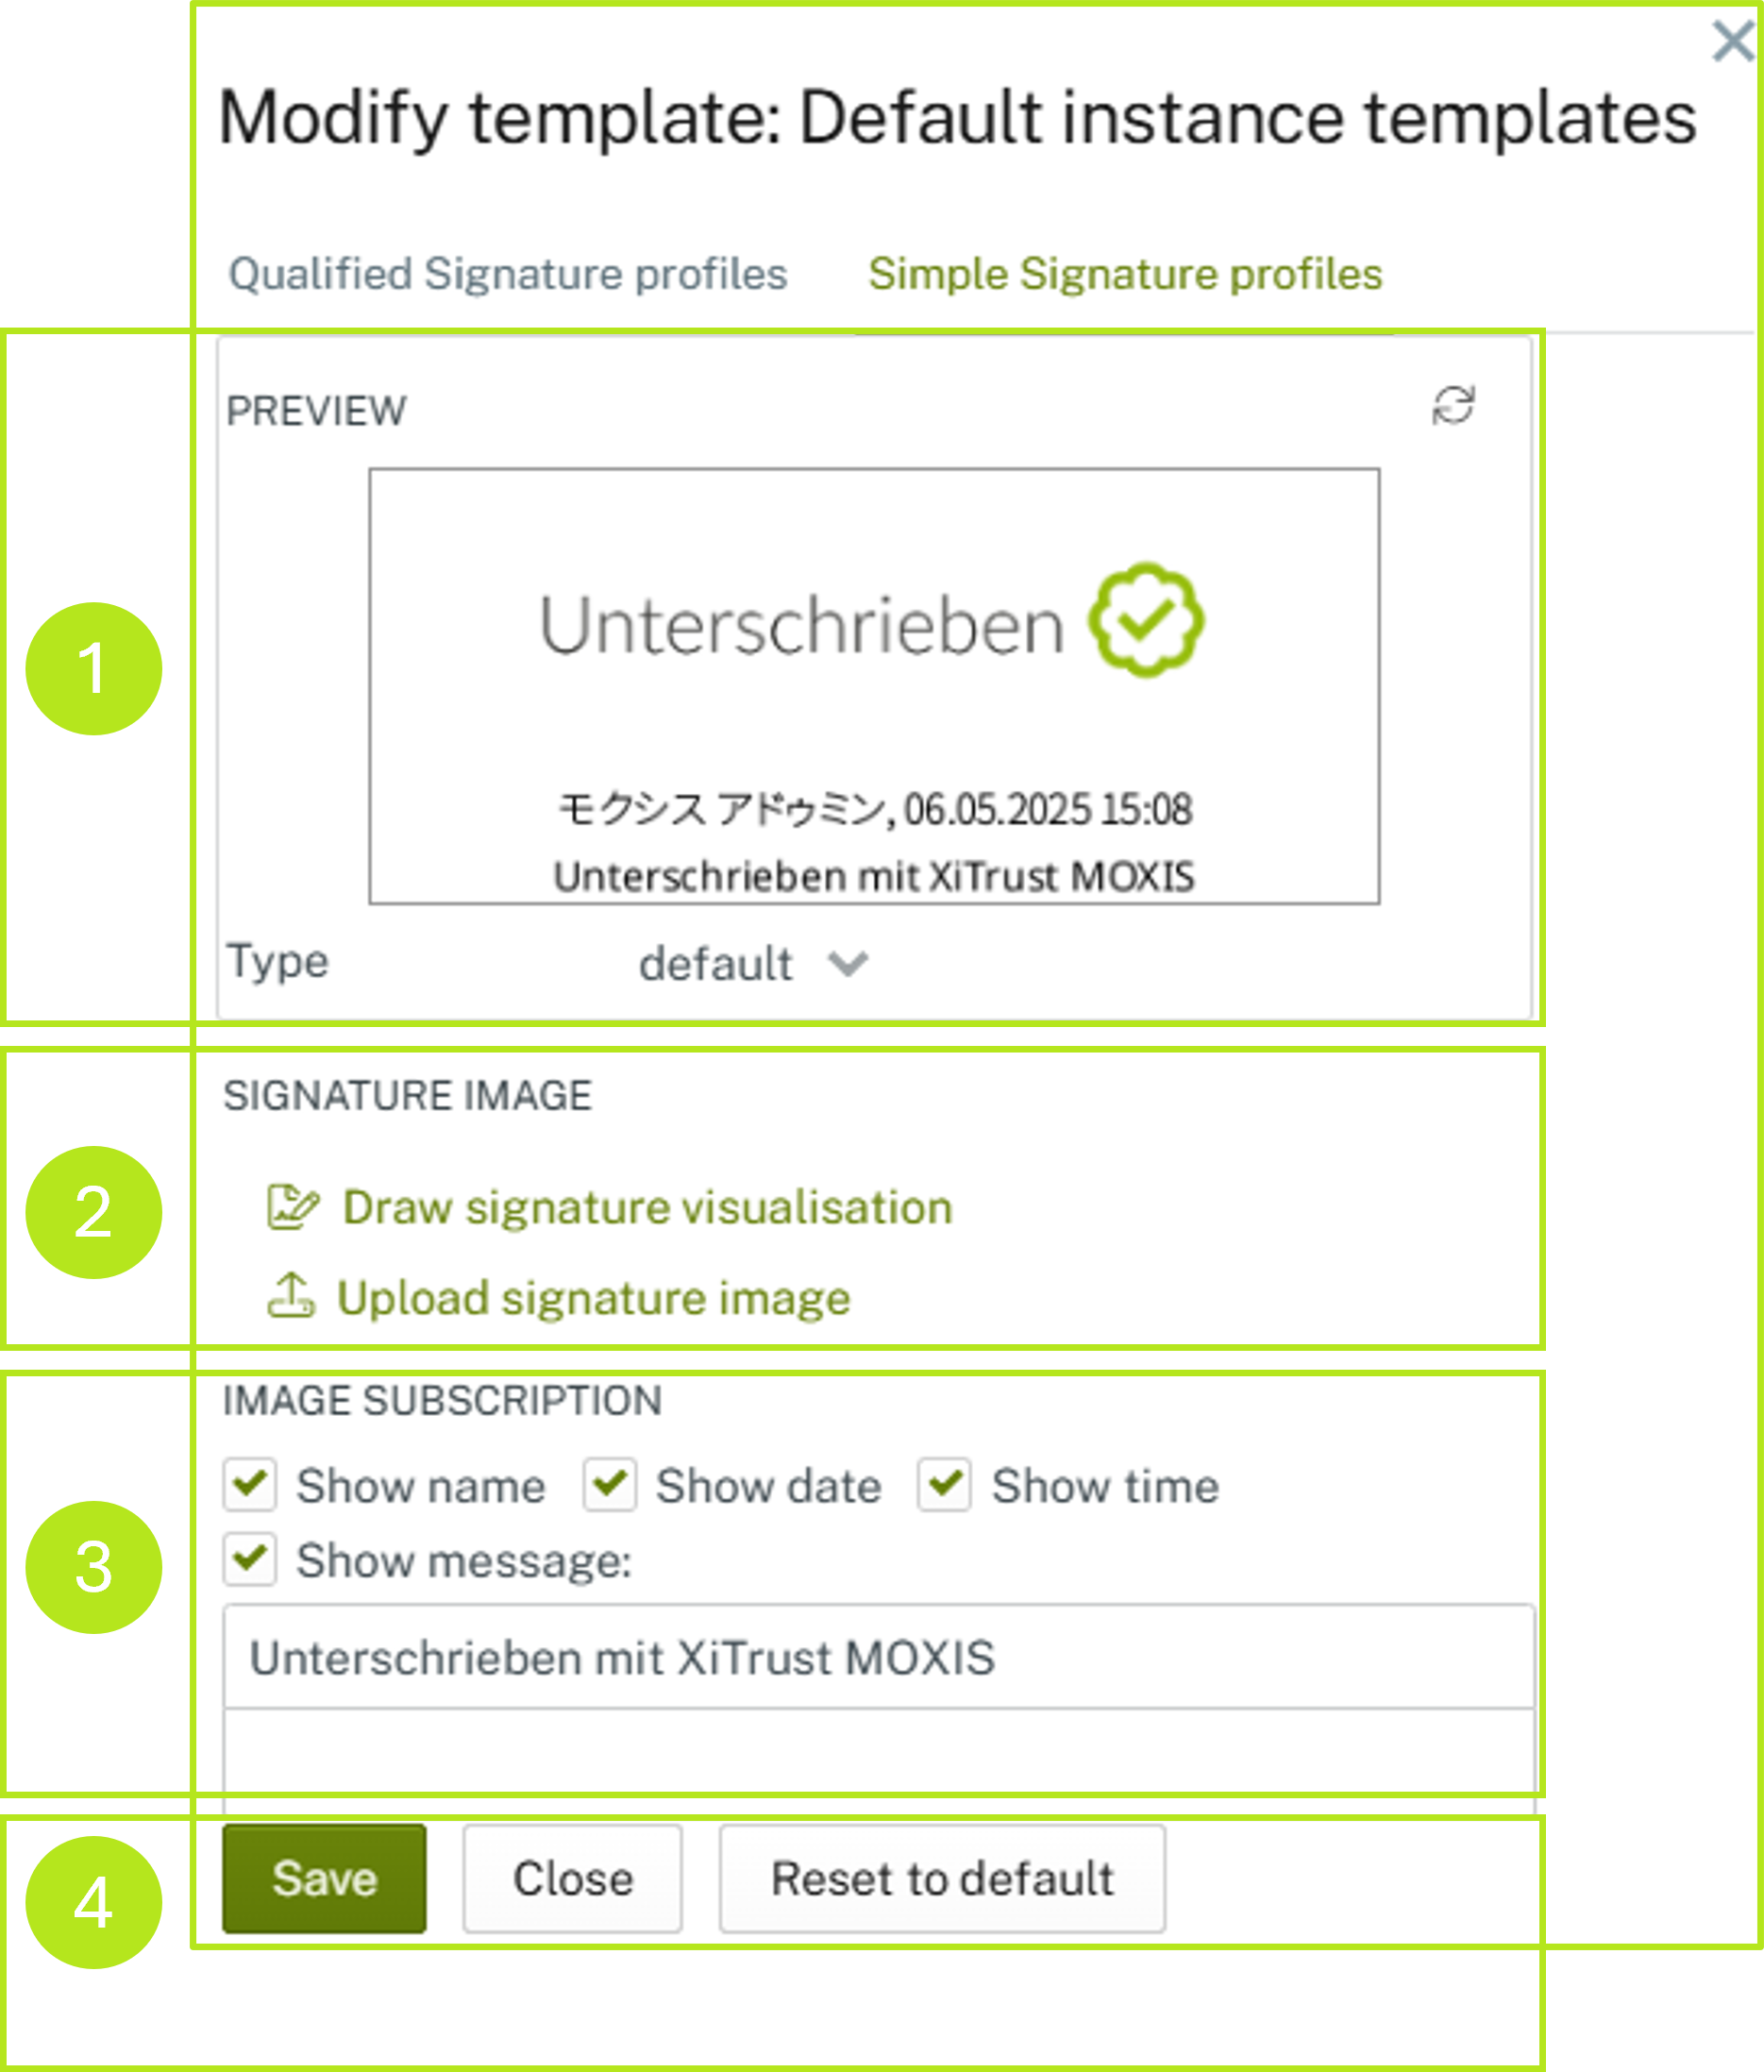
Figure 5: Edit standard template for simple signatures (approvals).
1.3. Create custom templates per client
In the second section of the signature profile settings, you have the option of creating custom templates per client (tenant). Before we go into detail, let's take a closer look at the terms.
1.3.1. Definition
What is a tenant?
A tenant is a sub-division of a company. This could be a department, group, team or even a branch.
XiTip
Tenants are created for you by XiTrust. If you are interested in working with tenants, please contact your XiTrust contact person. We will be happy to advise you.
Use case: Let's stick with the example of the branches. Let's assume that you work for a banking group operating in the DACH region, which consists of Bank 1 Austria, Bank 2 Germany and Bank 3 Switzerland. Since there are country-specific adjustments in the individual branches despite the cross-border umbrella of the parent bank, the signature profiles must also be adapted. It is therefore conceivable that the Group Bank 1 Austria uses the simple signature with the Standard of the Instance template via the tenant Bank 1 Austria. The Group Bank 2 Germany, on the other hand, is assigned a user-defined template for the qualified signature via the tenant Bank 2 Germany, as we created in Chapter 1.1, and so on.
What is the instance standard?
The instance standard is the default template for signature profiles that MOXIS automatically provides.
What is a user-defined template?
A user-defined template is a template that has been created specifically for a client (tenant).
1.3.1.1. Creating user-defined signature profiles per client (tenant) for the signature profile
To create a custom template and assign it to a tenant, simply click on the pencil icon in the Custom section in the row with the corresponding tenant.
In the window that opens, you can customise your signature profile for the qualified signature or the simple signature (release) as described in chapter 1.1.
1.3.1.2. Edit existing custom signature profiles
To customise an existing custom signature profile, please click on the pencil icon.
To delete it, click on the x icon.