
OPTIONAL: MOXIS Webservice User
Content
A MOXIS web service user can be created optionally if you want to use a programming interface. This requires a configured user in this application. This article explains how to create and configure a user.
1. Step-by-step instructions: Create web service users
Step 1: Please log in to the administration area and open the Settings (see figure 1 [1]). Here, under the Web service users-tab (see figure 1 [2]), you will find a current overview of the web service users that have already been created.
Please note: Click on the pencil icon to edit existing users (see figure 1 [3]), while clicking on the x deletes a user (see figure 1 [3]).
Step 2: To create a new user, please click on the [+ Add new user]-button (see figure 1 [4]).
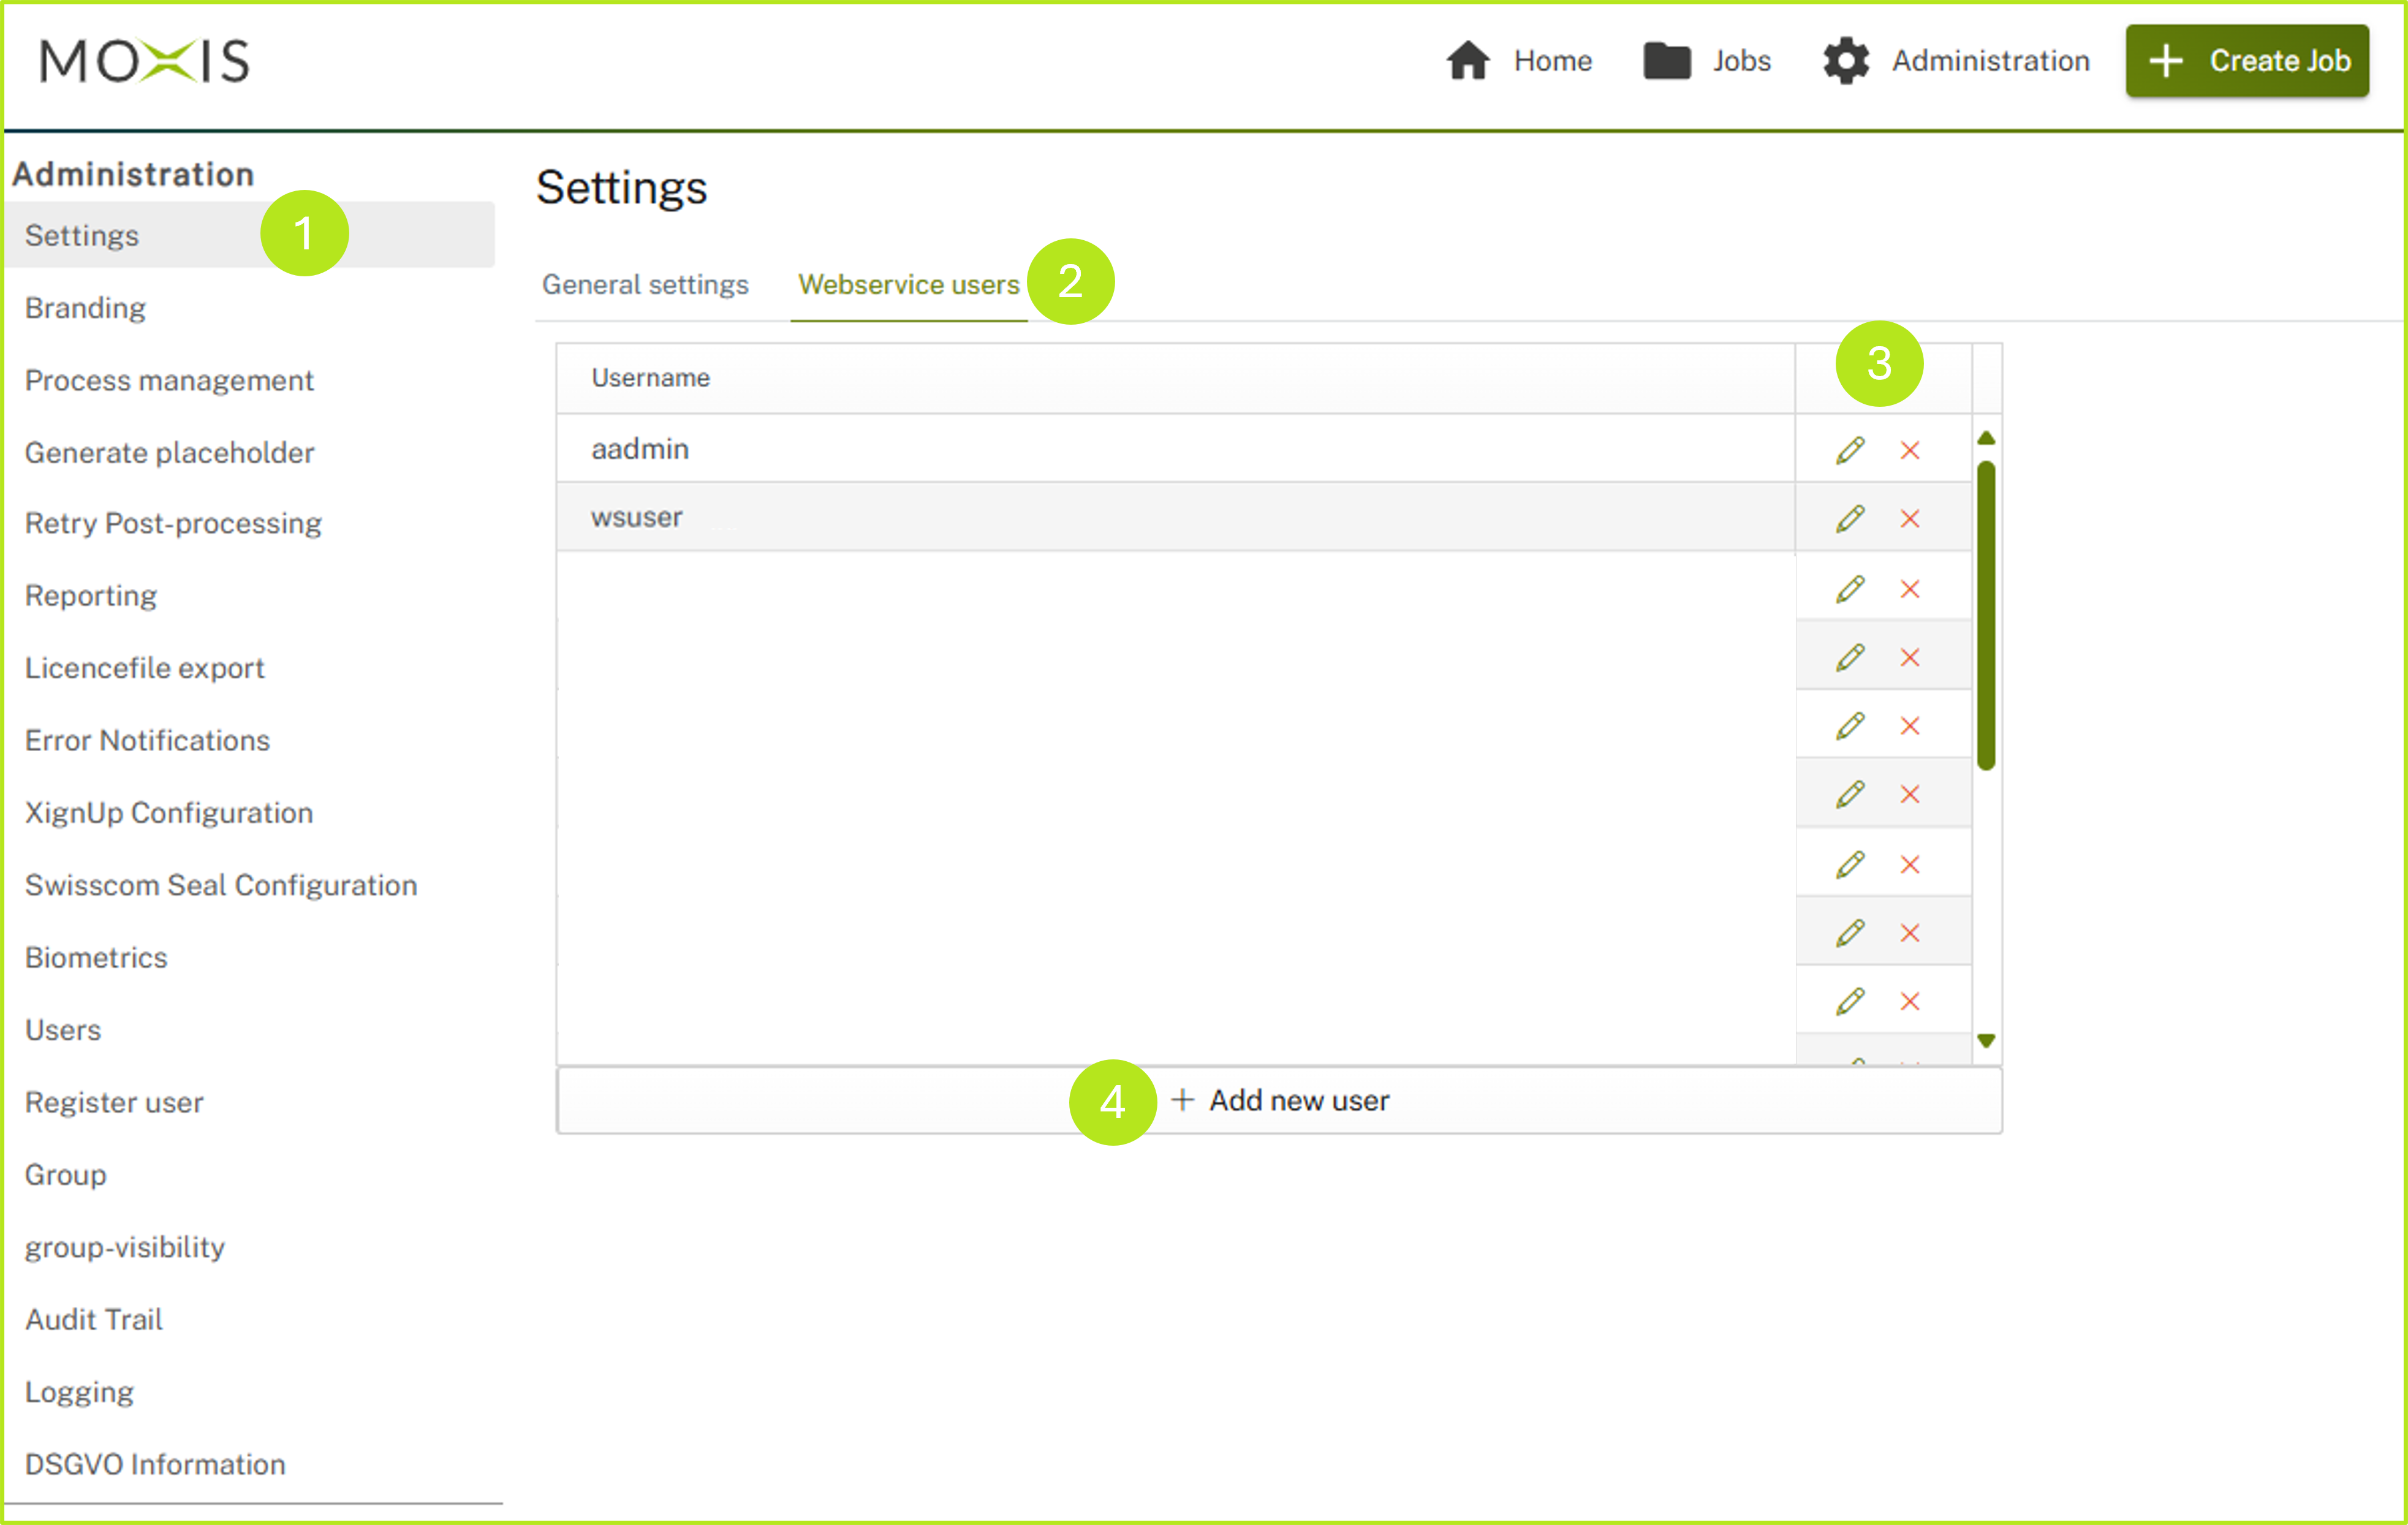
Figure 1: Settings- Webservice User Surface and how to add a new user
Step 3: In the interface that opens, you can configure the parameters for a new user as follows (see figure 2 [1 - 5]):
(1) Select a user name and enter it here (see figure 2 [1]).
(2) In the next step, enter any password and confirm it (see figure 2 [2]).
(3) Then specify which roles your web user should have (see figure 2 [3]).
(4) In the next step, define the processes to which this web user should have access (see figure 2 [4]).
(5) Click on the [Save]-button (see figure 2 [5]) to complete the creation of your web user. Click on [Cancel] to cancel the process if necessary.
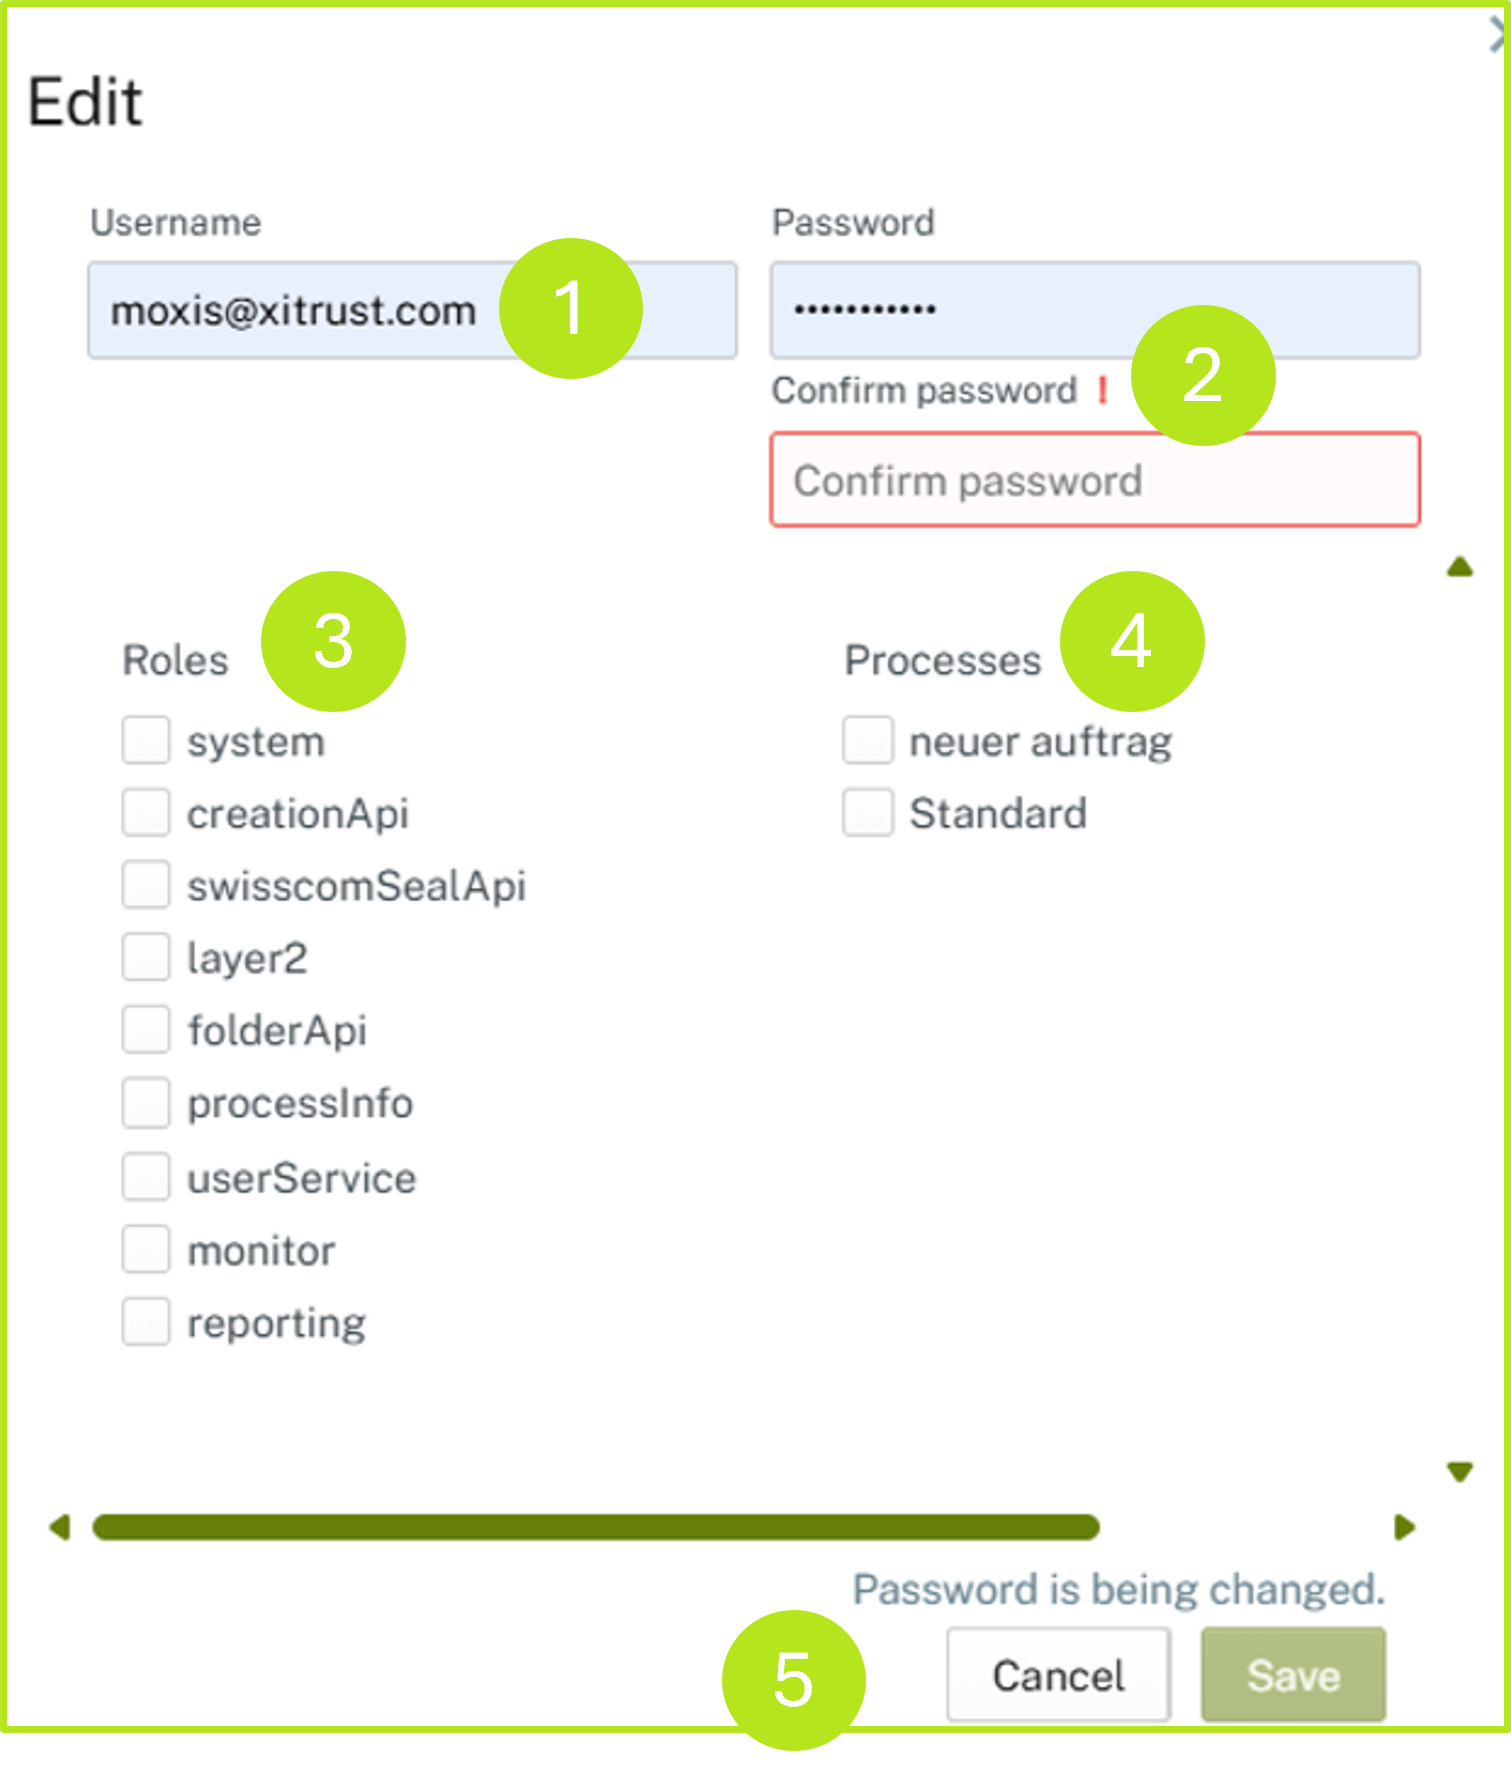
Figure 2: Configuration of a webservice user in MOXIS
2. Configuration of roles and processes for creating web service users
In MOXIS, there are two global variants for how the web service user can be used:
Layer 2 (one user for all processes) and
Secure Web Service (selection of processes during creation)
XiTip
If you require details on setting up your MOXIS instance, please contact the XiTrust support team.
2.1. Configuring roles
You can assign the following roles to a web service user (see figure 3).
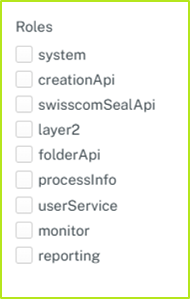
Figure 3: Roles for webservice users
system: is a basic requirement for standard functionality.
creationApi: is deprecated and only runs on a few instances. The function is available, but it is not recommended to use it as it is outdated.
swisscomSealApi: belongs to the regulated SealApi. If you want to assign the role or have questions about this role, please contact our support team.
layer 2: is a basic requirement for standard functionality.
folderApi: is deprecated and only runs on a few instances. The function is available, but it is not recommended to use it as it is obsolete.
processInfo: is deprecated and only runs on a few instances. The function is available, but it is not recommended to use it as it is obsolete.
userService: is deprecated and only runs on a few instances. The function is available, but it is not recommended to use it as it is obsolete.
monitor: is an edge case. Therefore, please contact our support before assigning this role.
reporting: is an edge case. Therefore, please contact our support before assigning this role.
XiTip
Please note: In addition to a role, it is important to assign a process to a web service user. If you do not assign a process to a user, but only the roles necessary for the basic function, then this web user can only perform the following activities:
Call API
Call process-independent methods
Perform a connection check
2.2. Configuring processes
Please note: In order to assign a process to a web user, the RestService checkbox must be selected for the respective process in MOXIS Process Management (see figure 4). Otherwise, the process will not be visible in Web User Management.
To select the RestService checkbox, please follow these steps:
(1) Open the process management in the administration (see figure 4 [1]).
(2) Define the processes that you would like to assign to your web service users. In our example, this is the Basic process.
(3) If there is more than one, take each process individually and make sure to follow these steps:
(4) First, click on the black arrow (see figure 4 [2]) in front of the process. This opens another menu item (see figure 4 [3]). Then open this additional menu item with a click. It is now highlighted in colour and various configuration options for the process appear on the right-hand side.
(5) In the next step, tick the RestService-checkbox (see figure 4 [4]).
(6) To complete the process, please click on the [Save]-button (see figure 4 [5]).
Please note: If you want to discard the configuration, click on the [Reject]-button. To delete it, click on the [Delete]-button.
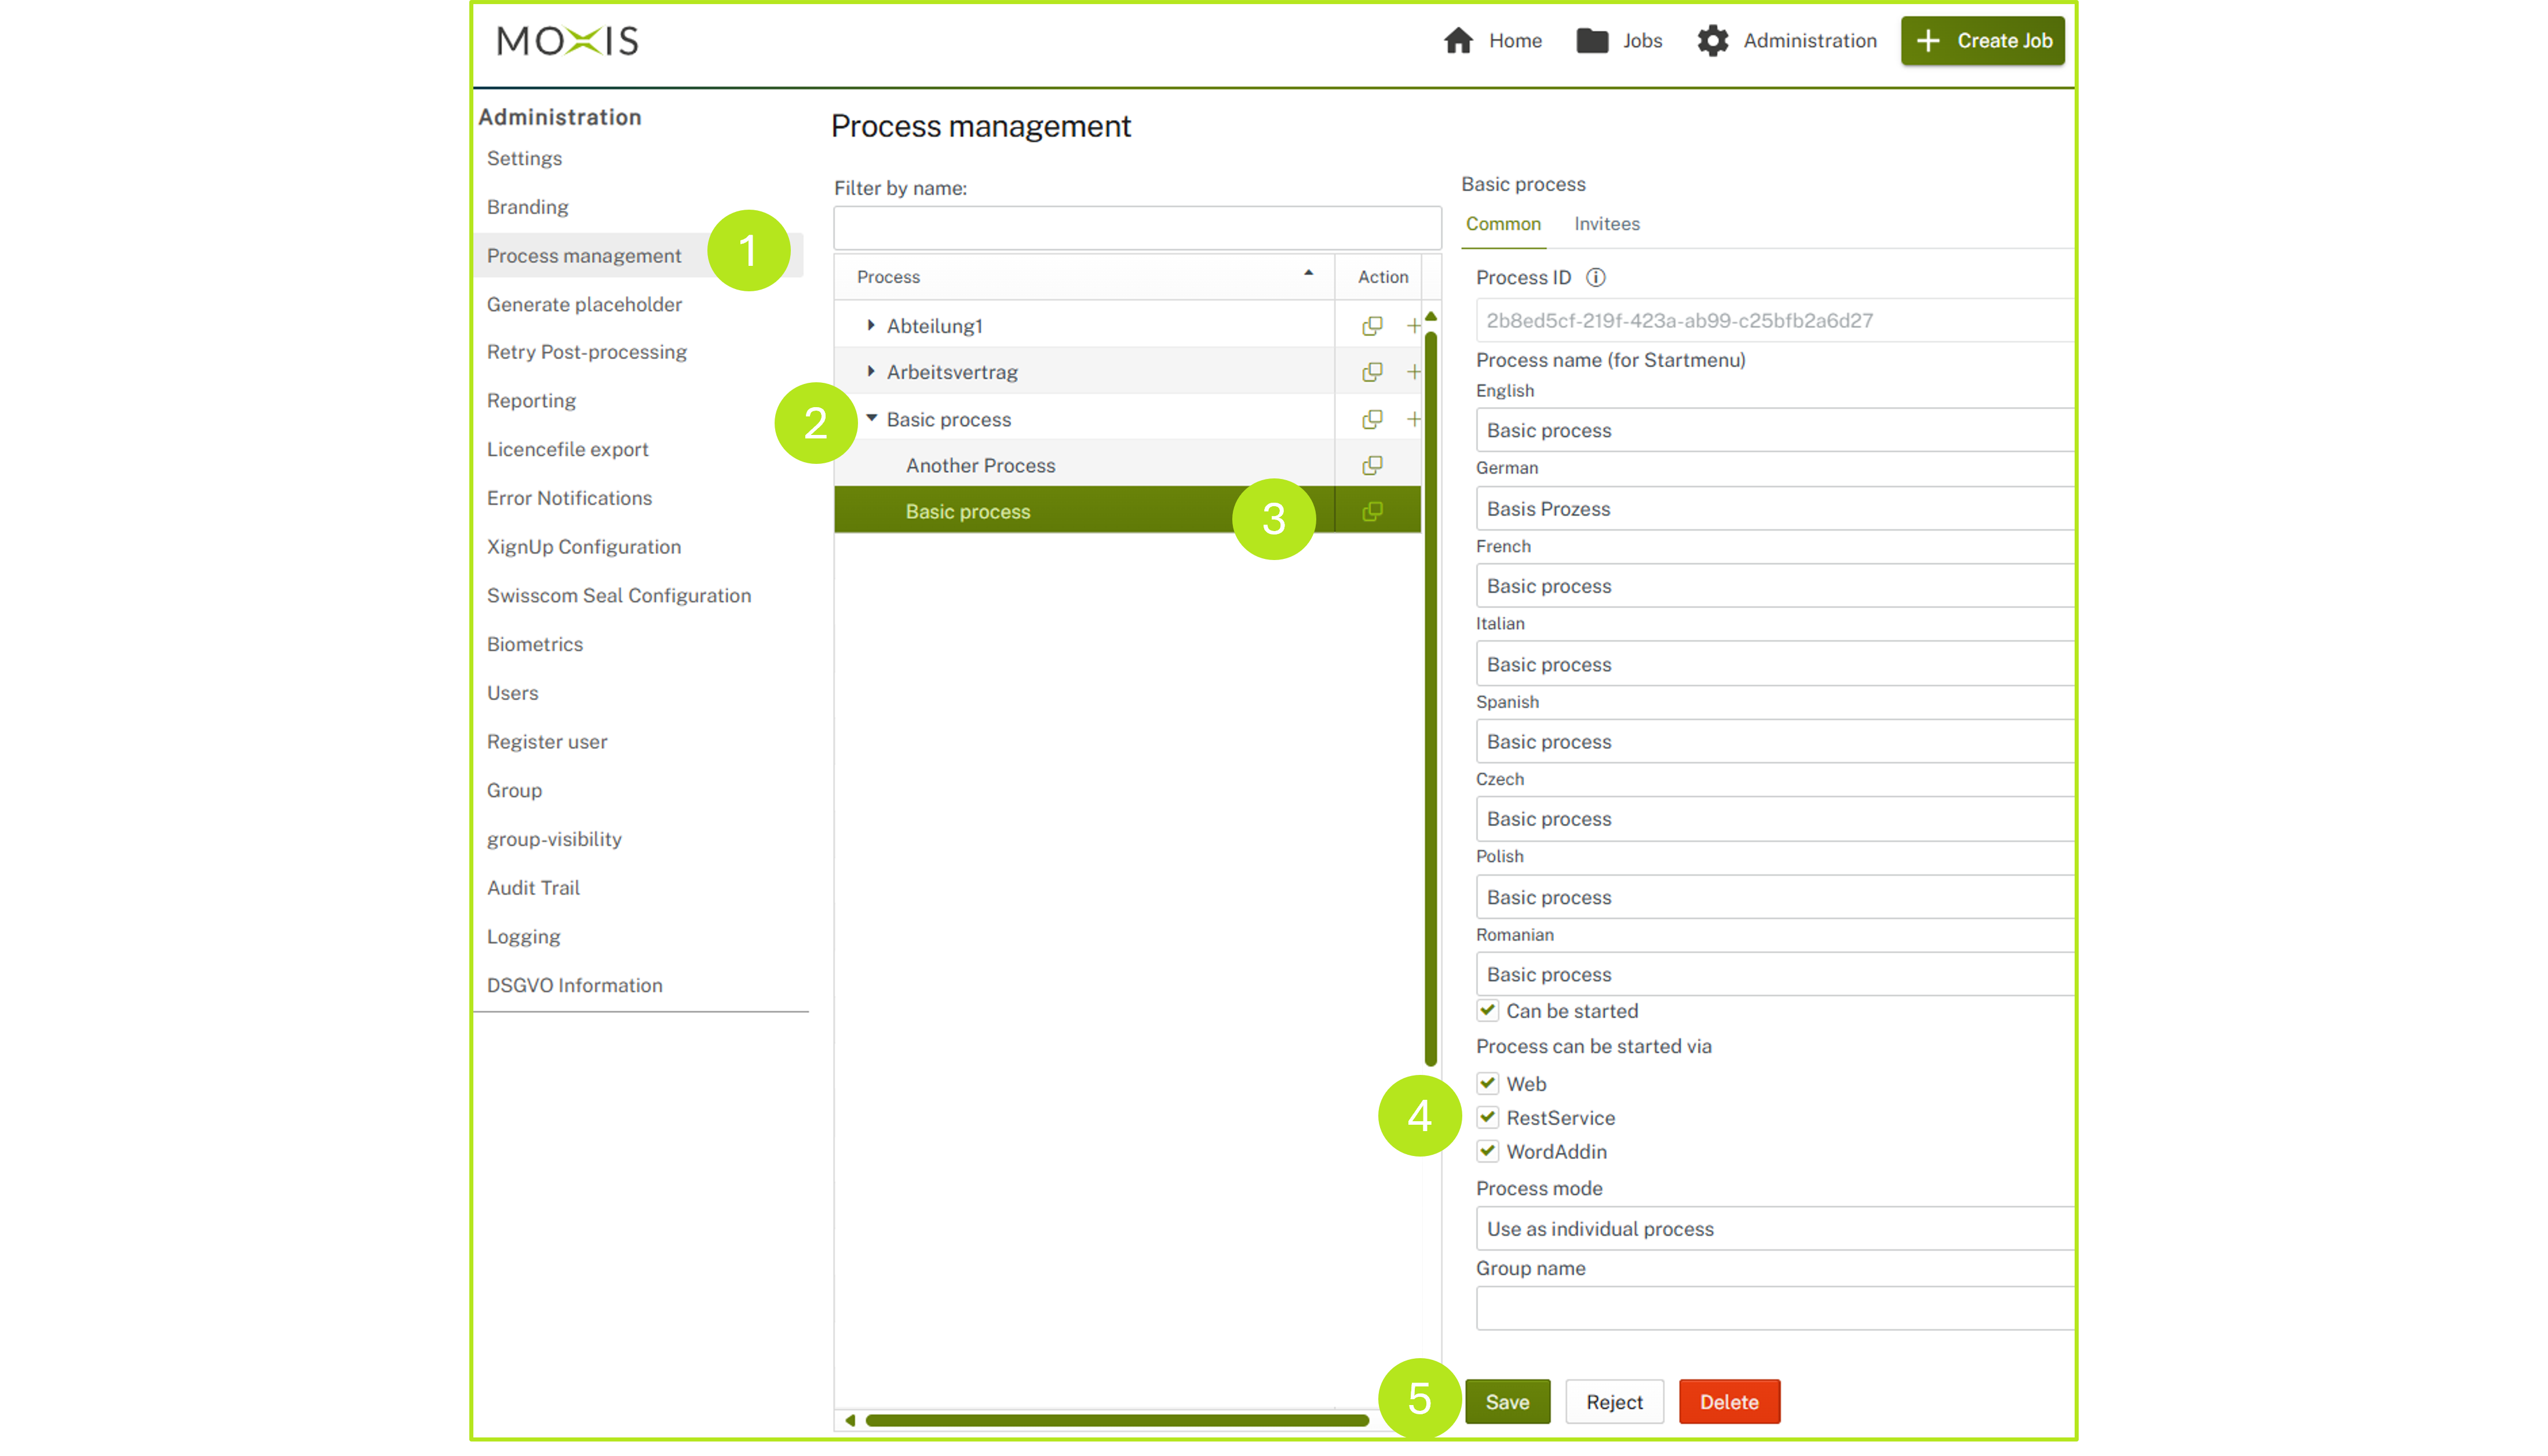
Figure 4: Configuration of a process for the webuser-management
(7) If you now switch back to the webservice user interface, you can assign the process to a webservice user under processes (see figure 2 [4]).