
Branding the MOXIS interface
Content
A first step in branding the MOXIS interface can be to customise the header logo, favicon and tab title of your MOXIS instance in line with your corporate identity. This article provides a step-by-step instruction on how to do this.
1. Step-by-step instructions: Branding the MOXIS interface
Step 1: Log in to the MOXIS administration area as usual. Click on MOXIS Branding in the administration menu (see figure 1 [1]).
Step 2: This opens an overview on the right-hand side. Under the MOXIS-tab (see figure 1 [2]), you have three options for branding MOXIS:
Header logo (see figure 1 [3])
To change the header logo, please click on Upload logo under the grey text field in the header logo area (see figure 1 [3]) and upload a logo in the appropriate size. Please note: Once a logo has been uploaded, you will also see the [Delete customer logo]-button here.
XiTip
Make sure you have a logo in the correct format before uploading the file, as images that are too large will be adjusted. The maximum size for logos is 230px x 40px. MOXIS supports PNG file types.
Favicon (see figure 1 [4])
To change the favicon, please click on Upload logo below the grey text field in the favicon area (see Figure 1 [4]) and upload a logo in the appropriate size.
XiTip
Make sure you have a logo in the right format before uploading the file, as images that are too large will be adjusted. The maximum size for logos is 32px x 32px. MOXIS supports PNG as the file type.
Tab title (see figure 1 [5])
To change the tab title, simply enter your desired tab title in the field provided (see figure 1 [5]). Click on the [Reset Tab Title]-button to return to the original settings.
Step 3: To apply your changes, please click on the [Save]-button (see Figure 1 [6]). Conversely, clicking on the [Reset all]-button (see Figure 1 [6]) will bring the MOXIS branding back to the original settings.
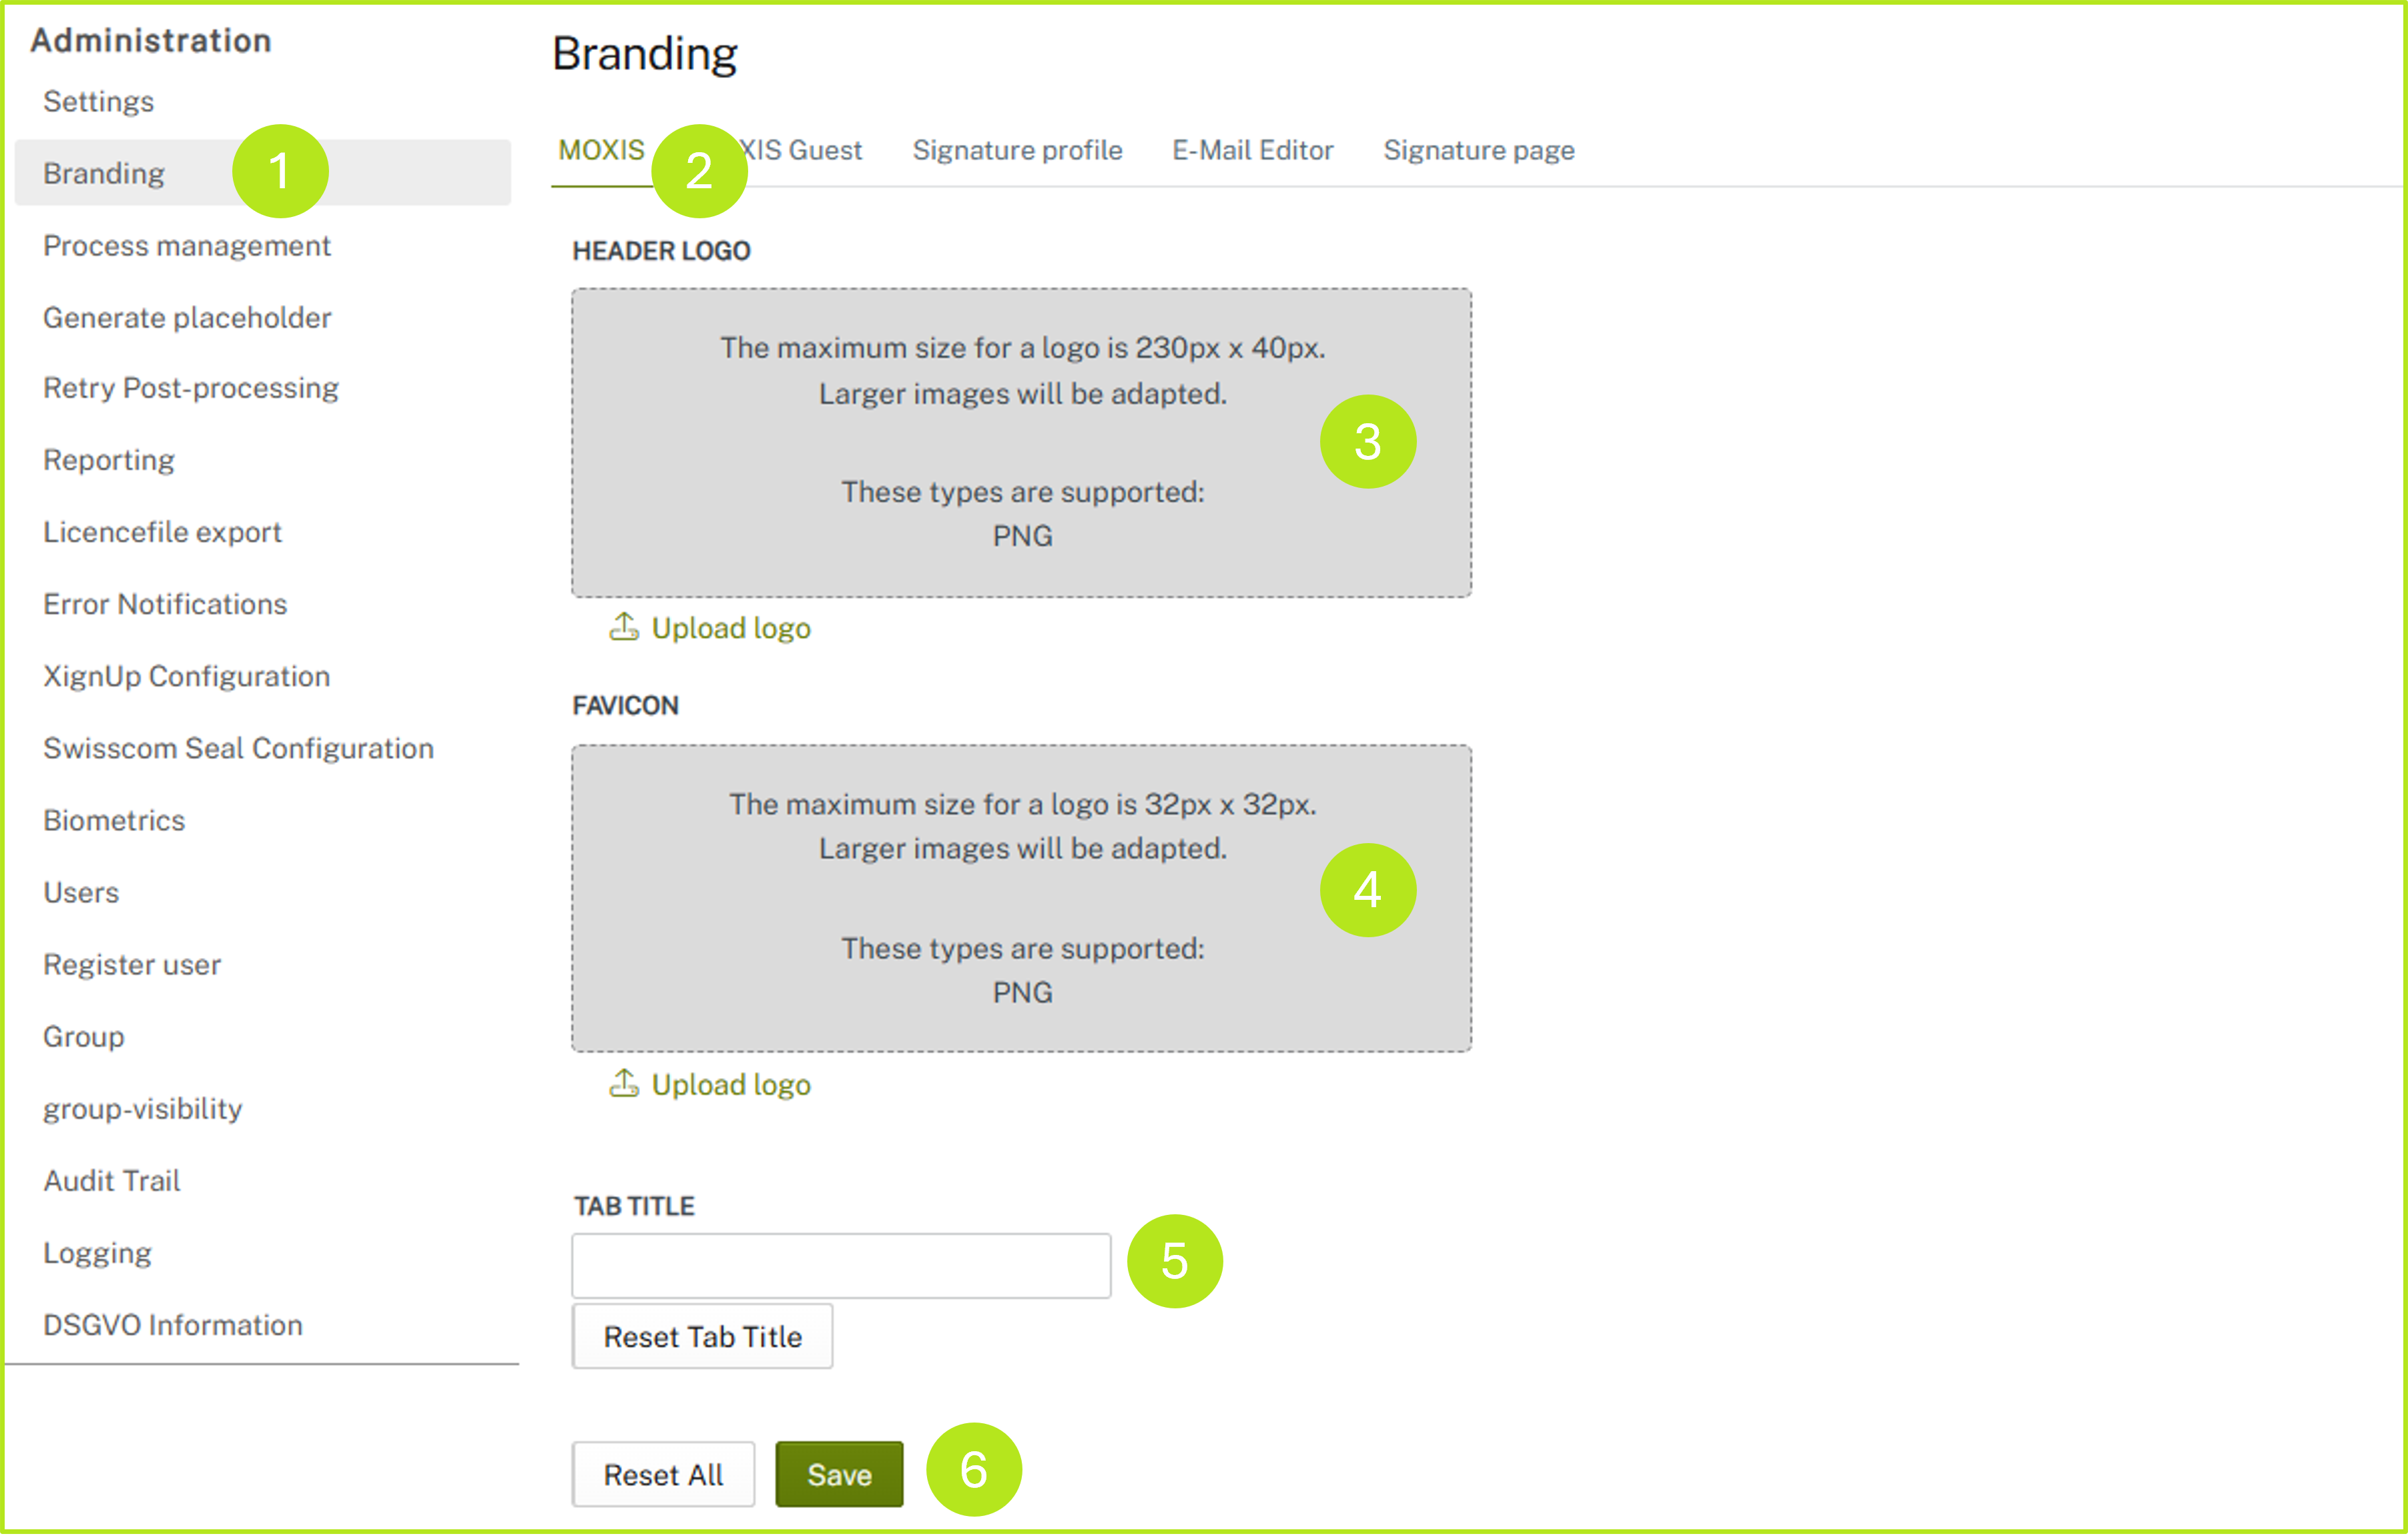
Figure 1: Options for branding MOXIS
Step 4: Once you have entered all the information or uploaded the relevant graphics and all changes have been saved successfully, the MOXIS interface will look as shown in figure 2, with the individual components displayed in the following locations:
MOXIS logo: see figure 2 [1]
Favicon: see figure 2 [2]
Tab title: see figure 2 [3]
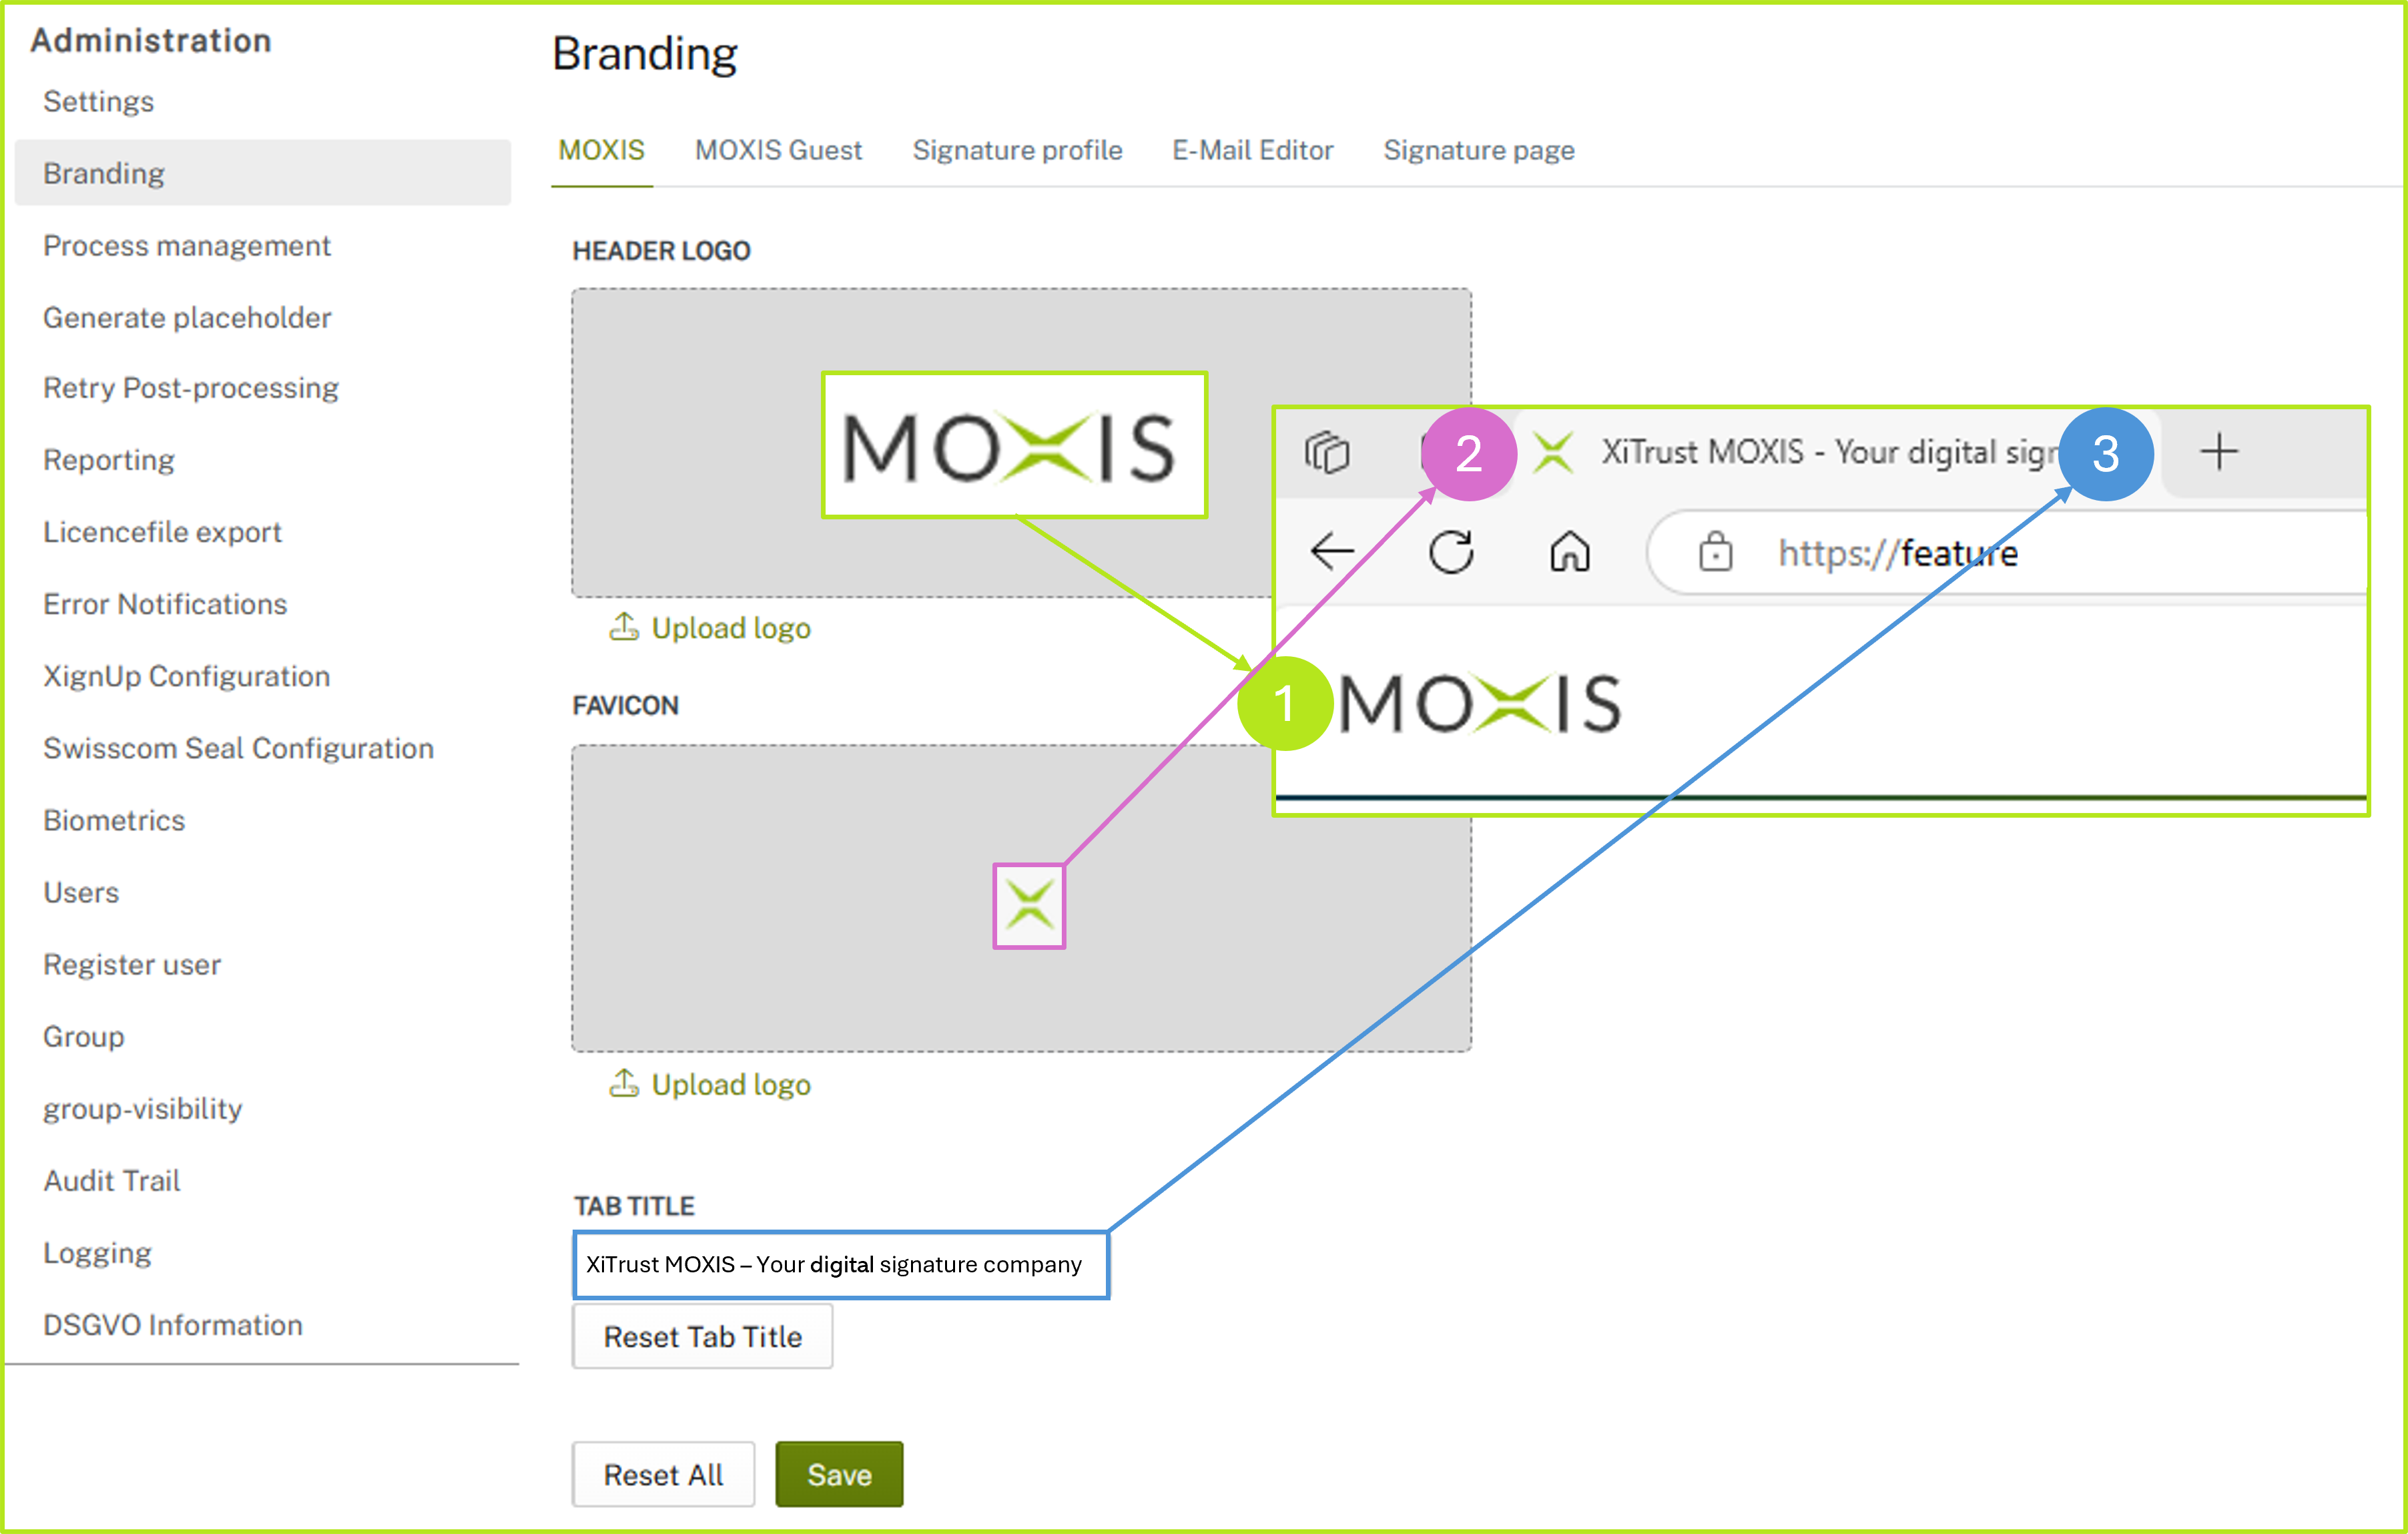
Figure 2: Branding implemented in MOXIS