
Branding the MOXIS Guest interface
Content
In addition to the MOXIS interface, it is also possible to customise MOXIS for external signatories. This is done in the MOXIS Guest area. Here, you can give the interface that external users work with a personal touch. This article provides more information about your options.
1. What is MOXIS Guest and why should I brand it?
MOXIS Guest is an instance of MOXIS that allows you to send orders to people outside your company. You can customise MOXIS Guest for external signatories to match your corporate identity (CI).
Consistent CI can lead to stronger customer loyalty, higher employee satisfaction and, overall, a higher degree of identification with your company. In MOXIS Guest, you can customise your company logo (see figure 1 [1]), various colours, such as colours for buttons (see figure 1 [2]) or warning colours and text colours (see figure 1 [3]).

These step-by-step instructions will guide you through the MOXIS Guest Branding interface and provide you with an initial overview of your options.
Step 1: To access the MOXIS Guest Branding interface, open the Administration area and navigate to MOXIS Branding (see figure 2 [1]).
Step 2: Under the MOXIS Guest-tab (see figure 2 [2]), you will find the interface where you can customise the branding for external signatories.
Step 3: In the Default instance tempalte area (see figure 2 [3]), you can modify the default template.
Step 4: In the Custom template per tenant area (see figure 2 [4]), you can create your own templates for specific tenants, which will override the default template.
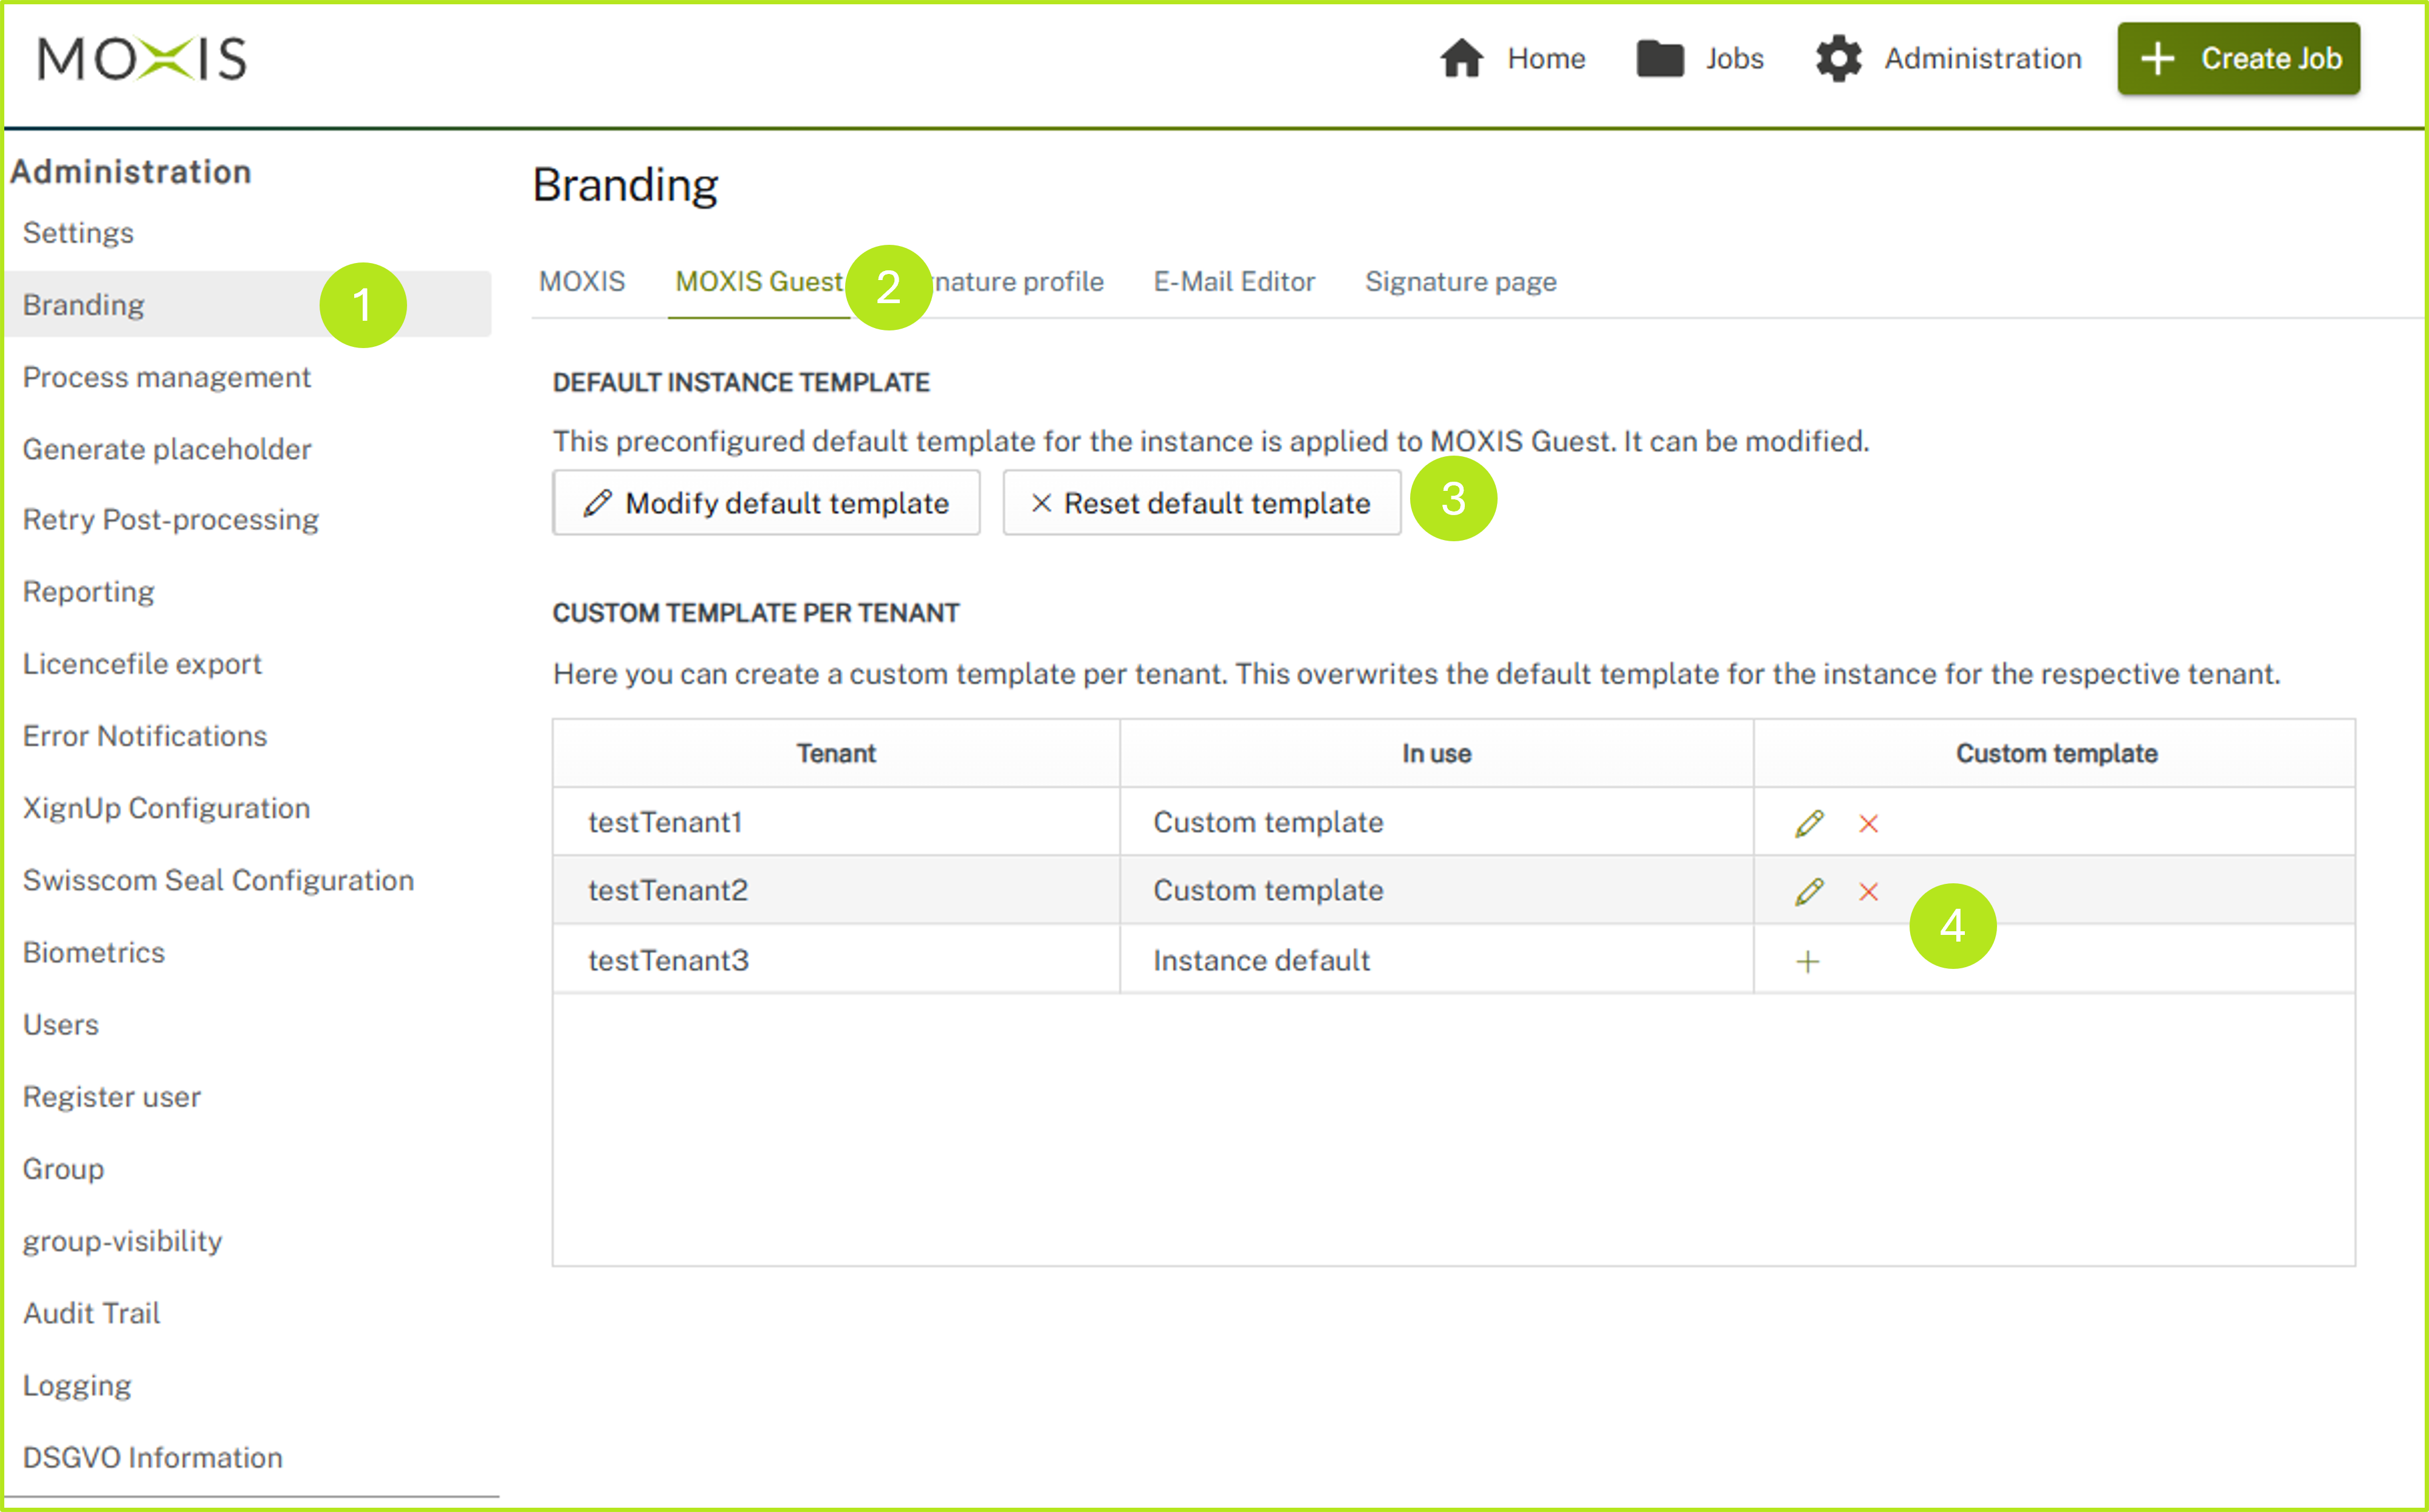
Figure 2: MOXIS Guest branding surface
XiTip
Before you release the templates you have modified, send them to an external test user. To do this, create any alias email address and send the order to yourself. This allows you to see how external signatories perceive your MOXIS Guest jobs.
Please note: Details and further information on customising standard templates can be found in the following sections of this article.
1.1.1. Configuring the standard template for the instance
In the first section of MOXIS Guest Branding, you can customise the default template for the instance. To do this, simply click on the [Modify default template]-button (see figure 3 [1]). If you do not want to apply a configuration, you can discard the changes by clicking on the [Reset default template]-button (see figure 3 [2]).
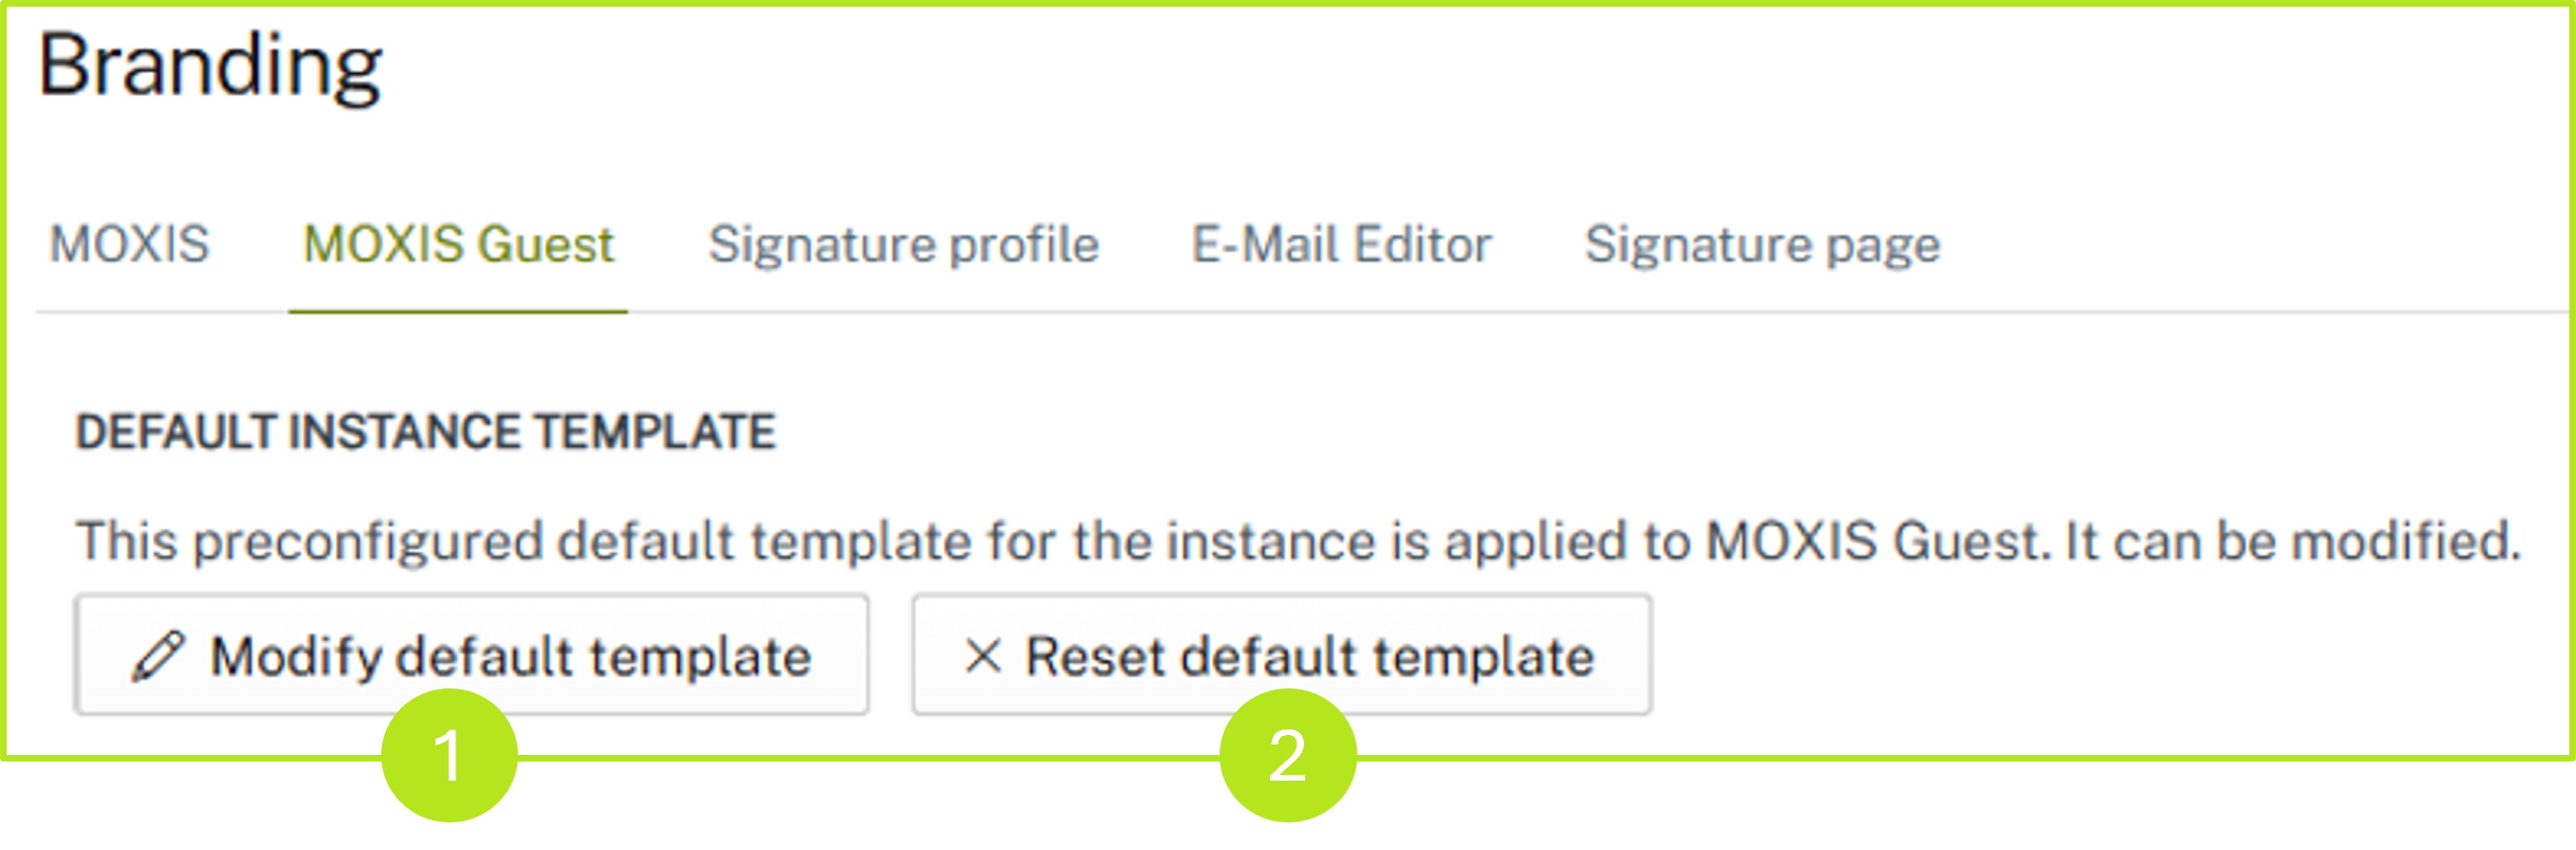
Figure 3: Customise MOXIS standard template for the instance
Clicking on the [Modify default template]-button opens an overview where you can customise your templates. You have the following options for customisation:
Colours (see figure 4 [1])
Logo (see figure 4 [2])
Clicking on the [Save]-button saves your changes. Clicking on the [Cancel]-button allows you to discard your changes.
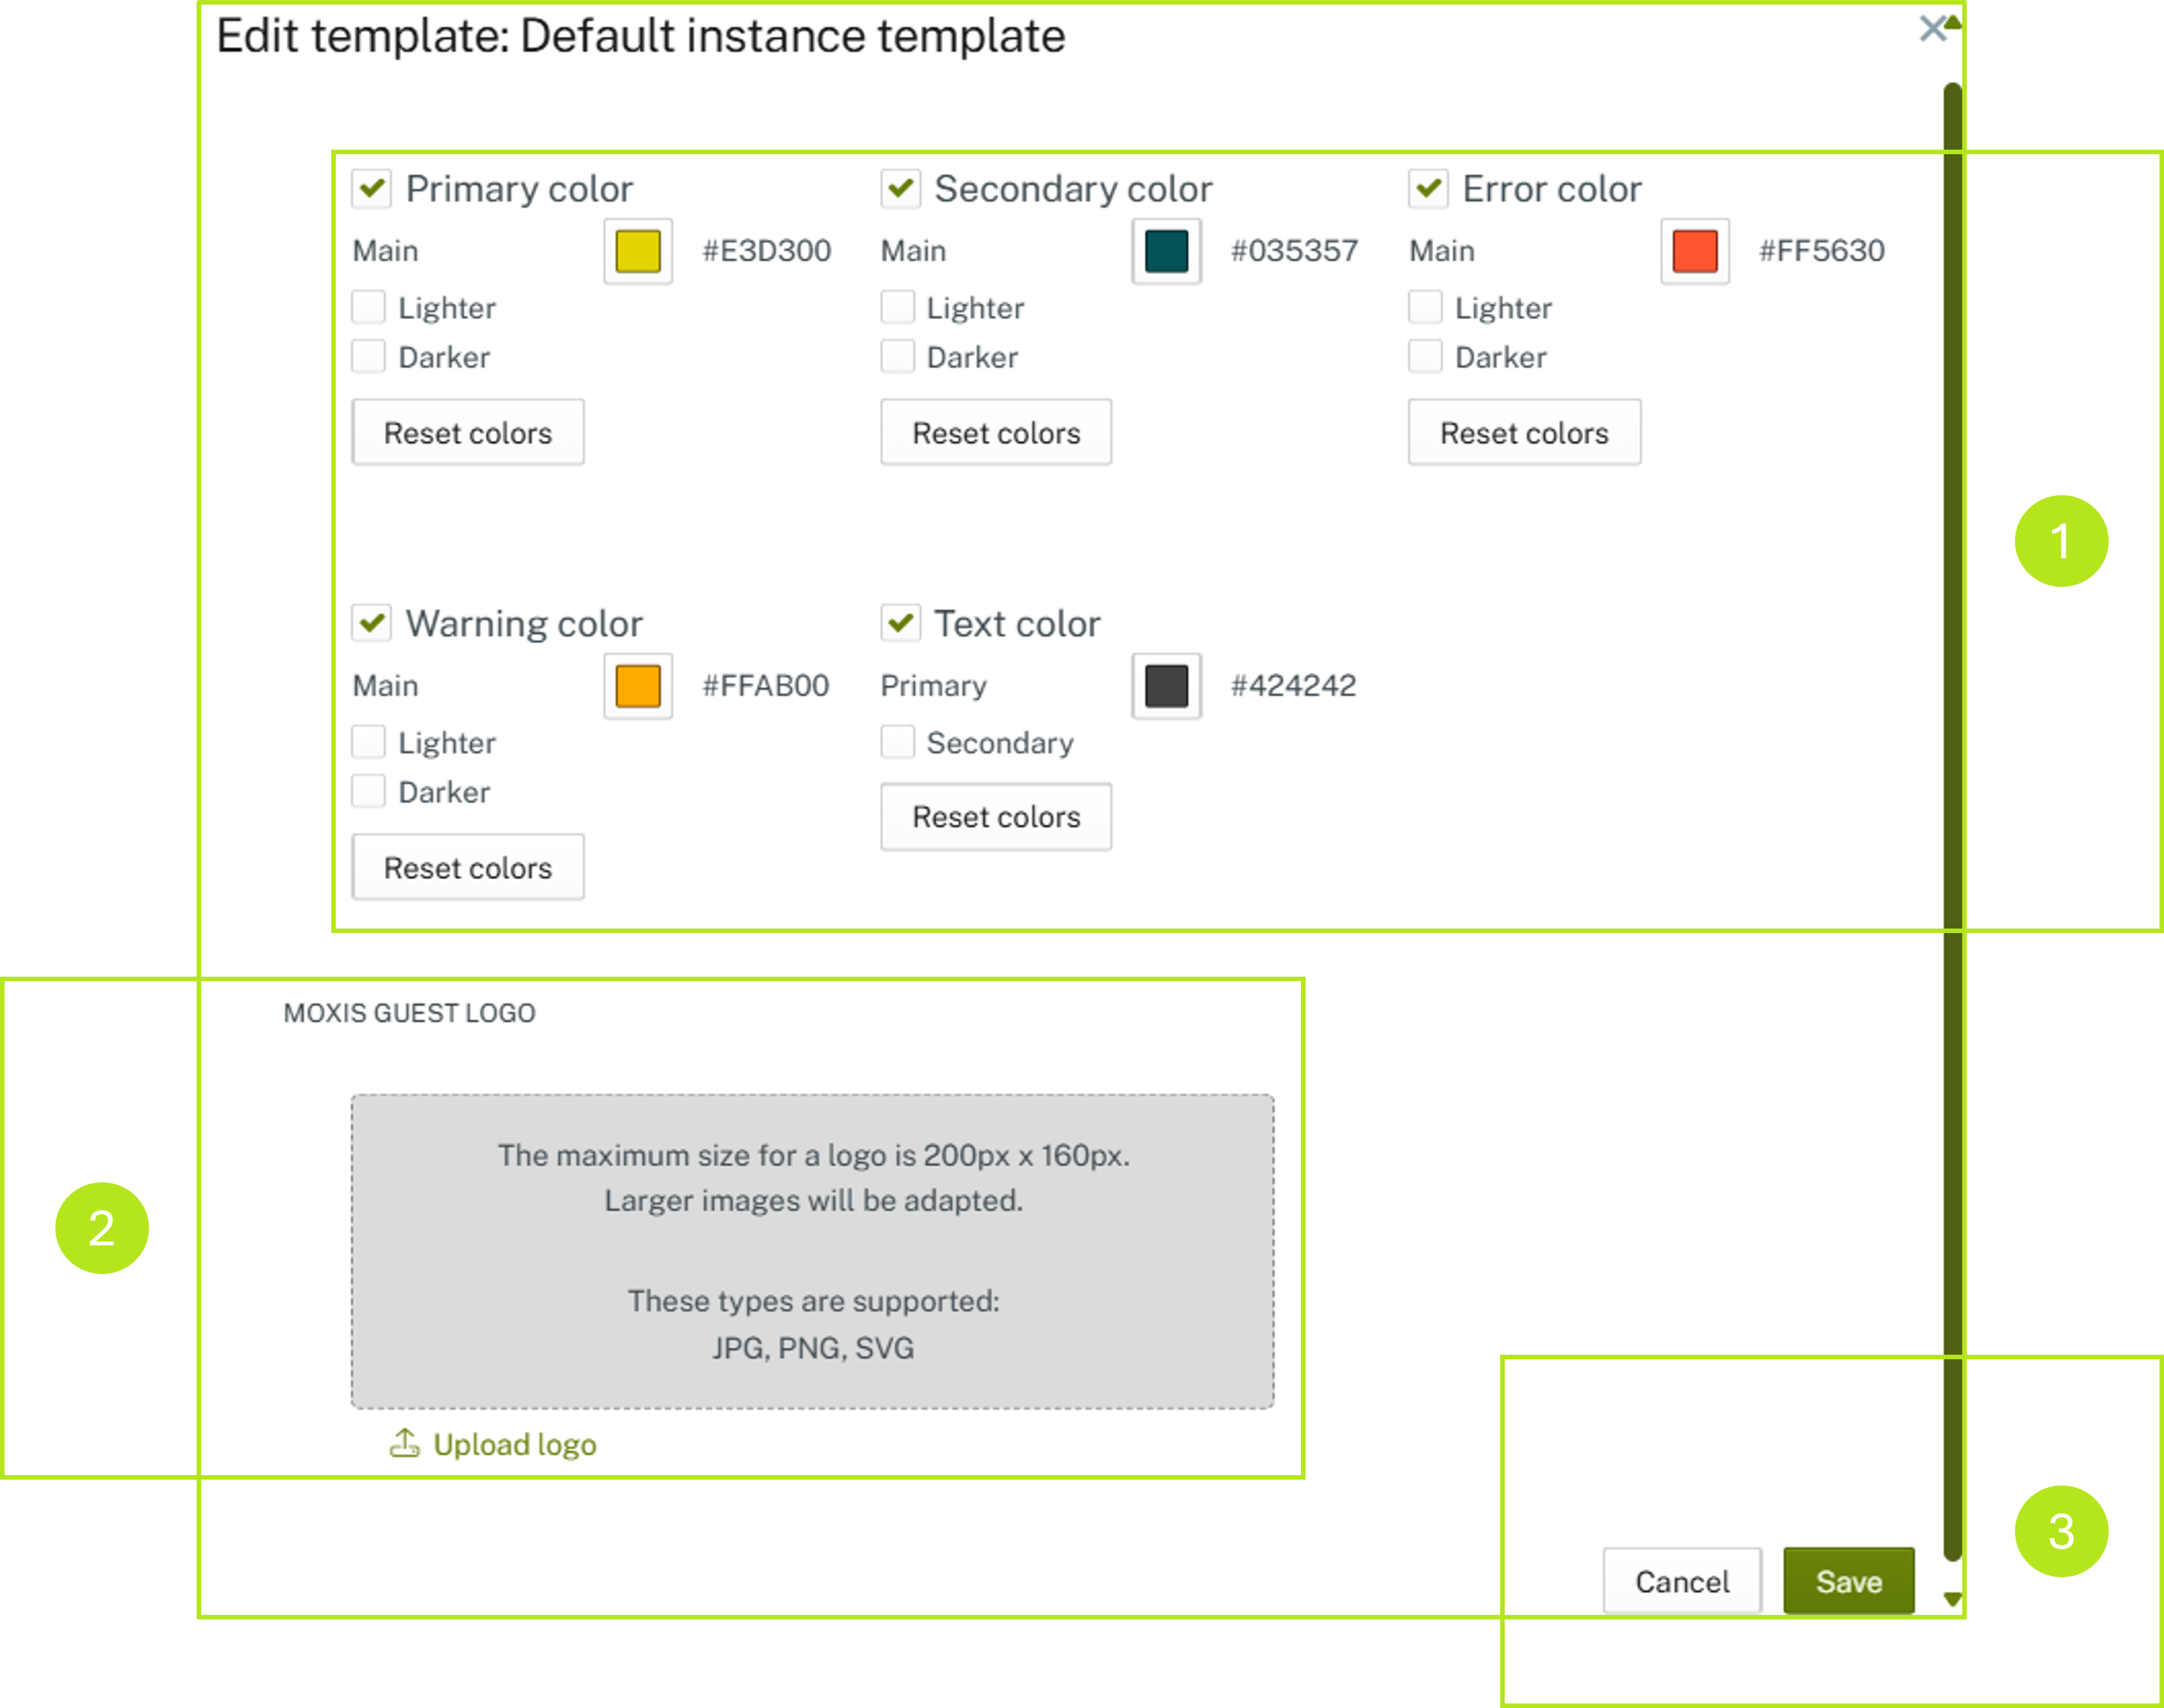
Figure 4: Edit standard template of the instance in MOXIS
1.1.1.1. Adjust colors
To adjust the colours in your default template, please click on the colour field (see figure 5 [1]) of the colour you want to configure.
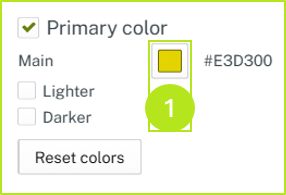
Figure 5: Edit colours in the standard template of the instance
You now have three options for defining your desired colour (see figure 6):
Enter a HEX code (see figure 6 [1]),
select your desired colour from the colour picker (see figure 6 [2]) or
define an RGB (red/green/blue) colour using the sliders (see figure 6 [3]).
Click the [OK]-button (see figure 6 [4]) to apply the changes. Clicking the [Cancel]-button discards your changes.
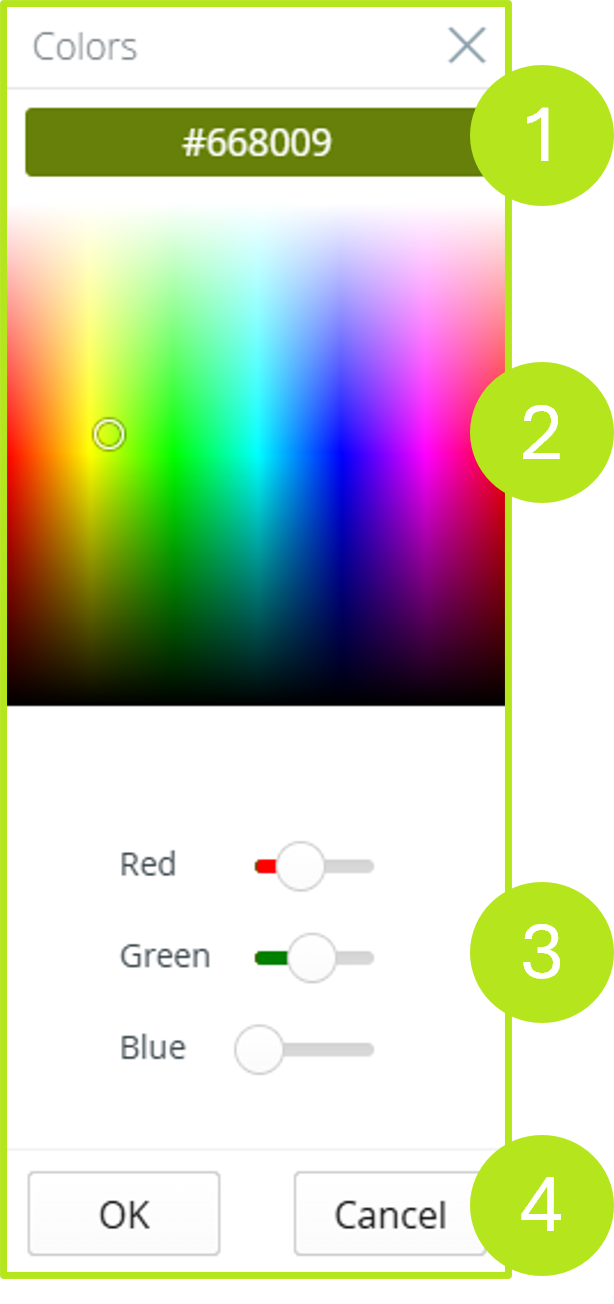
Figure 6: Color Picker in MOXIS
You also have the option of expanding the colour profile of a selected colour by adding a lighter or darker shade. To do this, you can use the checkbox in the overview to adjust the colours (see figure 7). The standard colour profile is automatically suggested by the system. However, you can adapt it to your corporate design if necessary, just like the primary colour. Click on the [Reset colours]-button to reset the individual colours to the default values.
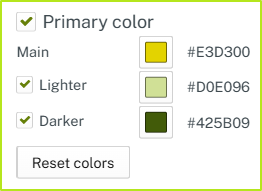
Figure 7: Expansion of the primary colour with additional colour nuances
The text colours are an exception to this. Here, you can define a primary colour and a secondary colour (see figure 8) or use the colour suggested by the system.
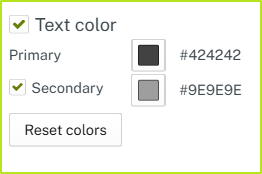
Figure 8: Add a secondary colour to the primary text colour
1.1.1.2. Upload logo
To upload a logo to your standard template, please click on Upload logo (see Figure 4 [2]). The maximum size of the logo must not exceed 200px x 160px. Larger images will be adjusted. MOXIS Guest supports JPG, PNG and SVG files for logos.
1.1.2. OPTIONAL: Create custom templates per tenant
In the second section of the MOXIS Guest Branding settings, you have the option of creating custom templates per tenant. Please note: This feature is optional. The tenant option must therefore be configured by XiTrust when setting up your MOXIS instance.
XiTip
If you have not preconfigured the option for tenants but are interested in this feature, please contact your XiTrust contact person.
Before we go into detail, let's take a closer look at the terminology.
1.1.2.1. Definition of terms
What is a tenant? (see figure 9 [1])
A tenant in MOXIS is the virtual representation of a sub-area of a company or enterprise. This can be a department, group, team or even a branch office.
XiTip
Tenants are created for you by XiTrust. If you are interested in working with tenants, please contact your XiTrust contact person. We will be happy to advise you.
Use case: Let's stick with the example of the branches. Suppose you work for a banking group operating in the DACH region, consisting of Bank 1 Austria, Bank 2 Germany and Bank 3 Switzerland. Since there are country-specific adjustments in the individual branches despite the cross-border umbrella of the parent bank, the templates must also be adapted.
It is therefore conceivable that the Group Bank 1 Austria uses the Standard template of the instance via the tenant Bank 1 Austria. The Group Bank 2 Germany, on the other hand, is assigned a user-defined template via the tenant Bank 2 Germany, as we created in Chapter 1.1.1, and so on.
What is the instance standard? (see figure 4)
The instance standard is the standard template supplied with MOXIS Guest.
What is a user-defined template? (see figure 9 [1] and figure 9 [3])
A user-defined template is a template that has been created specifically for a client (tenant).
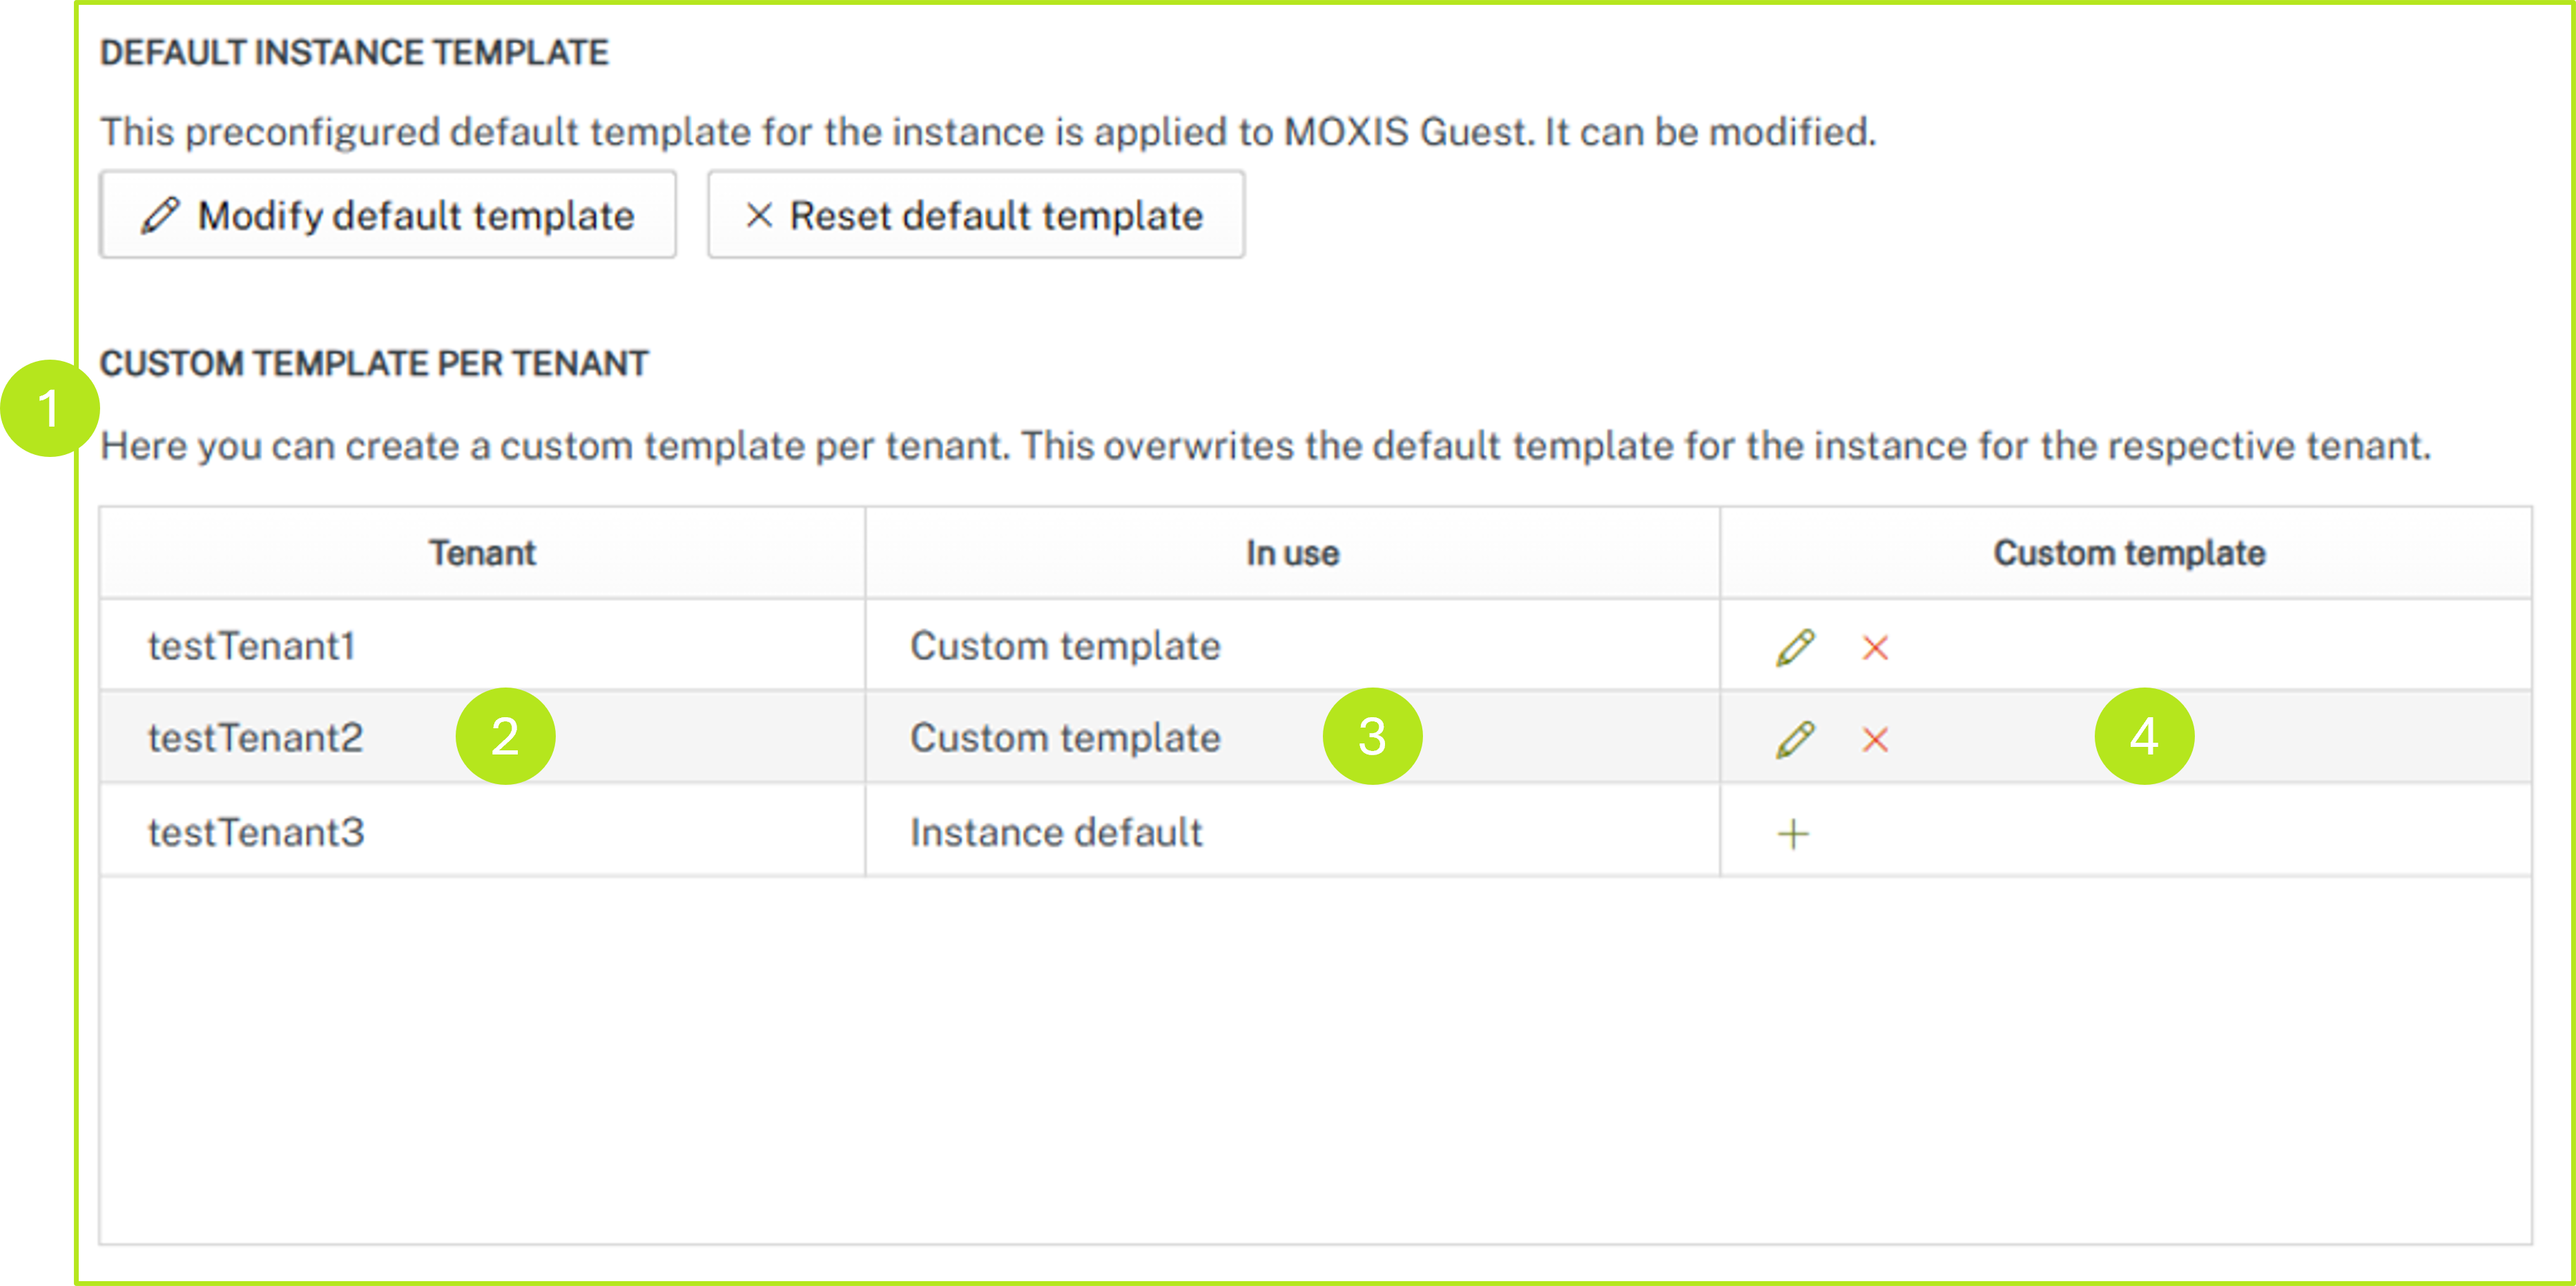
Figure 9: Custom templates per tenant in MOXIS Guest
1.1.2.2. Creating custom templates per tenant in MOXIS Guest Branding
To create a custom template and assign it to a tenant, simply click on the + icon in the Custom Template section (see figure 9 [4]) in the row with the corresponding tenant.
In the window that opens, you can customise your template as described in chapter 1.1.1. Configuring the standard template for the instance.
XiTip
Individual tenants can also be assigned to processes in process management under the Branding-tab.
1.1.2.3. Edit existing custom templates per client (tenant) in MOXIS Guest Branding
To customise an existing custom template, please click on the pencil icon (see figure 9 [4]).
To delete it, click on the x icon (see figure 9 [4]).
1.1.2.4. Manage existing custom templates per tenant in MOXIS Guest Branding
You can check whether you are using a standard template or a custom template at any time in the In use section (see figure 9 [3]).
You can find an overview of the existing tenants in the Tenant section (see figure 9 [2]).