
[ADMIN FAQ] NEMO: How do I use the notification engine in MOXIS optimally?
Content
Since MOXIS 4.50 (Spring 2024), administrators with ‘NEMO’ (Notification Engine MOXIS) have had the option of directly MOXIS (in the Enterprise version) to customise email templates. This allows you to brand and design the content of both internal and external emails according to your requirements. This article provides a more detailed insight into the functionality of NEMO.
XiTip
MOXIS NEMO is available as an optional feature from version 4.50. It must be activated when you update to version 4.50 or subsequently. Your XiTrust contact person will be happy to answer any questions you may have regarding the extension.
1. Step-by-step Guide: How do I access MOXIS NEMO?
Please note: To use MOXIS NEMO, you must have the appropriate rights (moxisAdmin and moxisEmailAdmin) in MOXIS. If you have questions about rights, please contact the administrators of your MOXIS instance.
To log in to MOXIS NEMO, please follow the step-by-step instructions below. After successful login, you can design and manage all mail templates used by MOXIS under the MOXIS Branding and NEMO tabs (see figure 1).
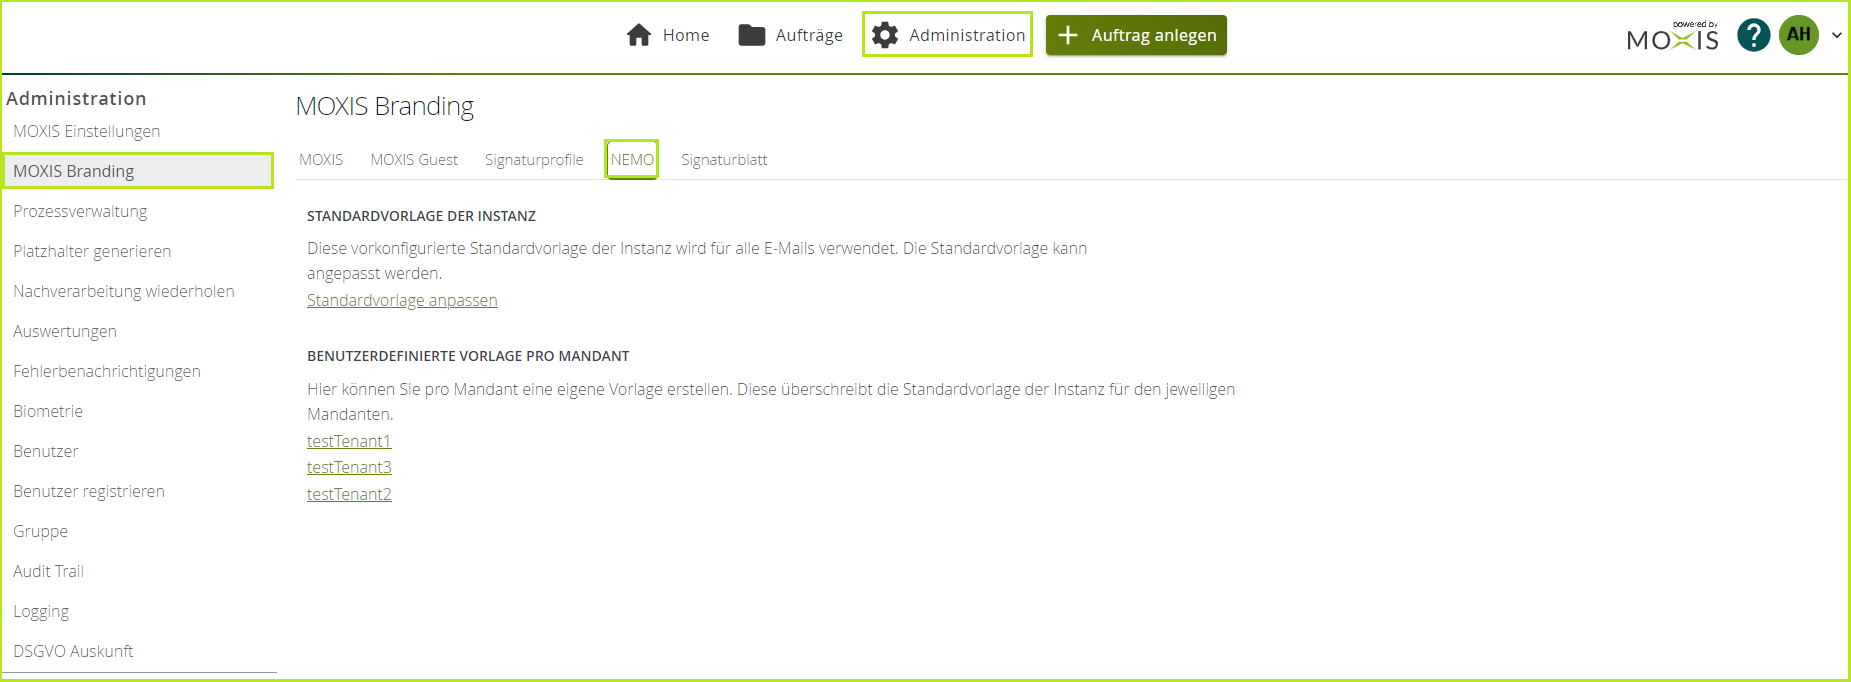
Figure 1: Accessing MOXIS NEMO. Overview of standard templates and tenants (example shows the maximum use of the tool; it is possible to add further tenants).
Step 1: Click on the Administration menu item in the header bar of the MOXIS dashboard to open the administration panel (see figure 2).

Figure 2: Administration menu item in the header of MOXIS dashboard
Step 2: In the administration menu, select MOXIS Branding (see figure 3 [1]).
Step 3: The MOXIS branding menu opens on the right. Please click on NEMO here (see figure 3 [2]). To customise a template, please click on Modify default template (see figure 3 [3]).
XiTip
MOXIS NEMO allows you to customise pre-made templates. If you want to increase the level of customisation of individual templates, then it is recommended to work with so-called tenants. For a live demo of the functionality of tenants, please contact your XiTrust representative. The example in figure 3 [4] shows all the options available in MOXIS NEMO (standard templates and tenants).
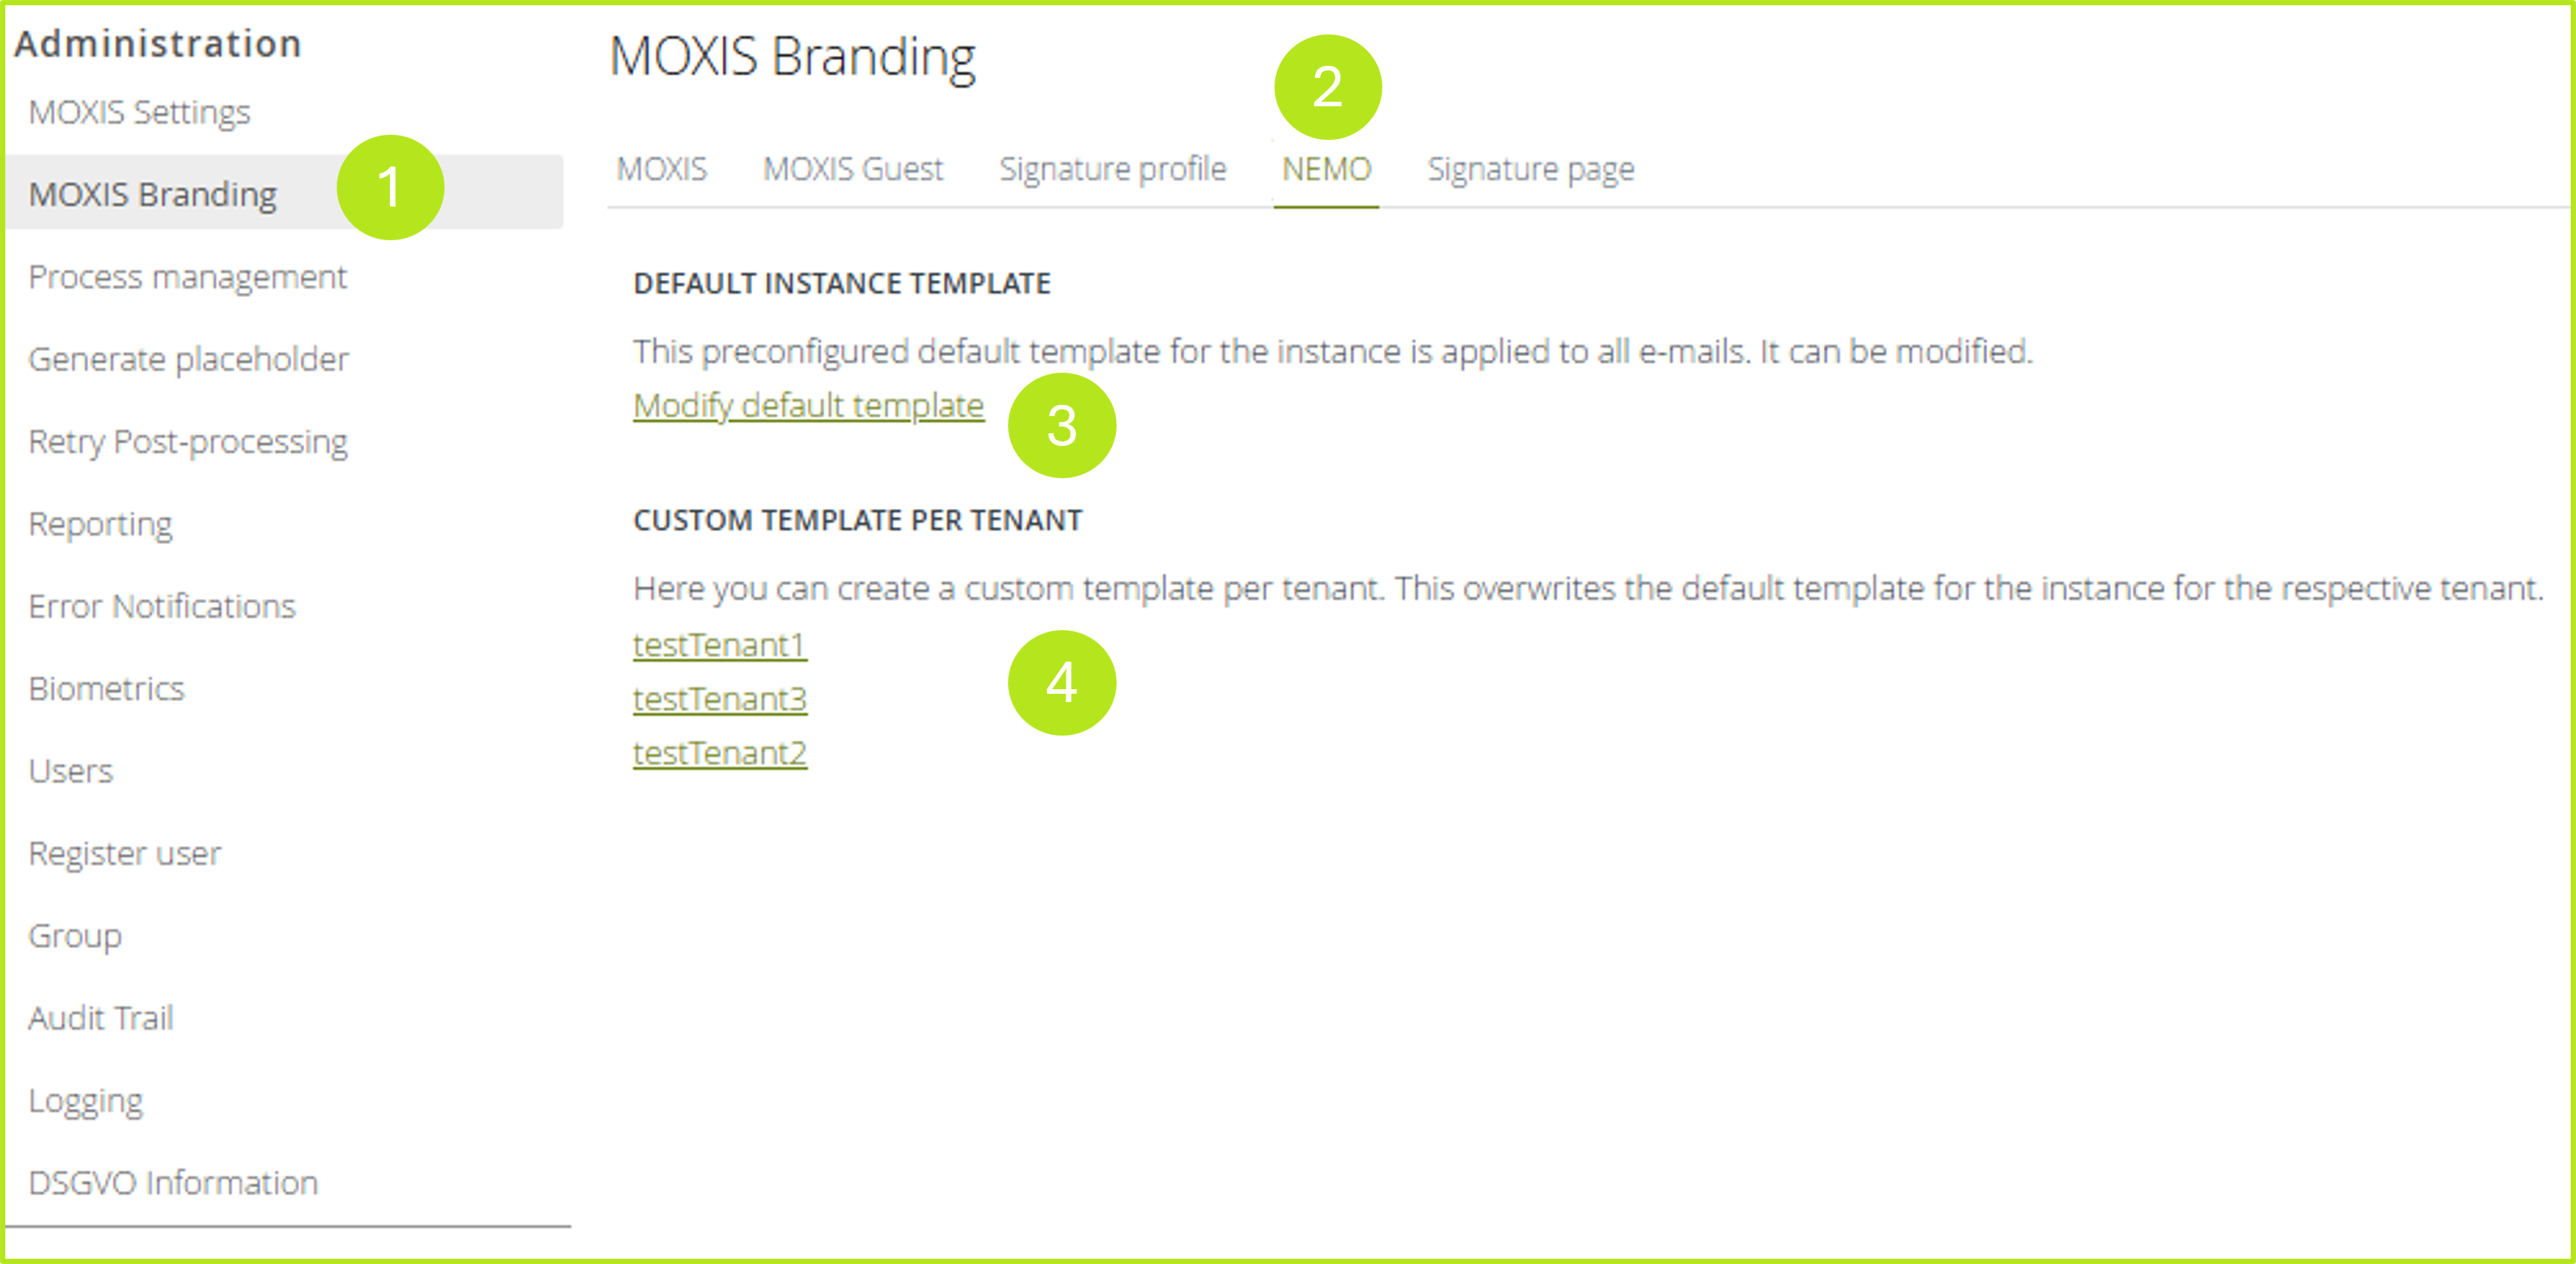
Figure 3: Entry point in MOXIS NEMO. Overview of all the potential processing options with MOXIS NEMO.
2. What standard mail templates are available in MOXIS NEMO?
MOXIS NEMO comes with over 90 ready-made standard mail templates (as of June 2024).
2.1. What changes can I make to the standard mail templates?
Please note: The structure of standard mail templates in MOXIS NEMO cannot be changed independently. However, the content can be customised. This means that the colour scheme, the logo and the body text in the templates can be manually adjusted. To create several customised templates, we recommend configuring one or more tenants.
2.2. How do I change the branding in the standard mail templates?
To change the branding, please follow these steps.
Step 1: Open the default templates via Modify default template (see figure 3 [3]).
Step 2: Click on the three green dots in the upper right-hand corner. A drop-down menu will open. Please click on edit branding here (see figure 4 [1]).
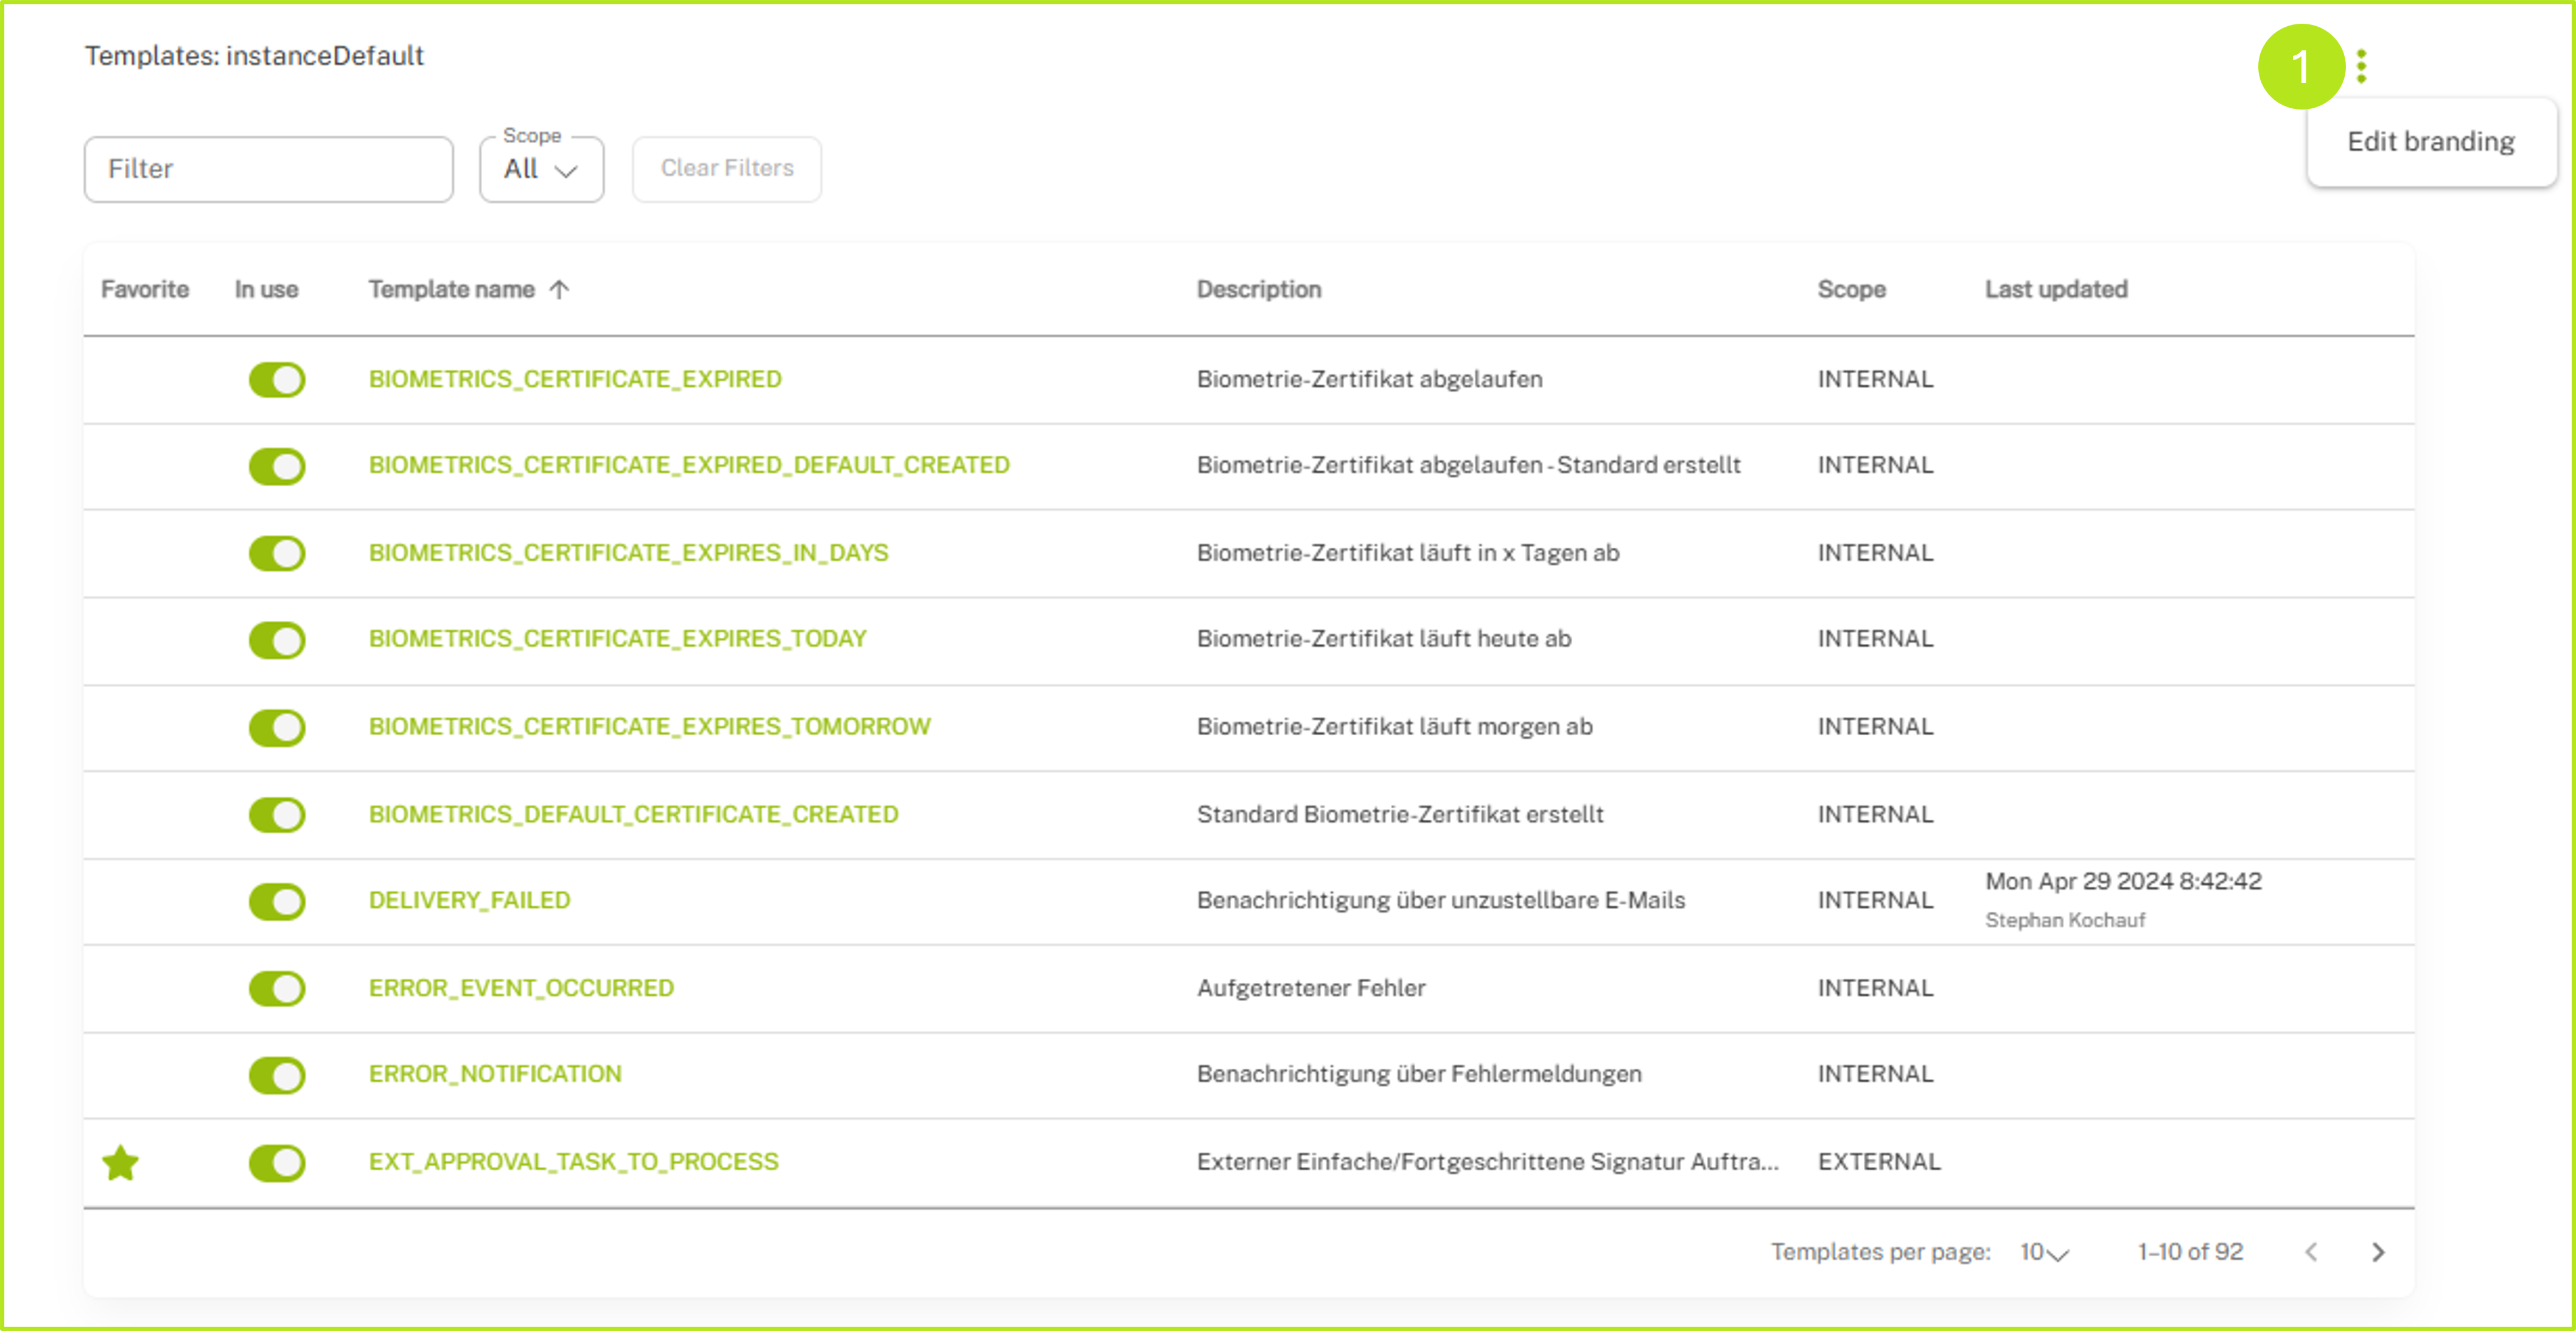
Figure 4: Drop-down menu for editing the branding in MOXIS NEMO.
Step 3: You can make the following changes in the overview (see figure 5):
XiTip
To edit an area, first click the checkbox to activate it (see figure 5).
Base colour (see figure 5 [1])
In this section, you can customise the base colour via the colour picker.
Base font (see figure 5 [2])
Select from Arial, Courier, Courier New, Georgia, Helvetica, Tahoma and Verdana as the font type.
Optional: If you would like to use an individual font and this has been stored by your XiTrust contact person, it will also appear here for selection.
Email alignment (see figure 5 [3])
Adjust the content of the email to ‘left aligned’ or ‘centre aligned’.
You can make the following settings for both internal (see figure 5 [4]) and external e-mail configuration (see figure 5 [5]):
Upload logo (see figure 5 [6])
You can upload your logo in the grey box. This logo will automatically be inserted in the header of all sent e-mails.
SMTP sender (see figure 5 [7])
Configure the SMTP (Simple Mail Transfer Protocol) sender here. This is visible to the recipients of all e-mails.
Please note: The entered email address must authorise MOXIS to send emails.
Company name (see figure 5 [8])
Here you can customise your company name. This is used as a variable in the mail templates.
Application name (see figure 5 [9])
The name of the application can also be easily customised. This is used as a variable in the mail templates.
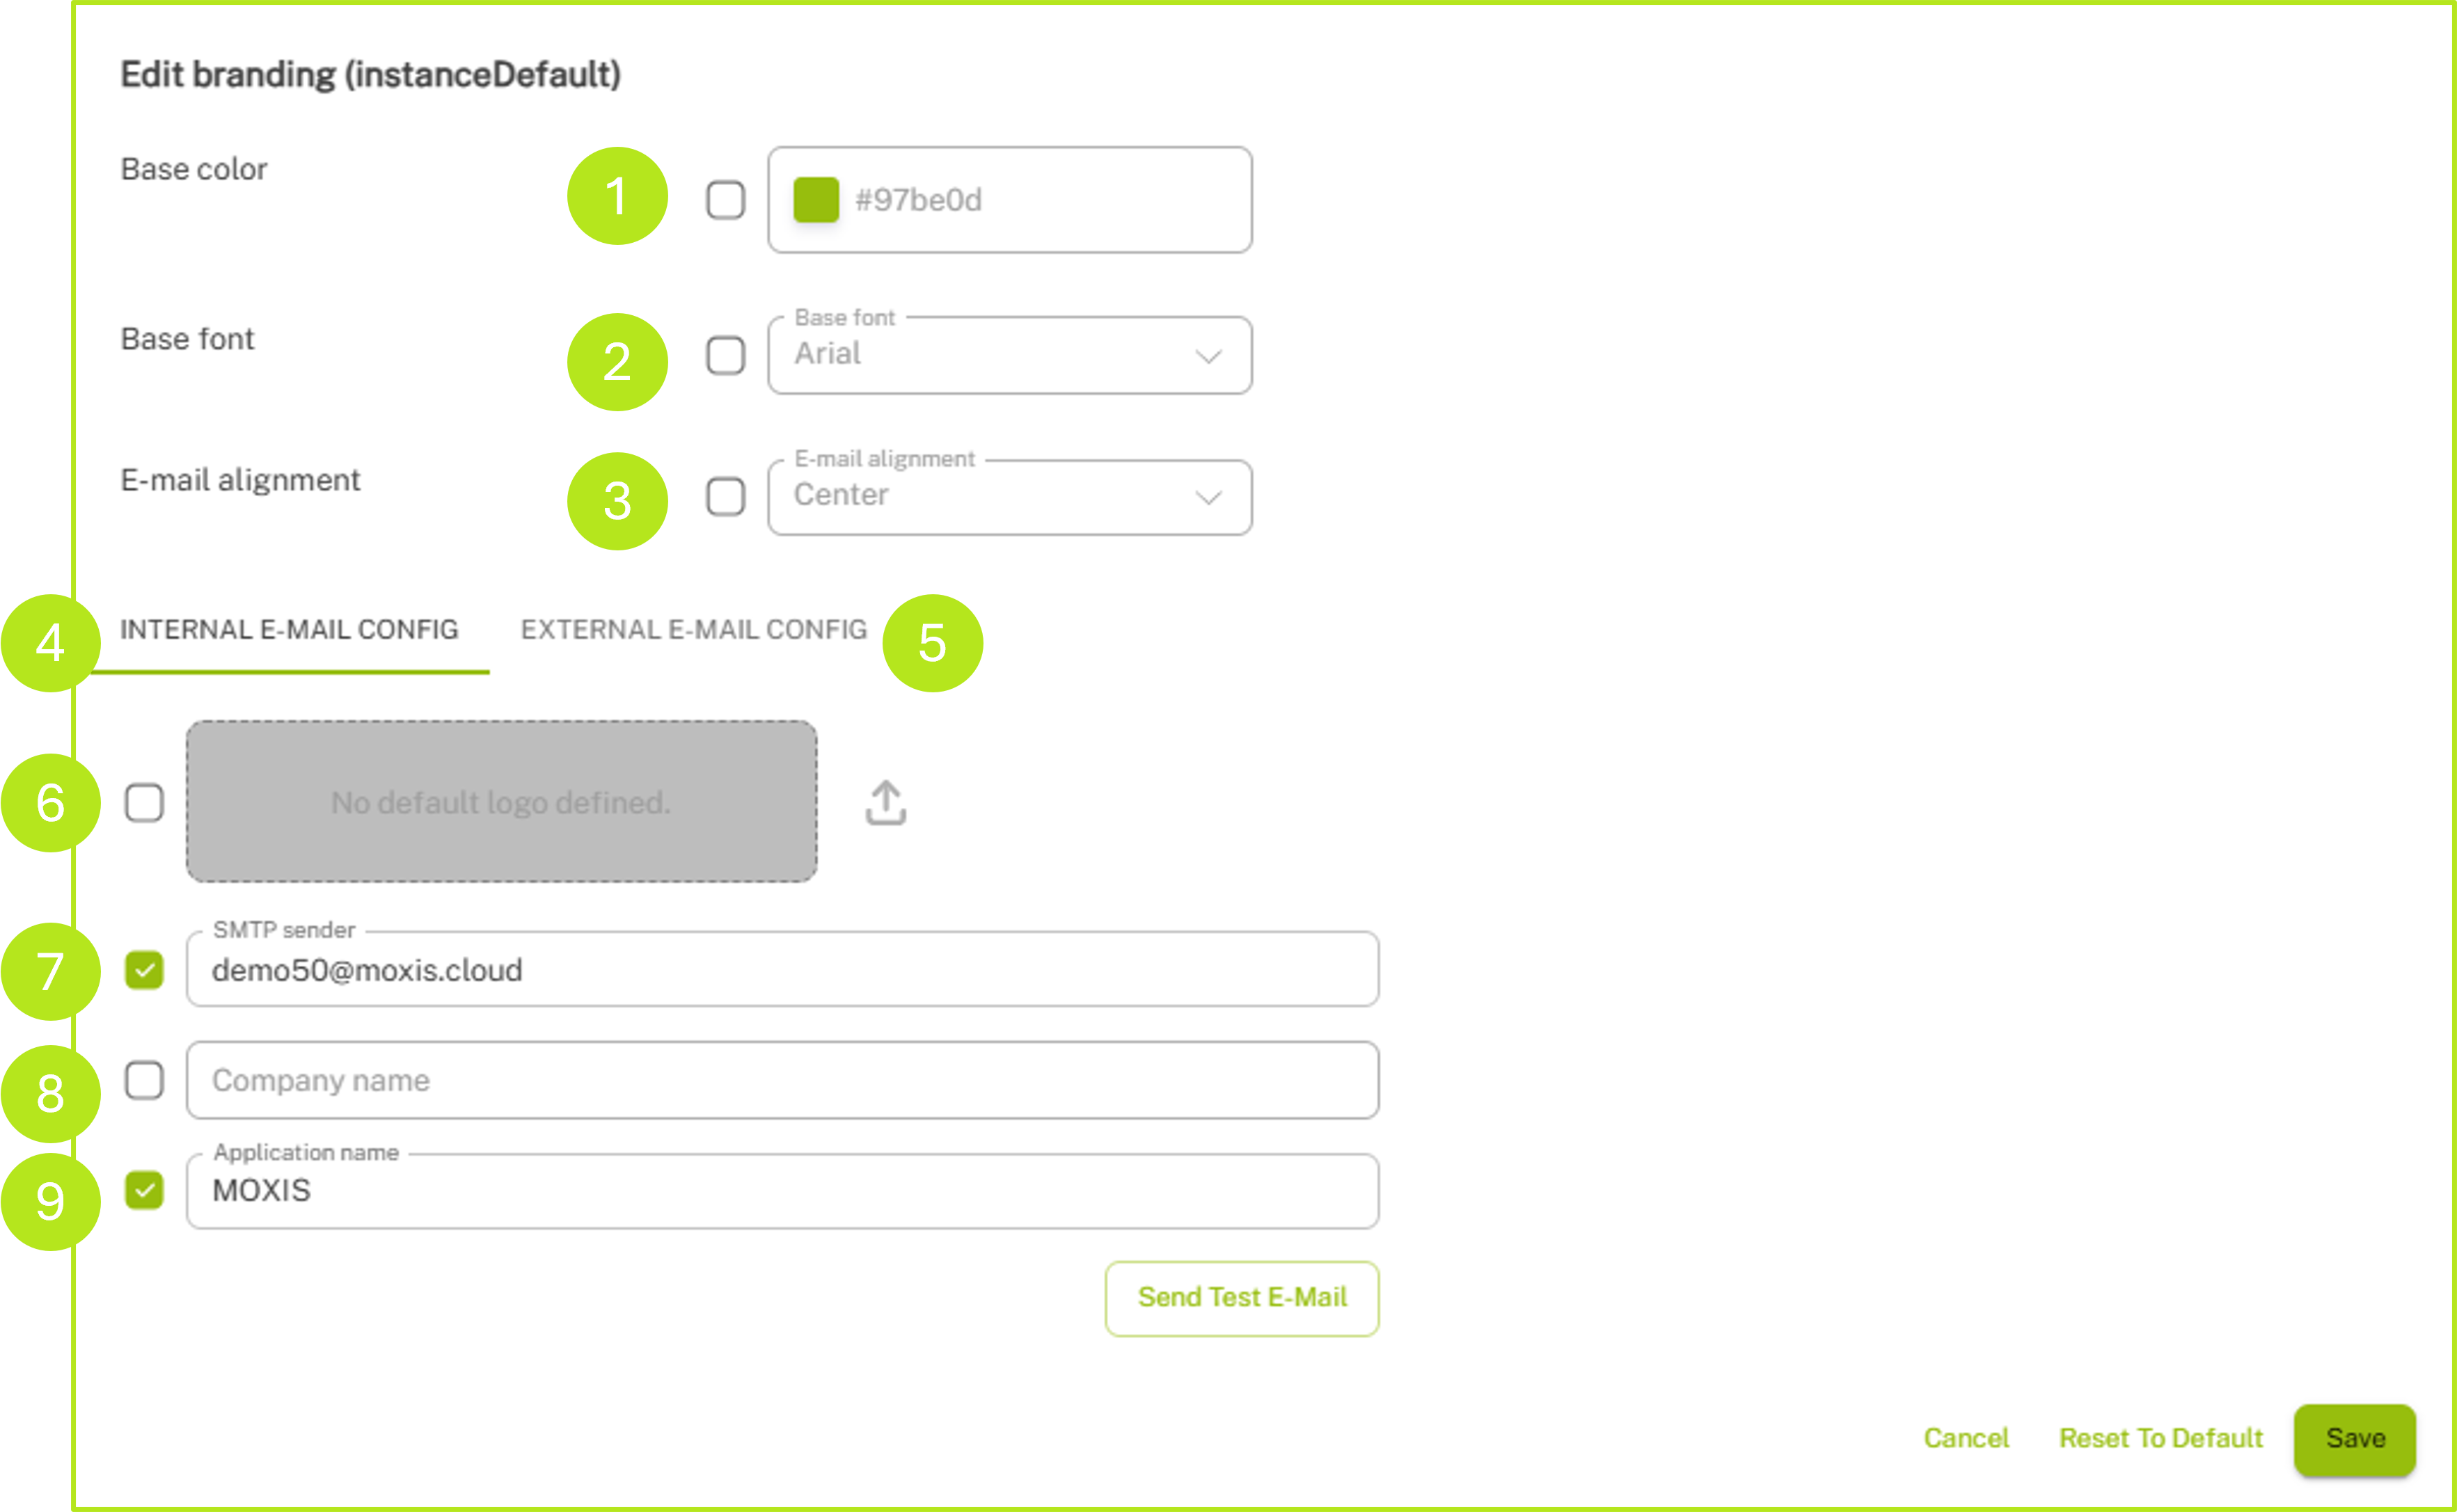
Figure 5: Email-Branding
Step 4: Once you are satisfied with all the configurations, click on the [Send Test E-Mail]-button. If the layout is as you want it, click on the [Save]-button in the interface. If you want to make further adjustments, you can do so at any time as described above. If, on the other hand, you wish to discard the changes, click on Cancel or Reset to default.
2.3. Optional: How do I change the footer of an email?
Depending on your contract, you may also have the option to configuring the footer in emails. However, this option must be configured beforehand.
Step 1: To change the footer of an email, click on Edit footer in the branding drop-down menu. This option only appears if the branding footer option is configured beforehand. An overview will now open (see figure 6).
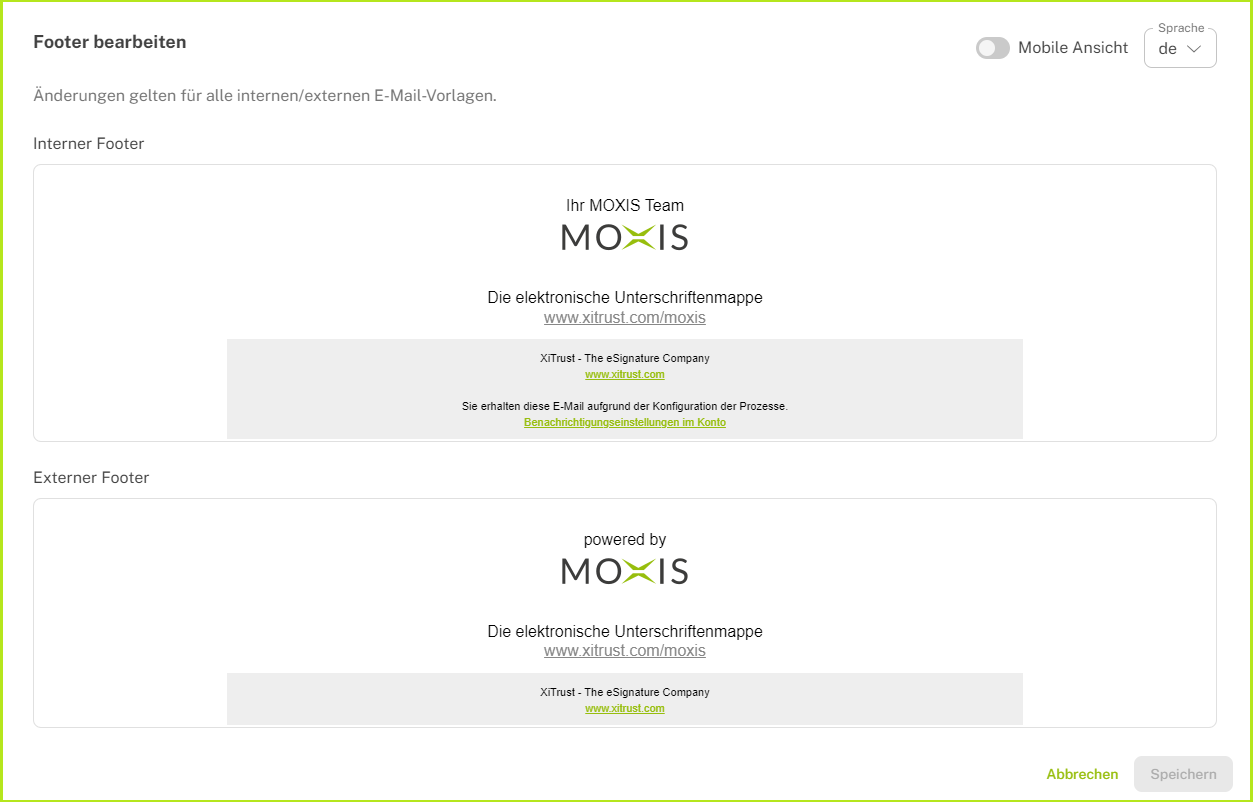
Figure 6: Overview of the configuration options for e-mail footers in MOXIS NEMO
Step 2: In the overview that opens, you can edit the footer of external and internal mails by clicking in the respective field. A WYSIWYG editor (What You See Is What You Get editor; see figure 7) opens.
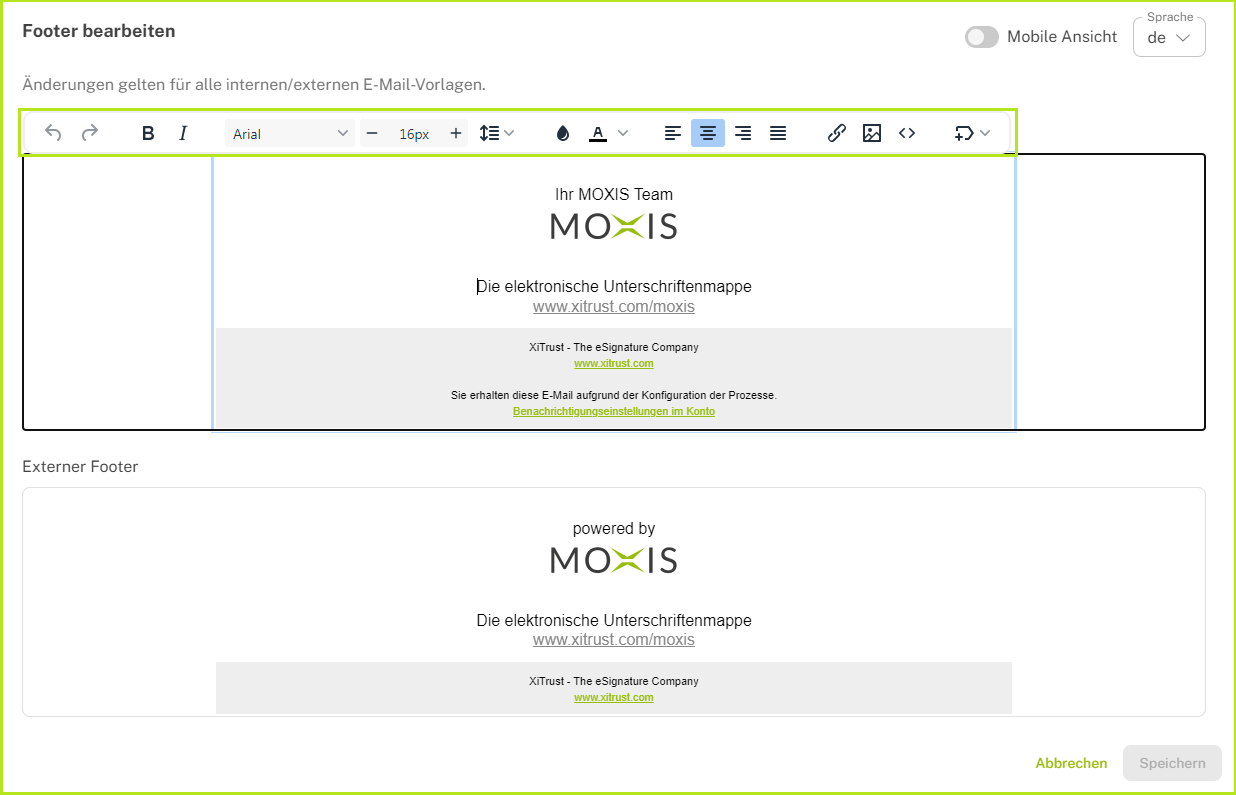
Figure 7: MOXIS NEMO WYSIWYG editor for the internal and external footer (depending on which field you activate)
Step 3: You can now use the WYSIWYG editor to customise the footer. Here is an overview of the individual functions:
Undo/Redo

Font styling (from left to right):
bold,
italic,
change font via drop-down menu
change font size by clicking on + or -

Line spacing
Change colour (from left to right)
Custom colour
Change text colour

Text alignment (left to right)
left aligned
centre aligned
right aligned
justified

Insert image

Display source code

Insert MOXIS-specific variables
Step 4: MOXIS NEMO also allows you to view the mobile view as a preview. To do this, click on the slide control to the top right next to mobile view and activate it (it will turn green, see figure 8). The preview usually shows 360 pixels in width. However, depending on the smartphone or e-mail client, it may vary in the final version.
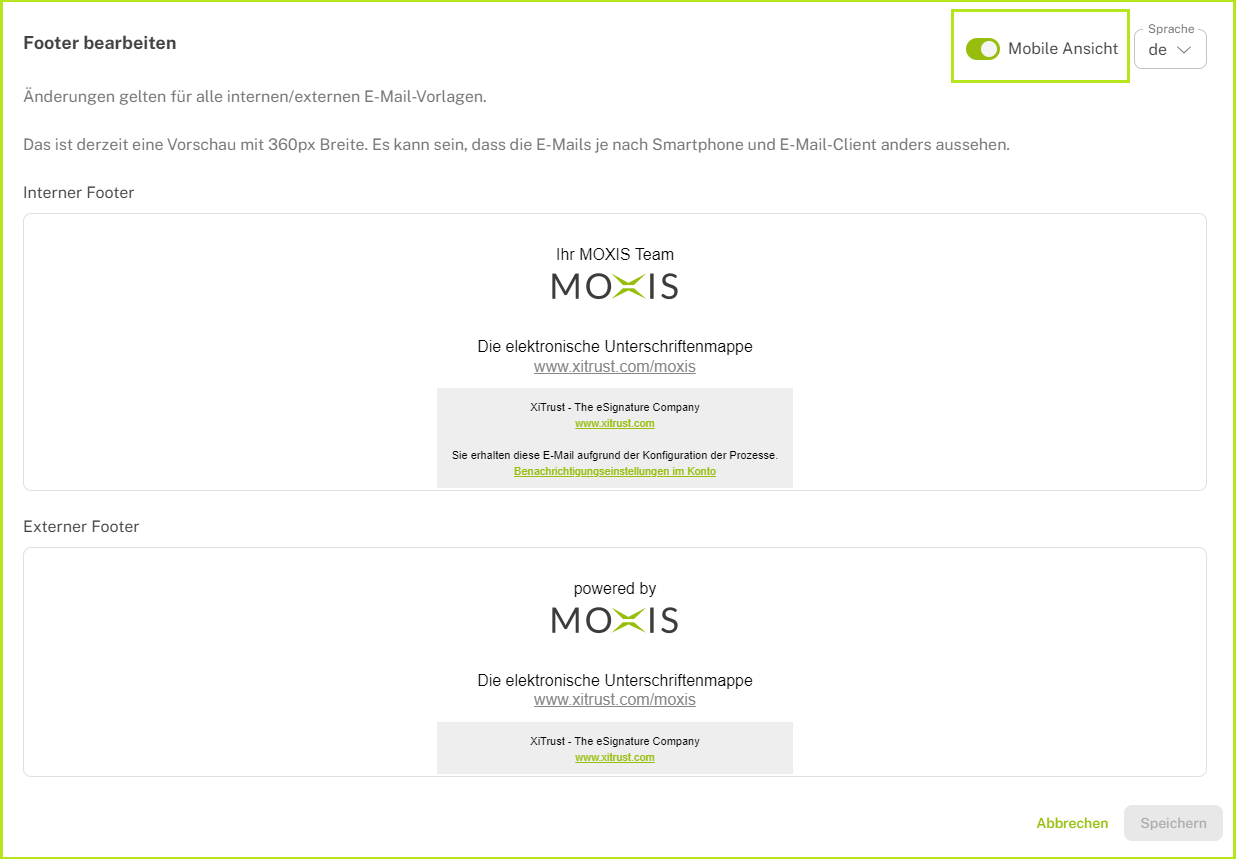
Figure 8: Switching to mobile view in MOXIS NEMO. Footer with a width of 360px.
2.4. How do I change an email template in MOXIS NEMO?
Changes to an email template can also be made using a WYSIWYG editor. This has the same editing options as the editor in the footer area (see the last chapter). In the following instructions, we will explain to you step by step how to customise a template.
Step 1: Select a template from the template list and open it by clicking on the template name (see figure 9).
.png?inst-v=1c57040a-43b4-493b-9938-25021fa84b57)
Figure 9: Template overview. Open a template by clicking on the template name.
Step 2: In the template, click in the area you want to customise. The WYSIWYG editor will open. You can use it to customise your template as you wish (see figure 10).
Menu items (from left to right)
Mobile view (see figure 10 [1]): Switch to mobile view. The editing options correspond to those in the last chapter.
Change the language (see figure 10 [2]): Switch between German and English using the drop-down menu.
[Send Test E-mail]-button (see figure 10 [3]): Send a test email to check whether the template meets your expectations.
[History]-button (see figure 10 [4]): Shows the template's change history. The changes only affect the template, which is why the current branding is used.
[Reset To Default]-button (see figure 10 [5]): Revert your template to the default if you are not satisfied with the changes.
[Save]-button (see figure 10 [1]): Click this button to save your template.
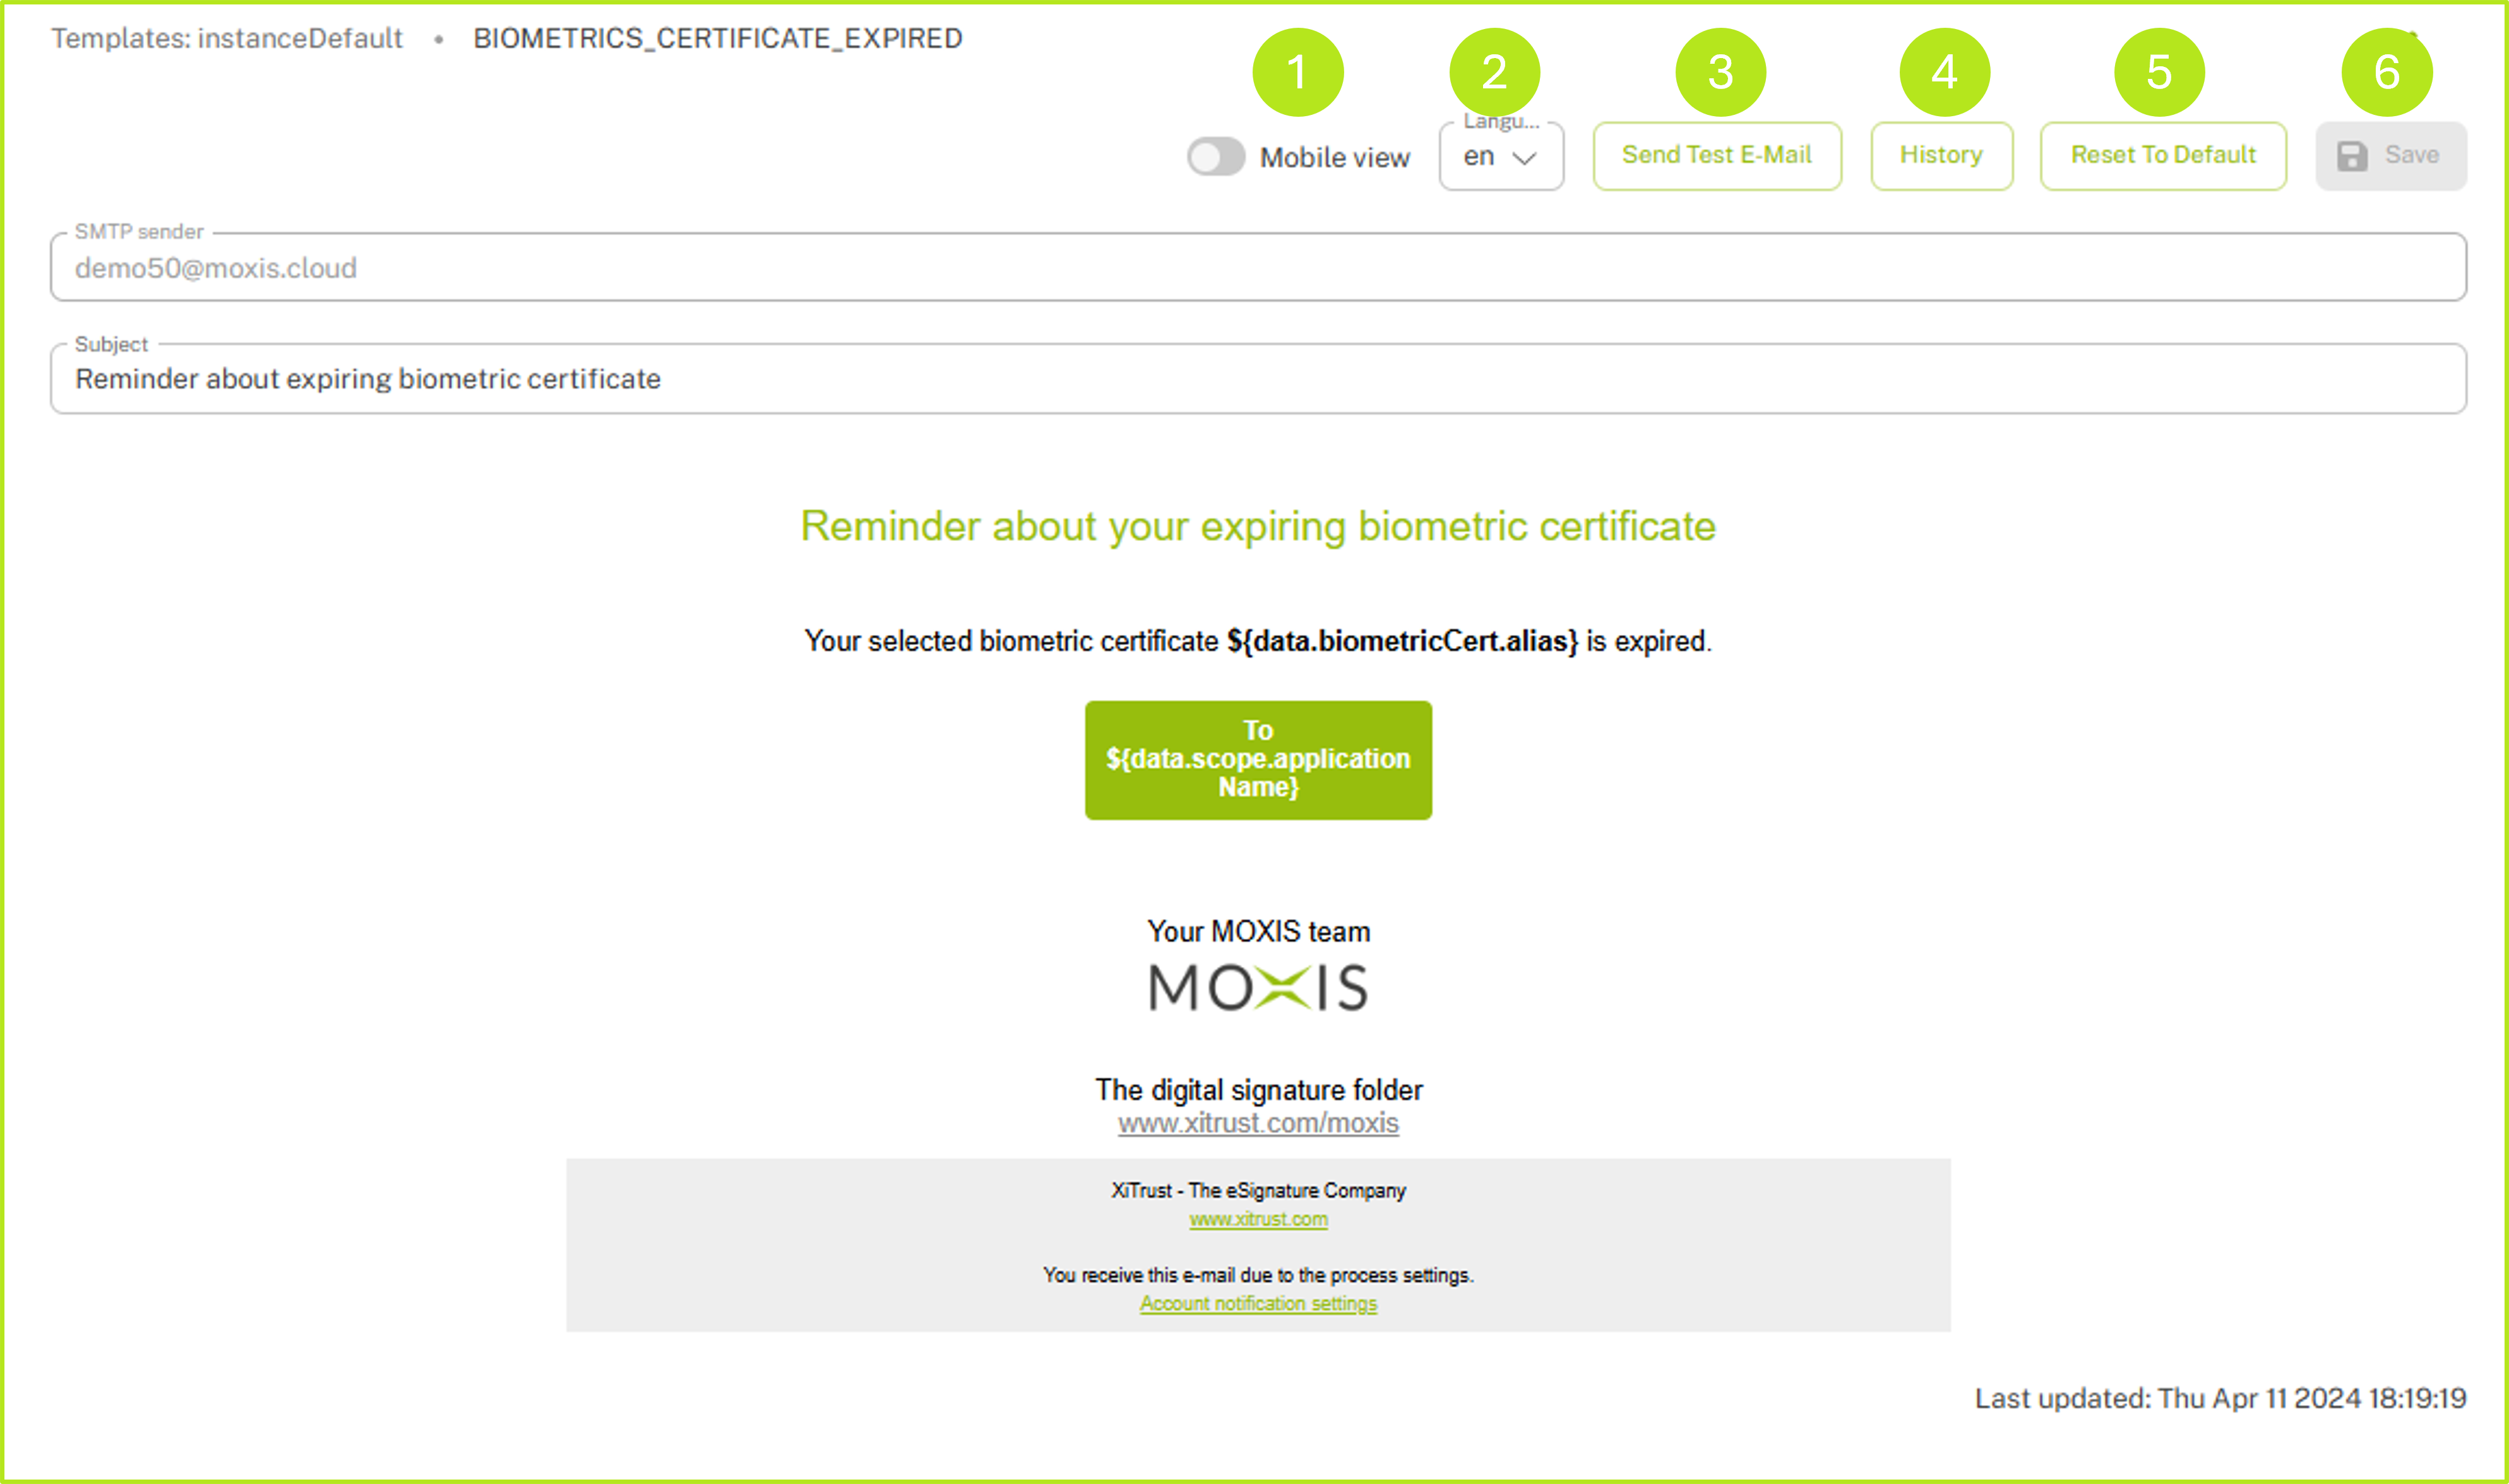
Figure 10: Customisation of a standard template using the WYSIWYG editor.
2.5. Can I also create my own mail templates in MOXIS NEMO?
No, you cannot create your own mail templates in MOXIS NEMO. Please note: To explore the full range of MOXIS NEMO and the associated influence on your individual signature process, we recommend a live demo, which you are welcome to request from your personal MOXIS contact.