
[v.4.53] The Dashboard - function and overview
Content
The dashboard is the entry point to MOXIS. This article will introduce you to its features.
1. The dashboard in MOXIS 4.53 – function and overview
The dashboard consists of a maximum of four parts (varies depending on role and authorisation), which are described in more detail below:
Menu (see figure 1 [1])
Received jobs (see figure 1 [2])
Sent jobs (see figure 1 [3])
Quick links (see figure 1 [4])
It also provides you with an overview of all orders (see figure 1). These can be divided into three categories:
Created
To be managed
To be signed
XiTip
The dashboard view depends on the role assigned to you. The dashboard in our example gives you an overview of all the functions.
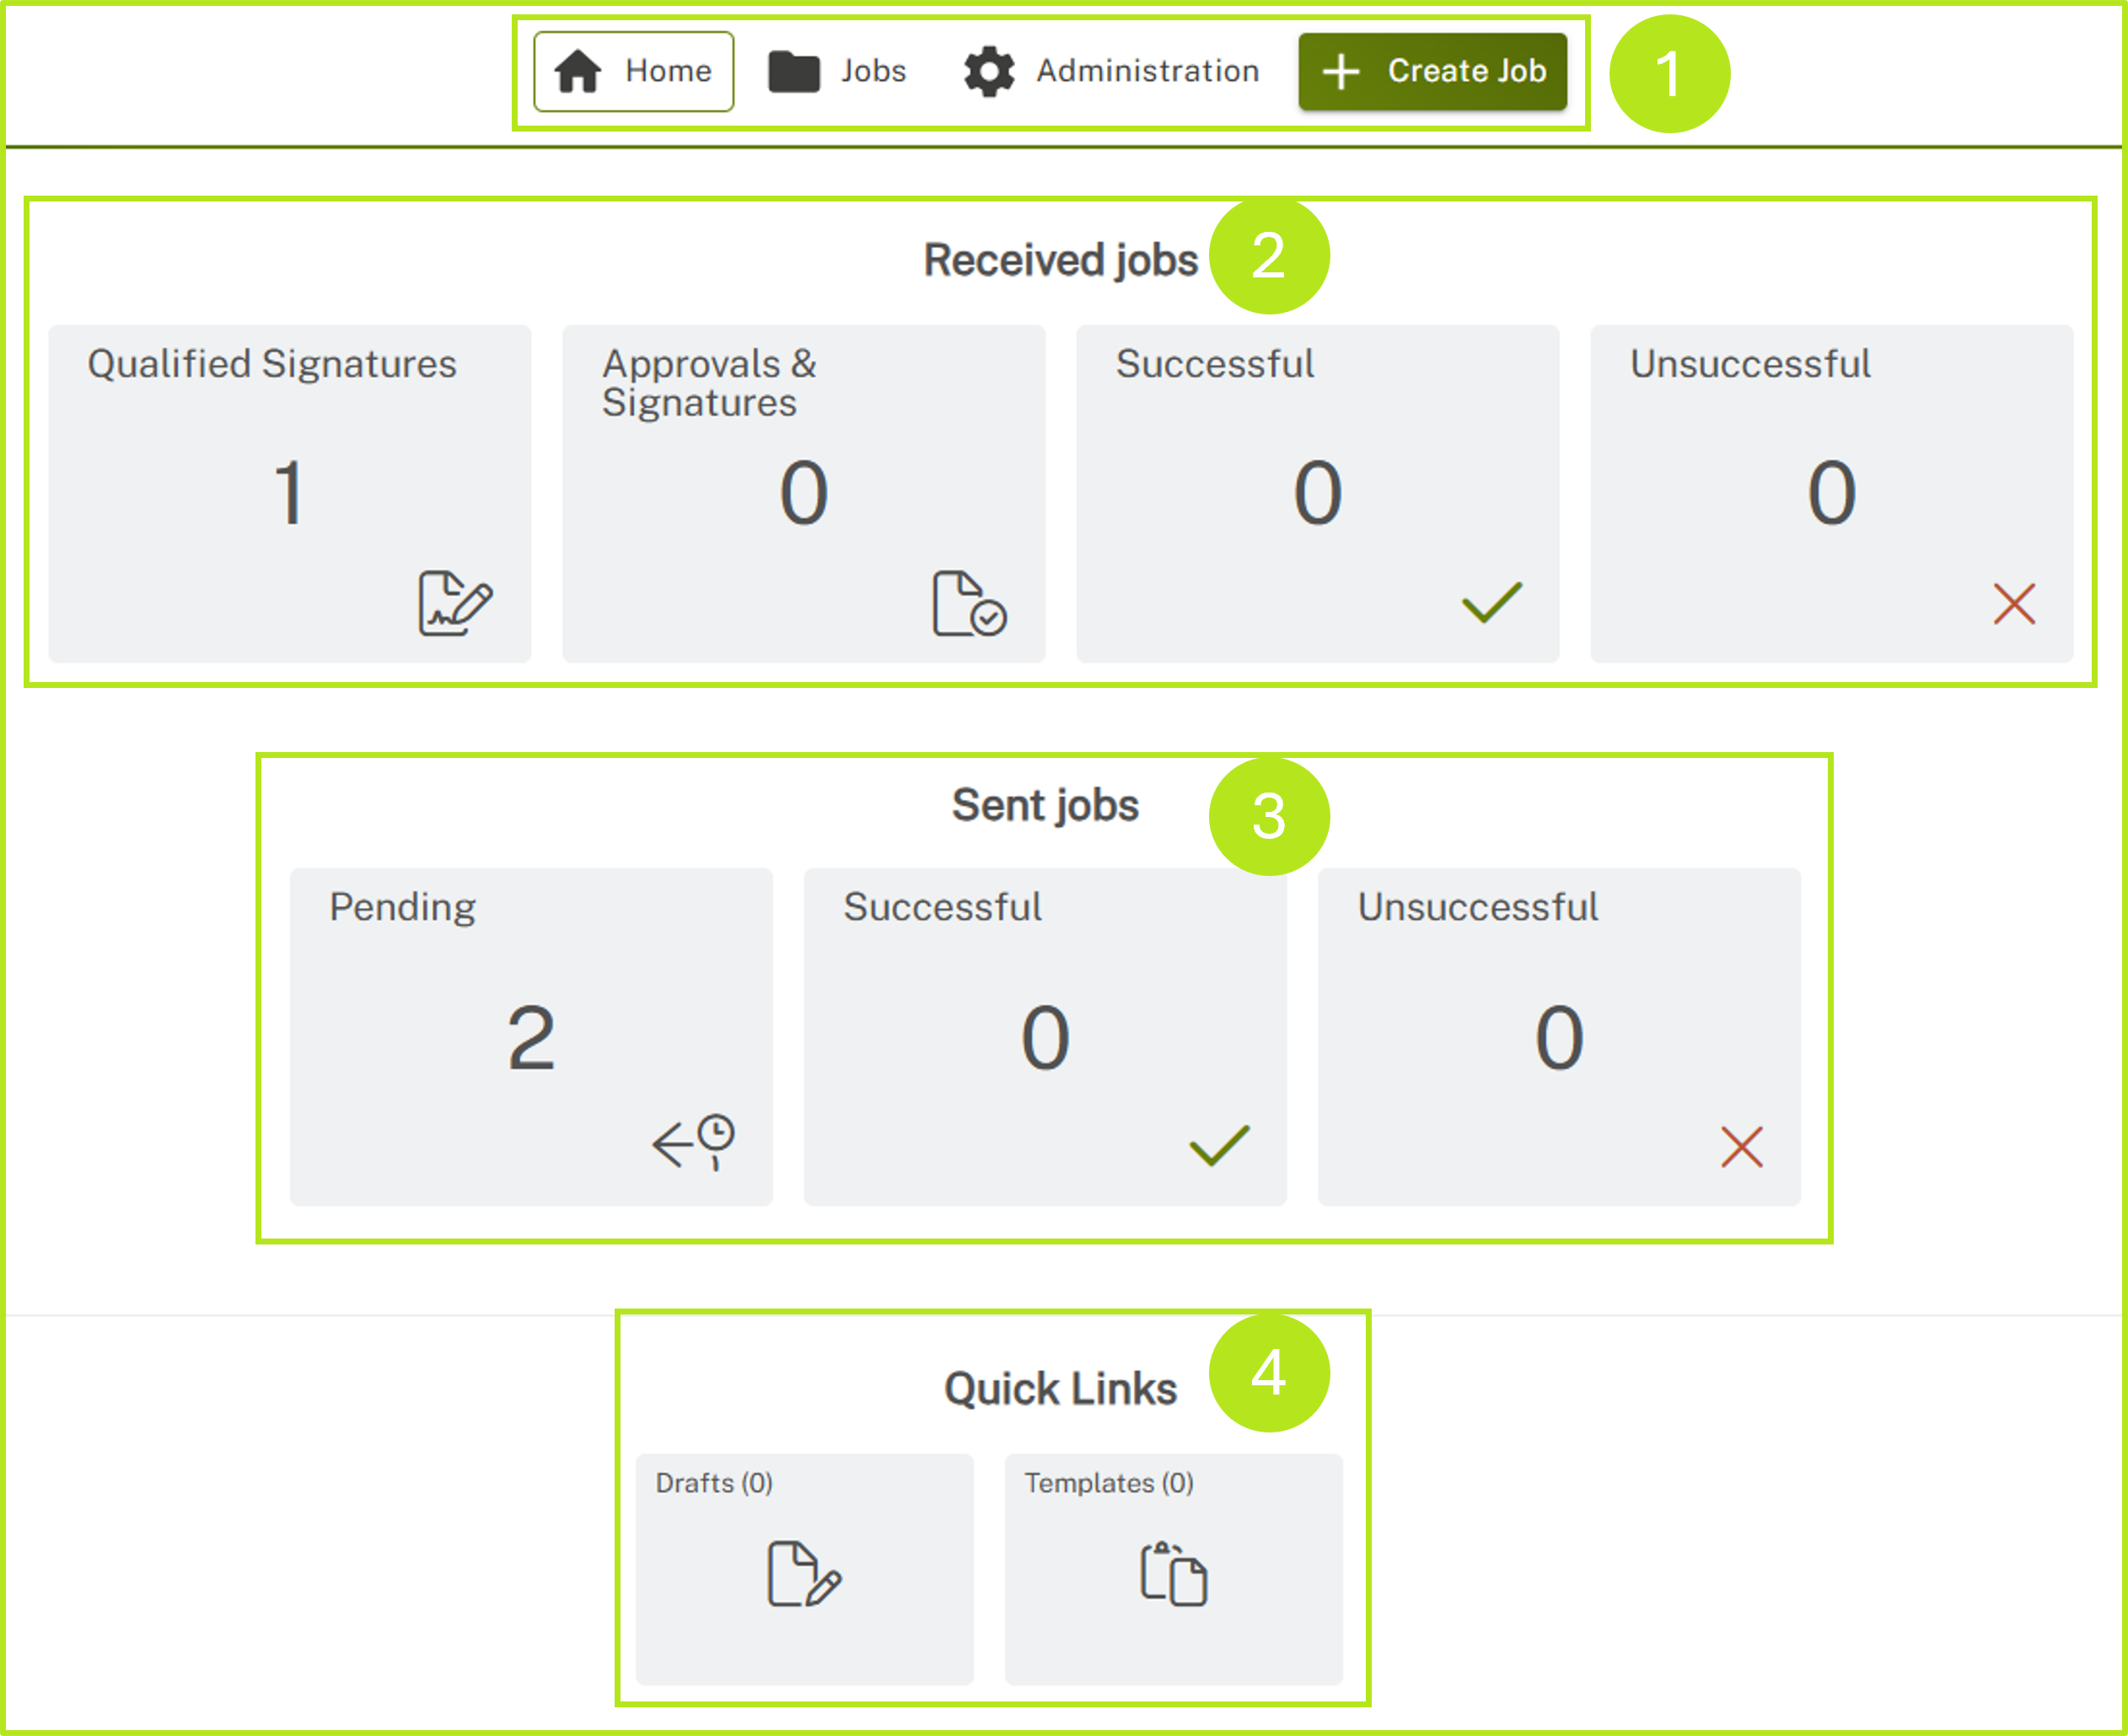
Figure 1: The starting point in MOXIS 4.53 is the dashboard. Here you can see an overview of your orders and manage or edit them according to your role.
1.1 The menu
In its maximum configuration, the menu has four menu items for managing jobs and users (see figure 2):
Home (see figure 2 [1])
Job (see figure 2 [2])
Administration (see figure 2 [3])
[+ Create job]-button (see figure 2 [4])
XiTip
Please note: To access the administration area, you must have the appropriate admin rights, otherwise this menu item will be hidden.
On the right-hand side, you will also find access to the Help page, which will redirect you to the 4.53 user manual. By clicking on the user bubble, you can configure various settings (see figure 2 [5]).

Figure 2: MOXIS 4.53 menu - overview
1.1.1 The individual menu items in detail
1. HOME
Clicking on this menu item always takes you back to the starting point, i.e. the dashboard overview (see figure 1).
2. JOBS
Under this item, you will find a detailed overview of your jobs (depending on your assigned role and corresponding rights). While you can jump between the individual folders in the menu on the left (see figure 3 [1]), the orders in the various folders are displayed on the right (see figure 3 [2]).
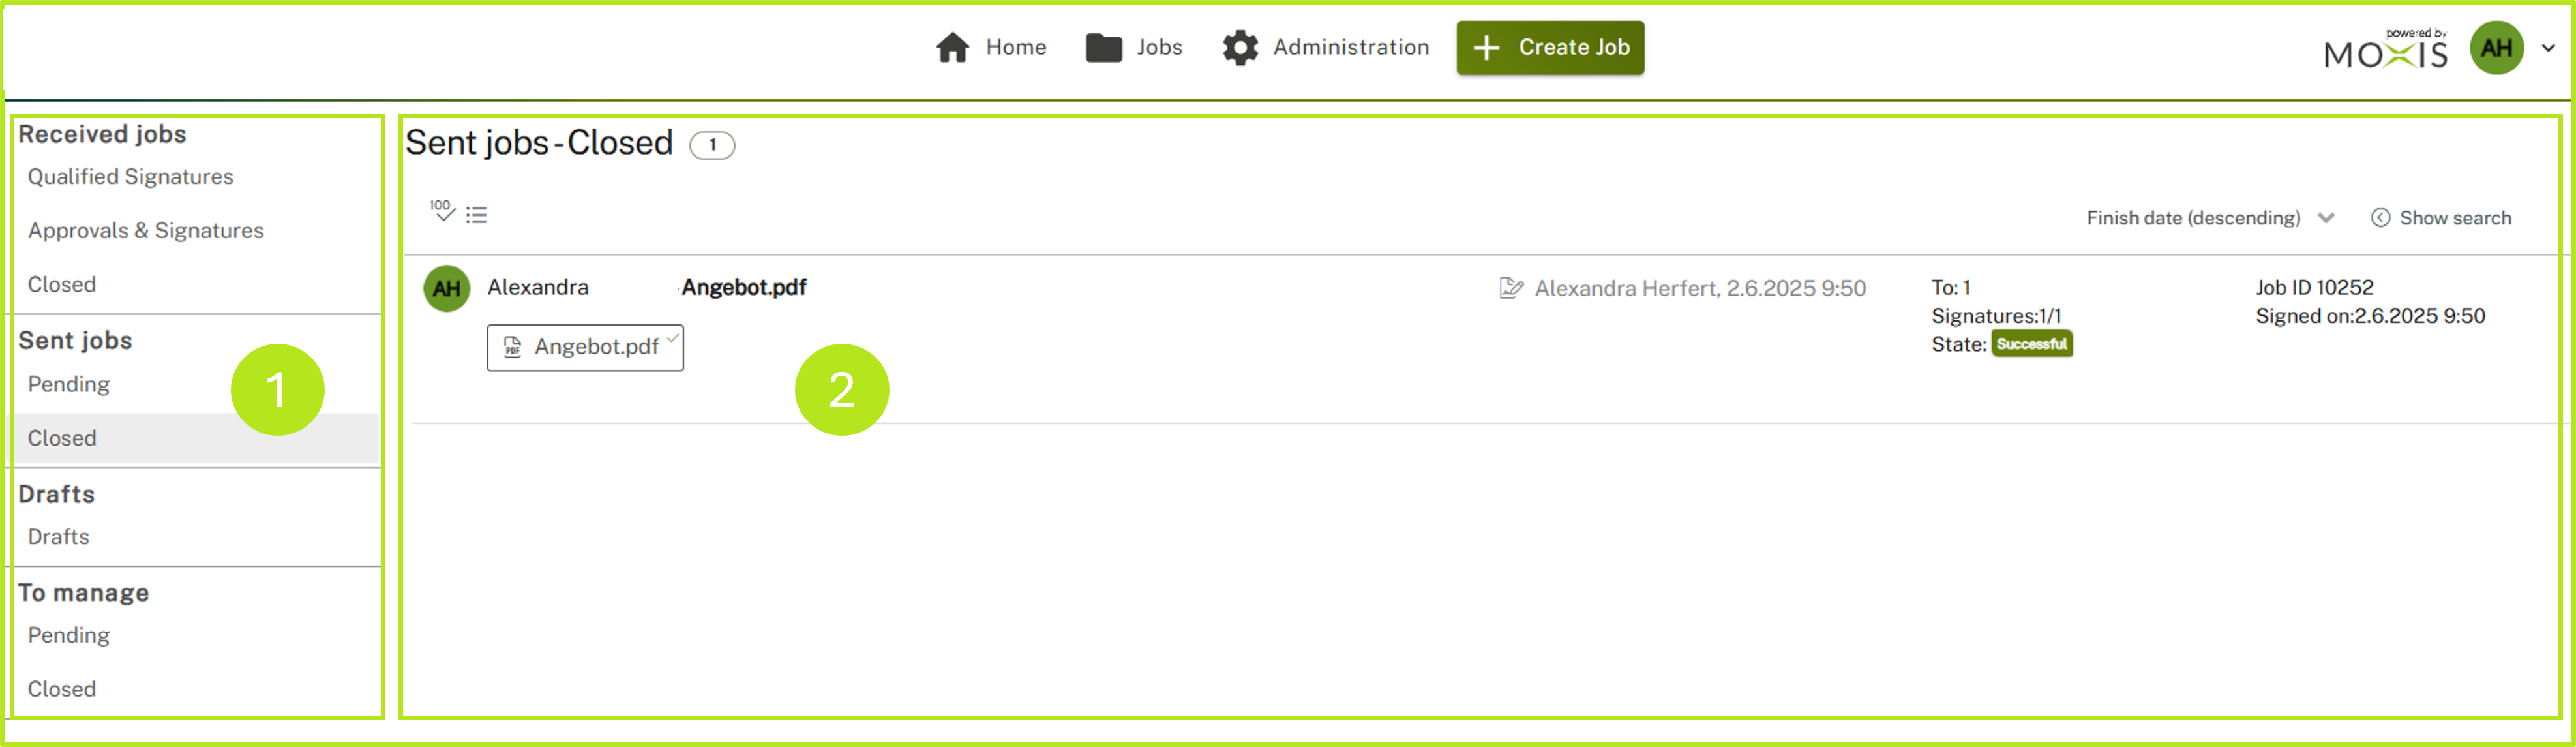
Figure 3: Job overview (here: Sent jobs - Closed)
3. ADMINISTRATION
This menu item will take you to the administration area. Please note: You must have administrator rights to make changes in this area or to see this menu item.
4. [+ Create Job]-BUTTON
You can create a new order by clicking on this button (see figure 4). Please find details on how to create a new order in this article.
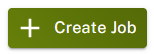
Figure 4: [+ Create Job]- Button
5. [?]-BUTTON ![]()
In the upper right corner, you will find a question mark on a green background. Click here if you have any questions.
6. USER SETTINGS
To the right of the notifications area, you can access the user settings (see figure 5). Here you can configure various settings for your user.
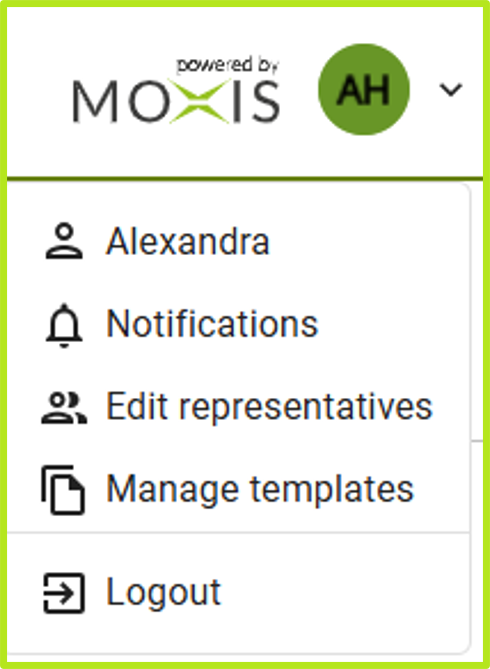
Figure 5: User settings
1.1.2 The job overview
You will find the job overview under the menu on the dashboard. It provides you with an overview of existing jobs (in this example, in the maximum layout). Depending on the rights assigned to you as a user, you will be able to view the corresponding tiles (see figure 6).
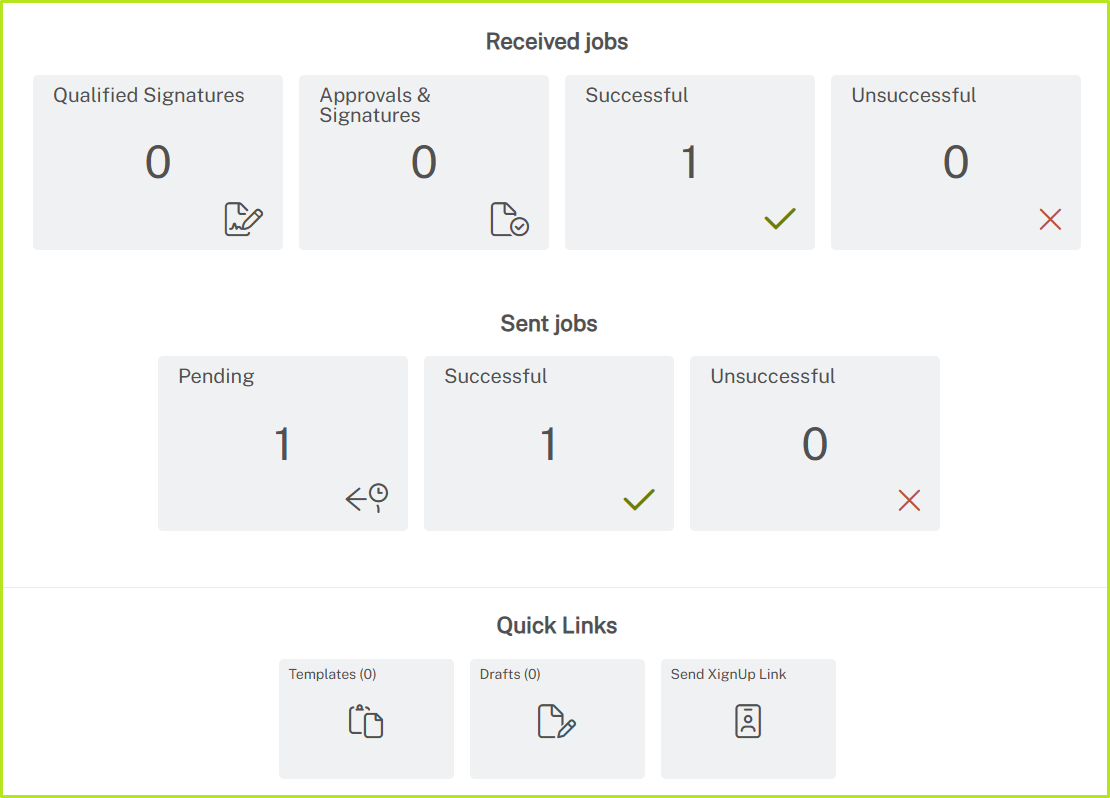
Figure 6: MOXIS 4.53 job overview
In the Received Jobs section, you will find your jobs if you have the right to sign (approvals or qualified signatures or both).
Under Sent Jobs, you will find your jobs if you have the right to create them.
In the Quick Links area, you can manage drafts, templates and (depending on the configuration of your MOXIS instance) send XignUp Links to selected users.
When you open your MOXIS account for the first time, you must confirm that you have read the service notification regarding approvals.
2. Messages when logging into MOXIS for the first time
2.1. Service notice regarding the use of ‘Approval with qualified seal’ and ‘External approval’
If you are logging into MOXIS for the first time, you must confirm that you have read the service notice regarding approvals. To do so, tick the box next to I have read and understood this service notice and click on the [Confirm]-button (see figure 7).
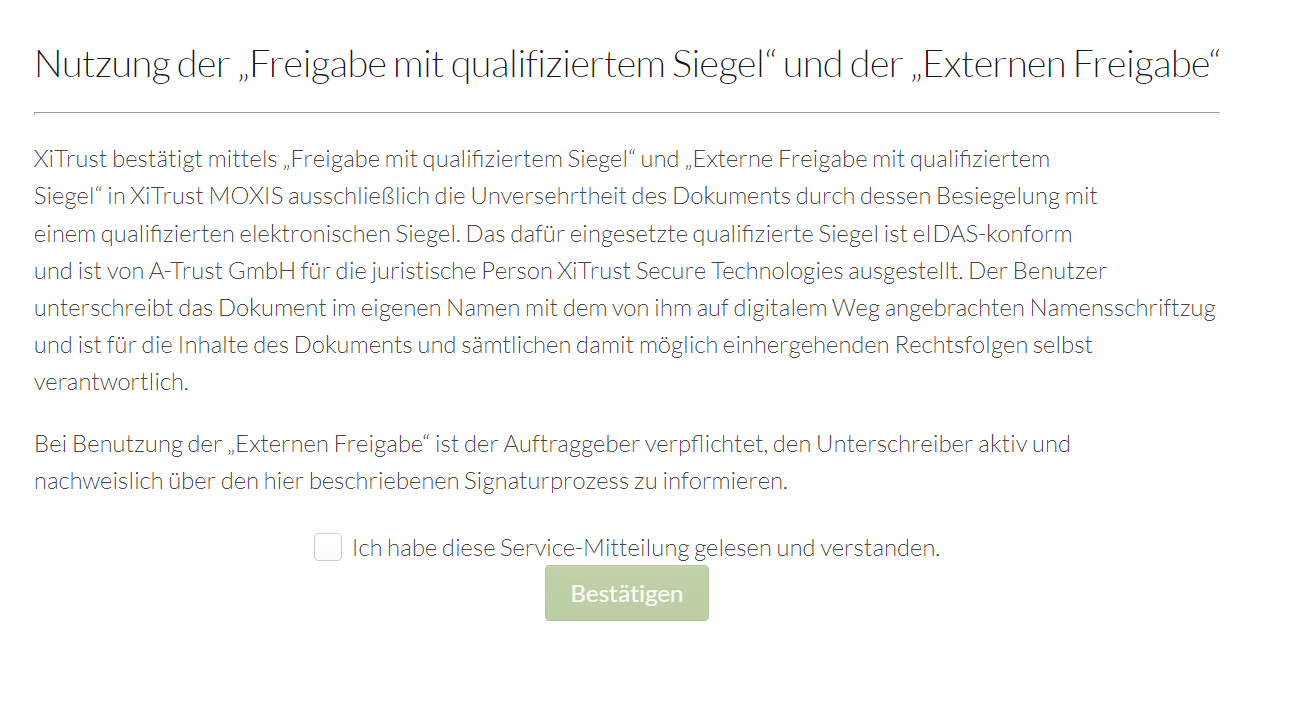
Figure 7: Service notice regarding approvals
2.2 Note on the full use of MOXIS
You will also be informed that you must complete your profile in order to use MOXIS to its full extent. Clicking on the [Complete now]-button will take you directly to your account settings. If you wish to change these settings at a later date, simply click on the [Complete later]-button (see figure 8).
XiTip
This pop-up will continue to appear after you log in until you have completed your profile. Please note: Only users who have been assigned the ‘moxisSigner’ (qualified signer) right will receive this message.
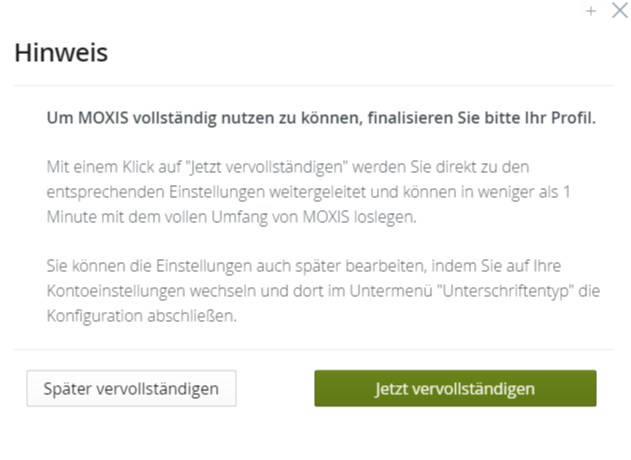
Figure 8: Note on the full use of MOXIS