
[v4.52] Create jobs
Content
This article shows how to create orders in MOXIS from version 4.52. It also provides more information about how attachments work.
1. Step by Step Tutorial: How to create a job
Step 1: To create a new job, please click on [+Create job]-button in the order overview (see Figure 2 [1]). In the drop-down menu that opens , you can choose between various processes, such as Sign Document with Attachments, Sign Document(s) with Biometrics, or Sign Document(s) (see Figure 2). In our case, we have the following two processes configured: Sign document(s) and Sign document(s) (ZertEs). For our example, we choose the simplest option: Sign document(s).
XiTip
While in MOXIS Business or MOXIS Now you can only choose between standardized options, in MOXIS Enterprise you can individualize the signing process . This saves time and resources. For further information, please contact your XiTrust contact person.
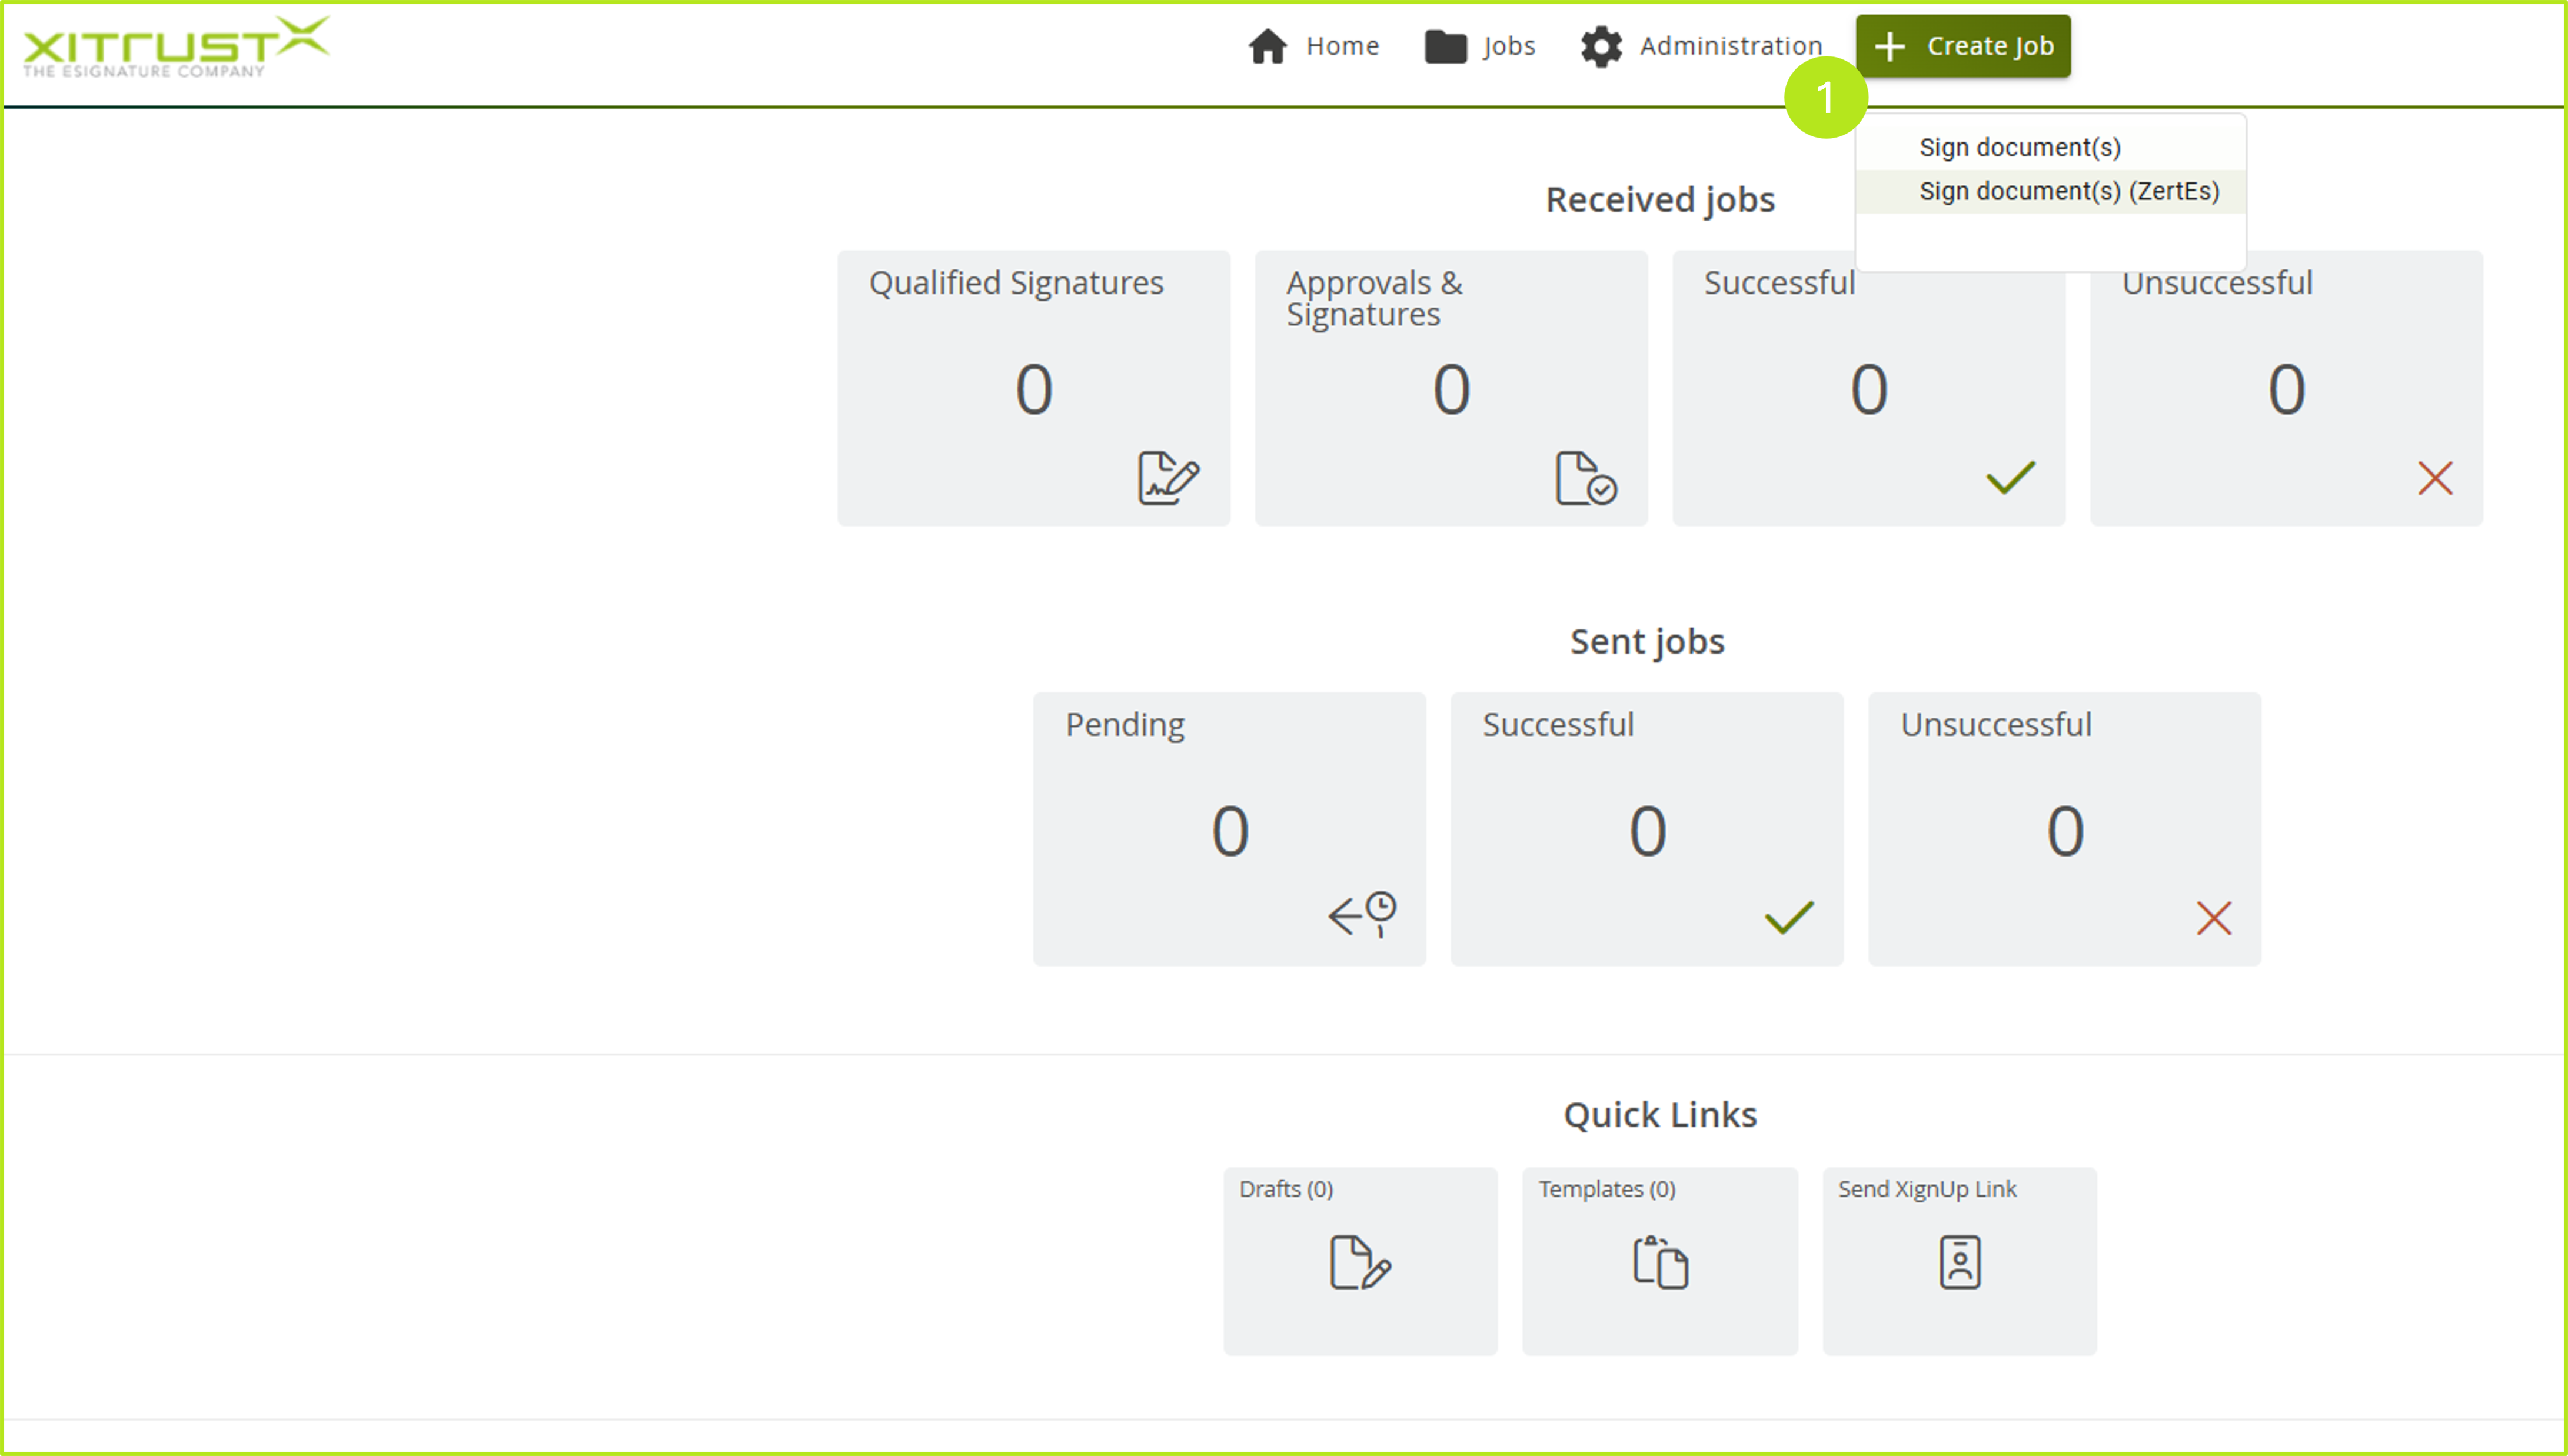
Figure 2: Creating Jobs in MOXIS
Step 2: Now please select a document you want to sign and upload it by clicking on browse (see figure 3 [1]) or simply drag the document into the gray field via drag-and-drop. Please note: The files are subject to certain restrictions imposed by your administrator and are visible in the gray field (see figure 3 [2]). If you would like to make changes here, please contact your administrator.
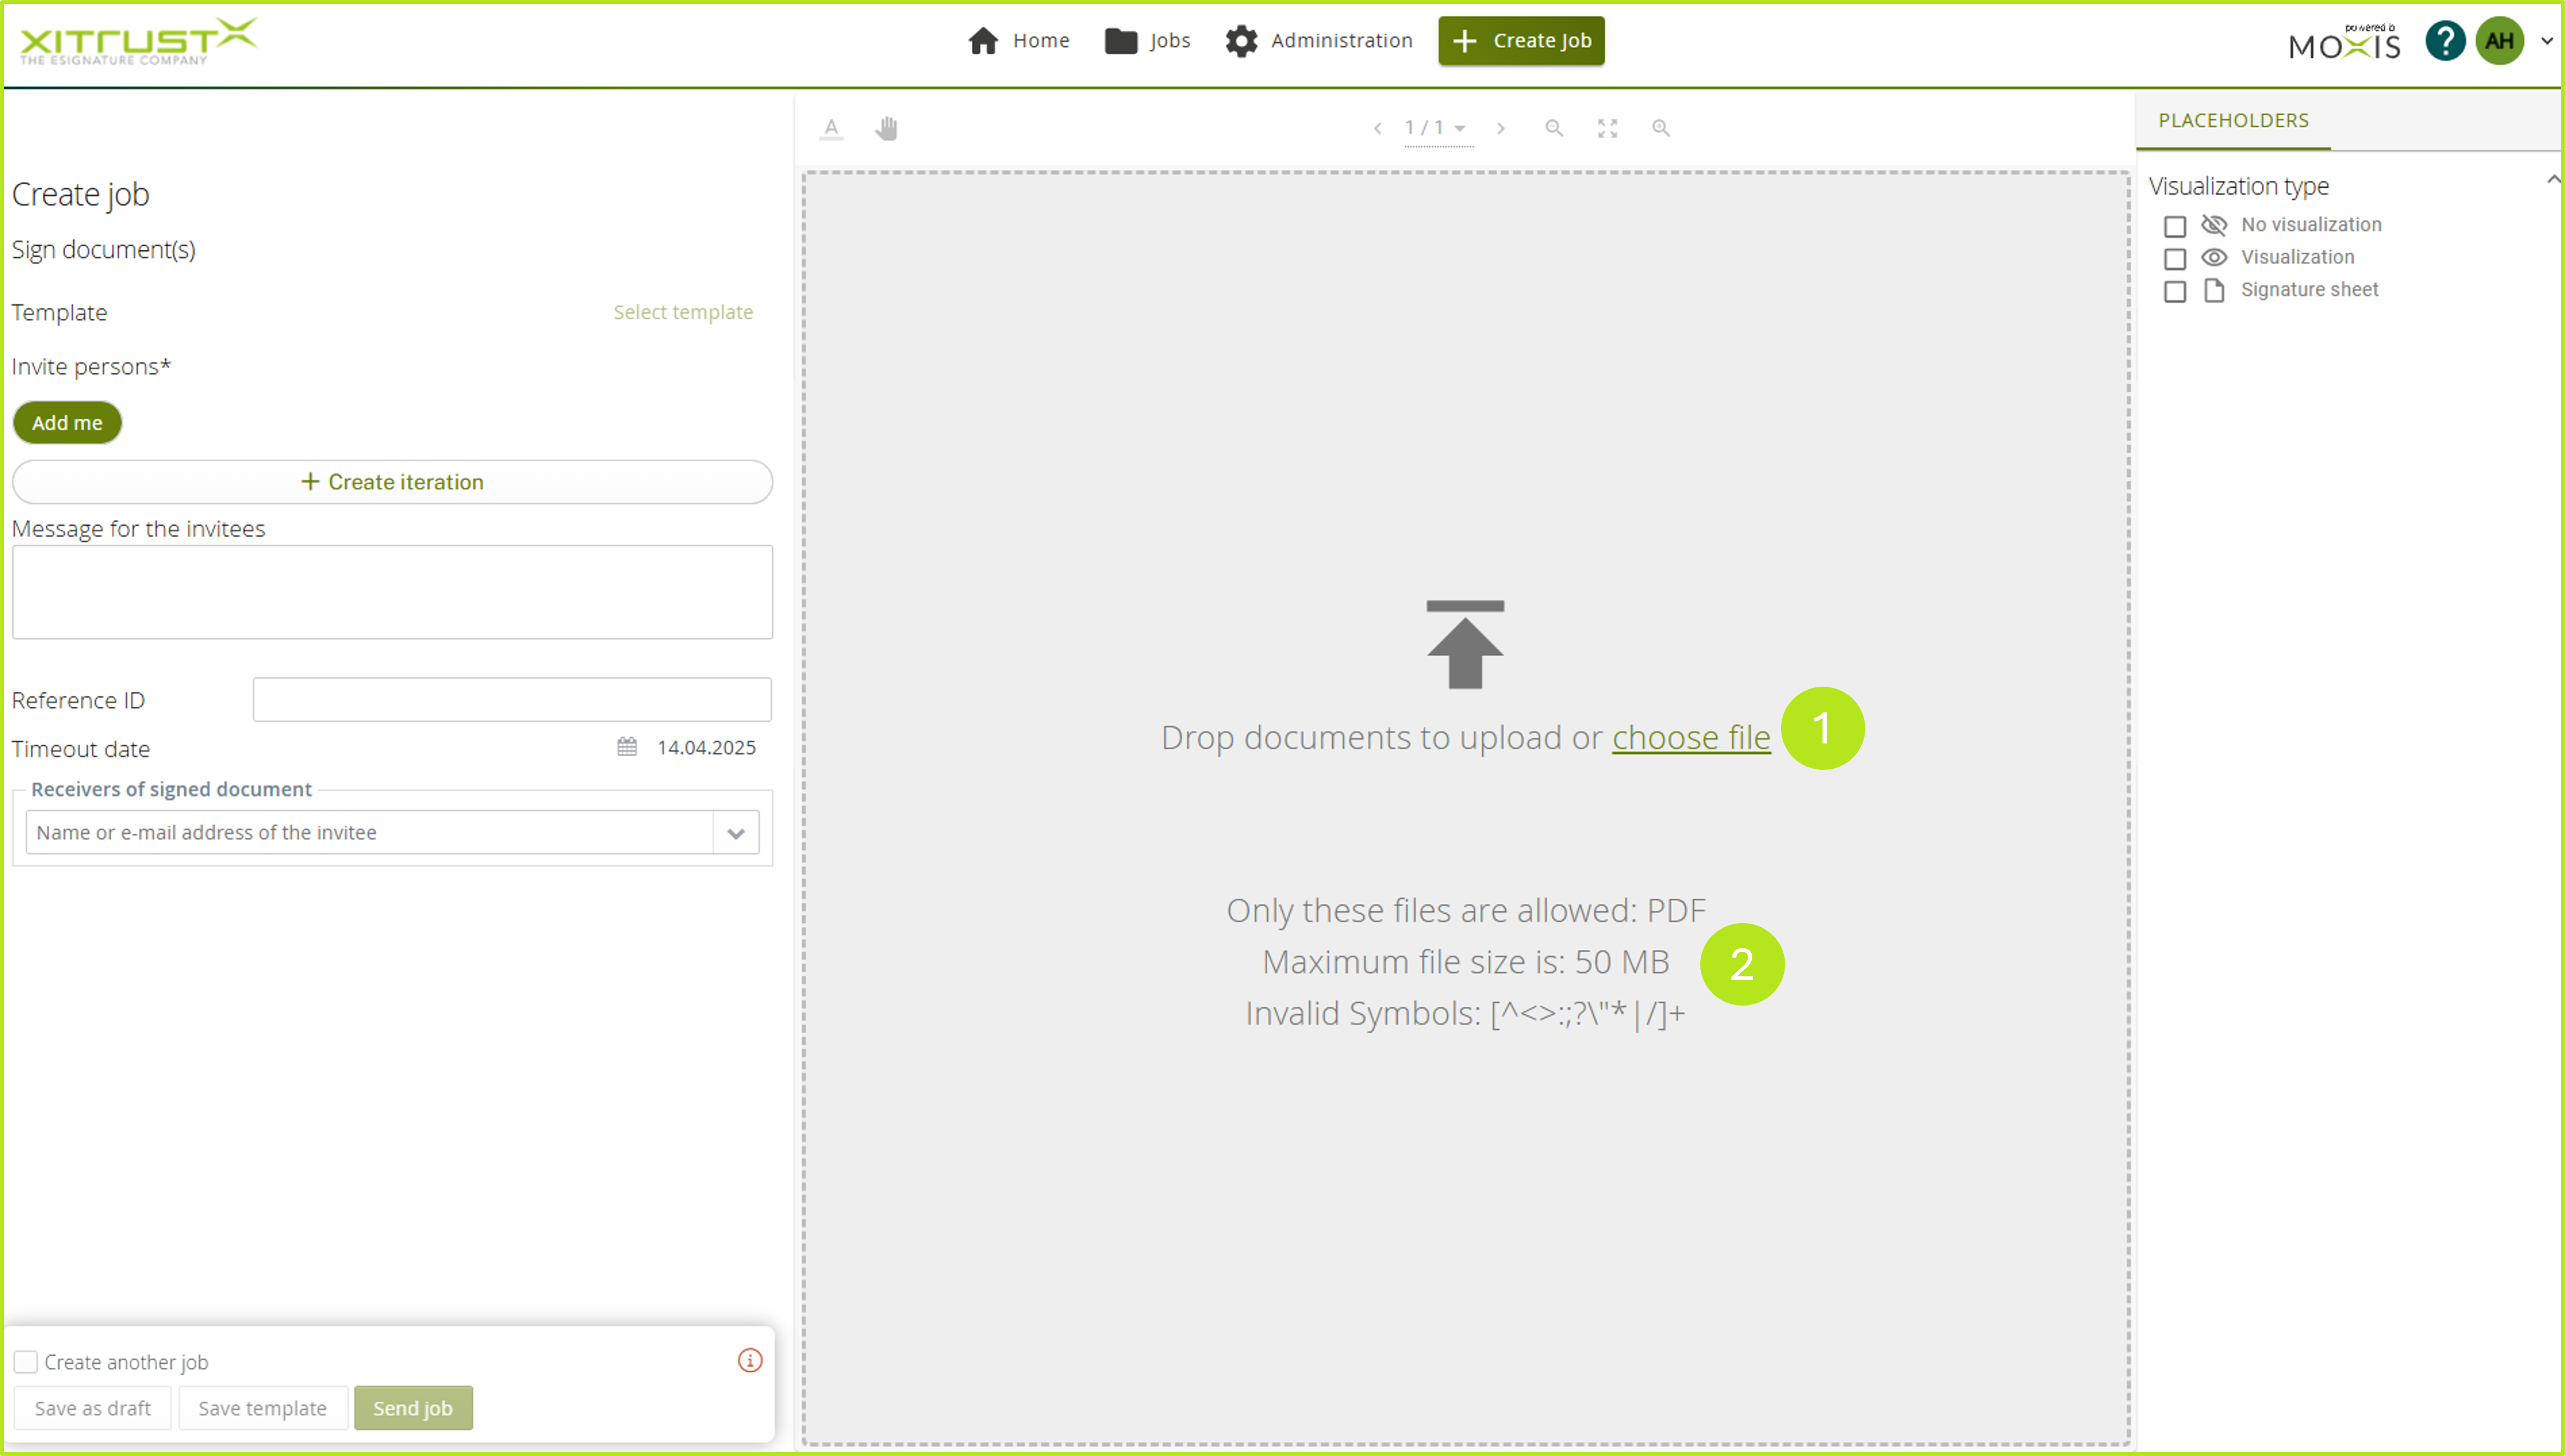
Figure 3: Add a document
Step 3: Once you have uploaded a document, you can fill in additional fields (see figure 4). You can define the signature quality and the recipients. This can be changed later.
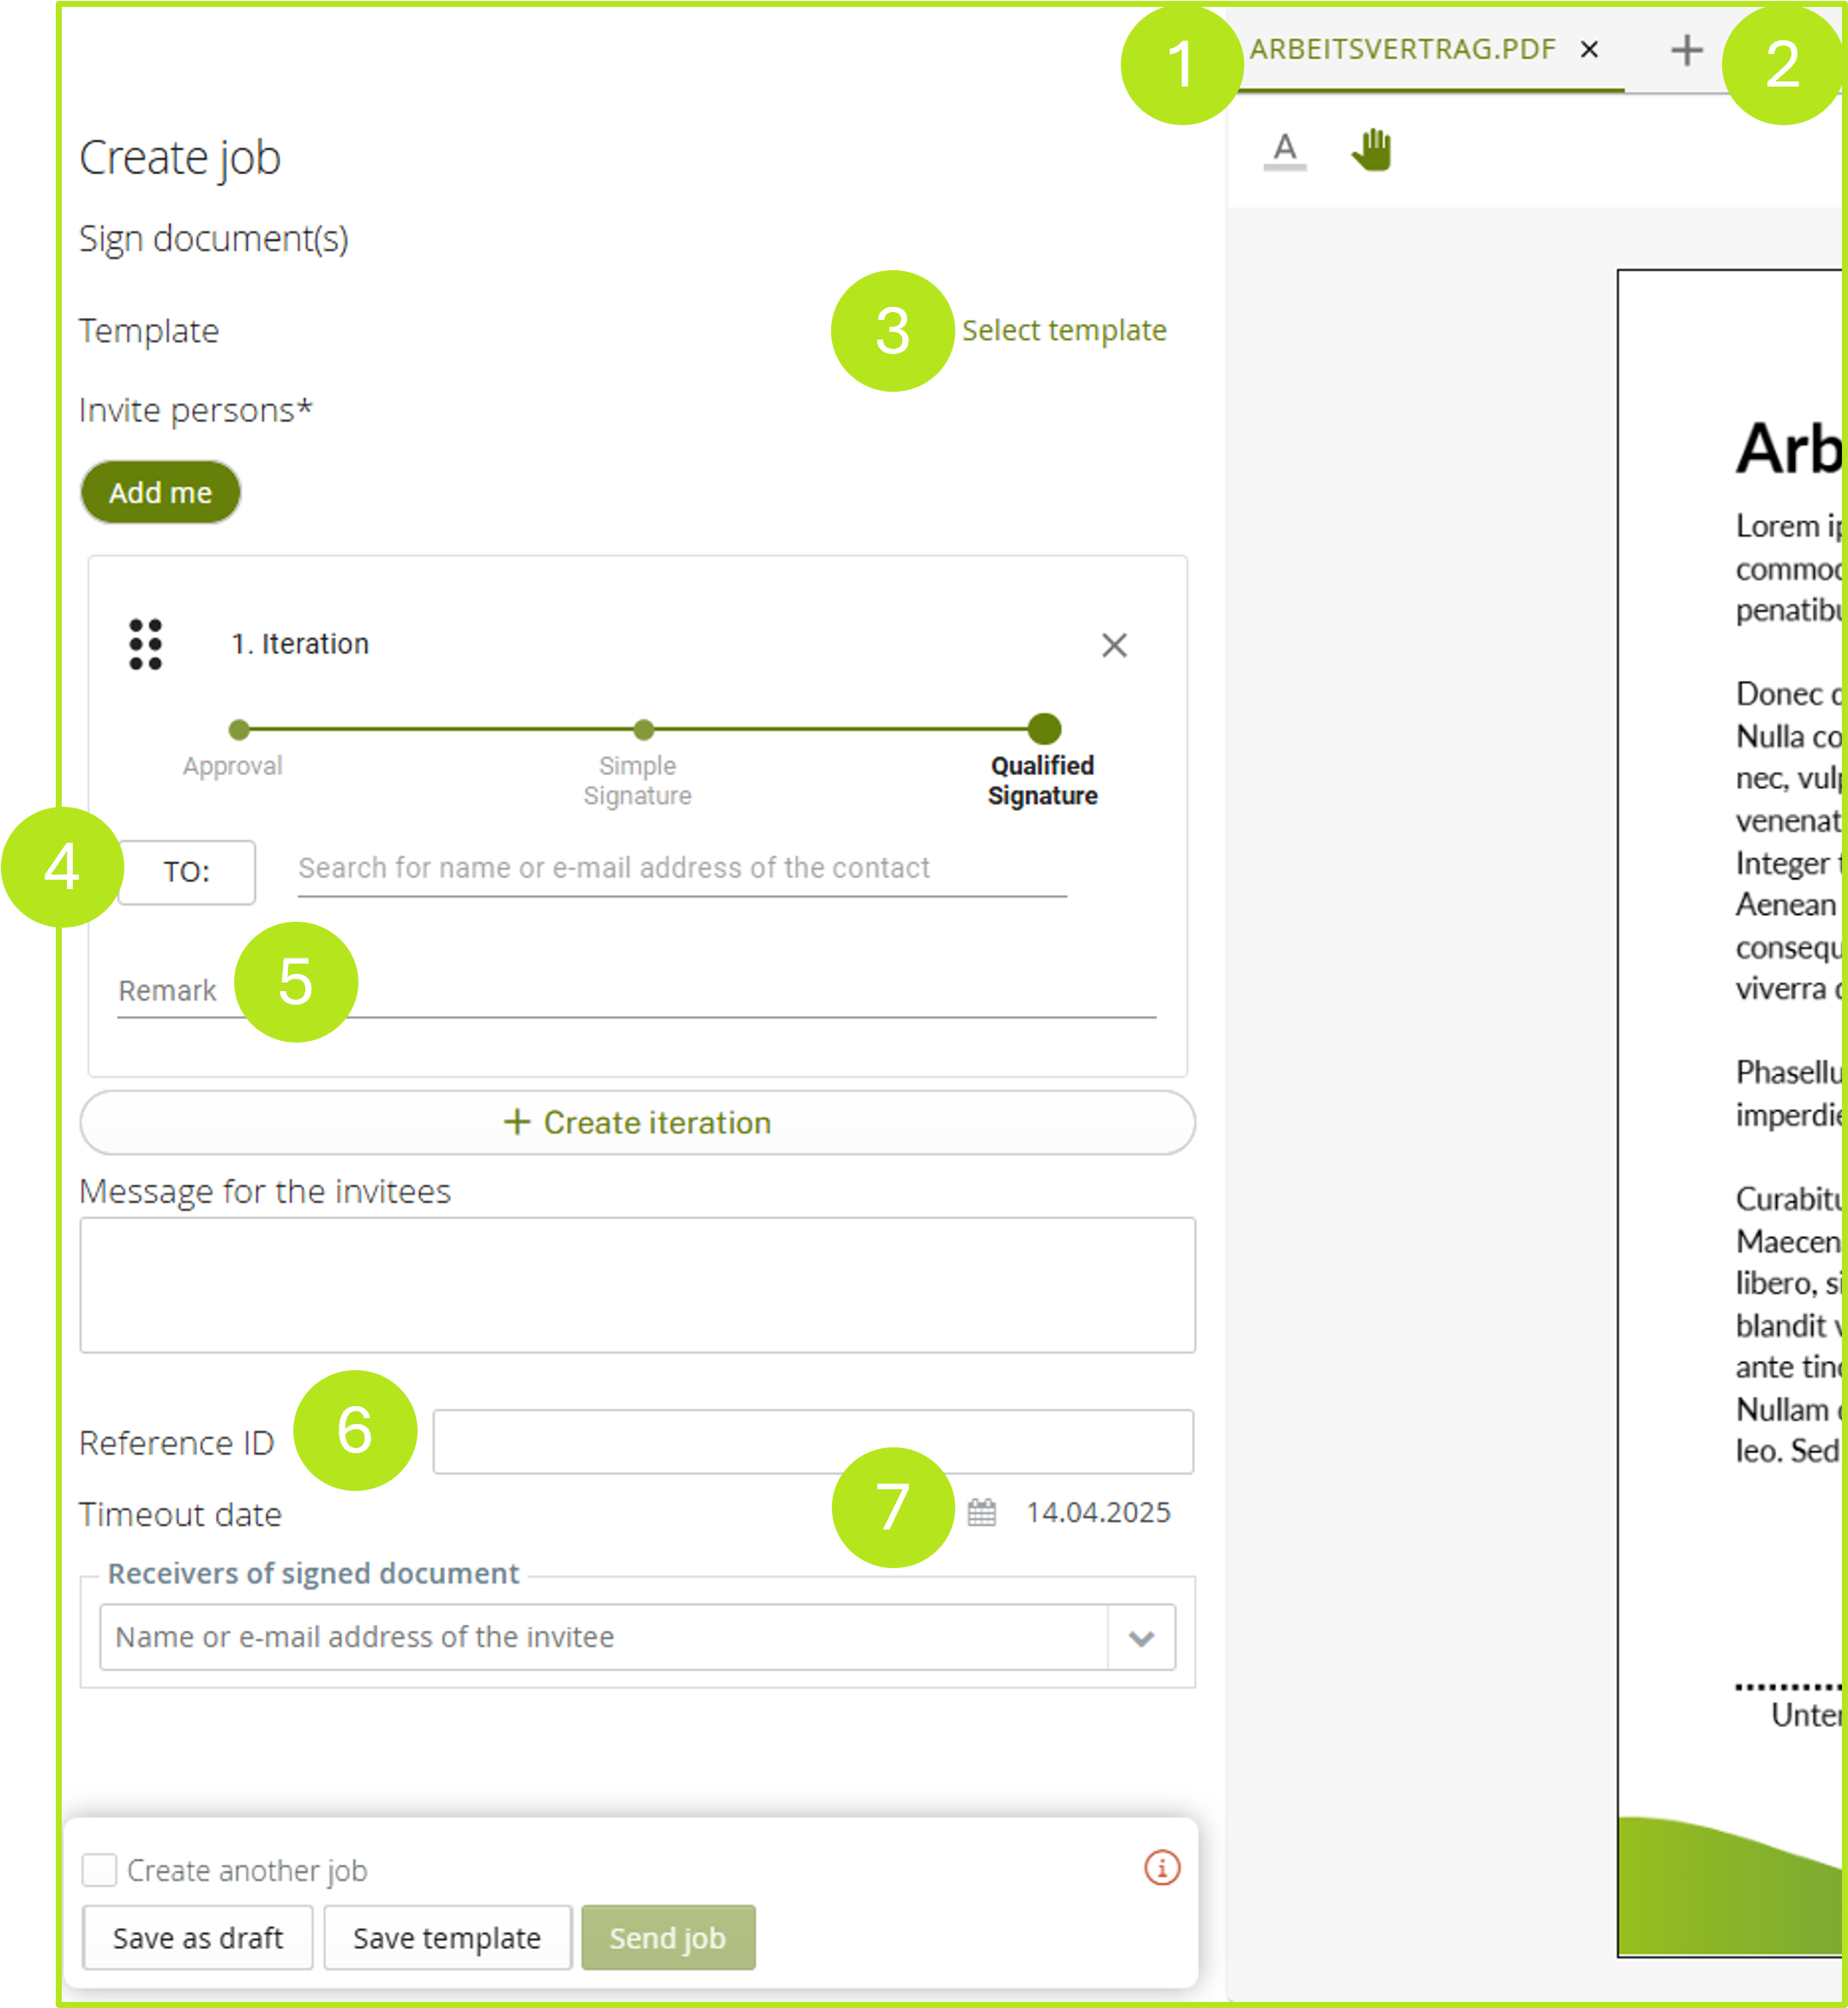
Figure 4: Overview of the options for entering order data in the signature mask
The following order data can/must* be entered:
Main document: The PDF document to be signed or released.
Attachments: Optionally, up to ten attachments can be uploaded by default (see Figure 4). Attachments are for the information of the order recipient and are not signed in the case of a standard configuration. If the ‘PDF container option’ is configured in the signing process, the ‘complete package’ consisting of the main document and attachments is signed. In this case, the attachments are part of the main document. Depending on the configuration, attachments can be restricted to certain file types.
Template: If a template has been defined, it can be selected here.
Recipient*: The recipients of the order must be listed here. Depending on the configuration, the search can be carried out using first name, last name or email address. Both registered MOXIS users and external signees (optional) can be invited. Clicking on the [TO] button opens the address book and allows you to add recipients directly from it.
Remark: Optionally, a remark on the job can be added.
Reference ID: Optionally, the job can be assigned to a reference ID via the API. Please note: The reference ID is only searchable in the API, but not in MOXIS.
Expiration date*: The expiration date determines how long all signing and releasing persons involved in the job have time to complete it.
XiTip
If you should leave the order form during the creation of an order and switch to another page (Home, Job, etc.), a pop-up window will appear (see figure 5). It informs you that your changes have not been saved. Click on the [Stay on page]-button to continue editing the order. Click on the [Save draft]-button to save a draft and you will then be taken directly to the overview page. If you wish to discard the draft, please click on the [Leave page]-button.
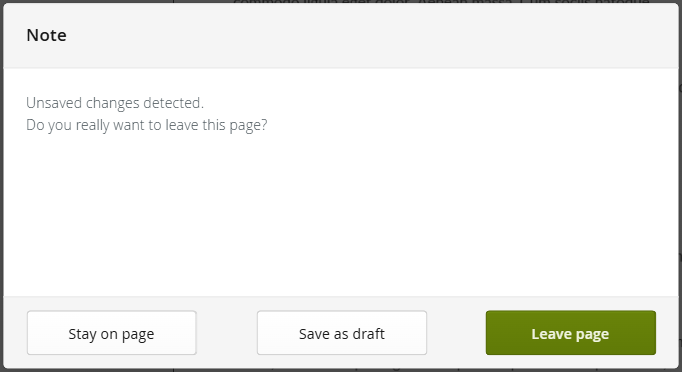
Figure 5: Note on unsaved changes
Step 4: Complete the job by clicking on the [Send job]-button. (see figure 4) However, you can just as easily save the job as a draft or as a template by clicking on the corresponding [Save draft]- or [Save template]-button.
2. Behaviour of attachments in MOXIS
2.1. Photos
When you add a photo as an attachment, a preview will be displayed so that you can check whether you have selected the correct file. To do this, open the tab with the corresponding file name. Scroll bars make it easier for you to check large files (see figure 6).
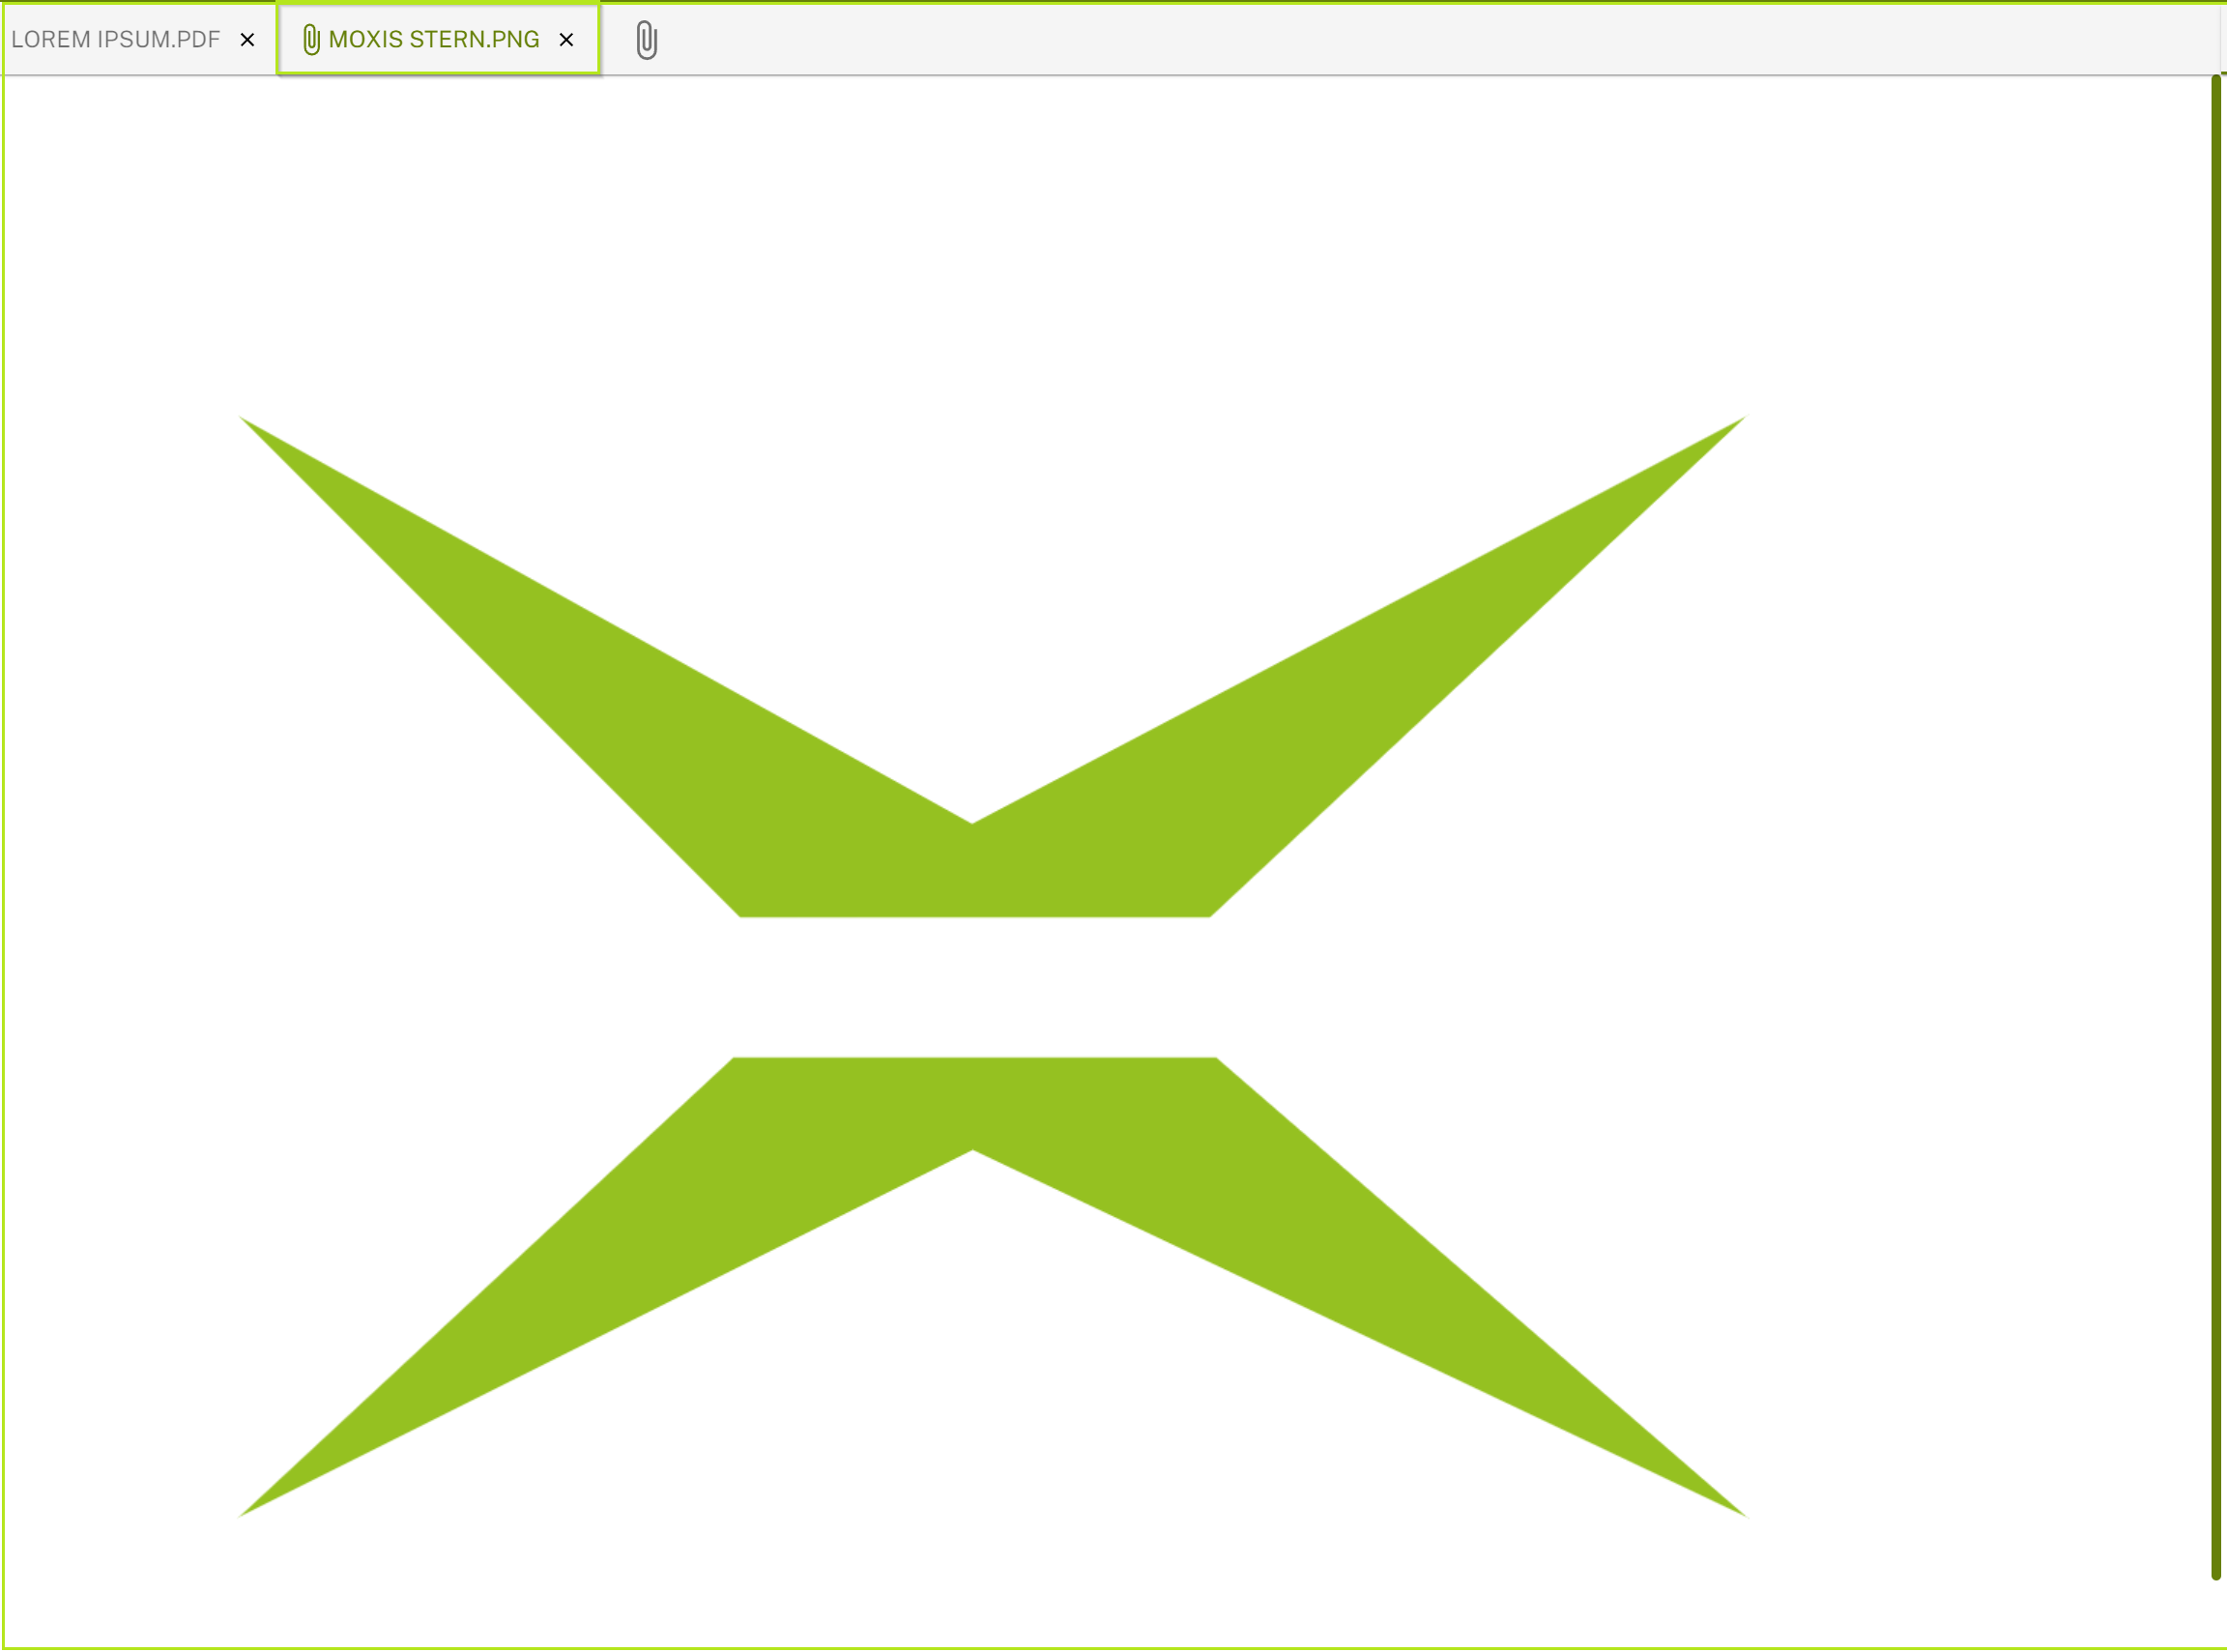
Figure 6: Large attachment with scroll bar on the right for checking
2.2. File types
Please note that certain file types (e.g. txt) are not displayed in the preview. If such files have been successfully uploaded, a corresponding message will be displayed (see figure 7).
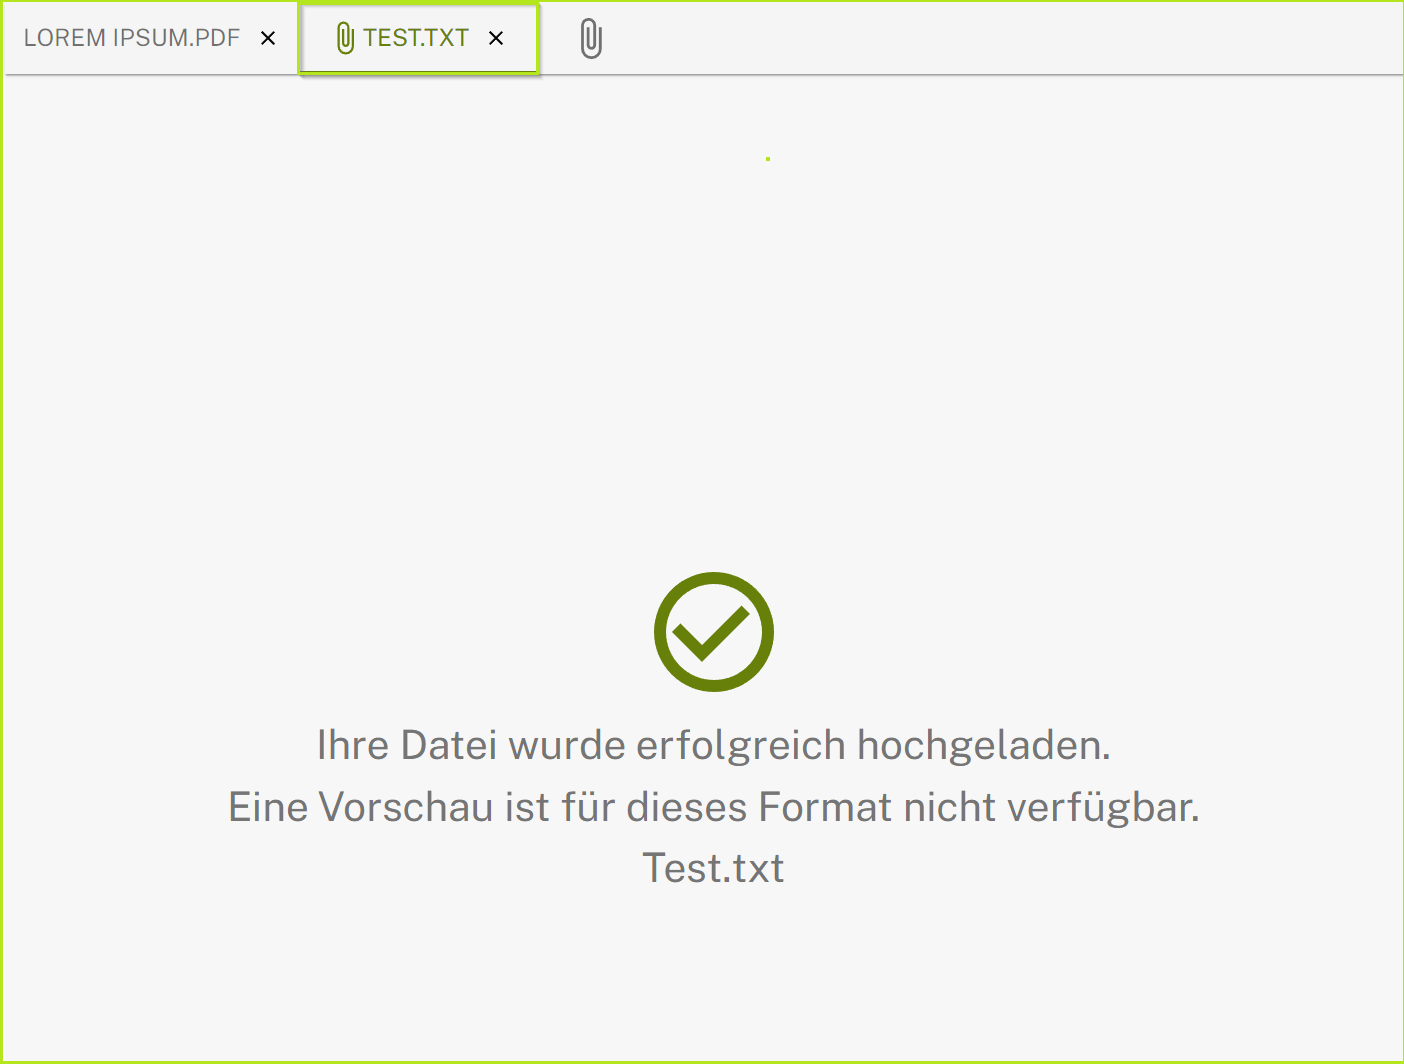
Figure 7: Preview not available (.txt-Datei)
2.3. Error messages for unauthorised file formats
If you upload a file in a format that is not allowed or that exceeds the permitted file size, you will receive a corresponding error message (see figures 8 and 9).
XiTip
The permitted formats and file sizes are displayed in the order form (see Figure 4). They depend on the configuration of your MOXIS instance. This means that they can be customised by your administrator.

Figure 8: Error message for invalid file format

Figure 9: Error message when the maximum size is exceeded