
[v4.52] Create, edit and manage profiles for qualified signatures
Content
The following article provides an overview of the options available in MOXIS for editing and managing qualified signature profiles.
1. Introduction to profiles for qualified signatures
The menu item Profiles for qualified signature is divided into two sections:
Profiles and
Rules
While signature visualisations with captions are created and managed in the section Profiles (see figure 1 [1]), certain rules can be defined in the section Rules as to when which visualisation is to be used (see figure 1 [2]). If no profile for the qualified signature has been stored, a system profile that corresponds to the default setting in MOXIS is used.
If you have already stored a profile for the qualified signature in a previous version of MOXIS, it is still available in the system. It is used by default for each document you sign.
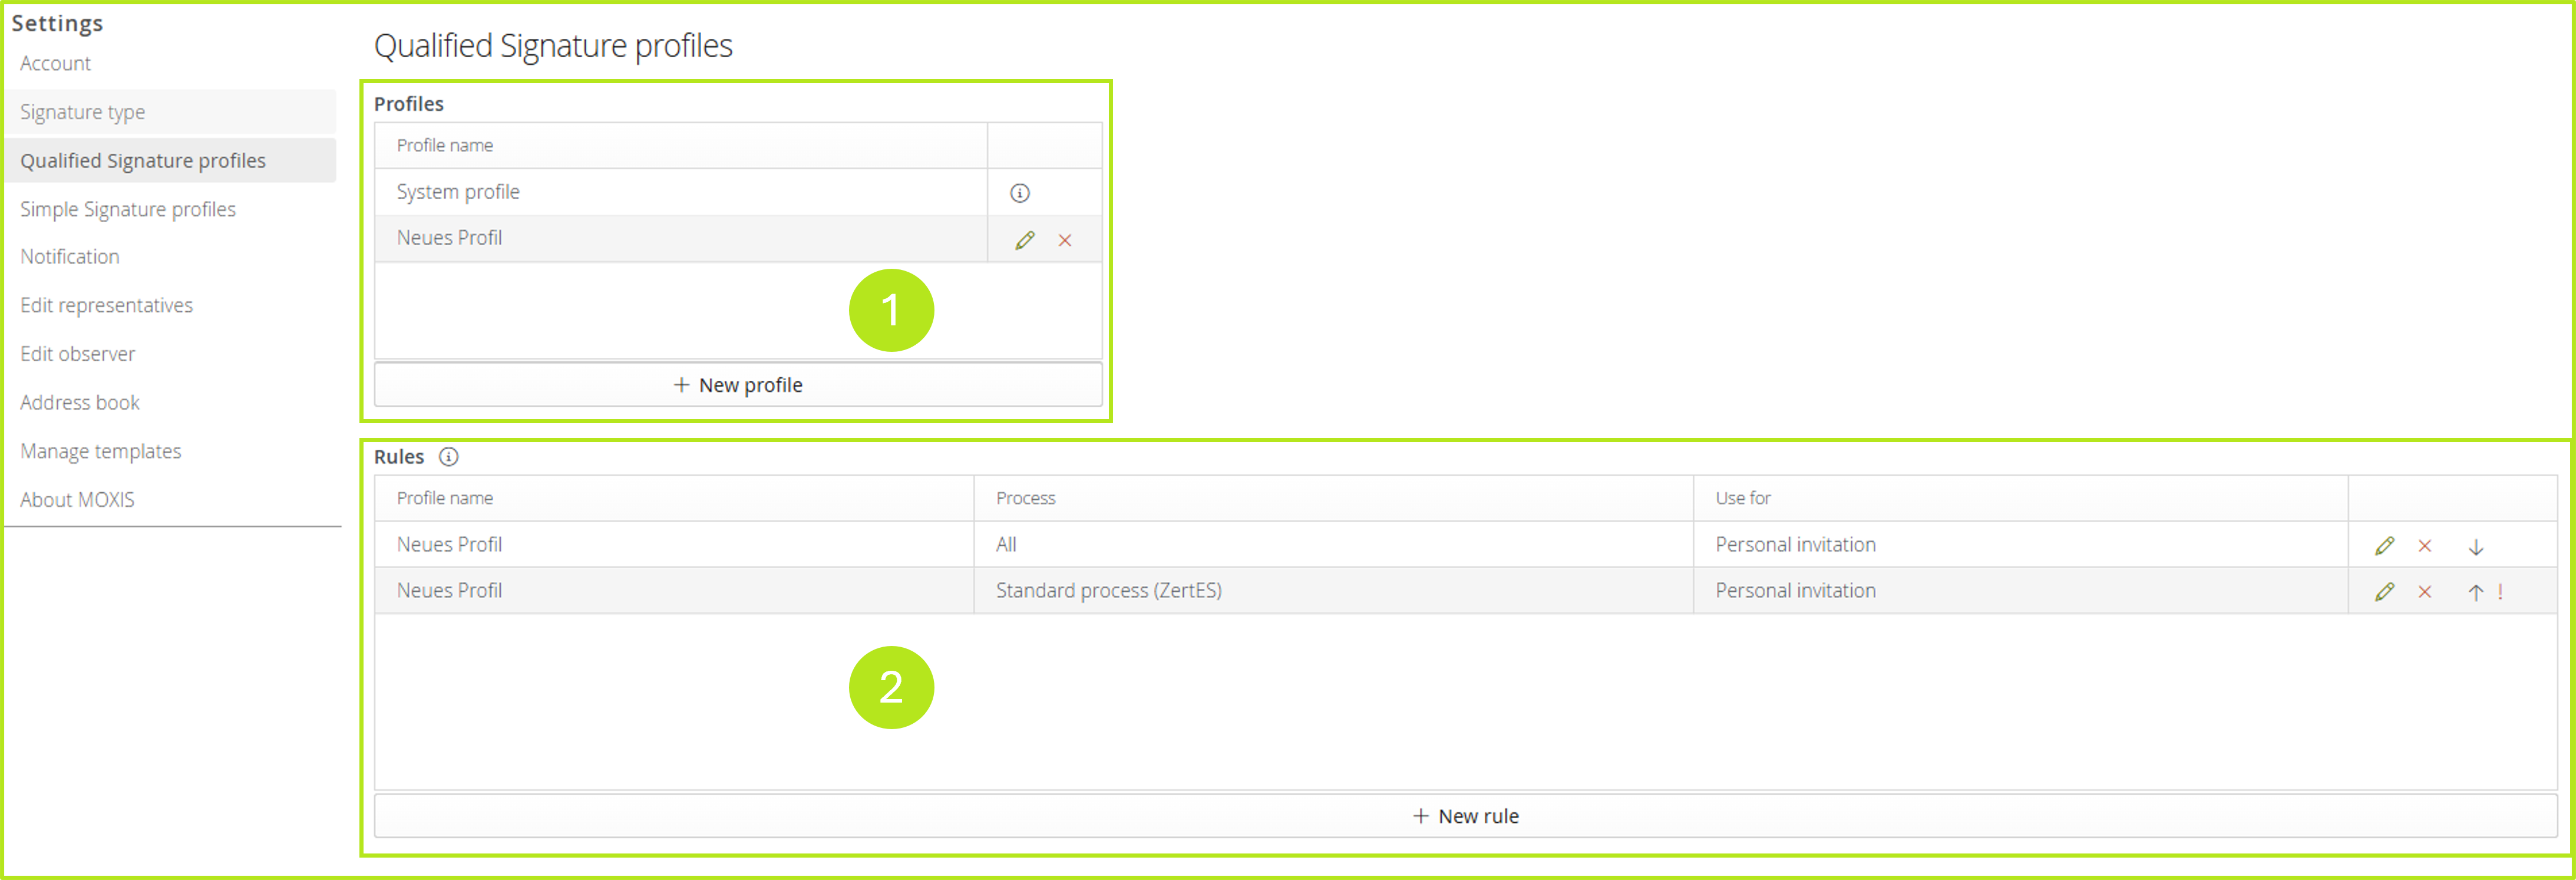
Figure 1: Profiles and rules for qualified signatures
1.1 Creating profiles for qualified signatures
To create a profile with your personal signature image, click on the [+ New profile] button (see Figure 1 [1]). A window will then open. Here you can customise your signature as you wish (see Figure 2 [1], [3], [4]) and also display a preview of the completed signature image (see Figure 2 [2]). You will find details on the individual points in the list below.
(1) Profile name: Enter a profile name here. Please note: This field is mandatory!
(2) Preview: The preview allows you to preview the signature image you have configured.
(3) Signature image: In this section, you have three options.
a. You can draw a signature visualisation yourself. To do this, click on the corresponding option. A window will open in which you can draw your personal signature with the mouse pointer.
b. You can upload your own signature image. Clicking on the corresponding option opens a window in which you can upload the desired image.
c. You can use the standard. Click on this option to adopt the standard settings of the system configuration.
(4) Caption: This option allows you to add various parameters to your signature, such as
Display name
Display date
Display time
Display note
Here you can customise the text under the signature visualisation (e.g. Signing with XiTrust MOXIS). The field can also be left blank.
XiTip
In addition to the note, a representative who has provided the signature can also be named. To fill this field as desired, please contact the XiTrust Support Team.
(5) [Save]-button: Click this button to save the changes you have made to the signature.
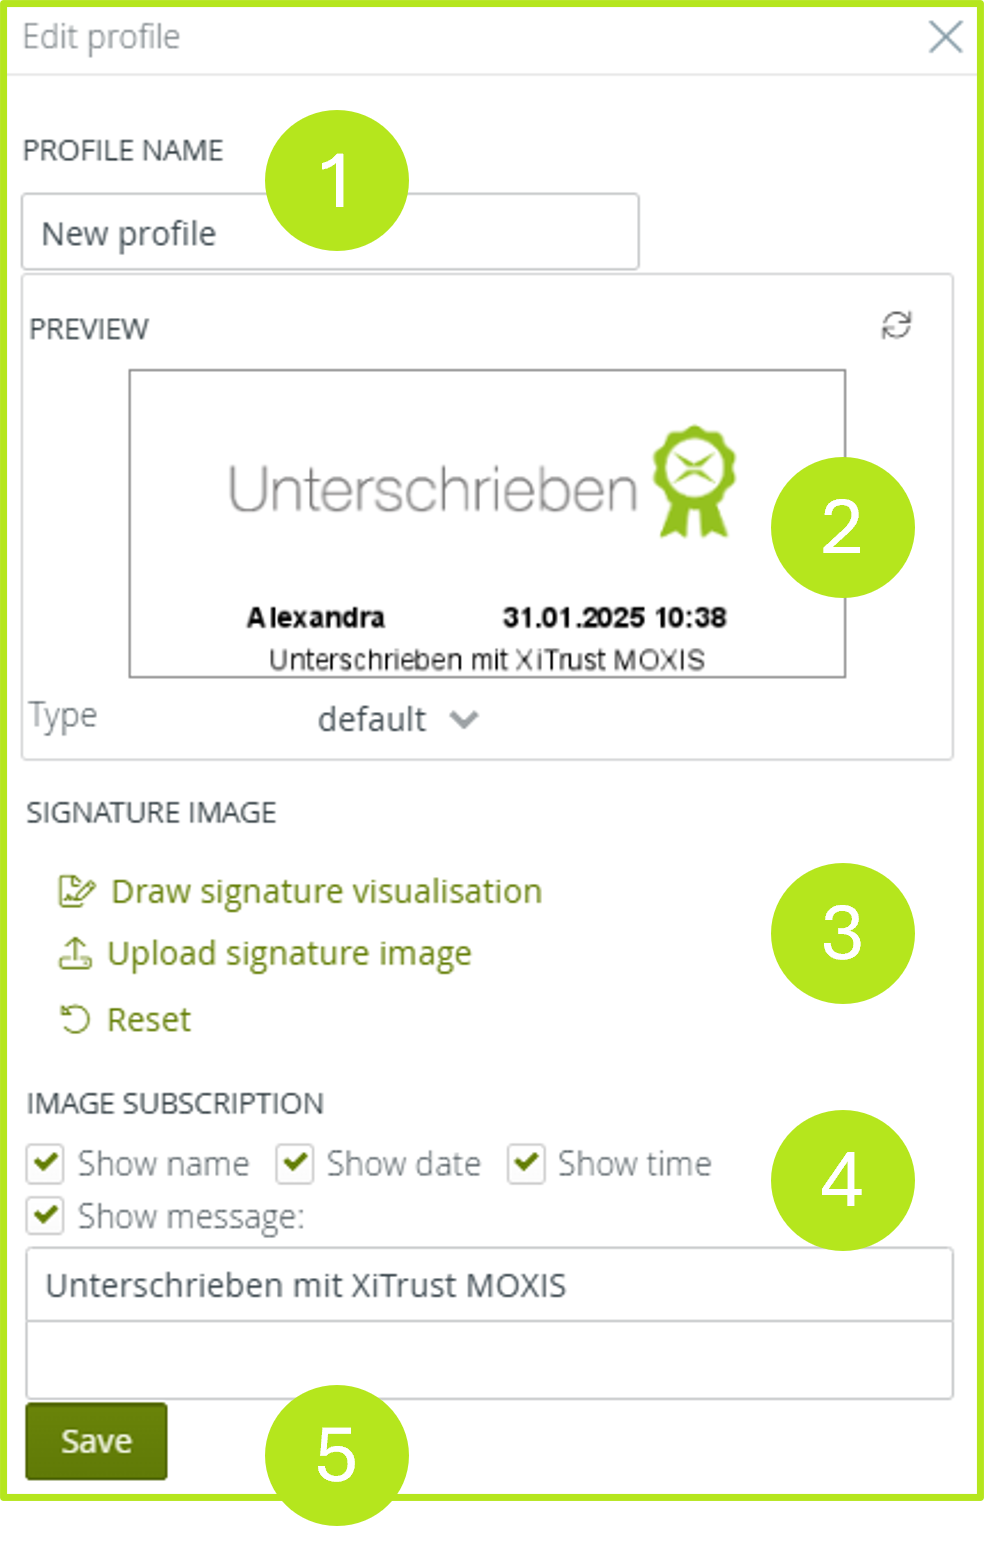
Figure 2: Design a signature profile of a qualified signature
2. Profile selection in the detailed view of an order for qualified signatures
An job is created as usual. The client does not need any information about which signature visualisation is used by the signing person, as this is mapped via the rules. In the detail view of the job, the profile that has been automatically selected based on the rules can be seen. The visualisation is also displayed on the document in the preview.
If you want to change the visualisation, you can select a different signature yourself. To do this, select the desired profile in the detailed view of an order using the drop-down menu. The visualisation changes so that you can immediately see how your signature image will be applied to the document.