
[v4.50] MOXIS Guest: The signing process for external signatories
Content
This article introduces you to the topic of MOXIS Guest. In chapter 1, you will learn more about the menu navigation in MOXIS Guest, while chapter 2 will show you the signing process from the perspective of external signatories. Chatpter 3 shows further options for signature visualisation.
1. MOXIS Guest menu bar for external users
The menu bar in MOXIS Guest is the centrepiece of the tool. This is where external signatories can find options for managing their documents. The menu bar (see figure 1) in MOXIS offers the following options:
(1) Select text
(2) Move document
(3) Page selection: Display the next (or previous) page in the selected document
(4) Zoom: Select the zoom factor to adjust the page size
(5) Select language
(6) Check documents and attachments: The red marking is replaced by a green tick as soon as all the required documents have been checked.
(7) Download: Here you have the options Download current document or Download all documents.
(8) Change document: This function allows you to switch between the documents to be signed.

Figure 1: Menu bar in MOXIS Guest for external signatories
2. The signing process in MOXIS Guest from the perspective of the external signer
2.1 Document management in MOXIS Guest
An order for external signatories may contain the following files:
Documents: It is possible that several documents are to be signed.
Attachments: Attachments are either documents or images that provide additional information. These files cannot be checked directly in MOXIS Guest. However, the external signatories have the option to download these files.
XiTip
Depending on which option you choose, you can download the current file only or all available files at once with a click on the Download-Icon. The Download all documents option allows you to download all documents and attachments together, provided that the job contains attachments.
If external signatories click on the [SIGN]-button before they have checked all the documents and attachments to be signed, a pop-up will open. External signatories now have two options:
Click on the [CONTINUE] button to proceed directly to the signing process.
Use the [REVIEW DOCUMENTS] button to navigate to the documents menu (see figure 2). (It will automatically open on the right side of the screen when you click on the button.)
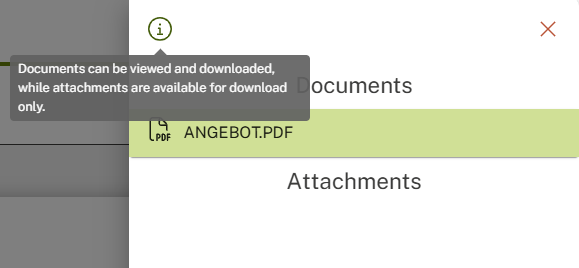
Figure 2: Review documents in MOXIS Guest
Unchecked documents are marked with a red mark (see figure 3) . Clicking on a document opens it in the background. Please note: The Documents menu must be closed to check the document.
Attachments can be downloaded individually in the Documents menu.
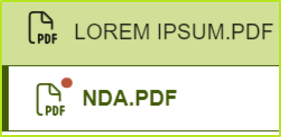
Figure 3: Unchecked documents are marked with a red mark
As soon as all documents have been checked, a green tick will appear in the Documents menu instead of the red mark (see Figure 4).

Figure 4: All documents in MOXIS Guest were checked
The order can now be signed or rejected.
2.2 Step 1 in the signing process: E-mail notification for external signatories in MOXIS Guest
After creating the signature request, the external signatories receive an e-mail with a link to the document. This e-mail can only be sent if this functionality has been activated by your administrator. The external signatories can access the signature page via the link in the e-mail.
XiTipp
Please note: The note regarding the signature process via smartphone is only displayed in the case of a qualified signature.
Depending on the process configuration, external signatories can only open the job after entering an SMS TAN or a password (see figure 5).
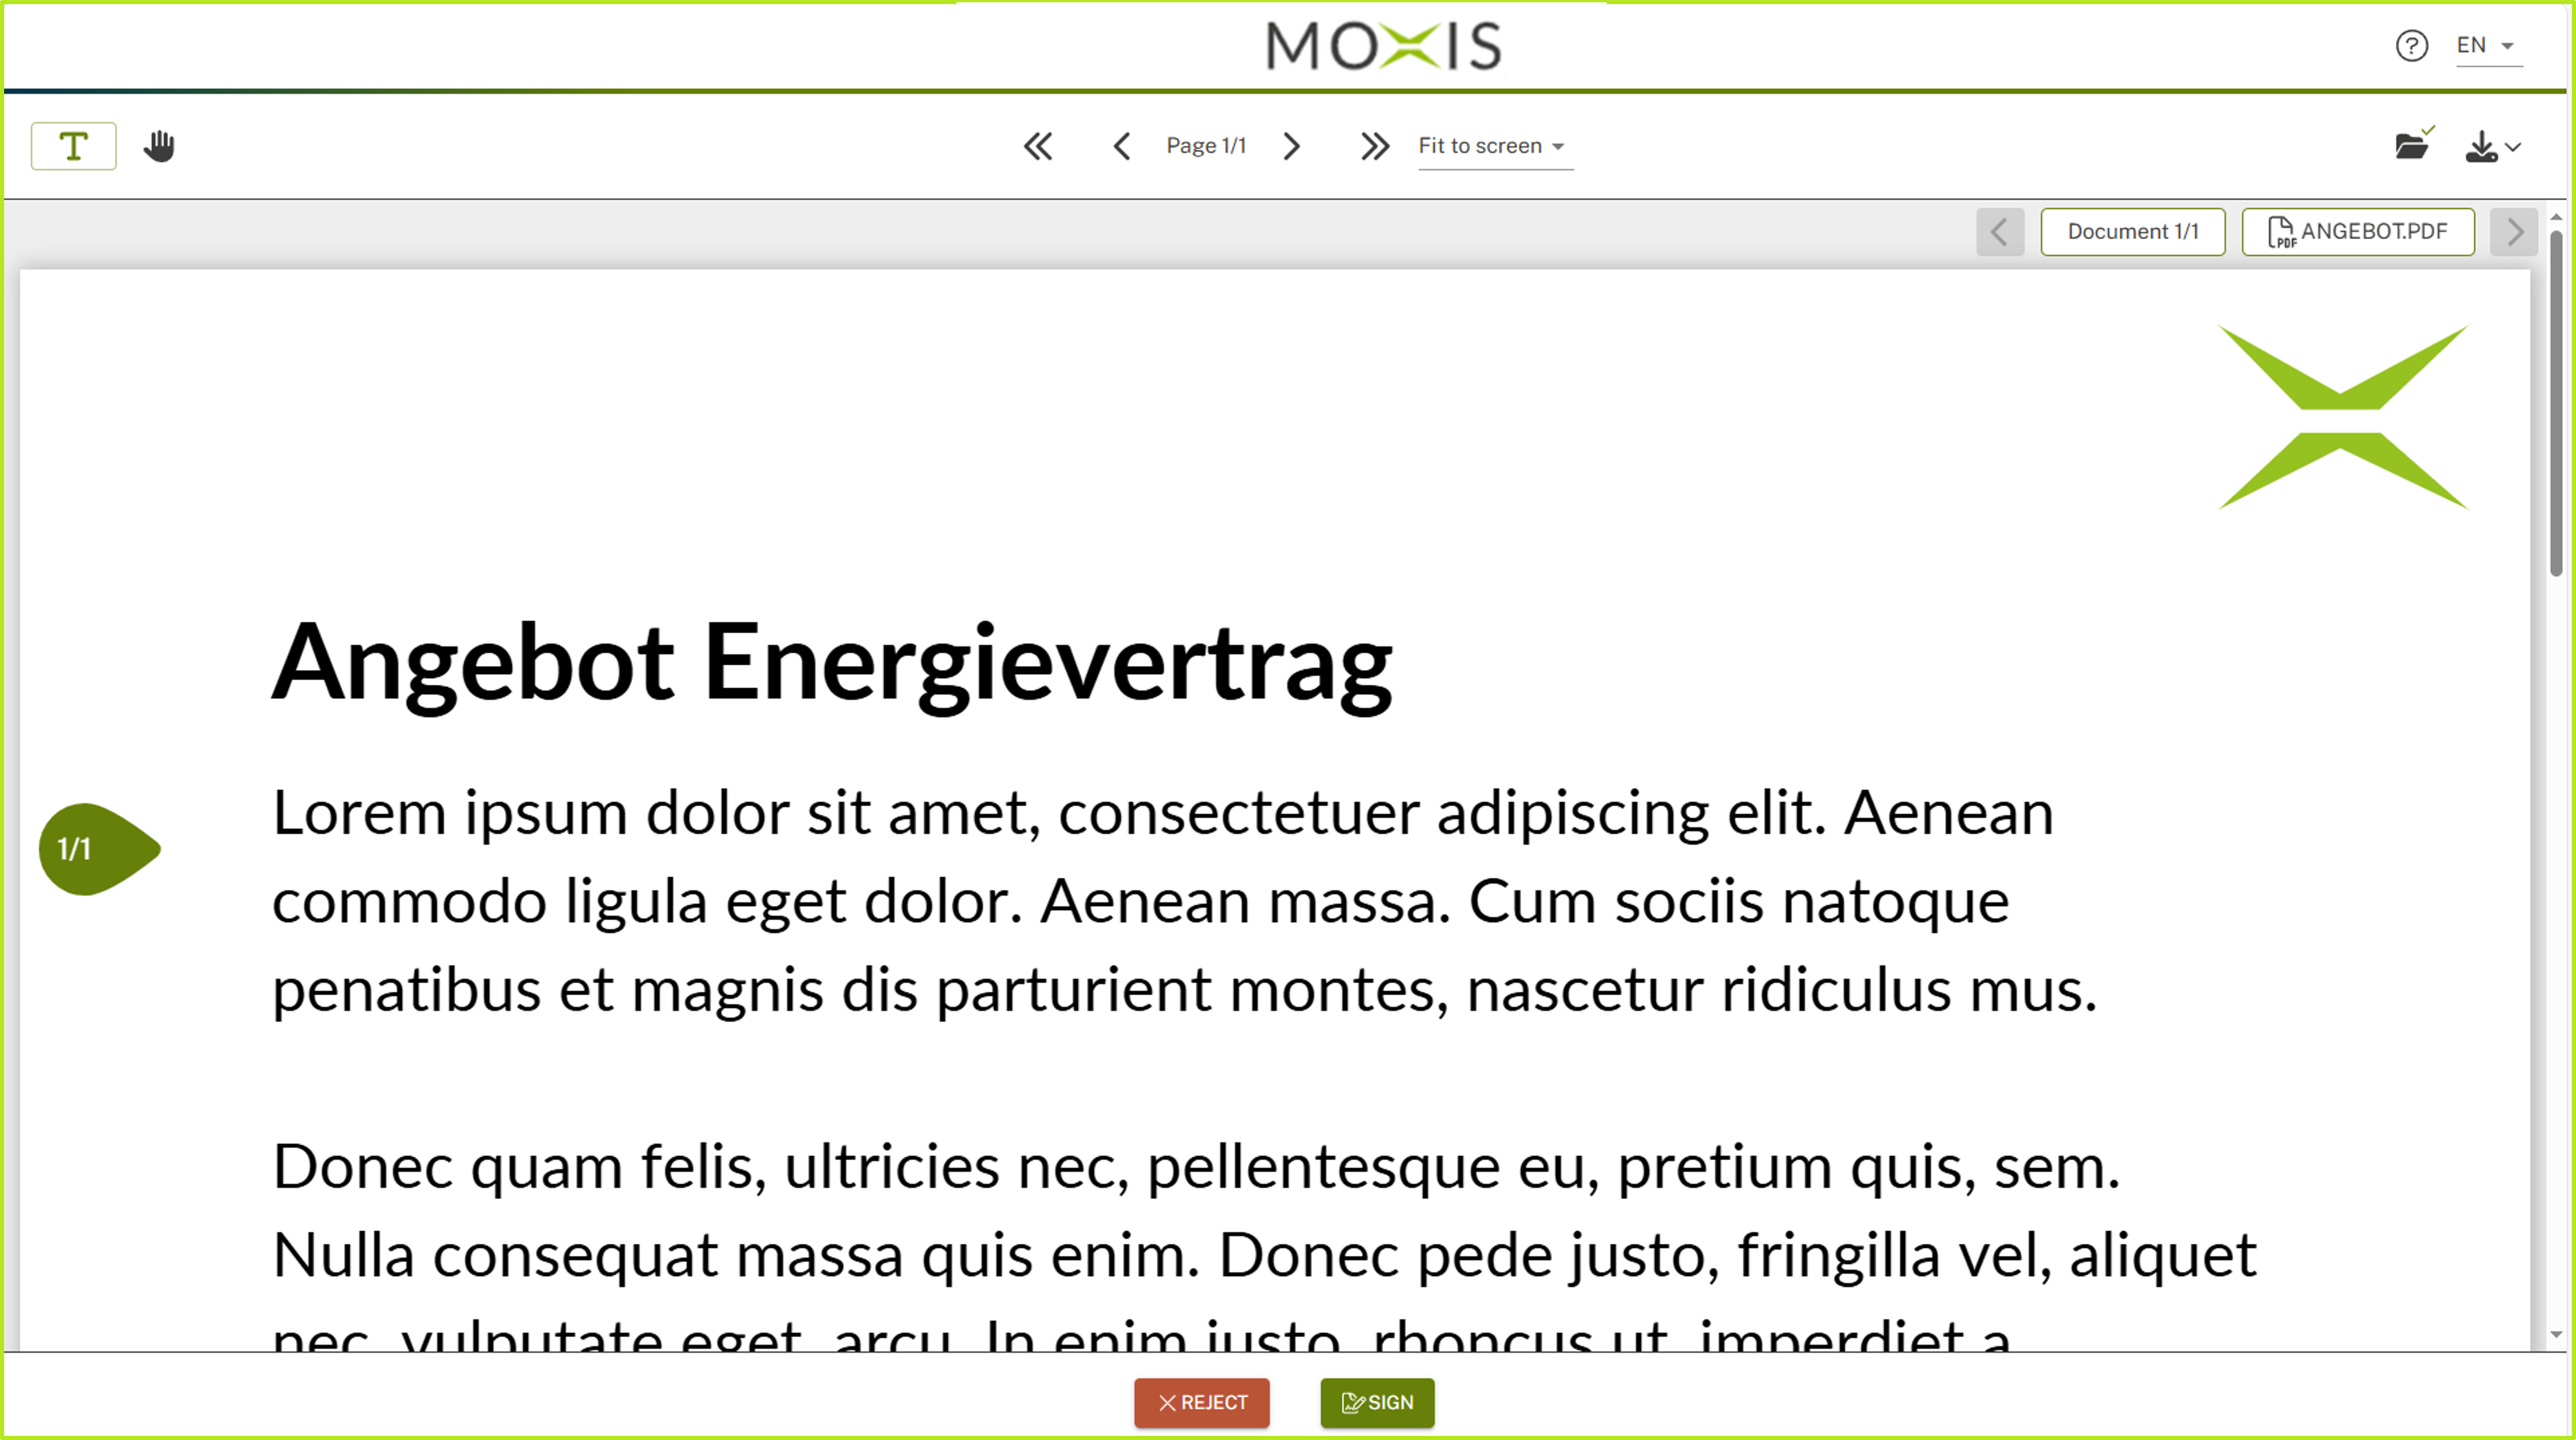
Figure 5: Signature page for external signatories
2.3 Step 2 in the signature process: Signing a job by external signatories in MOXIS Guest
After clicking on the [SIGN]-button on the signature page (see Figure 5), the signature menu opens with step-by-step instructions
2.3.1 The signature menu
The signature menu comprises the following mandatory areas:
(1) Heading The number of documents to be signed is displayed here in brackets (see Figure 5 [1])
(2) Create siganture visualisation This can be done either by drawing, text or image (see Figure 5 [2])
(3) Biometry and device data (optional) In this section, external signer:s can decide which data may be captured However, this security function must be activated in the process configuration (see Figure 5 [3])
XiTip
Please make sure to determine your location in order to be allowed to proceed (see Figure 5 [4]).
(4) Finalise the signature The signature process is to be finalised here.
(5) [Next]-button Click this button in order to proceed.
XiTip
Depending on your configuration, other steps (like for example entering additional data) could be necessary to be taken. If you send a job with a qualified signature to an external recipient, they must select a signature provider during the signing process. However, this only applies to jobs with qualified signatures!
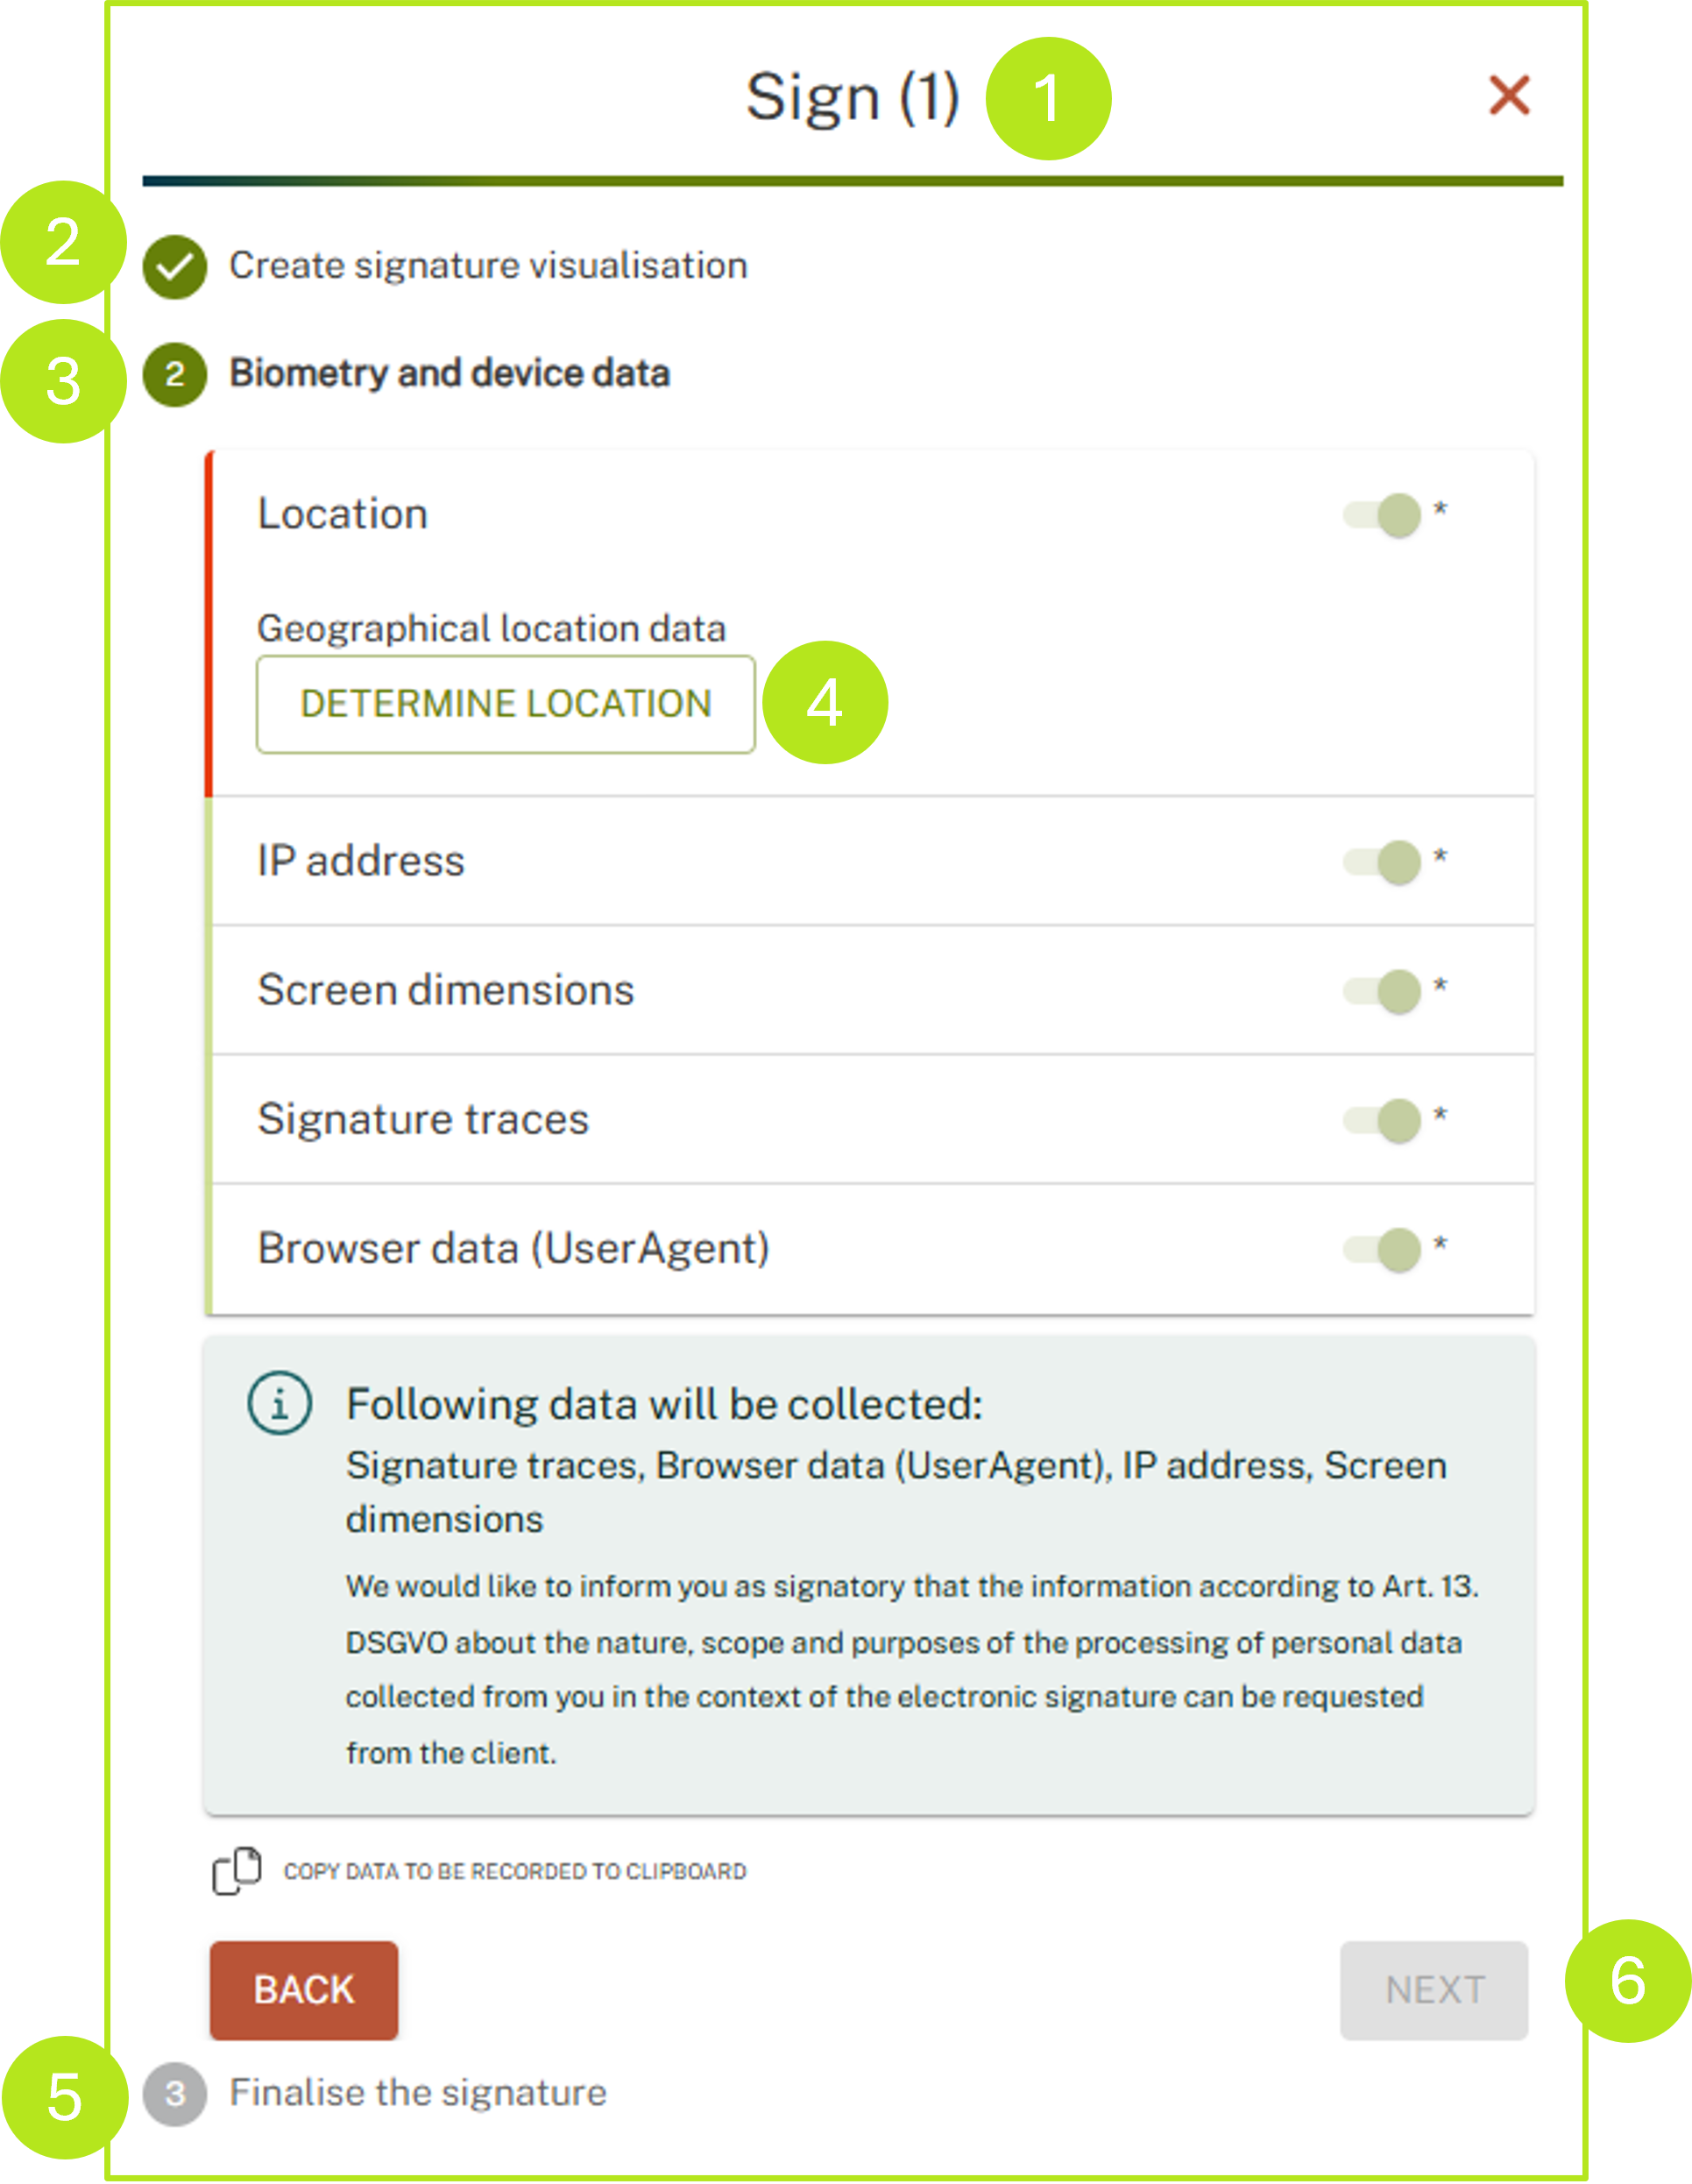
Figure 5: Signature process in MOXIS Guest
XiTip
External signers who carry out the signature process for a qualified signature via mobile phone must switch to the browser with the mobile phone signature app in order to complete the process. They will receive a corresponding message (see figure 6).
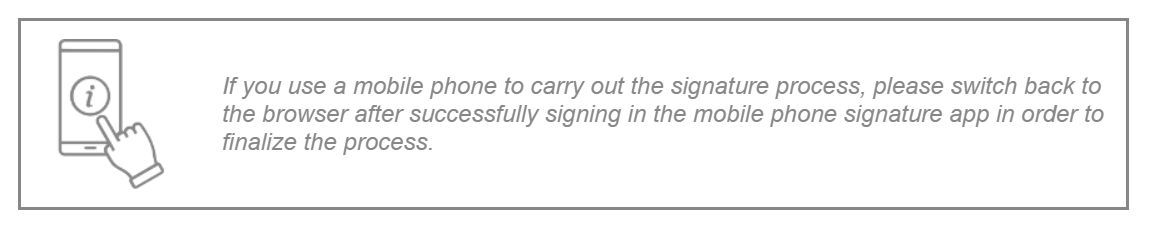
Figure 6: Notification when signing via mobile phone
2.3.2 Visualisation of the signature
The signature can be visualised in three ways (see figure 6):
(1) DRAW: With this option, the signature is drawn in the input window. The entry can be deleted using the [DELETE] button (see figure 6 [1]).
(2) TEXT: Contains a placeholder text, but can be customised. The [DELETE] button resets the text to the default setting (see figure 6 [2]).
(3) IMAGE: A photo (e.g. jpg, png, gif) of the signature can be uploaded here. The maximum file size may vary depending on the system configuration (see figure 6 [3]).
.png?inst-v=1f13bcd0-fef8-4a32-b325-e59b8ee4638a)
Figure 6: Visualisation options and the corresponding visualisations in MOXIS Guest
As soon as the process via the signature provider has been completed, a confirmation (see figure 7) is displayed. External signers can now either close the browser window or switch back to the request.
.png?inst-v=1f13bcd0-fef8-4a32-b325-e59b8ee4638a)
Figure 7: Confirmation of the successful signing of a document in MOXIS Guest
2.4 Rejecting a task by an external signer in MOXIS Guest
A task can be signed by an external signer, but also rejected. If the process configuration provides for it, external signers must state a mandatory reason for rejection (see figure 8 [1]). This must be confirmed by clicking on the [CONFIRM]-button (see figure 8 [2]).
.png?inst-v=1f13bcd0-fef8-4a32-b325-e59b8ee4638a)
Figure 8: Enter the reason for rejection in MOXIS Guest and confirm.
As soon as the reason for rejection has been confirmed, this is also displayed in the browser with a corresponding message. The browser window can now be closed.
2.5 Step 3 in the signing process: Downloading the documents by external signatories
When the signing process is complete, the external contact receives an e-mail with a download link for the document.
3. External signature visualisation (orders via API) – Optional
Optionally, it is possible to configure processes so that external signers can attach the signature visualisations themselves at the designated location. This is only possible if orders are sent via API. If the process is configured this way, the visualisation mode icon (see figure 9) is displayed in the external signer's user interface. Clicking the icon opens the visualisation mode.
.png?inst-v=1f13bcd0-fef8-4a32-b325-e59b8ee4638a)
Figure 9: Visualisation mode icon in MOXIS when configured accordingly
3.1. Open the help page for the visualisation mode for external signatories
If external signatories need help, they can access it by clicking on the question mark icon in the upper right corner next to the language selection (see figure 10 [1]). A help page with FAQ (see figure 11) opens. In addition to FAQs, the pop-up also contains a short animation of the signature visualisation and instructions in text form (see figure 11 [1]).
XiTip
The help page also opens when external signatories click on the [Sign]-button without having attached a visualisation. It can also be accessed at any time via the question mark icon.
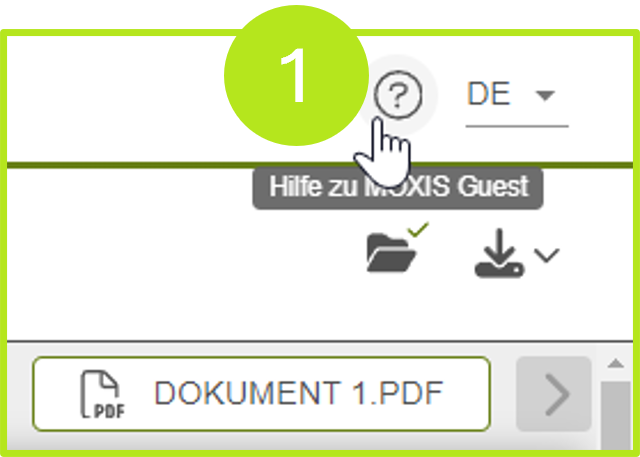
Figure 10: Access the MOXIS Guest help page
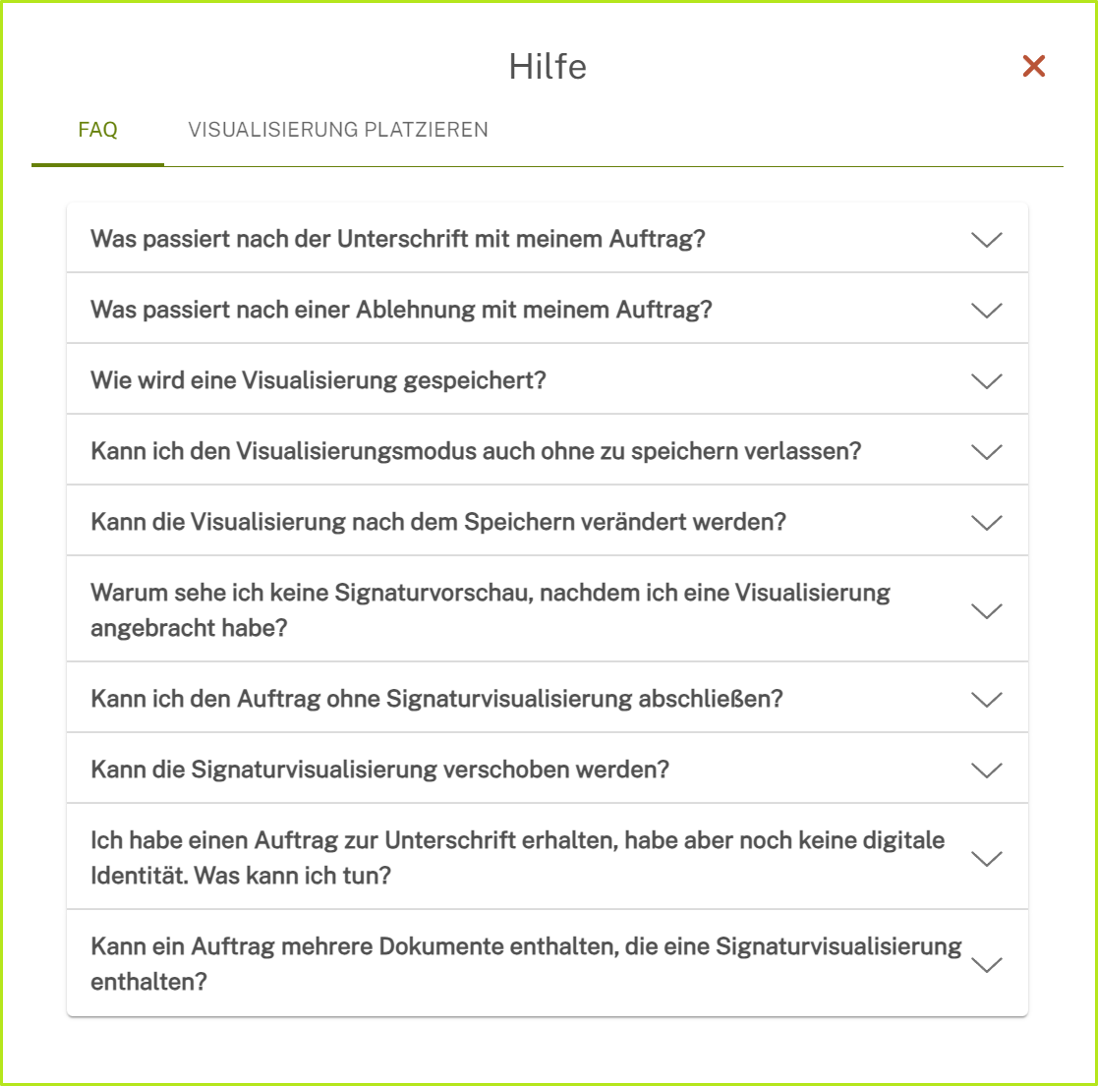
Figure 11: FAQ – Help page of MOXIS Guest
Clicking the [PLACE VISUALISATION] button [see figure 12 [2]) closes the pop-up and visualisation mode is automatically activated.
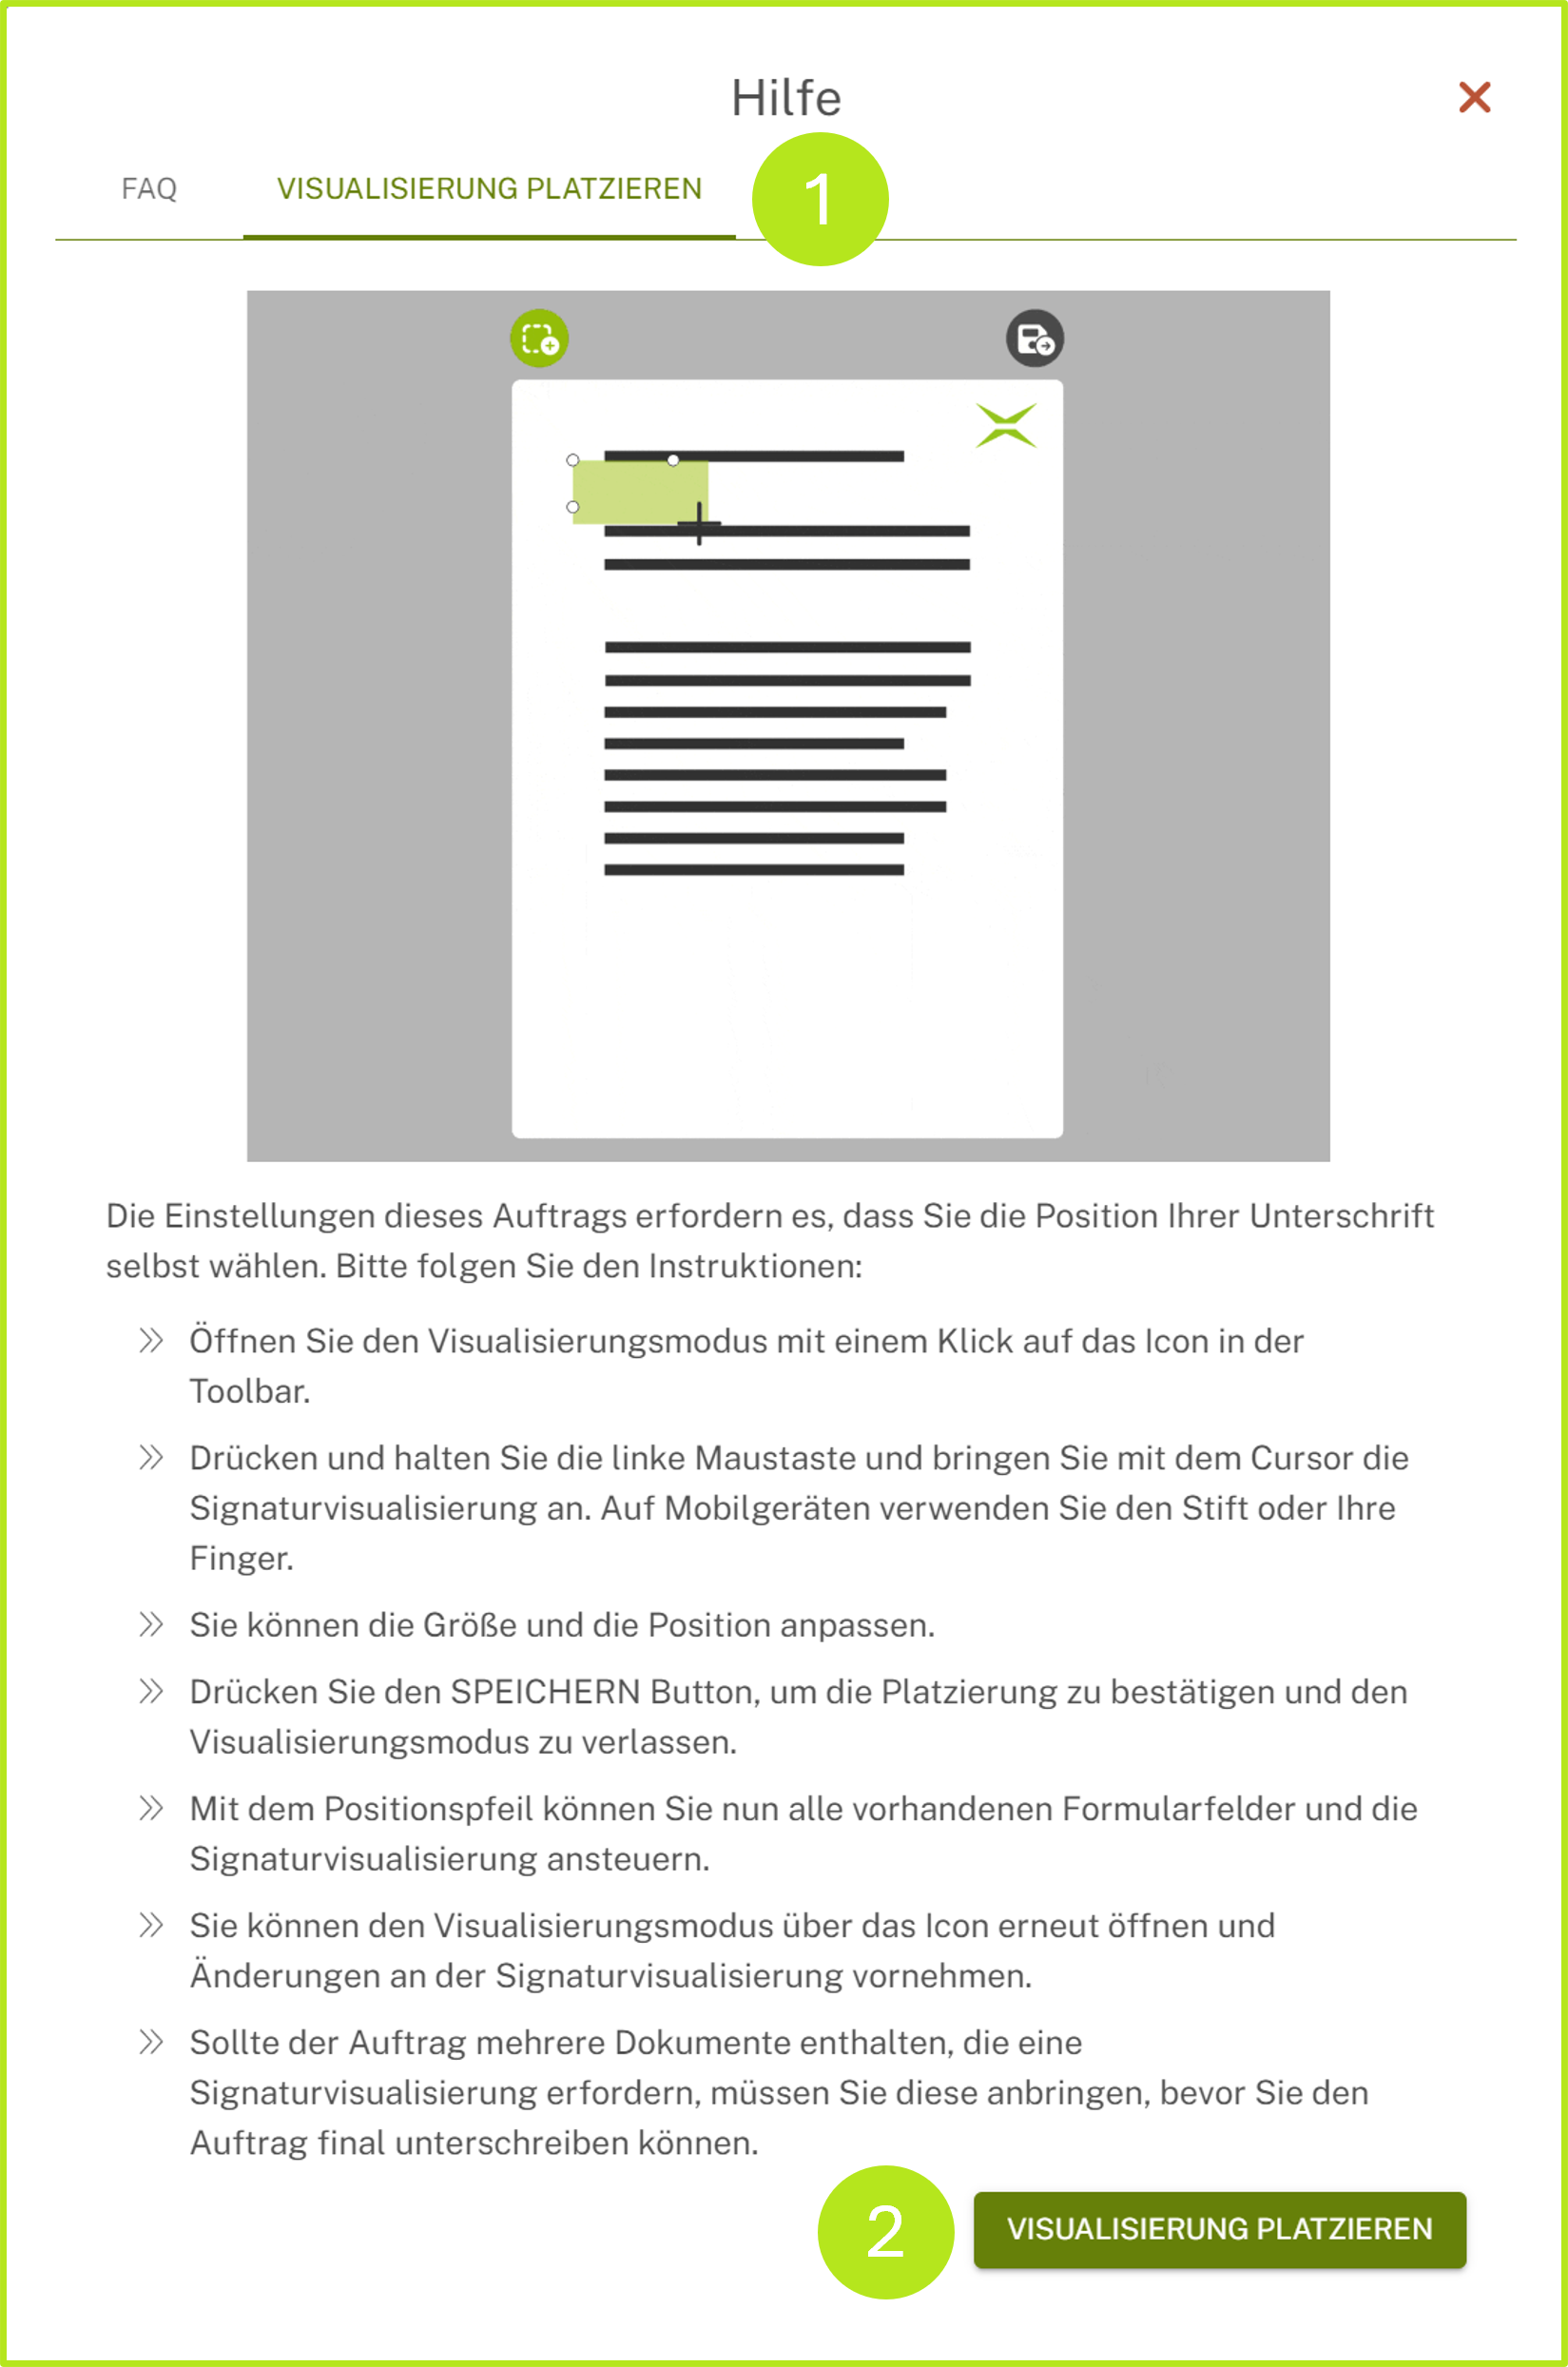
Figure 12: Further instructions for visualising signatures in MOXIS Guest
3.2. The visualisation mode in MOXIS Guest: The menu
In the activated visualisation mode, the mouse pointer changes to a plus sign and the menu bar is customised. The users have to scroll to the intended location in the document to attach the signature visualisation there. The following options can also be found in the menu (see figure 13)
(1) Plus sign: Customised mouse pointer in the MOXIS Guest visualisation mode
(2) [Exit]-button: This button is used to close the visualisation mode. Please note: In this case, the visualisation is not saved, which is indicated by a message.
(3) Page menu: Use the arrow keys to switch from page to page in the case of multi-page documents
(4) Adjust size to window: Here you can vary the size of the document
(5) [Discard]-button and [Save]-button: The [Discard]-button (or the DEL key on the keyboard) can be used to delete a visualisation. Since this does not cancel the visualisation mode, the process can be repeated. The [Save]-button is used when the job is to be checked again before the signature is The visualisation can be changed or removed by clicking on the visualisation mode icon even after saving.
(6) Switching between documents: Signature visualisations can be added to multiple documents without leaving visualisation mode. It is possible to switch between documents using the arrow key of the document display.
.png?inst-v=1f13bcd0-fef8-4a32-b325-e59b8ee4638a)
Figure 13: Editing menu in MOXIS Guest (call number visualisations of documents)
3.3. Step-by-step guide: The visualisation mode in MOXIS Guest
Step 1: Drag a rectangle in the document (see figure 14) in which the signature visualisation is to be placed. To do this, press and hold the left mouse button to attach the signature visualisation to the document. Please note: on mobile devices or tablets, the rectangle is placed in the document to be signed using the pen or your finger.
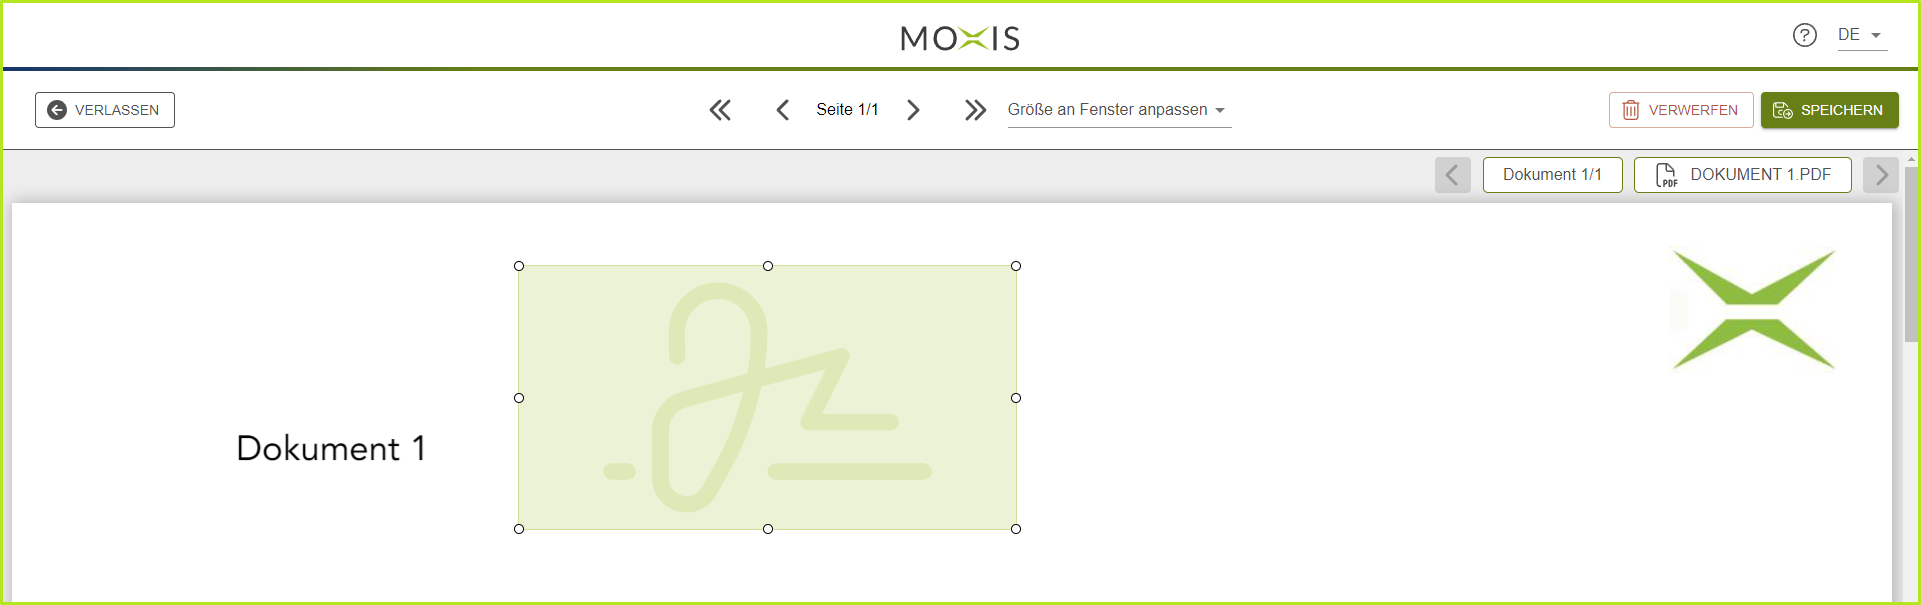
Figure 14: Drag out a rectangle in MOXIS Guest with the mouse pointer to visualise a signature.
Step 2: If necessary, adjust the size of the visualisation using the circles around the visualisation (see figure 15 [1]). To move the signature visualisation (see figure 15 [2]), click in the field, hold down the left mouse button and place it in the desired location.

Figure 15: Adjusting the size of the signature visualisation in MOXIS Guest or moving it
Please note: If the job contains more than one document that requires a signature visualisation, the signature process cannot be completed without all visualisations being placed and saved. However, only one signature visualisation can be attached per document.
XiTipp
A pop-up (see figure 16) informs the external signatories about missing signature visualisations if they click the [SIGN]-button too early. In this case, they have to reopen the visualisation mode using the icon.

Figure 16: Note that further documents are available for signature visualisation.
Step 3: As soon as all signature visualisations have been set, please click on the [SIGN]-button. This is how you save the signature visualisation (see figure 17).

Figure 17: Message that the signature visualisation has been successfully saved.