
[v4.50] Form fields adaptations and configurations
Content
Form fields can be configured and intuitively customised for your purposes. This article describes the options available to you for customising form fields in MOXIS.
1. Moving form fields
To move a form field, click on the = sign (see figure 1 [1]). You can now move the form field using drag-and-drop. The + sign (see figure 2 [1]) opens up further editing options, which will be explained in the next chapter.
.png?inst-v=1f13bcd0-fef8-4a32-b325-e59b8ee4638a)
Figure 1: Moving form fields in MOXIS and further editing options
2. Locking, editing, rotating and deleting form fields
To edit form fields, further options are available in MOXIS. To use these options, simply swipe the + sign. The plus sign then changes into an X (see figure 2 [1]) and further options for editing appear.
.png?inst-v=1f13bcd0-fef8-4a32-b325-e59b8ee4638a)
Figure 2: Various options for editing form fields in MOXIS.
These are the options for customising form fields:
(2) Lock: If this option is activated (the padlock is closed), the form field can no longer be edited by anyone. Clicking on the padlock again, which then appears ‘open’, releases the form field for editing by everyone again.
(3) Edit: Clicking on this button opens up various options for editing the form field.
(4) Rotate: Use this button to adjust the form field to the layout of your uploaded document (e.g. if you want to sign in landscape or portrait format). Clicking on the button causes the field to rotate by 90 degrees.
(5) Delete: Remove the form field here.
3.1 Instructions: Configuring form fields
Use the cogwheel (see figure 2 [3]) to edit form fields in detail. We will show you how to edit a currency form field here. The configuration of all other fields differs mainly in that field-specific parameters can be configured.
Open the editor of the ‘Currency’ form field by clicking on the gear icon. You can now configure the field in the interface that opens (see figure 3, [1-6]).
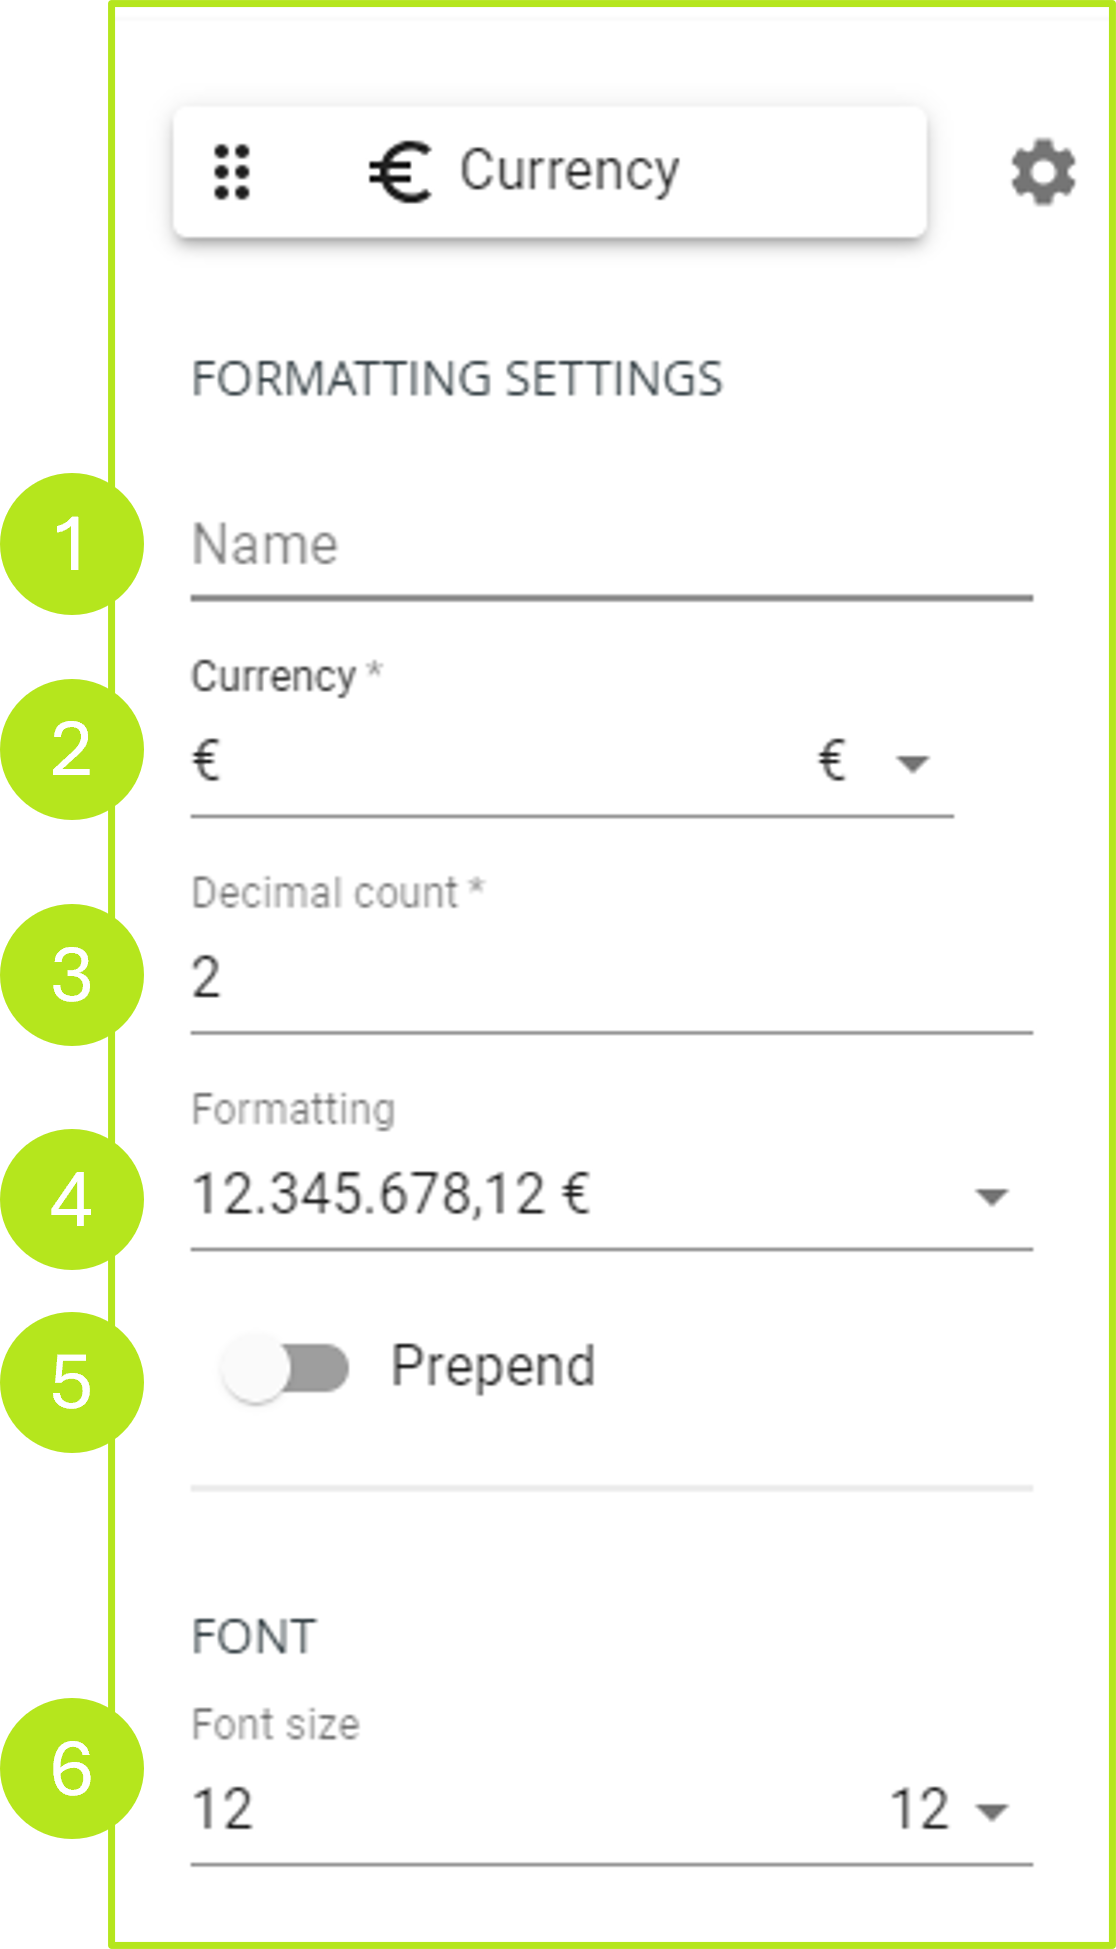
Figure 3: Overview of the configuration options for a currency field in MOXIS
The following options are available for configuring the form field:
(1) Name: Enter a designation for the currency field (e.g. US Dollar for foreign order).
(2) Currency: The Currency drop-down menu allows you to select a specific currency. To do so, click on the arrow next to the euro symbol. You can currently choose between euros, dollars, Swiss francs or pounds (as of 06/24).
(3) Decimal places: Specify how many digits should be displayed after the decimal point by entering the appropriate number.
(4) Formatting: Specify the format in which the currency's hundredths should be displayed. You can choose between a period, comma, apostrophe or no separators.
(5) Prepend (Currency prefix): Use this controller to determine whether the currency symbol is placed before or after the number.
(6) Font: By clicking on the drop-down arrow next to the number (in our example, you can see the default font size 12), you can change the size of the font.
XiTip
Please note: If you change the font size, you may also need to adjust the size of the form field (see Chapter 3.2)
3.2 Resizing form fields in MOXIS
Changing the size of a form field is very easy and intuitive. Just click in the form field. An edge icon appears in the lower right corner of the field. When you move the mouse over it, the mouse pointer changes to an arrow (see figure 4, [1]). As soon as this happens, left-click the edge icon and drag the field to make it larger or smaller as you wish. In our example, the field has been enlarged (see figure 4, [2]).
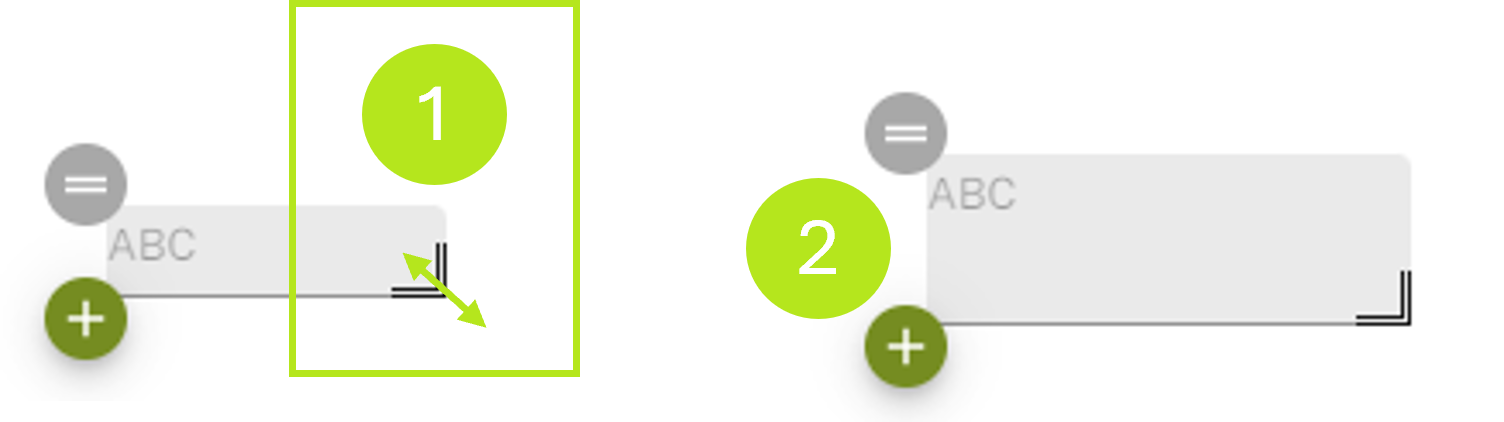
Figure 4: Adjusting the size of form fields in MOXIS