
[v4.50] Form fields
Content
Form fields in MOXIS are used to assign persons to specific fields in a document to be signed. There are several types of form fields, including text or date fields and radio buttons. There are two ways to place form fields. This article will inform you about the different types of form fields that are available and how they can be placed.
1. Form fields in MOXIS: The basics
MOXIS basically differentiates between two groups of form fields:
Form fields that are added to a document via the form fields toolbox
Form fields already embedded in an existing PDF
In both cases, the assignment of the form fields is done directly from the form fields toolbox (1), which is located in the right side menu of MOXIS (see figure 1). In our example, you can see several text fields (2) and two check boxes (3).
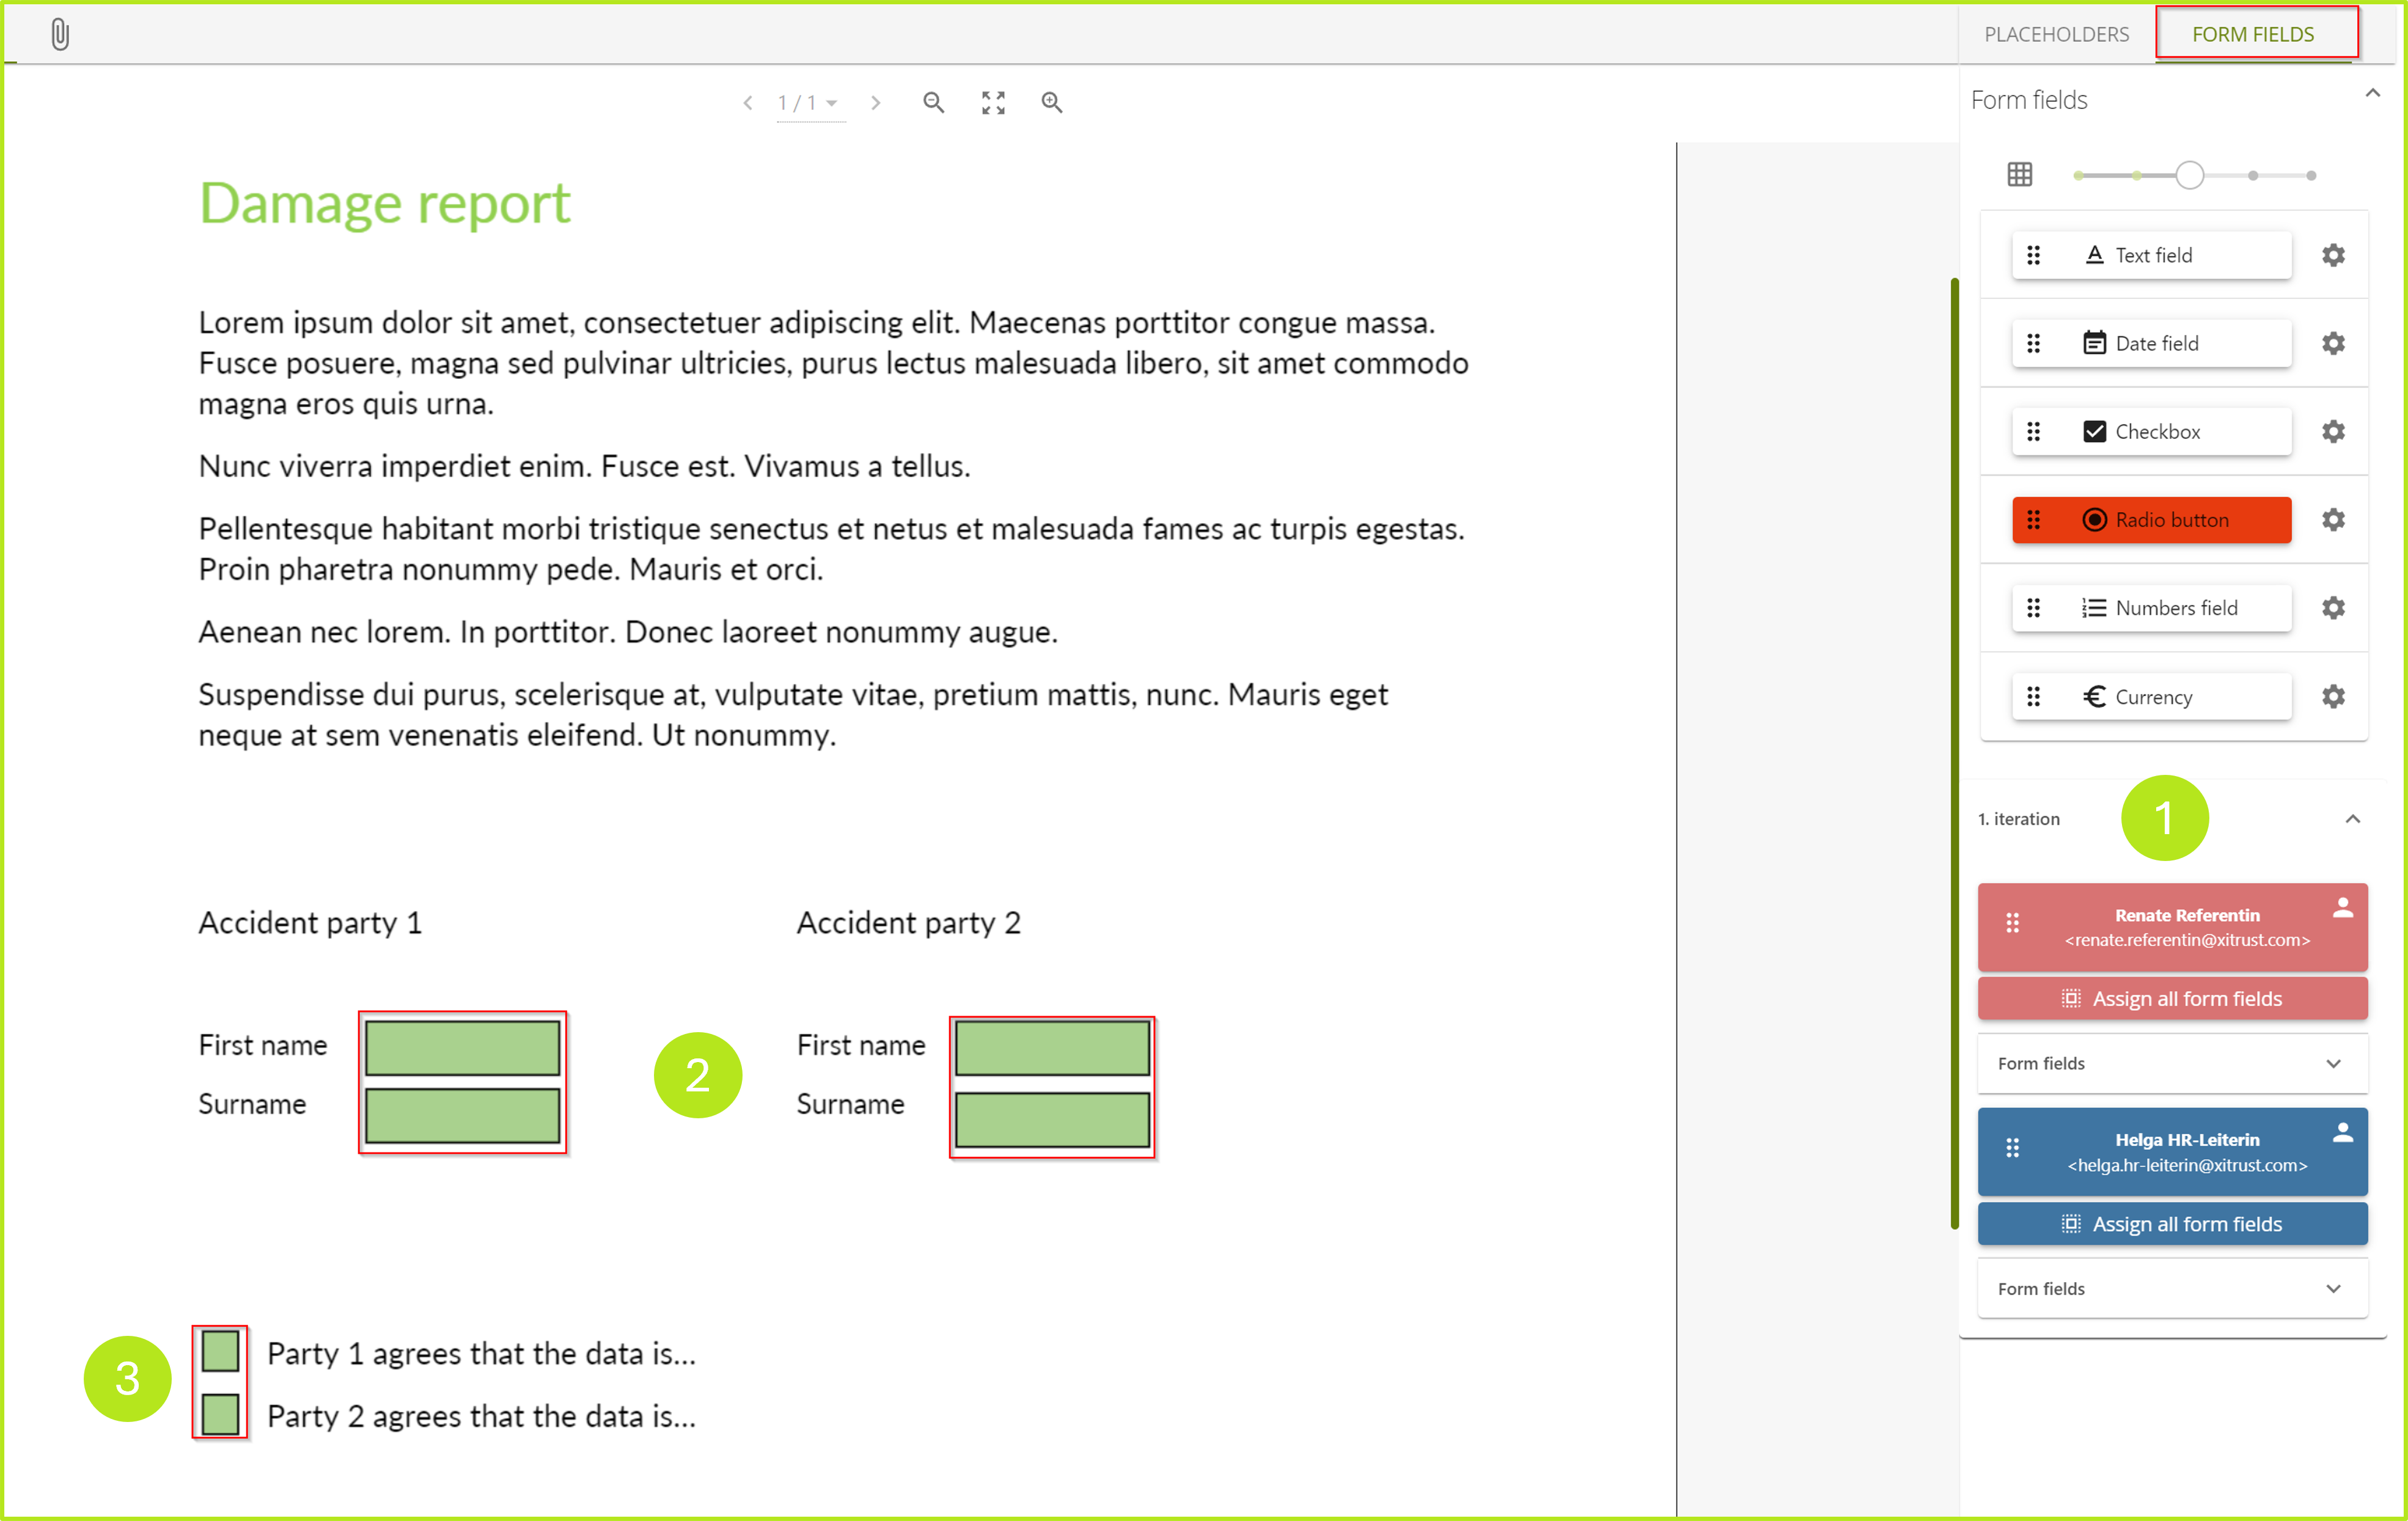
Figure 1: Example of two form fields (text fields and checkboxes) on a form in MOXIS
1.1. Types of form fields in MOXIS
MOXIS offers various types of form fields that have different functions (see figure 2 [1, 2, 3, 4, 5, 6]) and descriptions under figure 2). They are assigned by simply dragging and dropping them onto the document to be signed. The only exception is the radio button, as this must be configured beforehand. You can find more information about the radio button in the corresponding chapter. You can also use form fields to enter digital signatures.
XiTip
Once a form field has been assigned to a person, only that person can fill it in with the appropriate data or a digital signature.
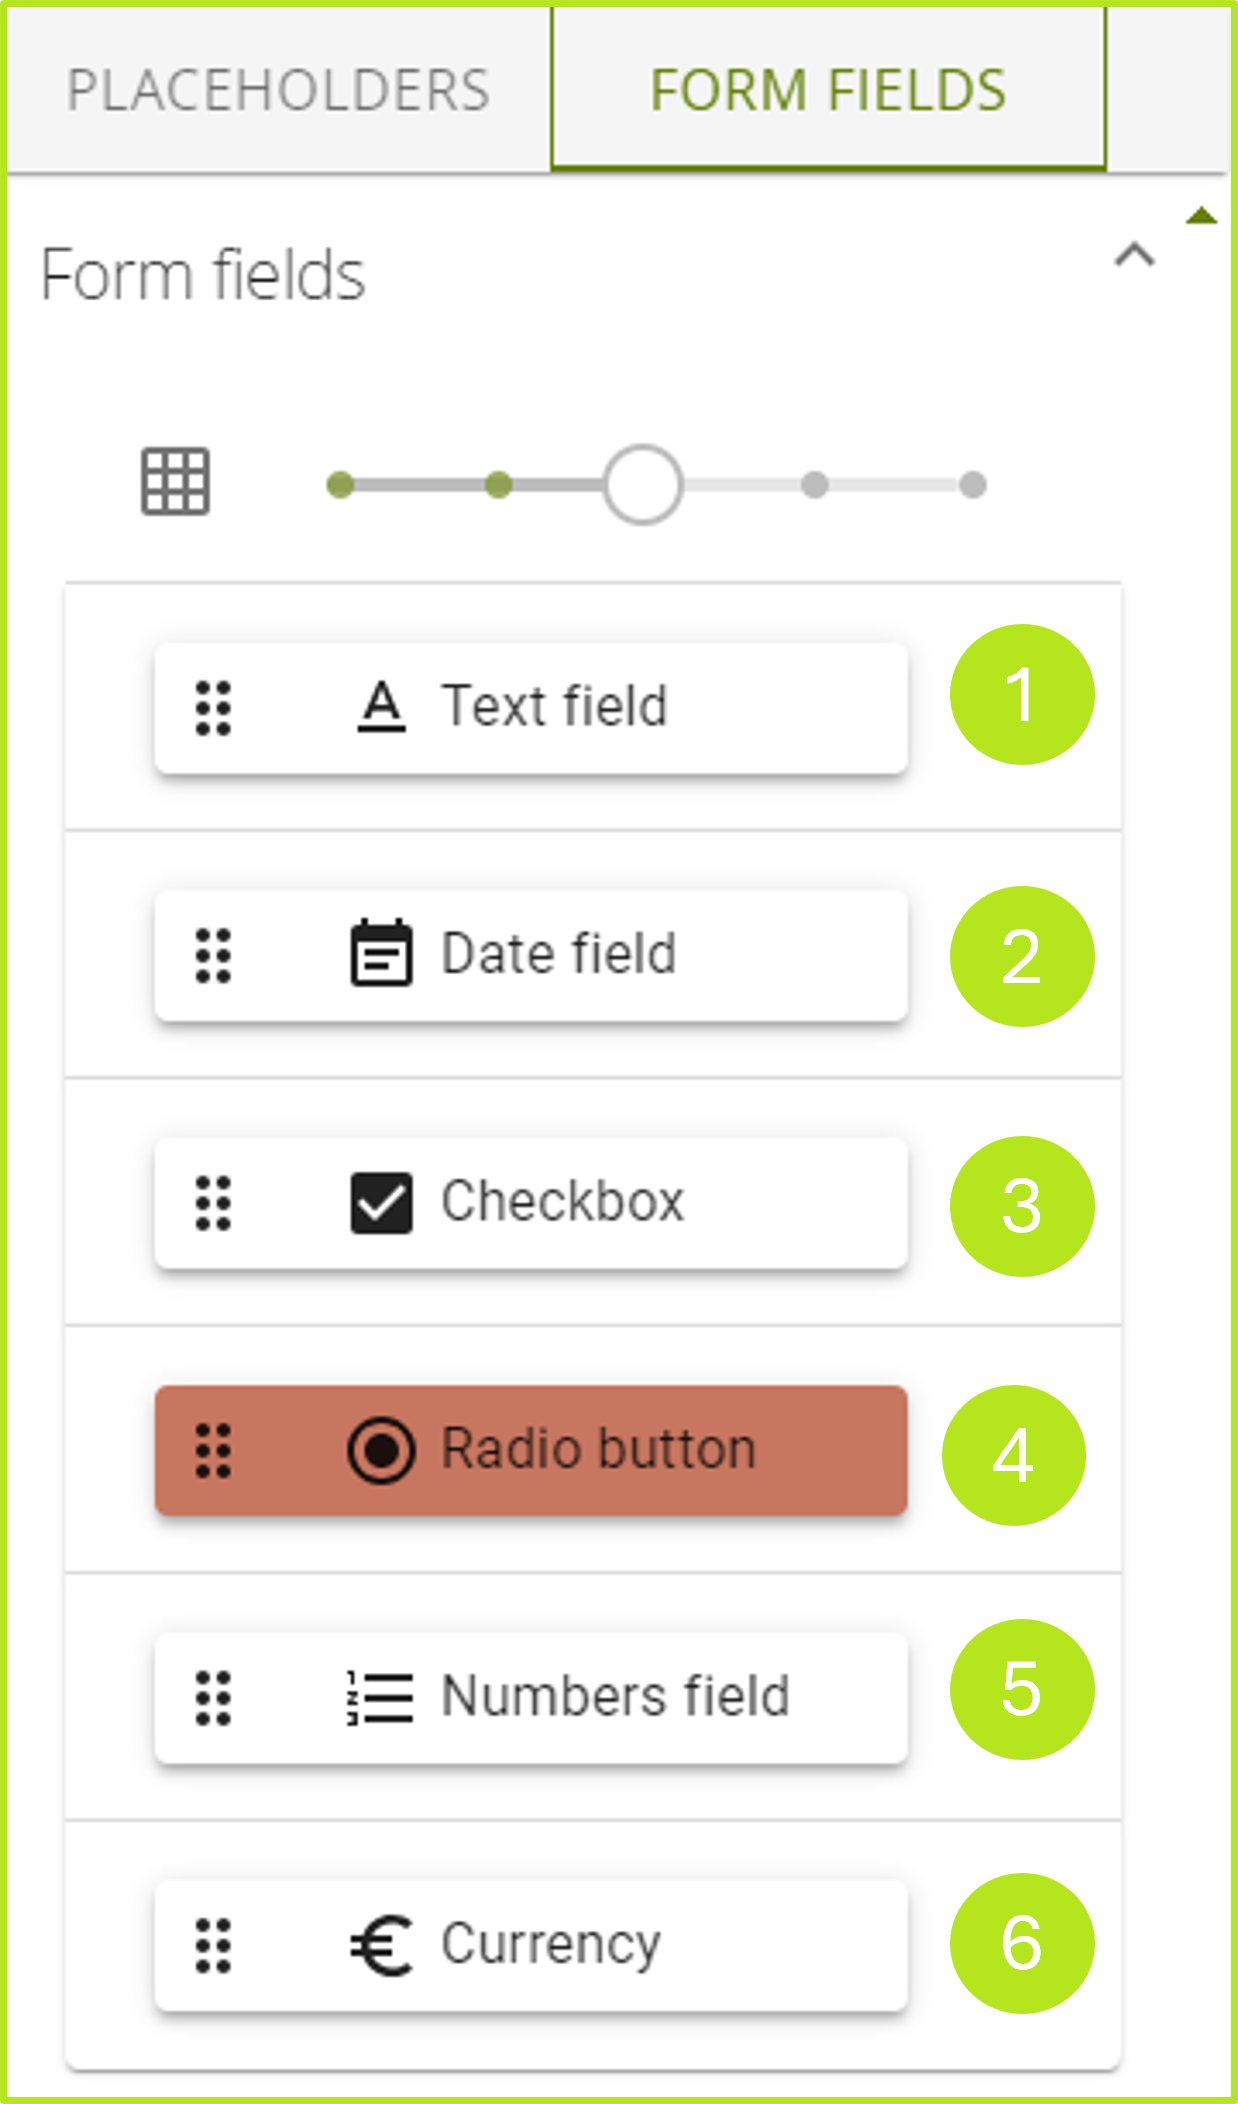
Figure 2: Various form fields in MOXIS.
(1) A text field can be filled with numbers, letters or symbols. ABC is displayed as the default placeholder text (can be overwritten, does not need to be deleted).
(2) Date fields can only be filled with dates.
(3) Thanks to a checkbox, users can tick the individual boxes.
(4) Radio buttons are used to select between different options.
(5) A number field can be filled with whole numbers or decimal numbers. 123 is displayed as the default placeholder text (can be overwritten, does not need to be deleted).
(6) Currency fields display numeric values as currency values.
1.1.1 Step-by-step guide: Configuring radio buttons
Radio buttons allow you to choose between several options. Unlike checkboxes, where several can be selected, only one can be selected in a group of radio buttons.
XiTip
Combined radio buttons are an exception to this. In this case, two options are linked together by the same name and the same export value. If a radio button is marked that is linked to another radio button, by default both are selected.
Unlike other form fields, radio buttons must be configured before they can be dragged onto the document. You can find out how to optimally configure a radio button here
Step 1: Open MOXIS and open the form fields toolbox. Here you will find the button for the radio button. To configure it using the editor, please click on the gear wheel next to the button (see figure 3)
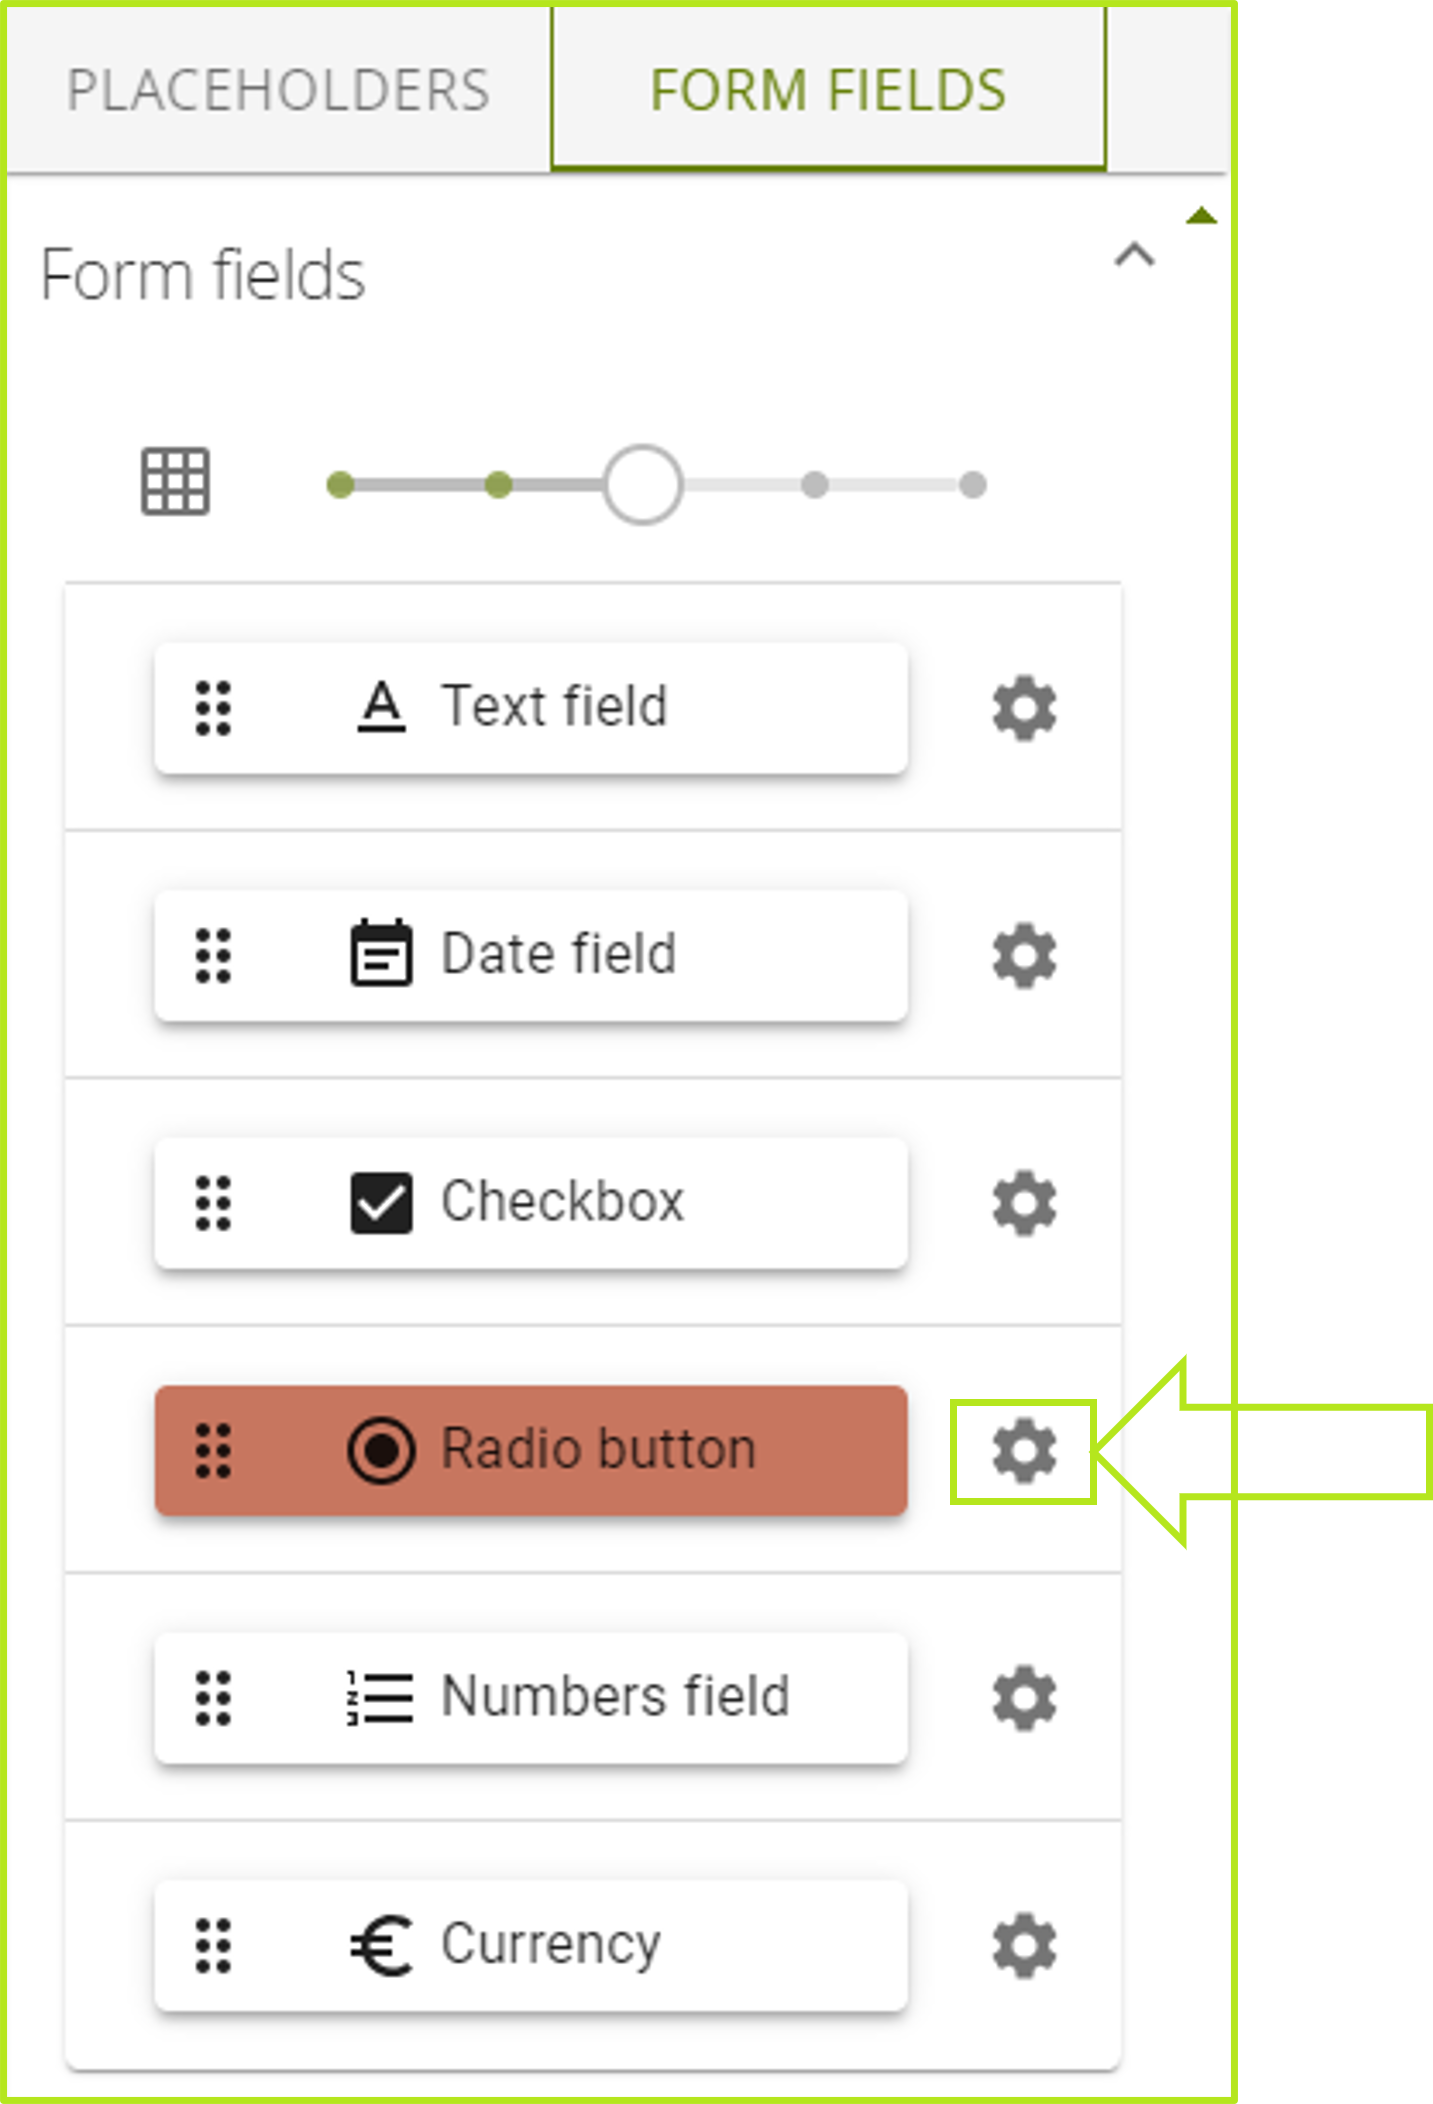
Figure 3: Opening the editor to configure radio buttons in MOXIS
Step 2: You can now configure the radio button in the editor window that has opened (see figure 4). Assign it a name (1) and an export value (2) and, as soon as you have done that, the button's colour will change to white.
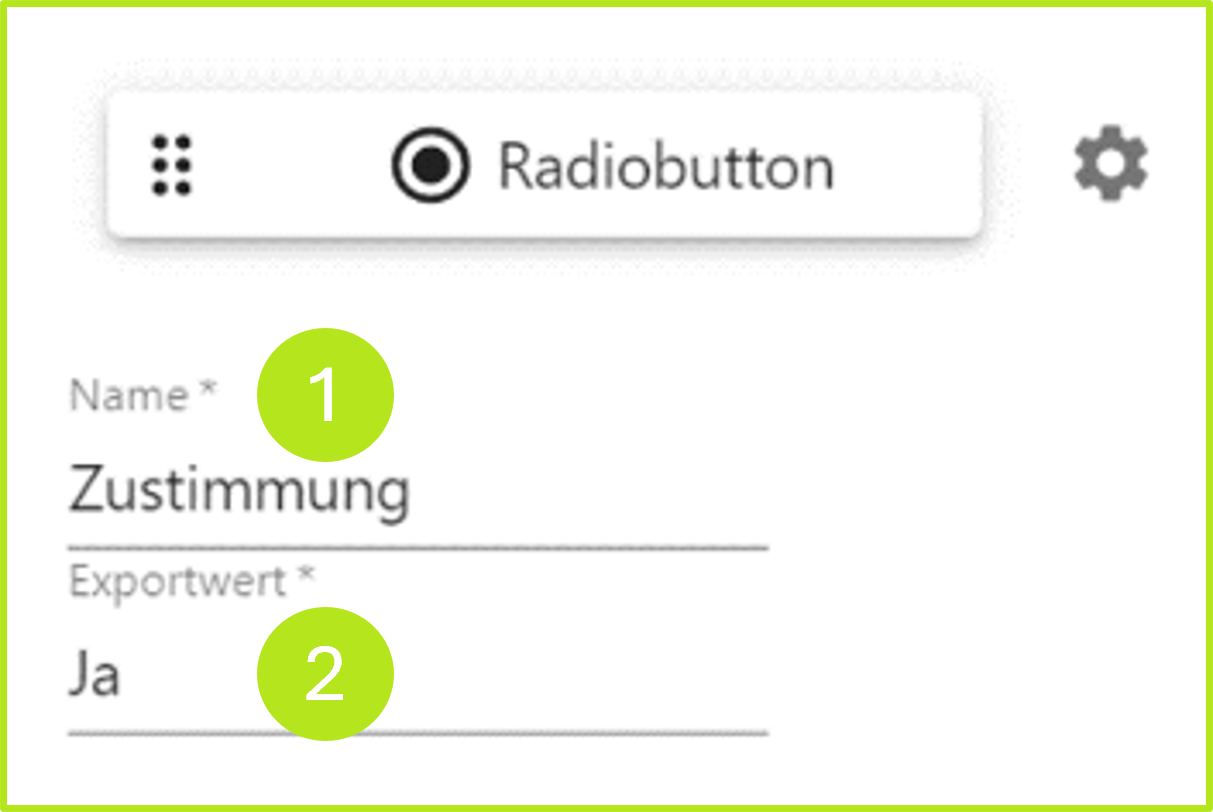
Figure 4: Configuring the radio button in the editor
XiTip
For radio buttons that belong to the same group but have different values, select the same name but different export values. If you want to combine radio buttons in a group, select the same name and the same export value.
Step 3: Drag the radio button to the desired location in the document.
Step 4: Since radio buttons do not have a title field, you have to combine them with a text field (see figure 5). Simply create a text field next to the radio button. To move a radio button, click on the = sign (see figure 5 [1]) and keep it pressed. To edit a radio button, click on the + sign (see figure 5 [2]).
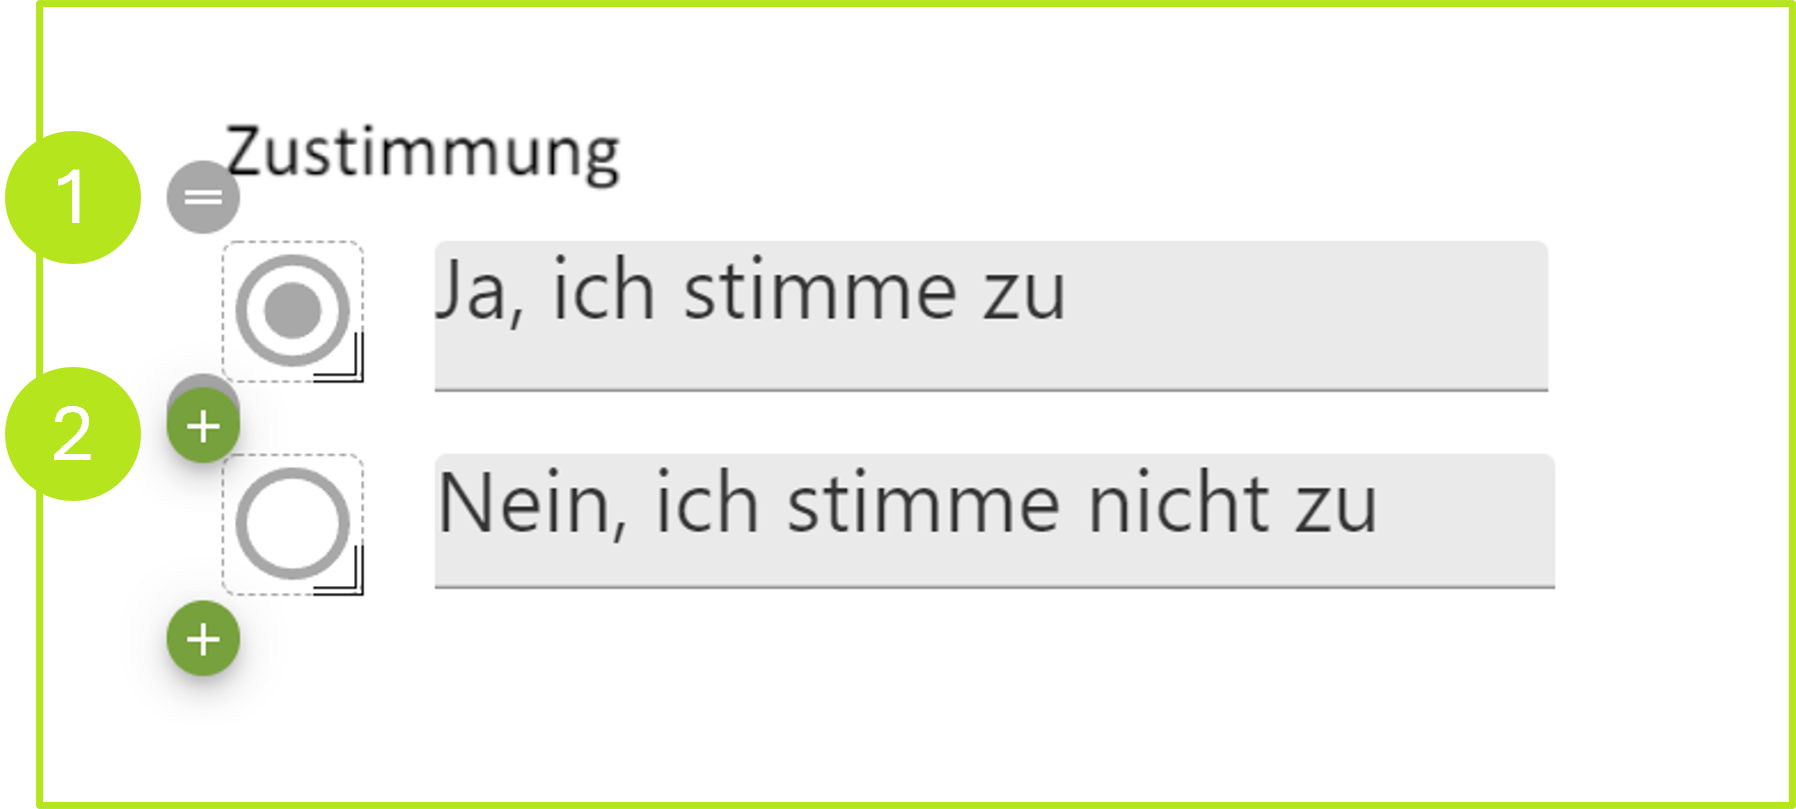
Figure 5: Configured radio buttons in MOXIS including a form field with text
1.2 Adding form fields from the form field toolbox
If you want to position a form field on a document, simply drag and drop it from the form field toolbox and position it where you want it.
1.3 Assigning form fields to an existing PDF with embedded form fields using the example of a digital signature
If a PDF document already has a signature field when uploaded, a signer can be assigned to it via a form field. In this case, you cannot position a placeholder
To assign a signer, click on the respective person in the form field toolbox (see figure 6 [1, 2]) and drag the form field to the desired signature field (see figure 6 [1, 2]).
Please note: The field can now only be completed by the assigned person.
After that, the signing process takes place as usual.
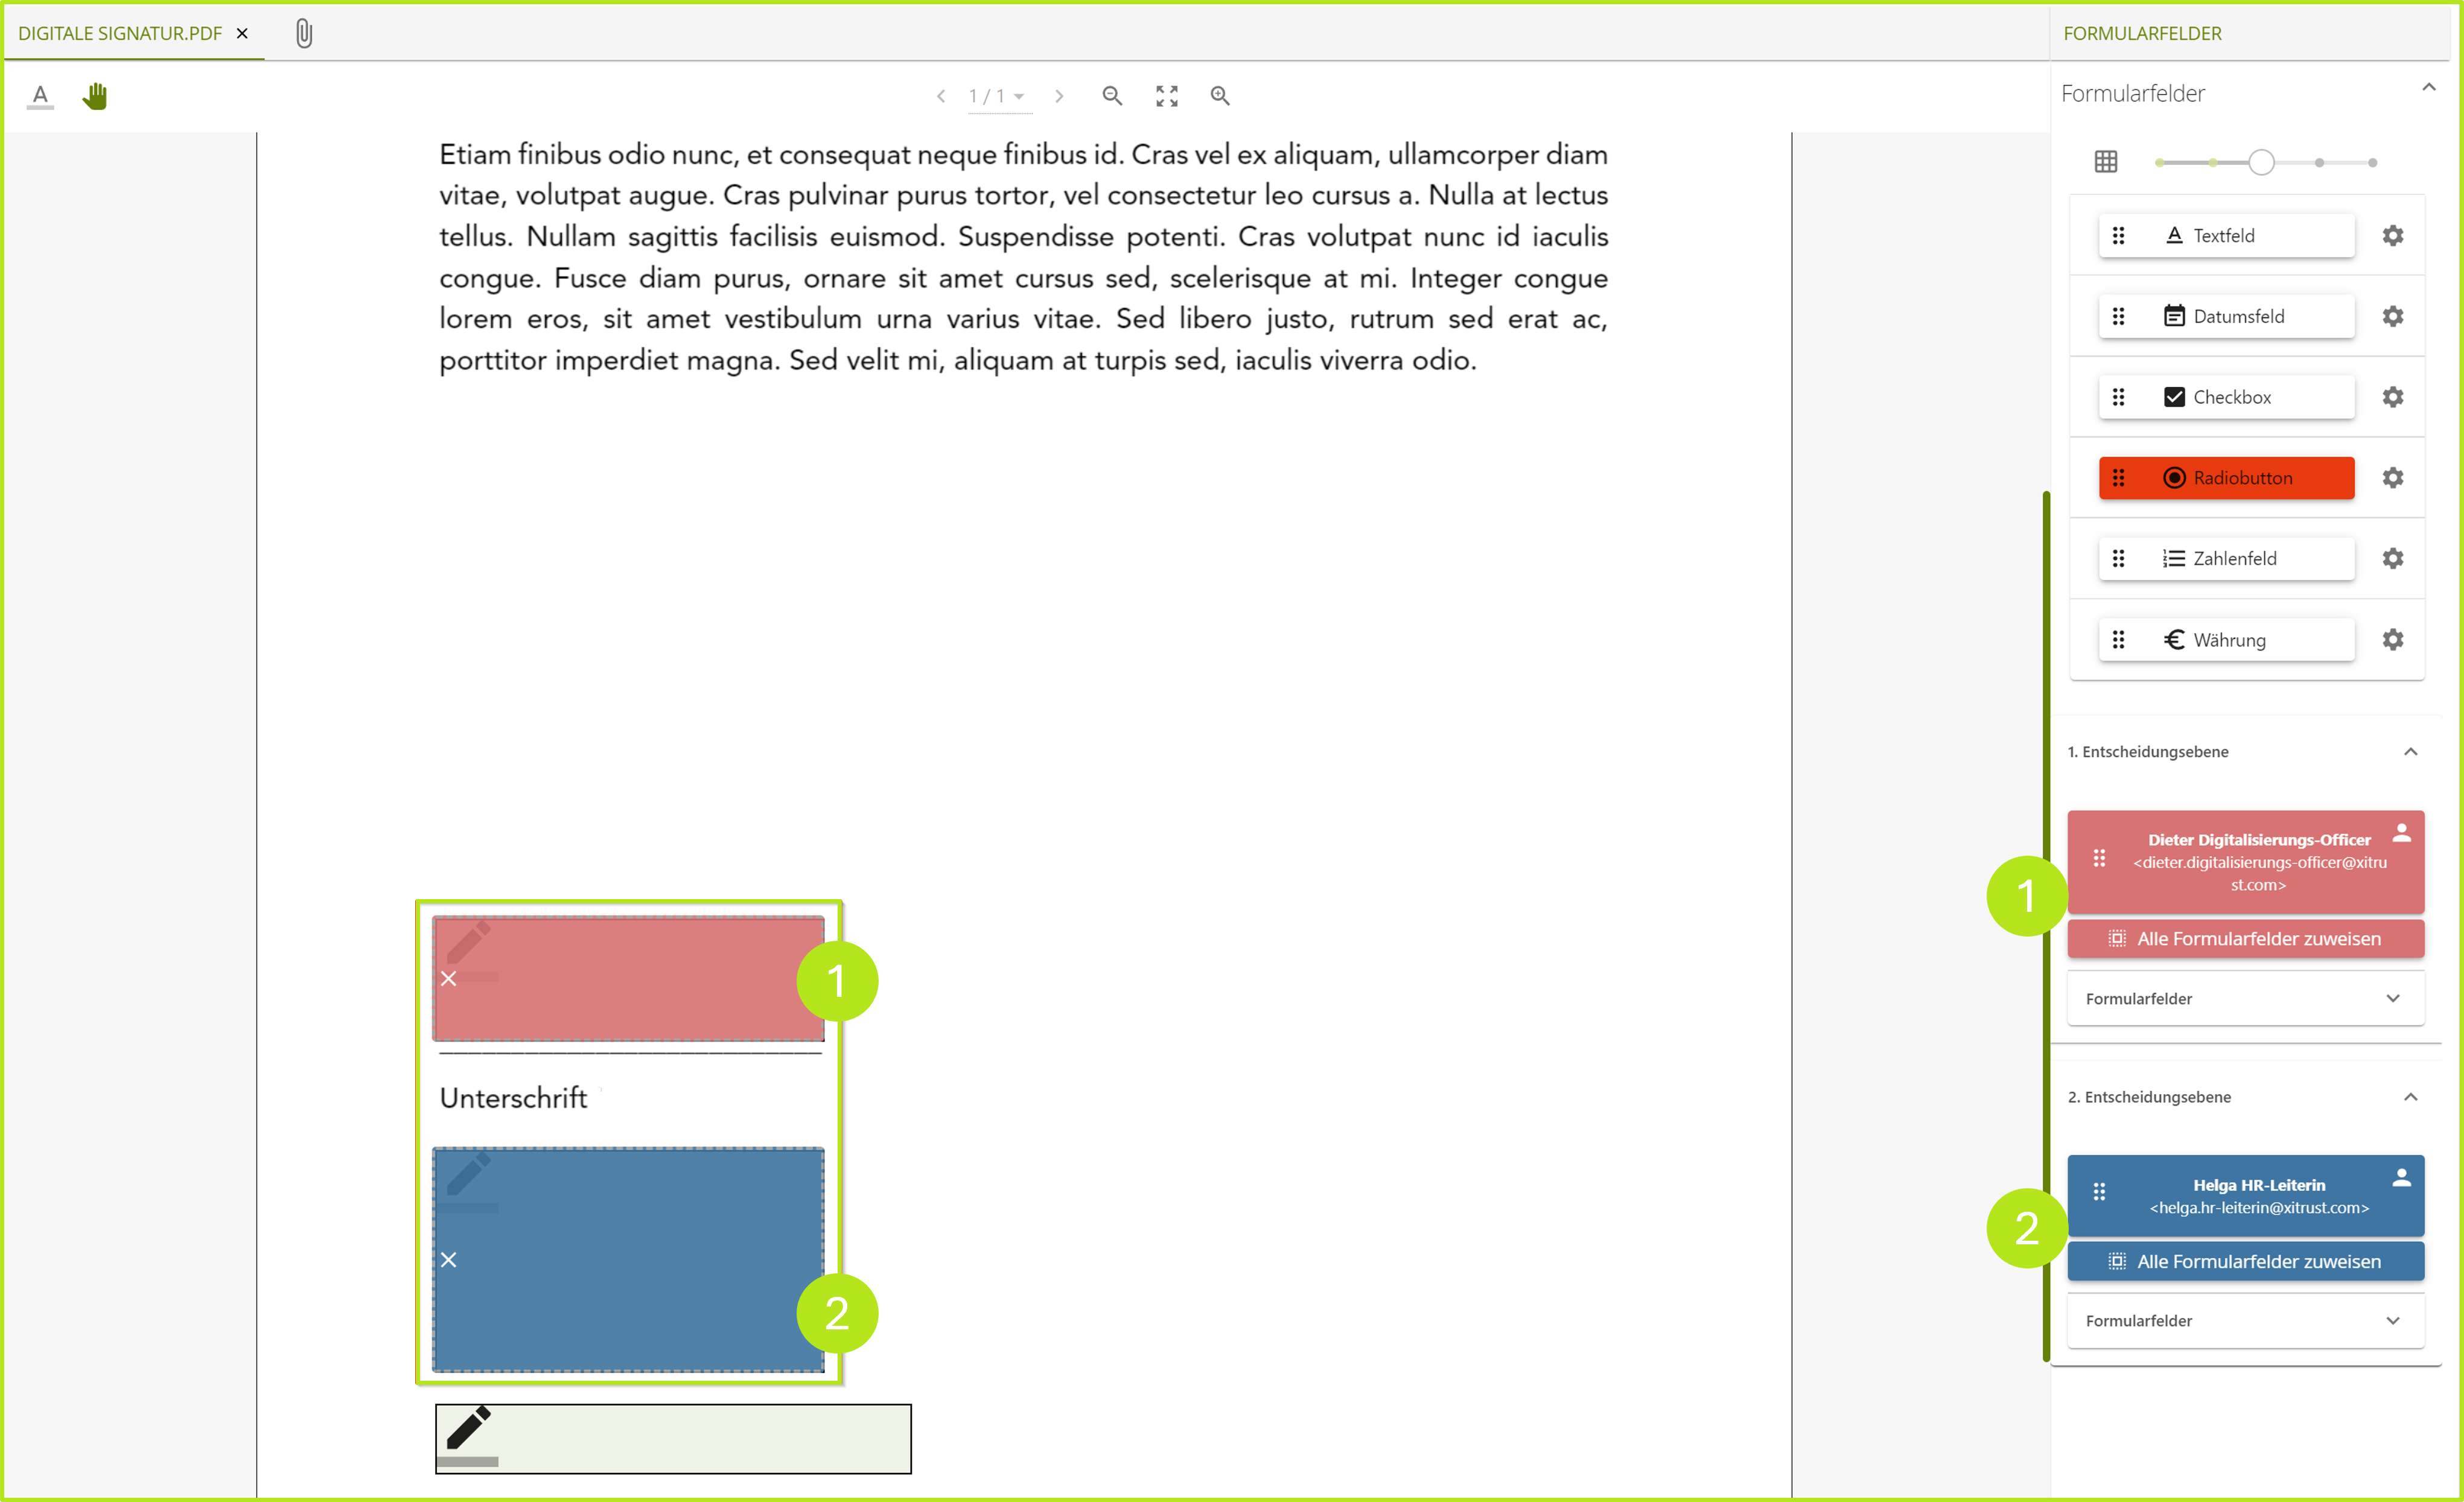
Figure 6: Predefined signature field in a PDF uploaded to MOXIS, including assignment of the form fields for the digital signature