
[v4.50] Defining iterations
Content
Thanks to the use of iterations, all of an organisation's decision-making processes requiring signatures can be mapped in MOXIS in a user-defined manner. An iteration can therefore be the first individual step in a sequential signature process. Use cases on workflows and the topic of iterations can be found on our website. This article provides a step-by-step guide to the topic.
1. Step-by-step instructions for creating a decision level
Step 1: Once you have created a new job, you can add an iteration. To do this, please click on the [+ Create iteration]-button (see figure 1).
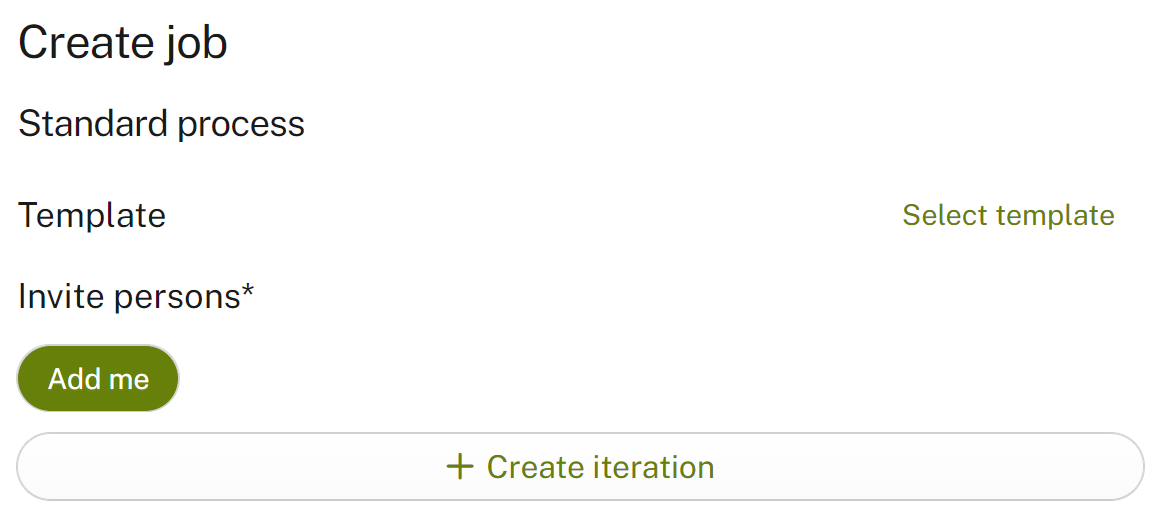
Figure 1: Create a decision level in the course of a new order.
Step 2: By selecting the first contact, you decide whether the signature quality defined by the slider is an external or internal signature (see Figure 2).
XiTip
Please note: Once the first signatory person has been defined, only additional recipients of the same type (internal/external) can be added to this decision level.
If several people are entered at the same decision-making level, they will receive the notification to sign at the same time. This means that they can sign practically ‘in parallel’. Only after these persons have signed will persons in any other existing iteration be invited.
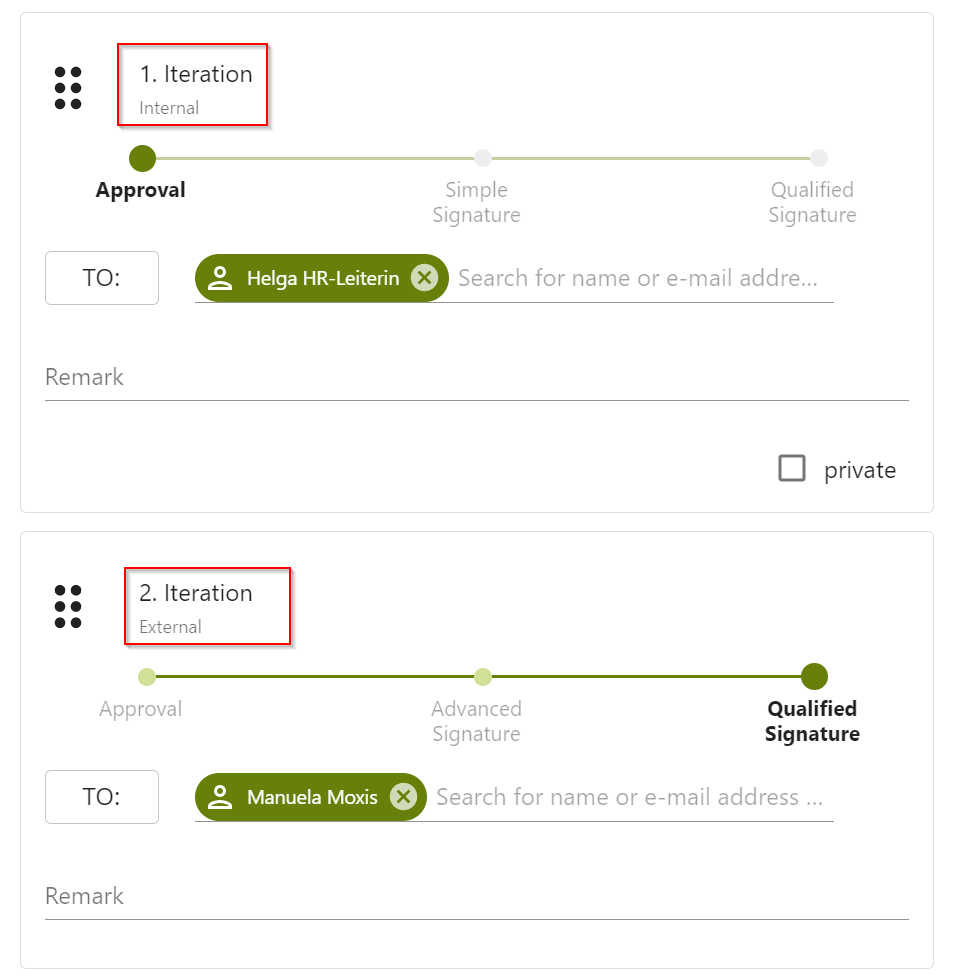
Figure 1: Internal and external iteration
2. Use Cases for creating decision levels
Use Case 1: There are four decision-makers in controlling who have to confirm that a process has been checked by adding their signature. All of them should be added to the same decision level because they are all authorised signatories. However, to confirm that the process has been successfully evaluated, basically one signature is sufficient.
Solution: Add a decision level with a group and specify that only one person from the group has to sign.
2.1. Step-by-step guide: Adding a group to a decision-making level where only one person needs to sign.
Step 1: Add a group from the address book by clicking on the [To:]-button on the left of the image (see figure 2). In the address book that opens, please select Groups in the header bar and tick the group that you would like to insert for this particular process. Finally, click on the [Save]-button in the address book to add the group to the decision-making level.
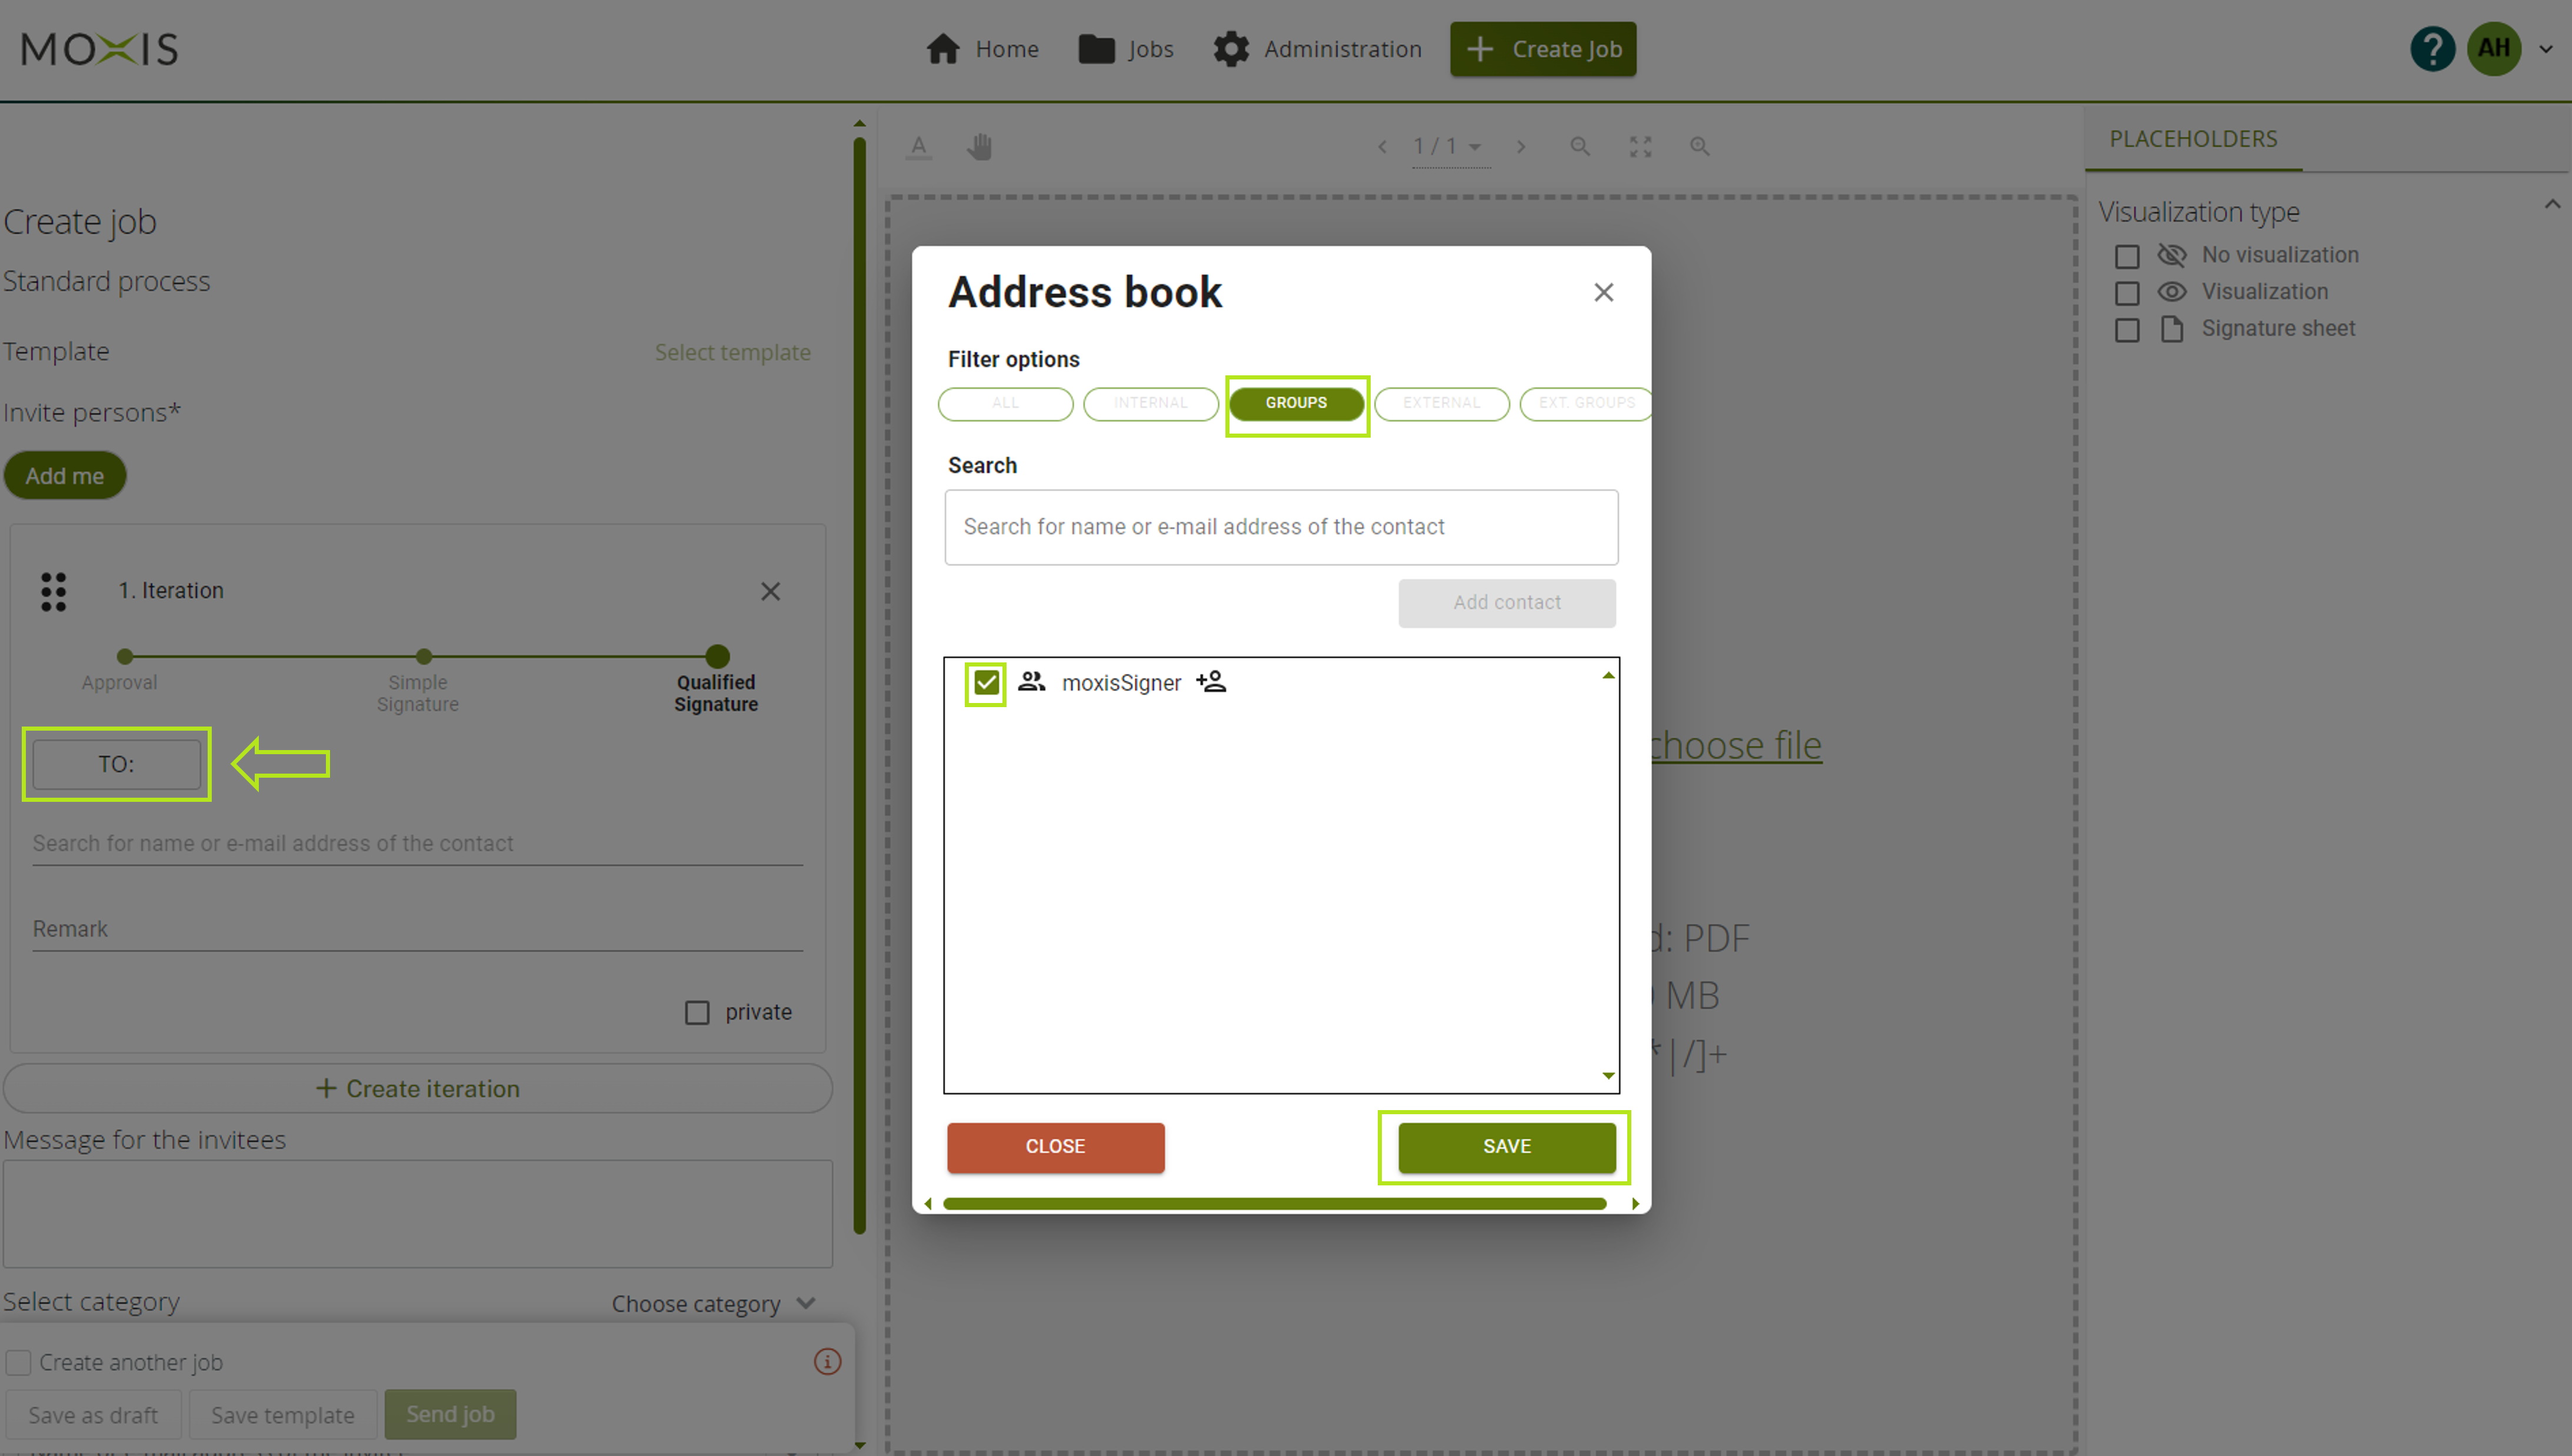
Figure 2: Use Case 1
Step 2: Now define how many signatures are needed by setting the number in the corresponding field (see figure 3). In our example, one person from the group moxisSigner is sufficient. So as soon as a signatory has signed, the order is forwarded directly to persons in any further decision-making levels that may exist.
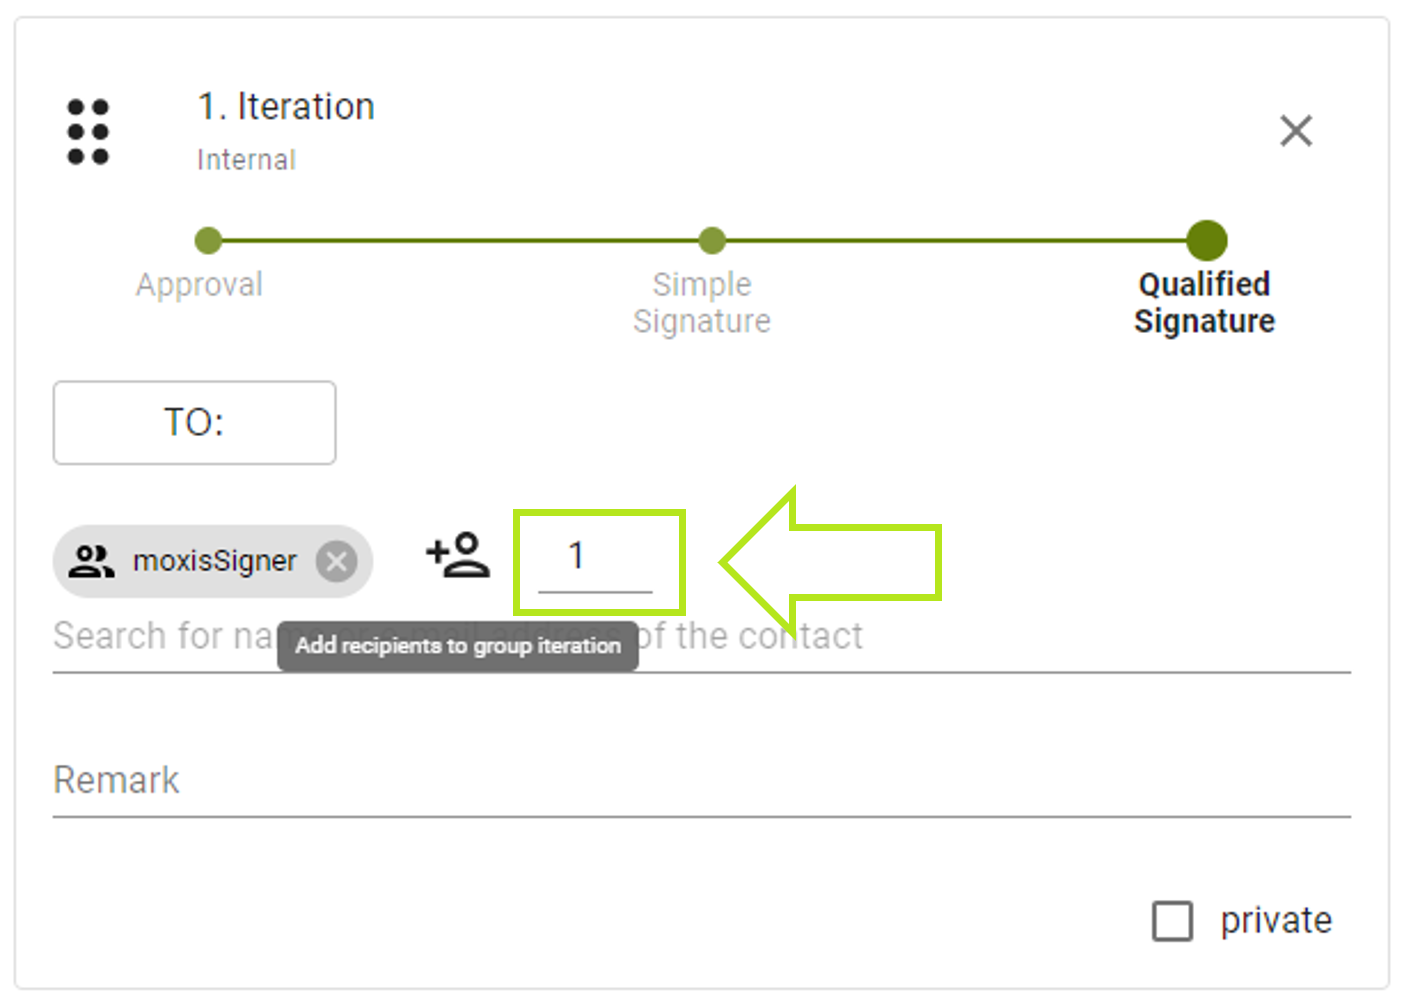
Figure 3: Determining the required signatures from the moxisSigner group at the current iteration level.
Use Case 2: An order with 5 decision levels has been created. You are now informed of a change in the sequence of signatories. The decision levels need to be changed without deleting the order.
Solution: Move the decision level
2.2. Guideline: Shifting iteration levels
Click on the six dots in the iteration plane and, keeping the left mouse button pressed, drag the decision plane to the desired position (see figure 4).

Figure 4: Drag & drop iteration levels
Use Case 3: A person (the only one added at this iteration level) is no longer relevant to the signing process. This iteration must therefore be removed from the signing process.
Solution: Delete the iteration
2.3. Guideline: Deleting iteration levels
To delete a decision level, drag it to the last position as described in chapter 2.2. Guideline: Shifting iteration levels. This is the only way to make an [X] button visible in the top right corner (see Figure 5). Click on the [X] to delete the decision level in question.
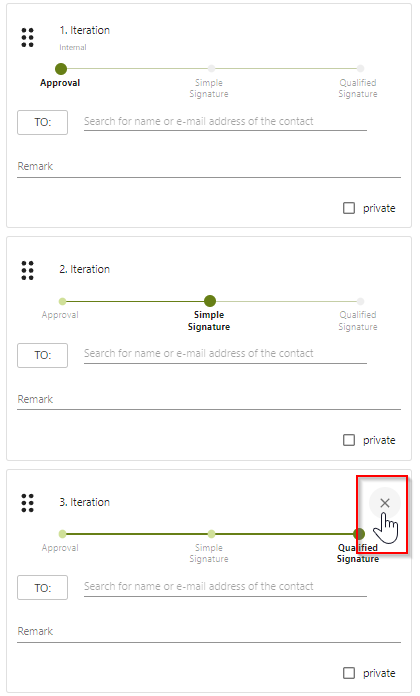
Figure 5: Deleting iterations