
[v4.50] The detail view
Content
The detailed view shows all the information about an order. This article provides an overview of how to use the detailed view.
1. General information on the detail view
To open the detailed view of the orders, please first click on the Jobs tab in the menu bar. The detailed view is located one level below the job overview.
Depending on the rights you have as a user, various tabs are displayed on the left side of the general menu, which you can use to filter the jobs (see figure 1 [1, 2, 3, 4]). MOXIS offers the following categories:
(1) Received jobs (qualified signatures, approvals & signatures, closed; see figure 1 [1])
(2) Sent jobs (Pending, Closed, Serial jobs; see figure 1 [2])
(3) Drafts (Drafts; see figure 1 [3])
(4) To Manage (Pending, Closed; see figure 1 [4])
1.1. How do I open the detail view?
Click on the respective tab to open the corresponding job overview on the right-hand side. There are two ways to open the detail view:
by clicking directly on the job line (see figure 1 [5])
by clicking on the order number or the order details (see figure 1 [6])
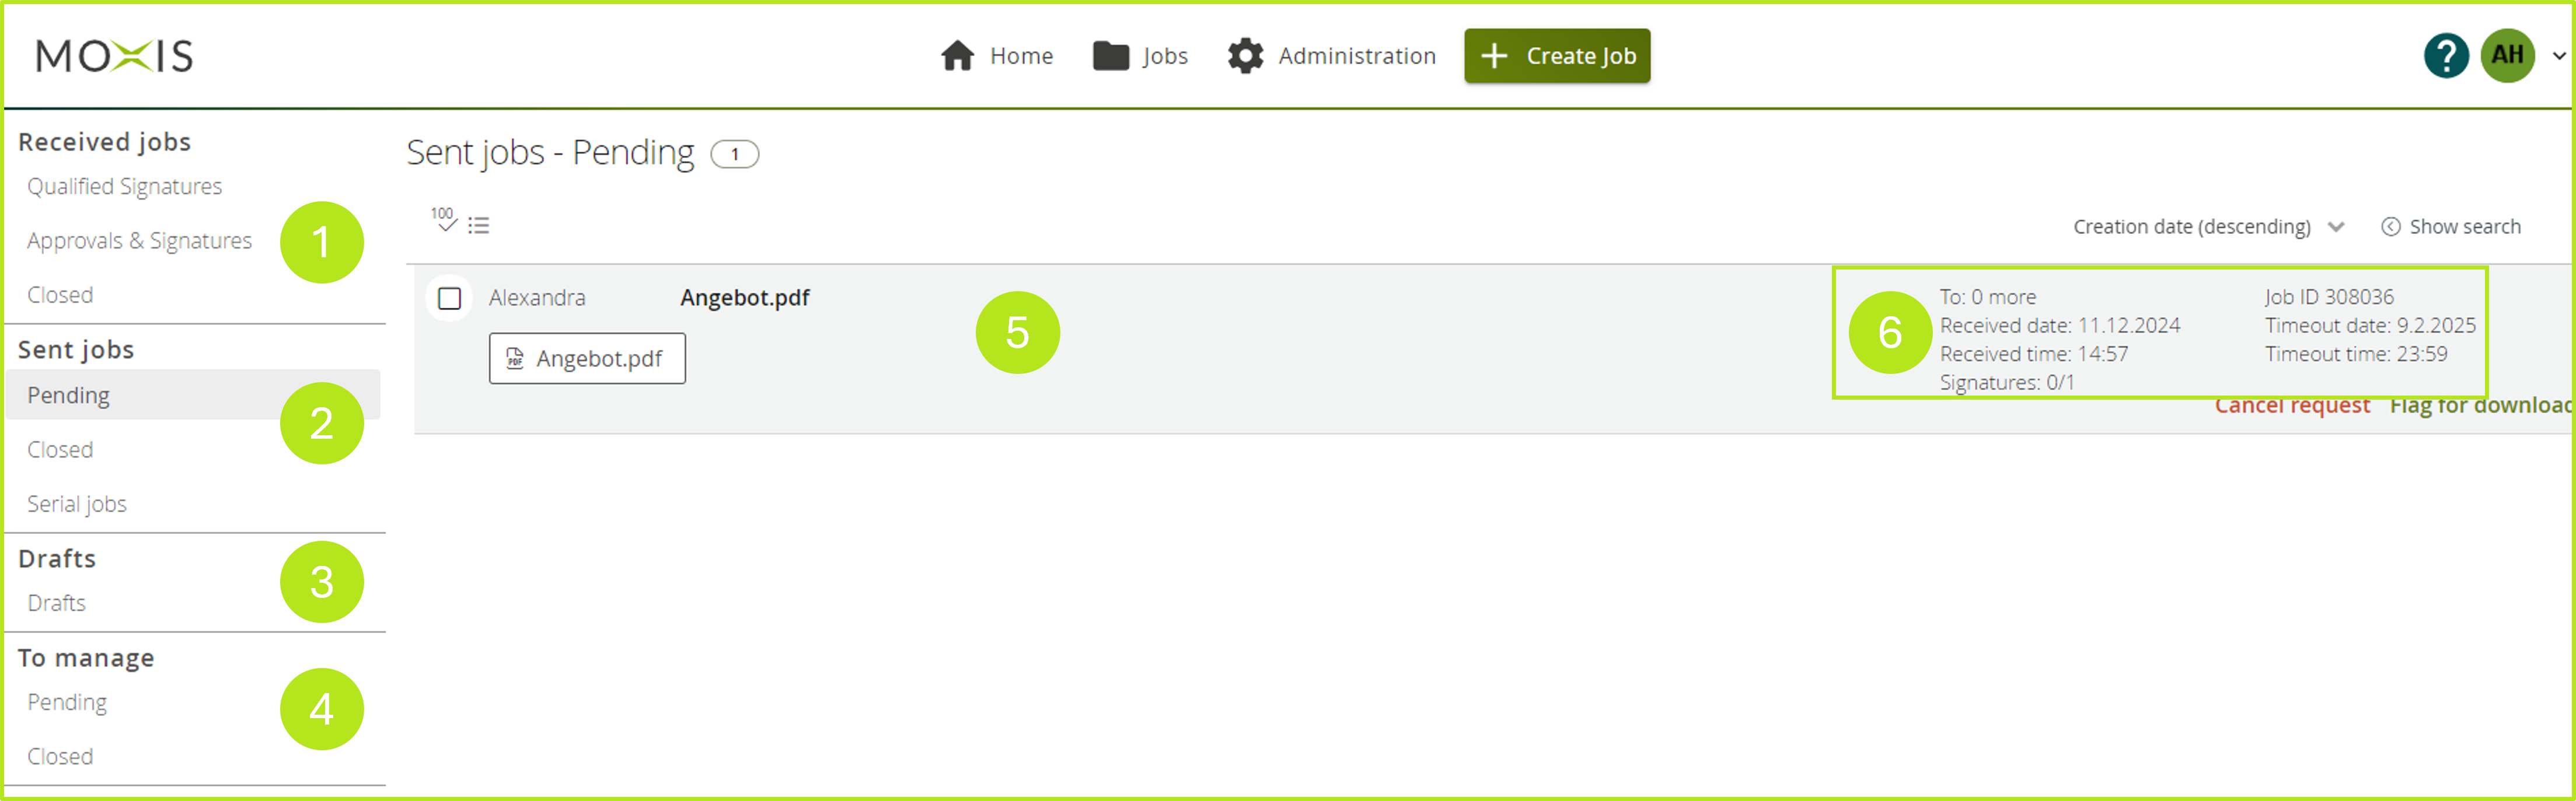
Figure 1: Order overview in MOXIS filtered by ‘Sent jobs– pending’
Please note: Clicking on the document itself will not open the detailed view, but the document in a new browser tab.
1.2. Overview of the detailed view
The detailed view opens in a pop-up together with the main document of the order The following is an overview of the individual points (see Figure 2; where points [1 - 9] concern the detailed view and points [10 - 12] support the processing of the document). Point [3] is an exception, as it has the same function in the detailed view as in the document processing
(1) Constituent: Here you can see who created the job and, by clicking on the mail icon, you can compose and send a message to that person.
(2) State: There are four order statuses, which are displayed here, namely open - successful - rejected - cancelled. (see Figure 2 [2]; in our example, the status is ‘open’).
(3) Main document: You can download the document here and in the document processing under point 3.
(4) ID – Creation date – Timeout date
(5) Create template: With a single click, you can create a suitable template from the document.
(6) Start with a new document: Clicking on this field allows you to start a new job with the settings of the completed job
(7) Iteration levels: The iteration level detailed view shows you the details of the individual iteration levels.
(8) Signature preview: The person(s) who are to sign the document can already see a preview of the signature to be applied here
(9) Depending on the rights assigned and whether you are the signatory or the person issuing the order or both, you have various options under this item. You can cancel the order using the [Cancel request]-button or mark the job for signing using the corresponding button
(10) Zoom in and zoom out or return to default size.
(11) Page break (for documents with more than one page)
(12) Hand symbol: move the document; letter symbol: highlight text
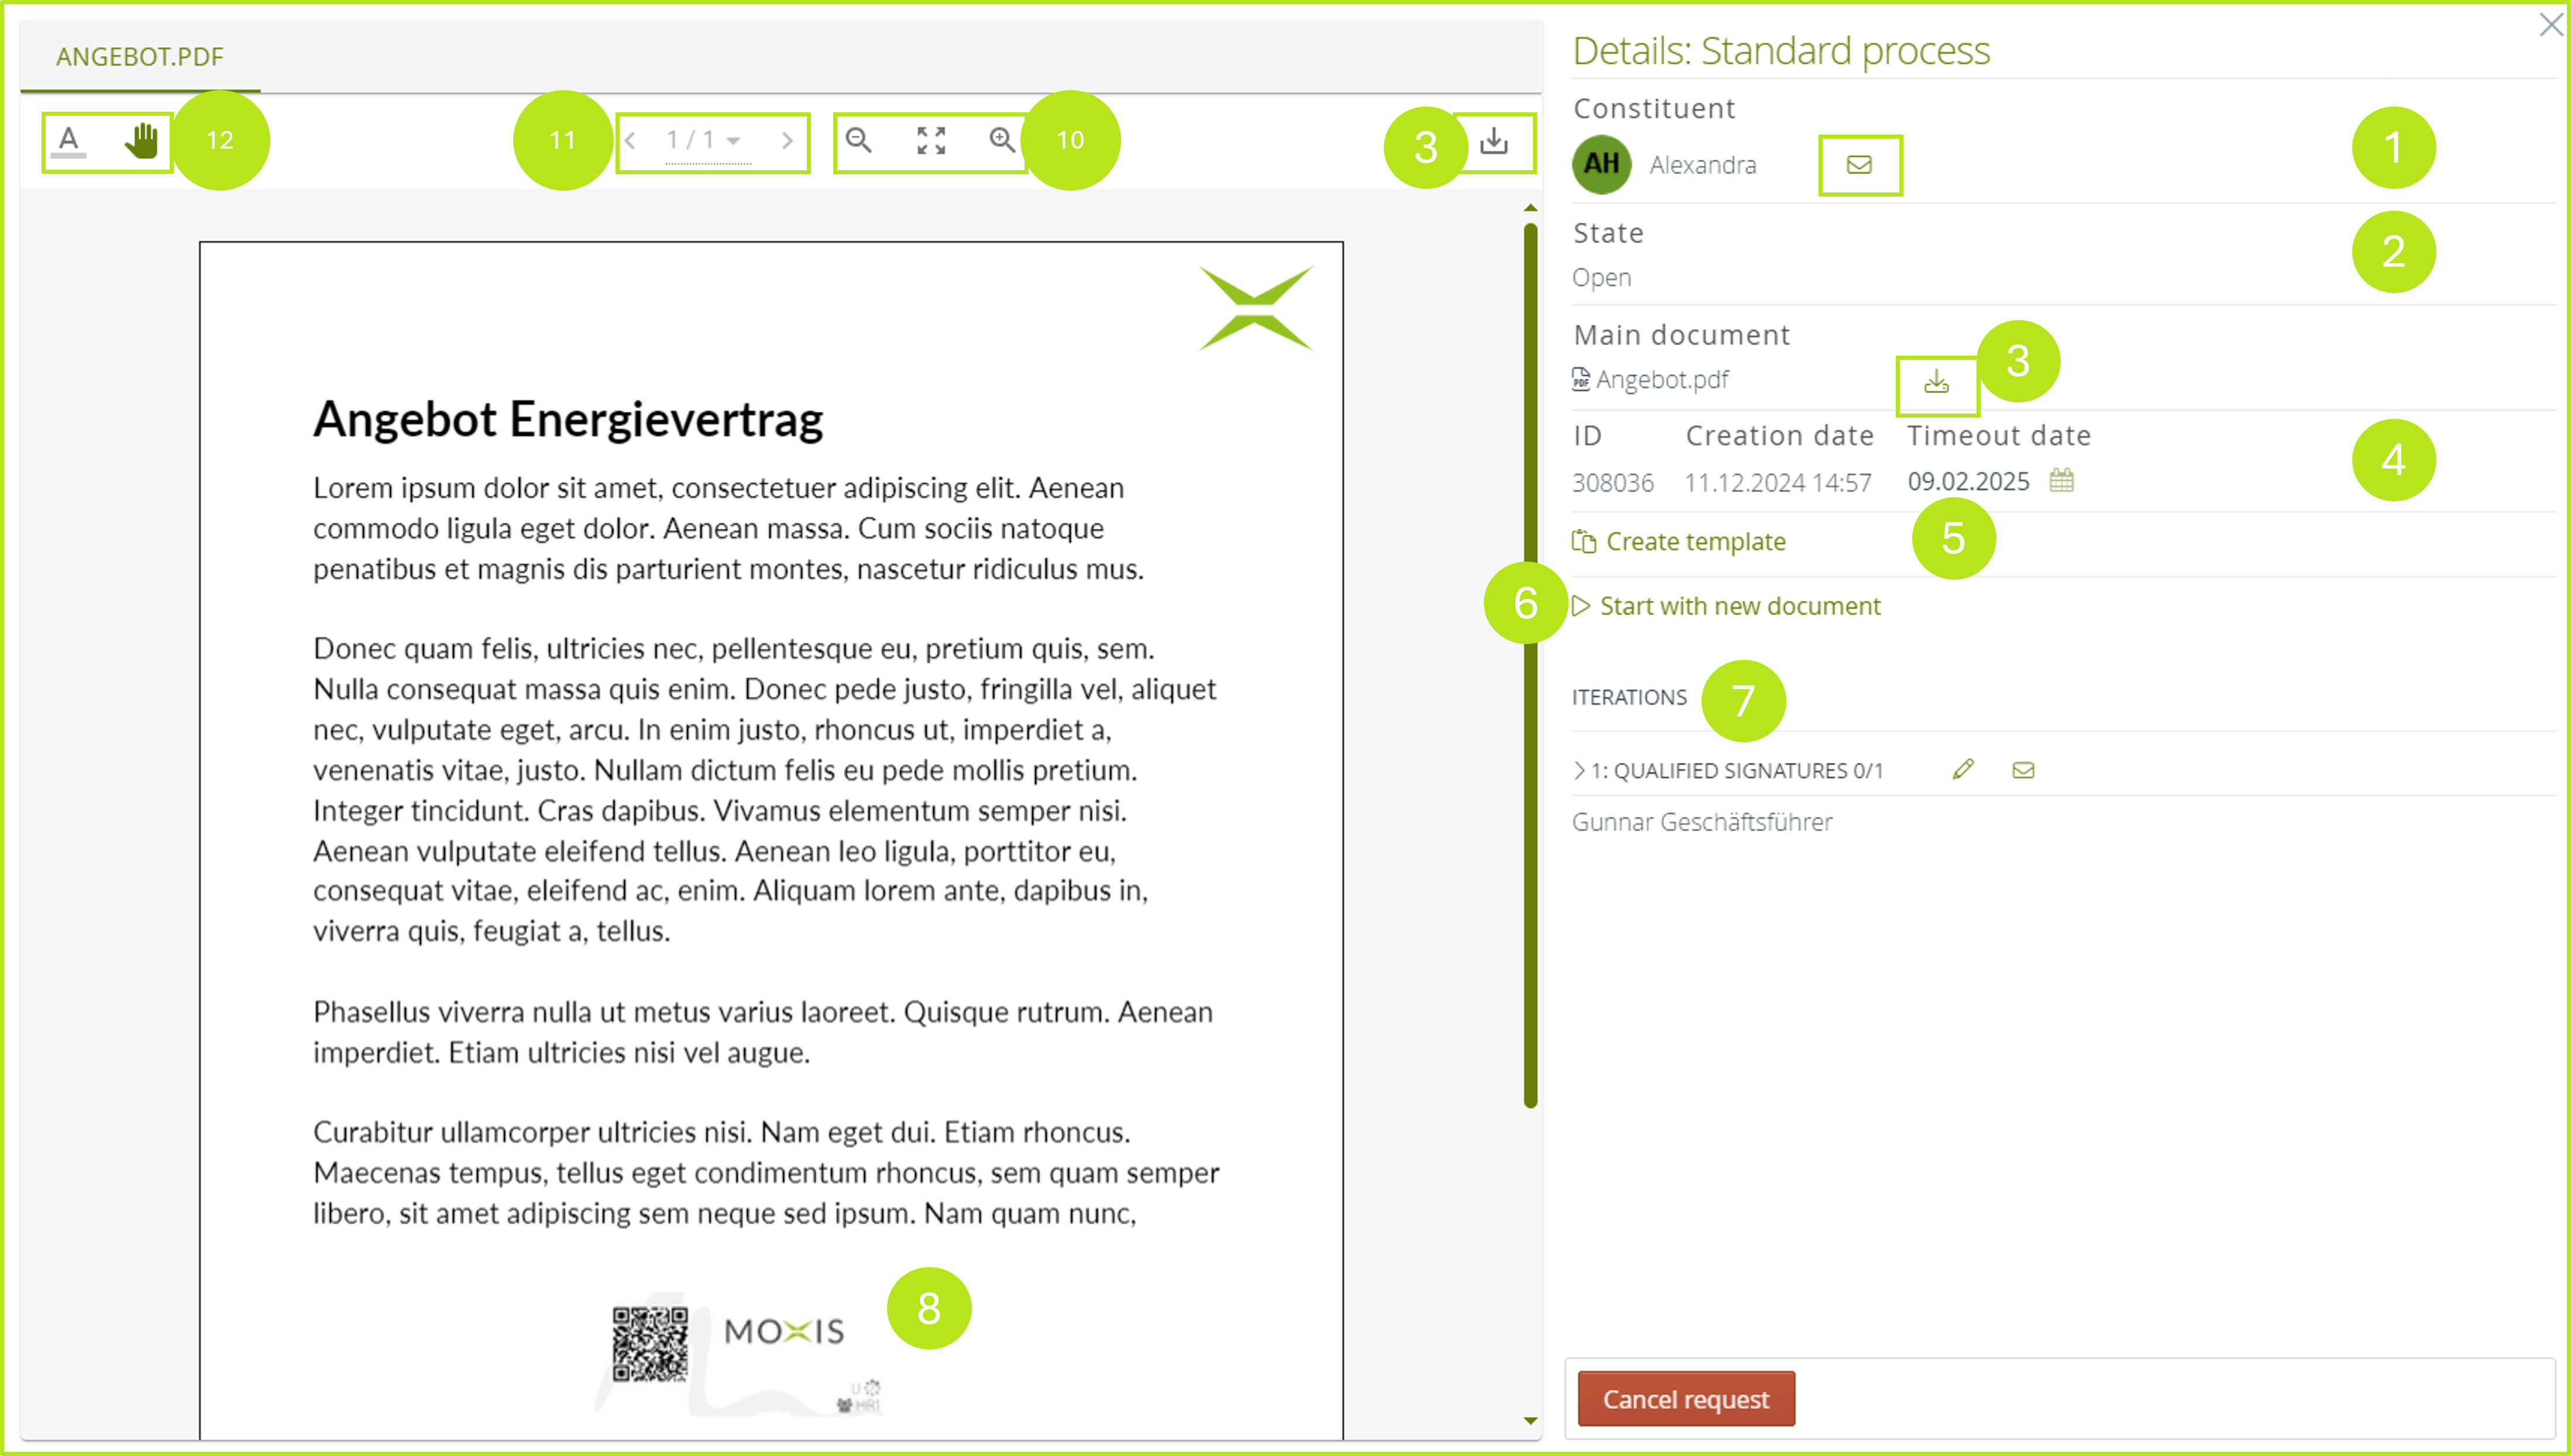
Figure 2: Detailed view and pop-up with order including various processing options