
[v4.50] Selecting groups and contacts in a group
Content
There are various ways to add a group to your order. It is also possible to select individual contacts from a group for an order. We will briefly explain your options below.
1. Step-by-step guide to selecting and adding a group using the search function
Step 1: To add a group using the search function in MOXIS (see Figure 1), first enter the search term in the address field (1). If groups have already been created, they will appear in the suggested search results (2). Please click on the relevant group to add it.
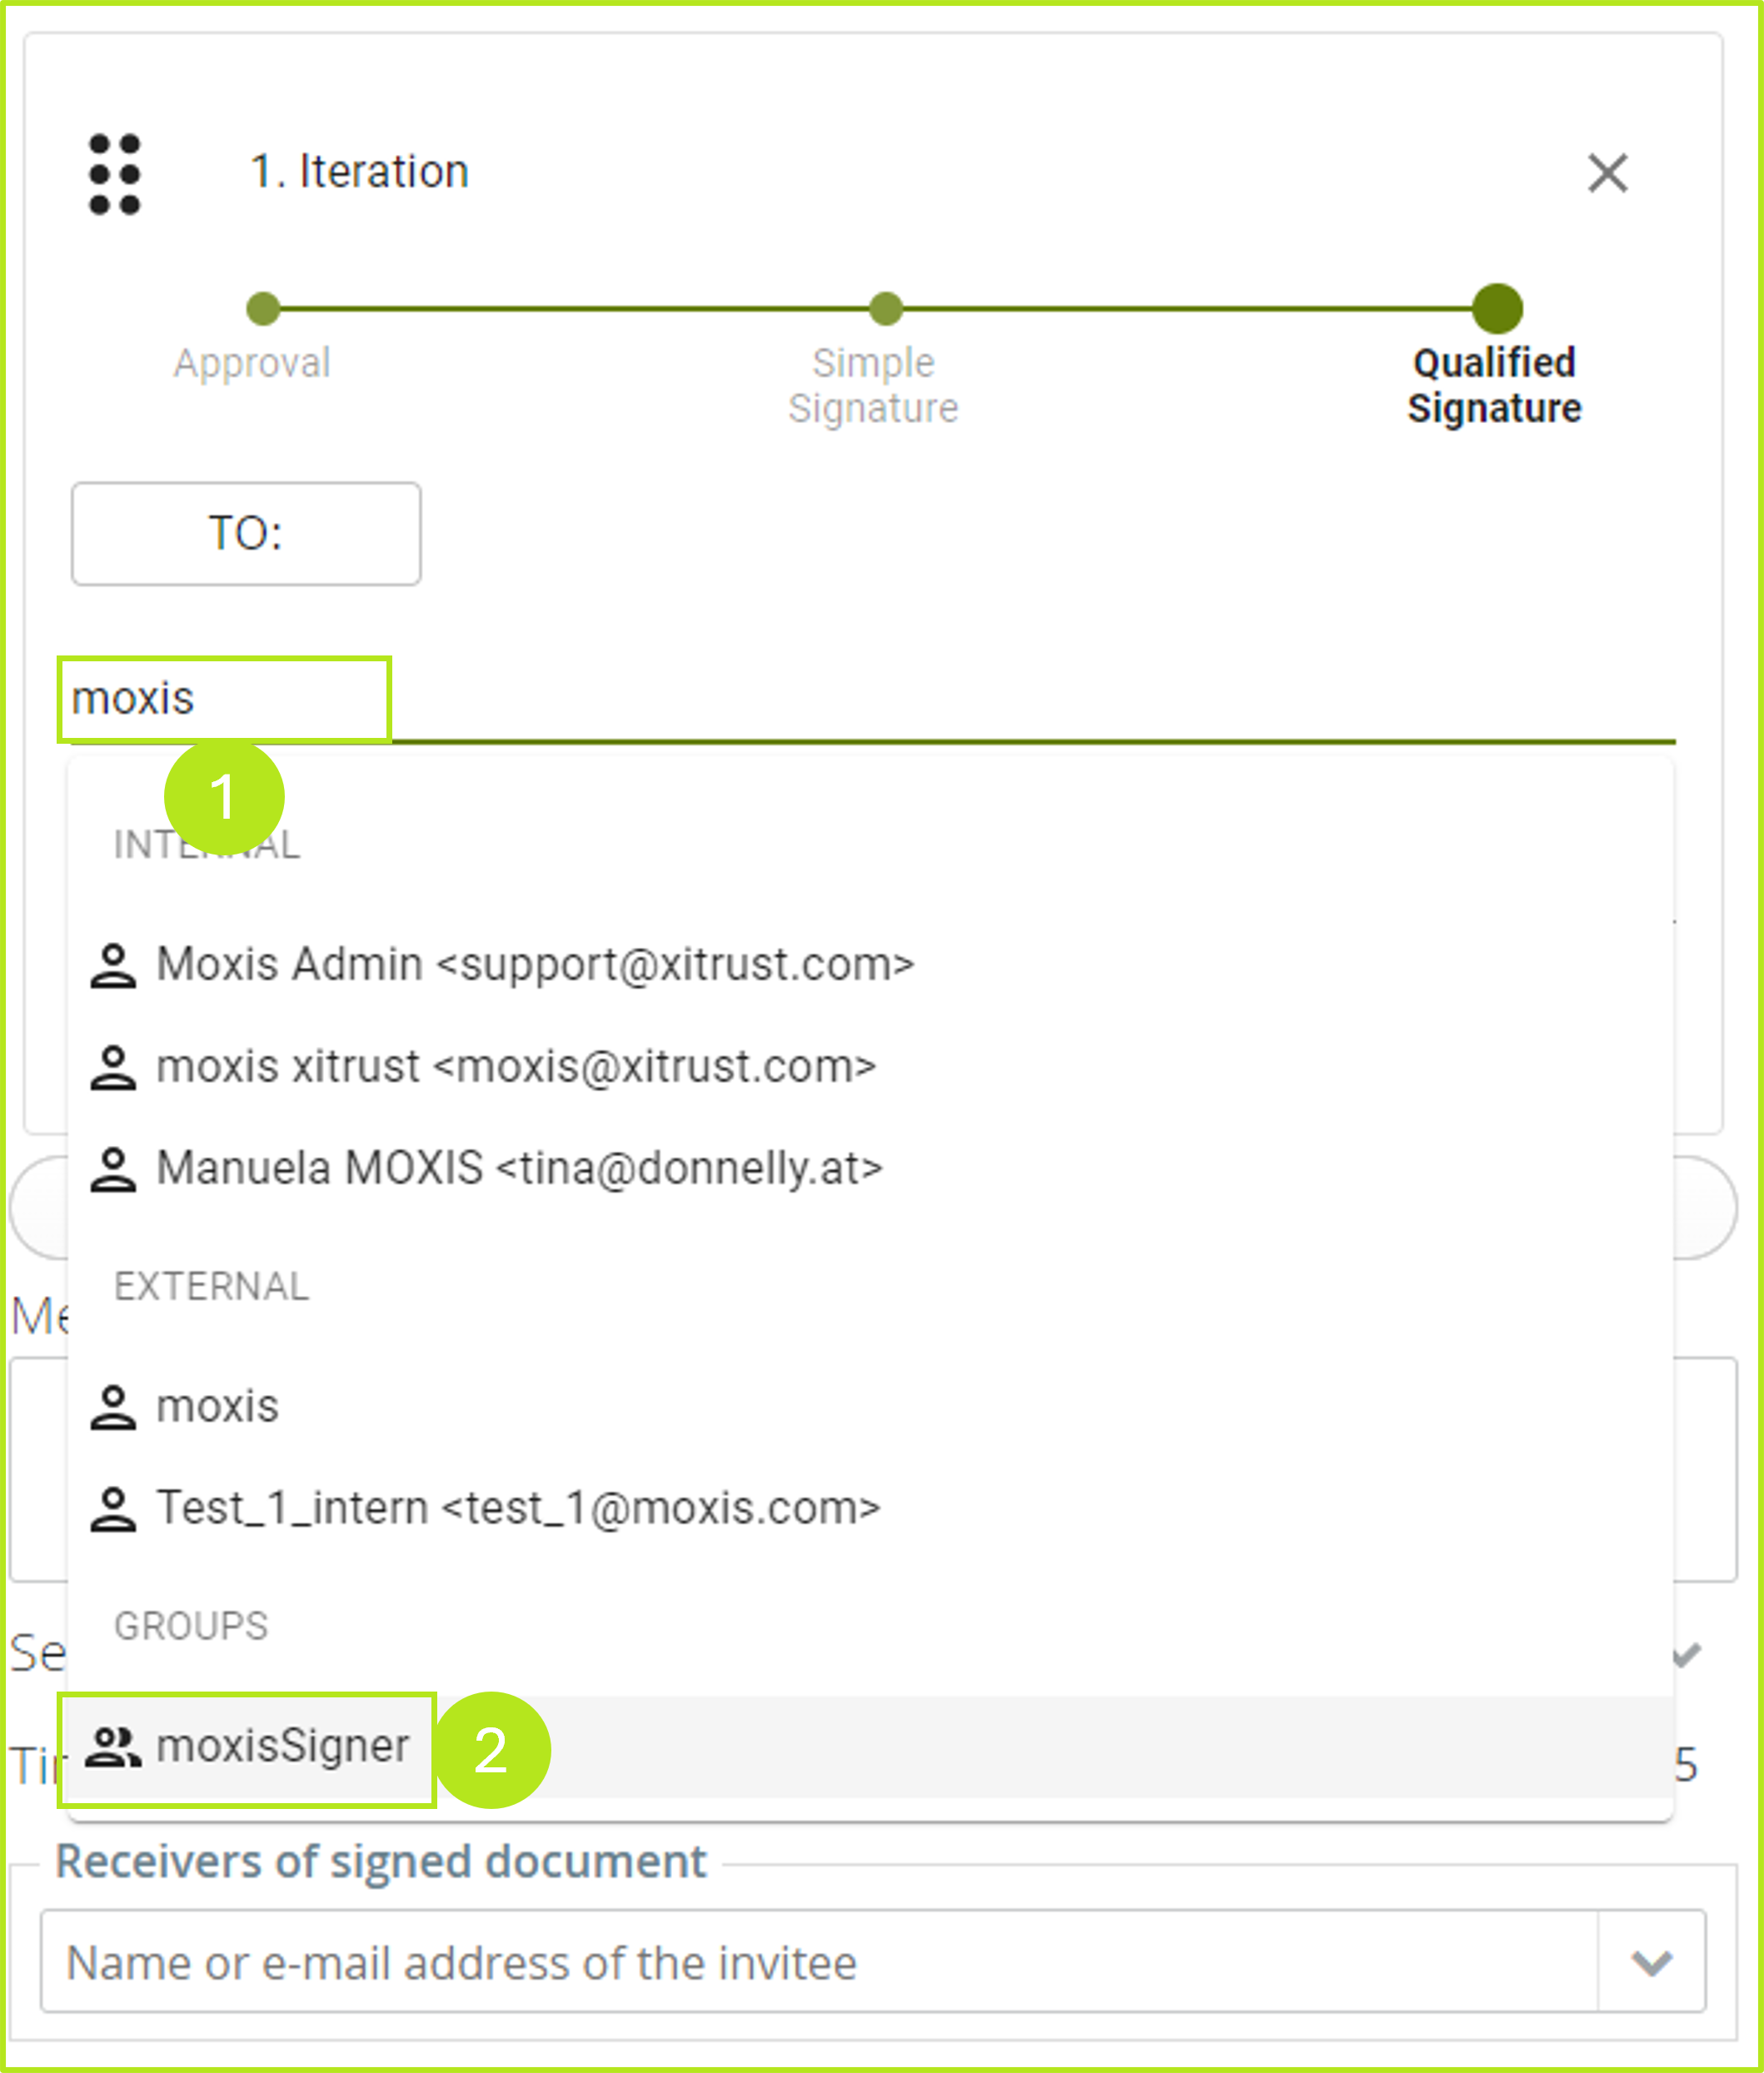
Figure 1: Select group in MOXIS
Step 2: Now add selected employees from the address book using the edit icon (1) (see figure 2) and make changes to them if necessary. You can learn how to edit group entries here.
Use the number next to the group (2) to define how many signatories a group must sign for the entry to be considered signed and, if necessary, passed on to the next decision level.
If you select more than 10 contacts, they will be grouped under one entry. The exact number of added users is displayed in brackets next to the entry.
XiTipp
If all persons need to sign, the number of selected contacts must match the number after the edit icon. If fewer signatures are needed to forward the order to further available iteration levels, you can adjust the number of signatures. As soon as you move the mouse pointer to the number after the edit icon, you can either change the number using the arrows, delete it or replace it with another one.
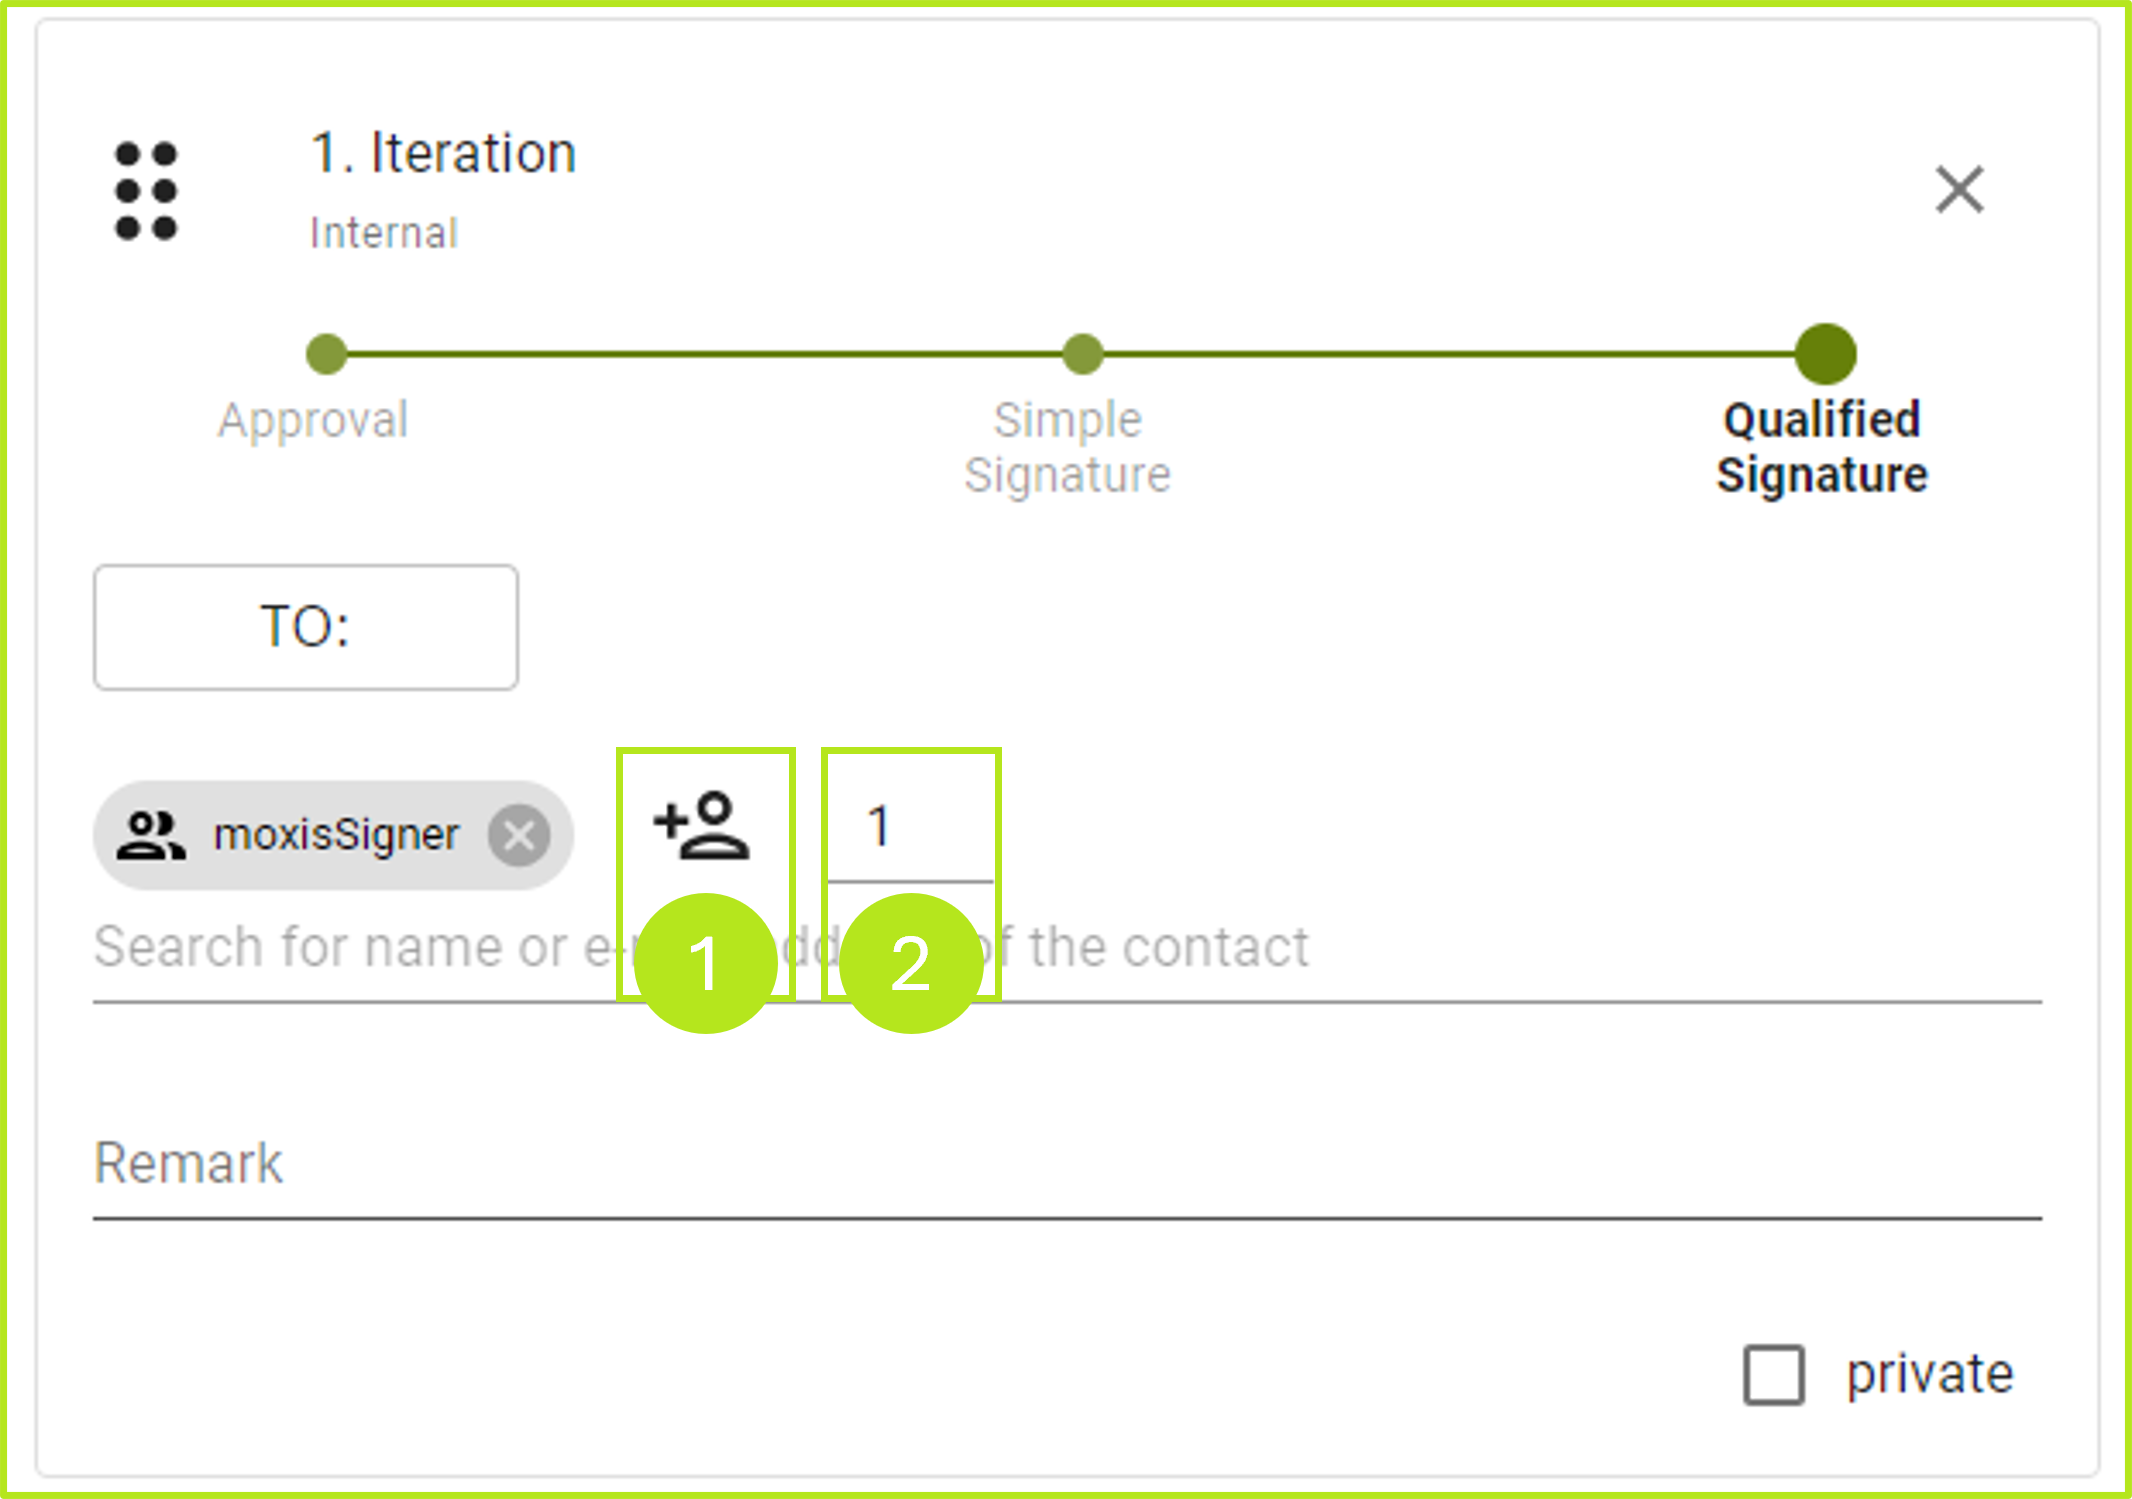
Figure 2: Selecting individual members of a group and determining how many of them have to sign.
2. Instructions for selecting and adding a group via the address book
Step 1: To add a group to MOXIS via the address book, please open the address book (see figure 3) during job creation by clicking on the [TO:]-button (1). Filter the entries by group, by clicking the [Groups]-button (2). Then tick the box next to the group you want to add (3) and click the [Save]-button (4) to add the group.
Step 2: To complete the order, you need to define which recipients should sign, and how many signatures are required to successfully complete the order. Please refer to the explanations accompanying figure 2.
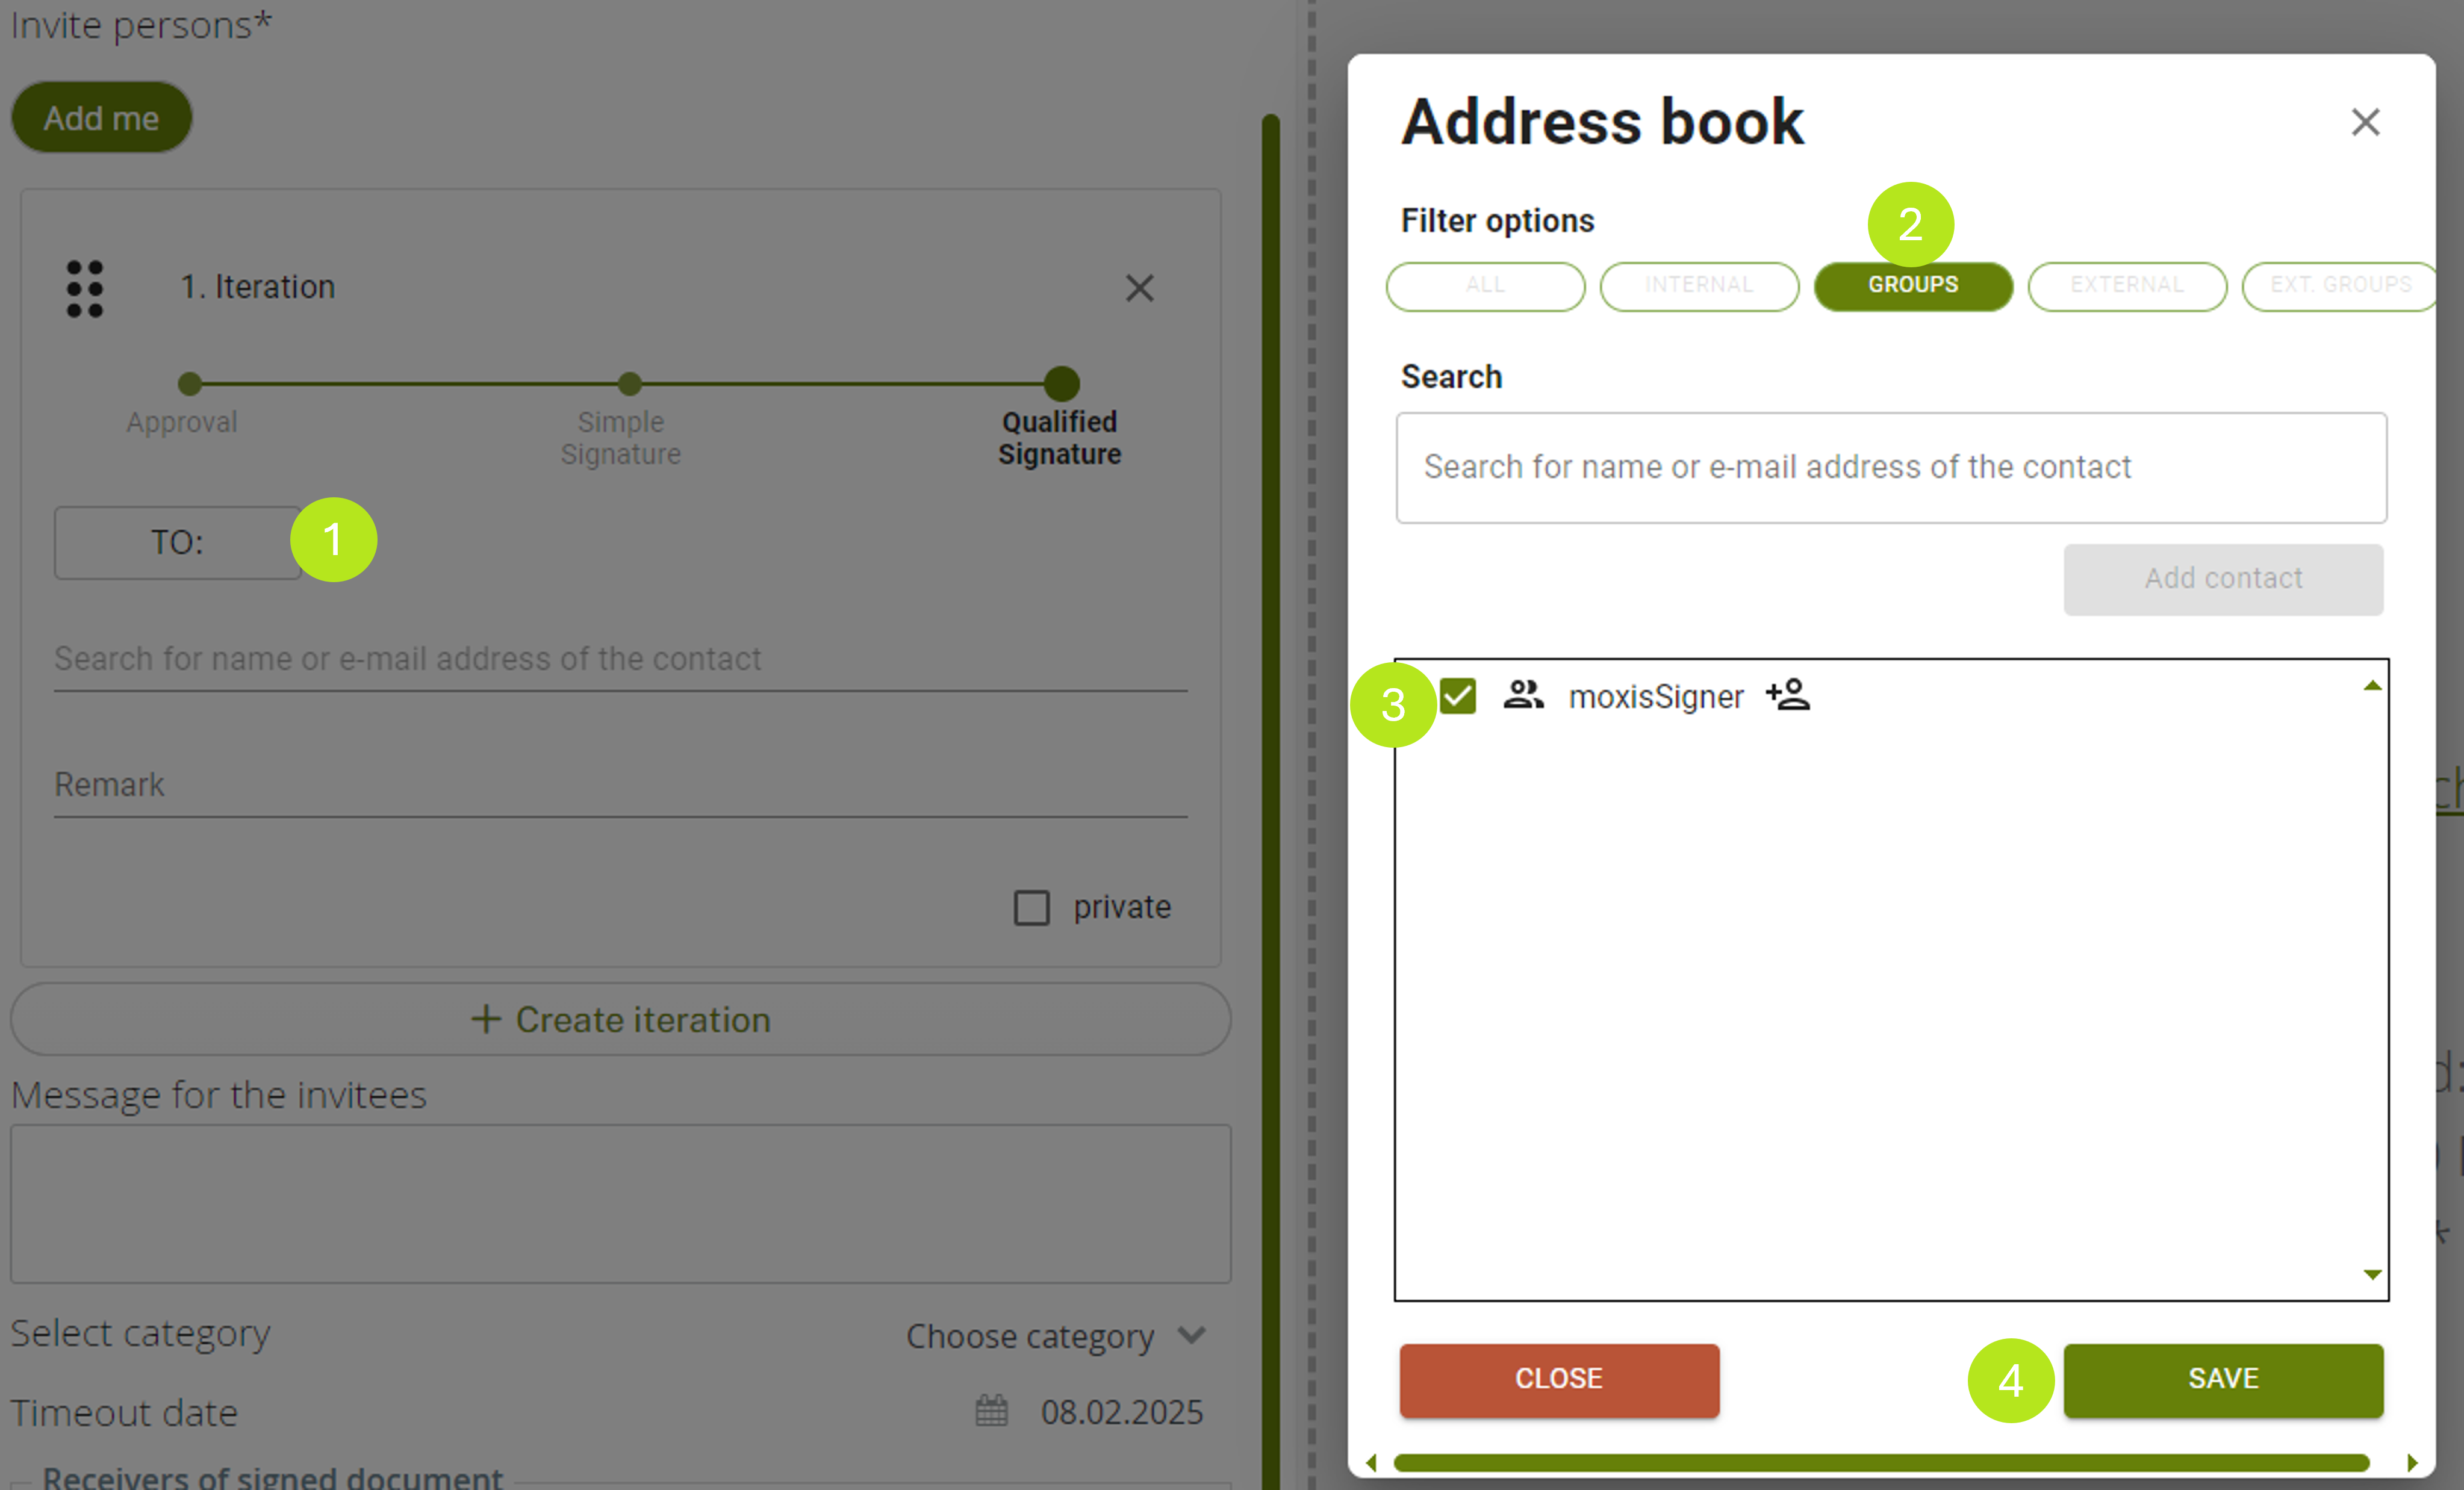
Figure 3: Select and add a group via the address book